How to Create a Glossy Web Button in Photoshop
Glossy Web 2.0 buttons were once everywhere, but the technique behind them is still useful if you want to learn Photoshop layer styles, highlights, shadows, and simple UI polishing.
This tutorial walks through building a glossy button from scratch in Photoshop, starting with a rounded rectangle base, then layering on gradients, shading, and a soft glass effect. The final look is unapologetically old-school, but the process is still a solid exercise in visual styling.
Step 1 – Create the Base Shape
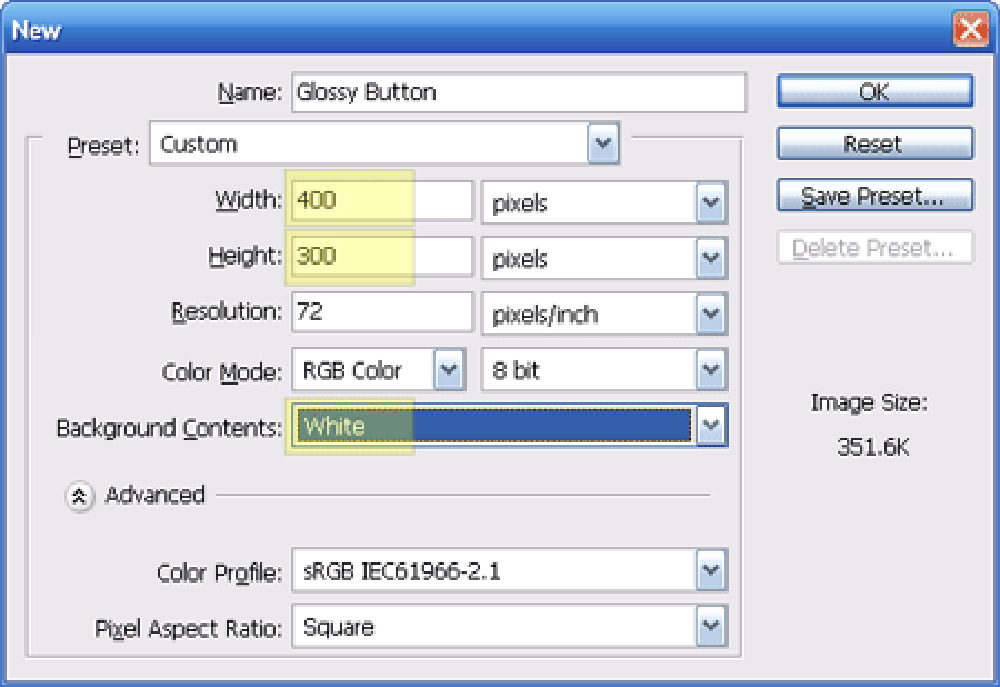
Start with a new canvas and use the default settings unless you need a specific size for your design.
Create a new layer and name it Button.

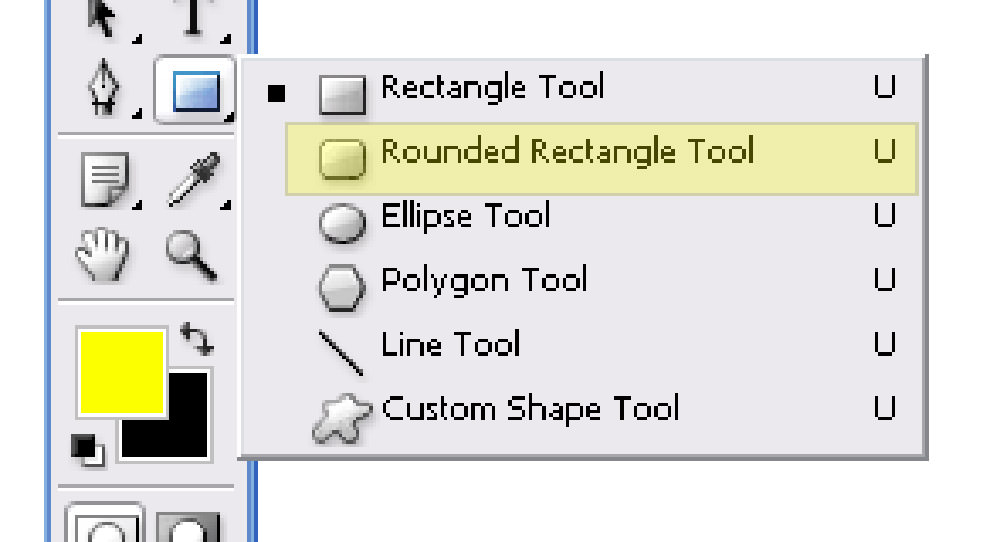
With the Button layer selected, choose the Rounded Rectangle Tool.
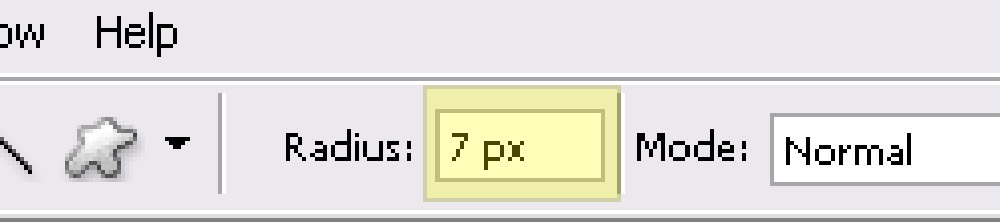
Set the corner radius to 7px.
Draw a rounded rectangle similar to the one below.

Step 2 – Style the Red Button
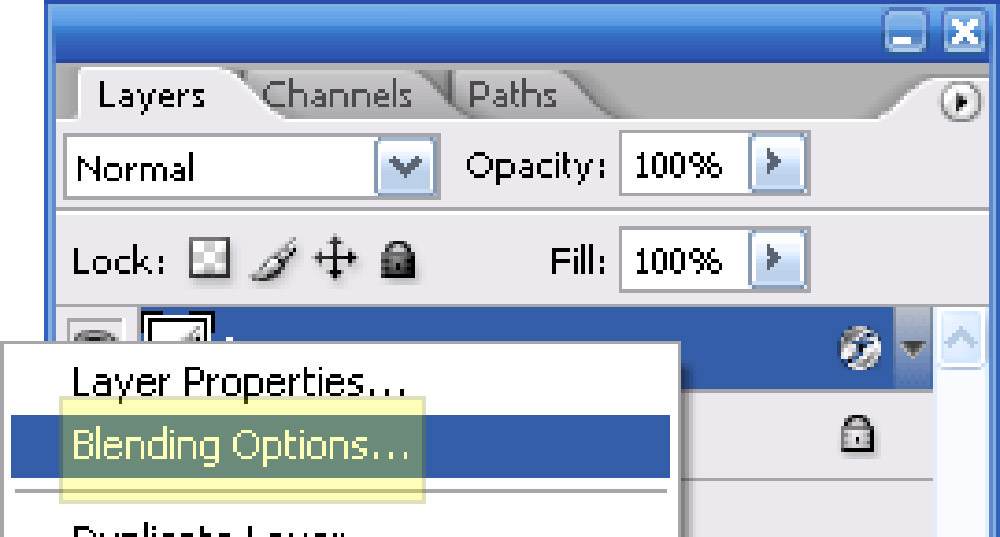
Open the layer styles for the Button layer by right-clicking it and choosing Blending Options.
Apply the following effects.
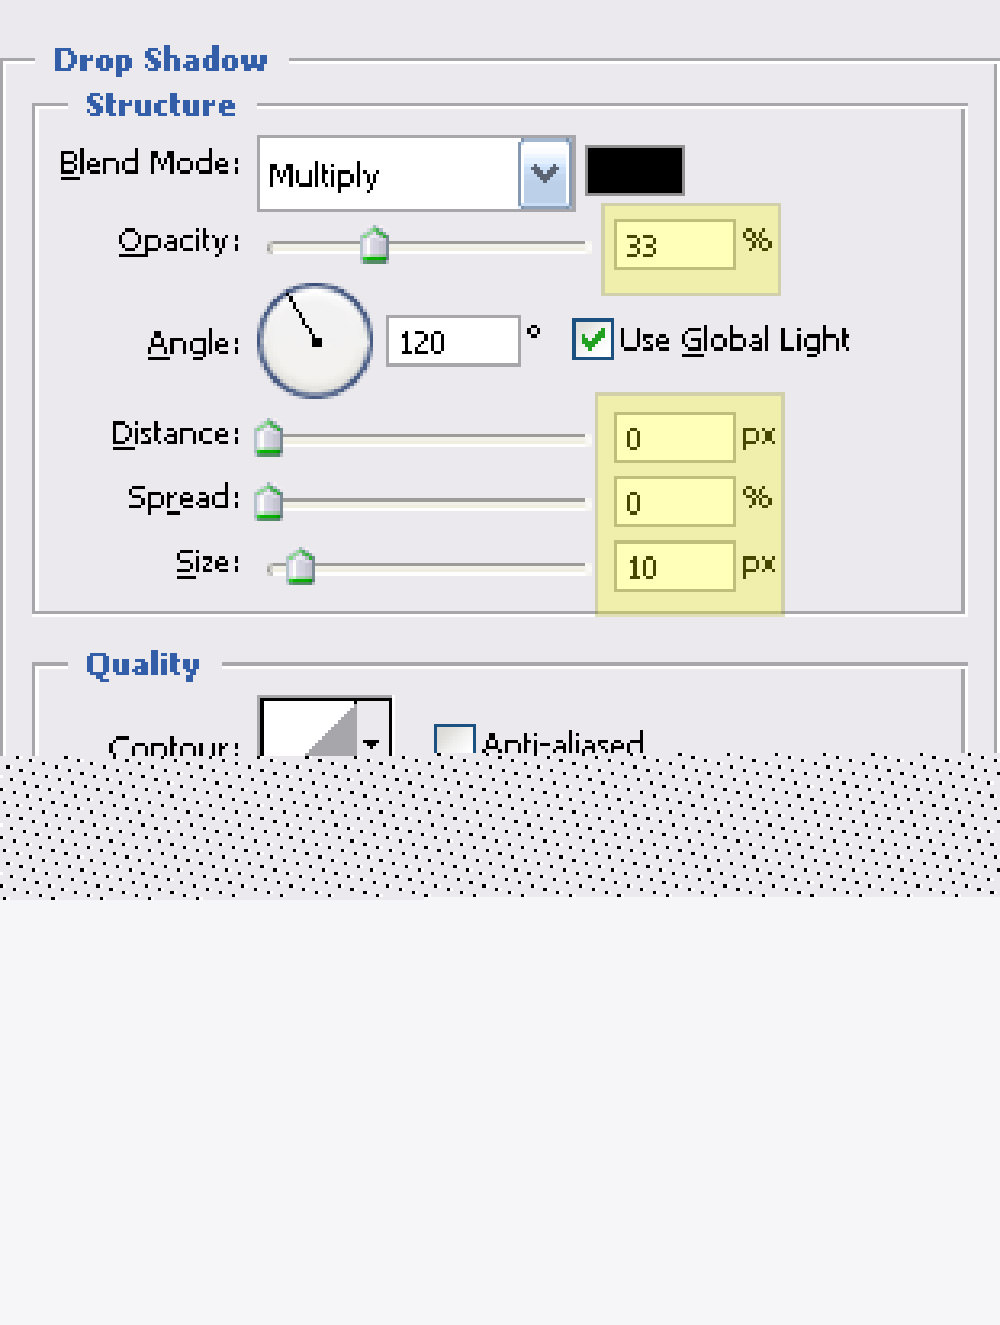
Drop Shadow
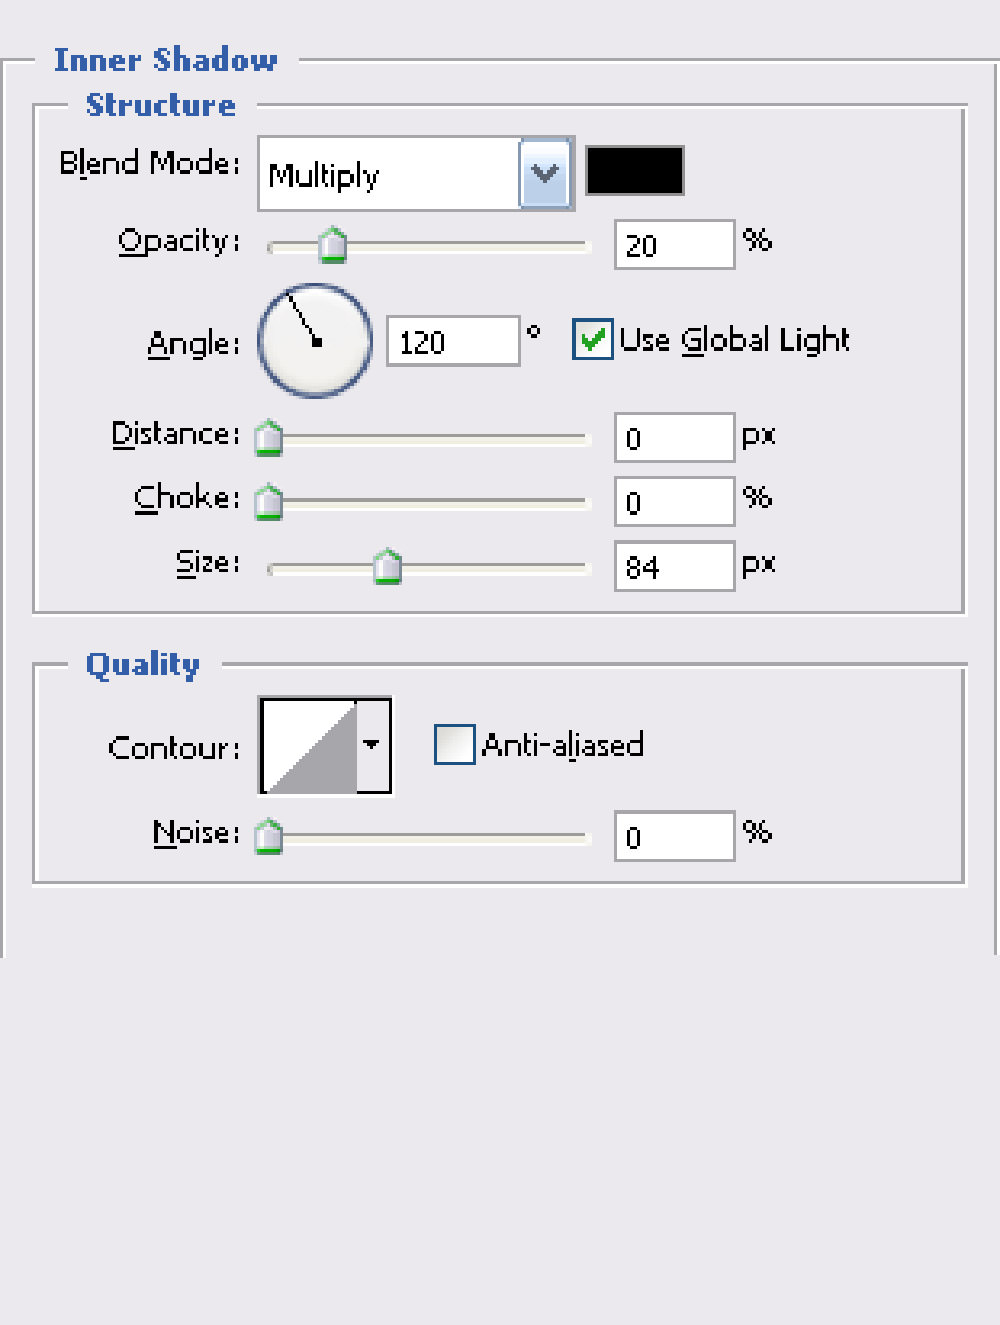
Inner Shadow
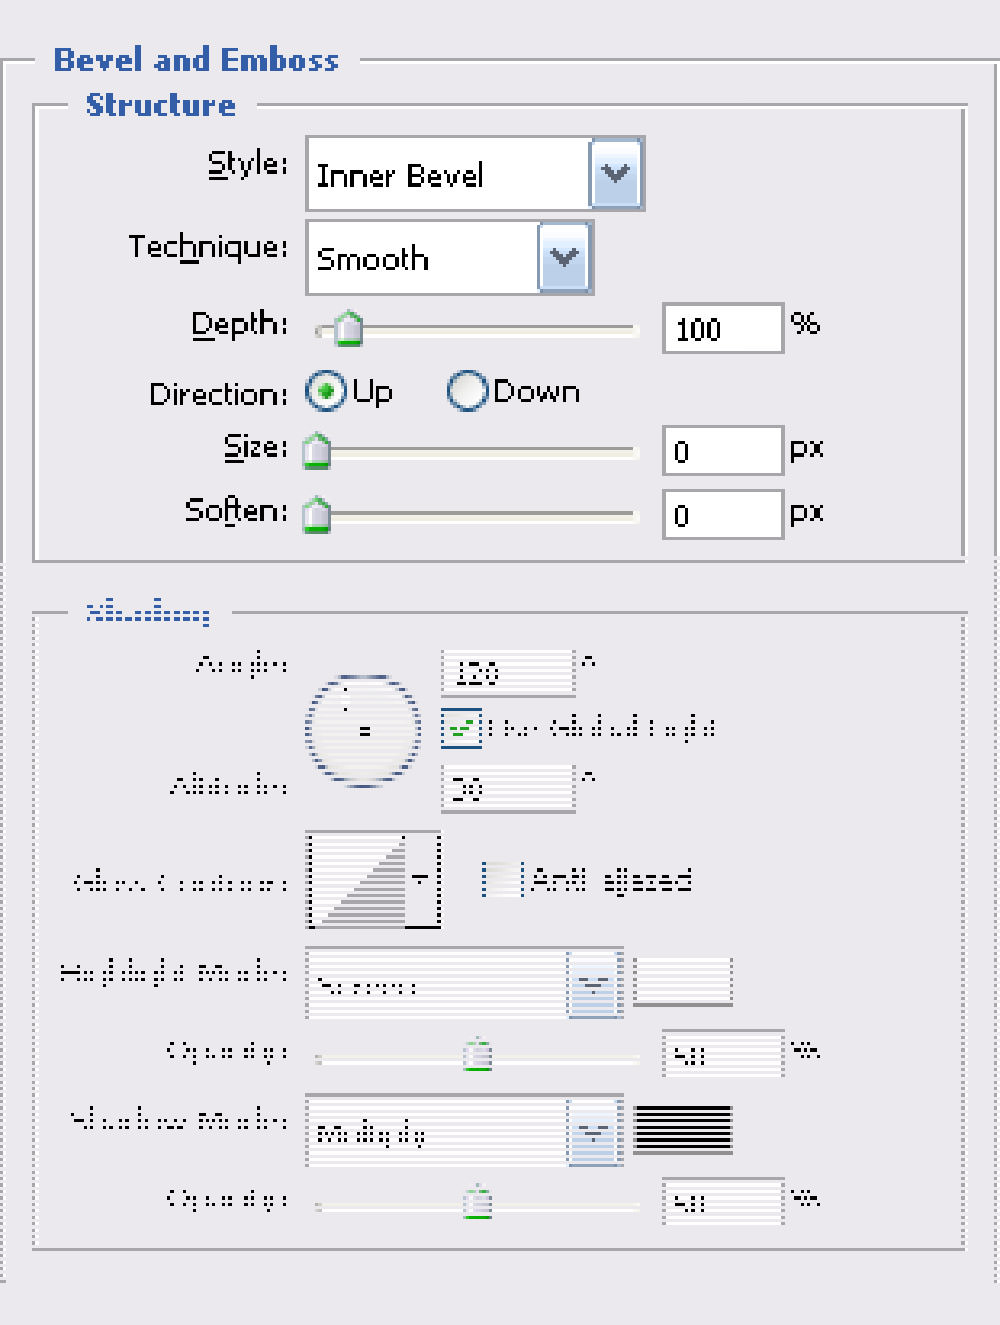
Bevel and Emboss
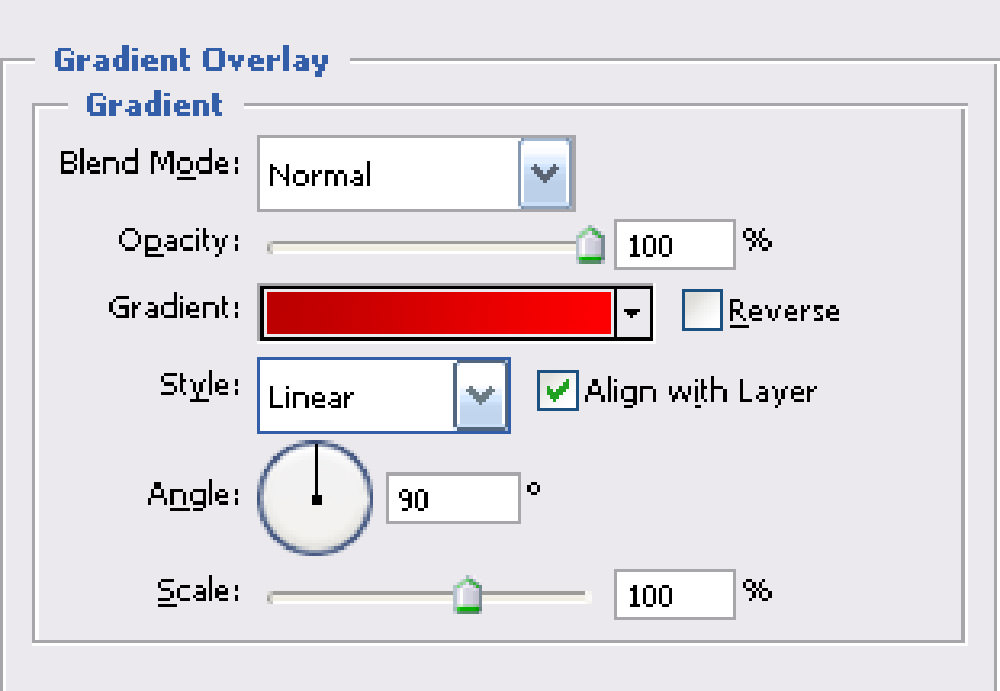
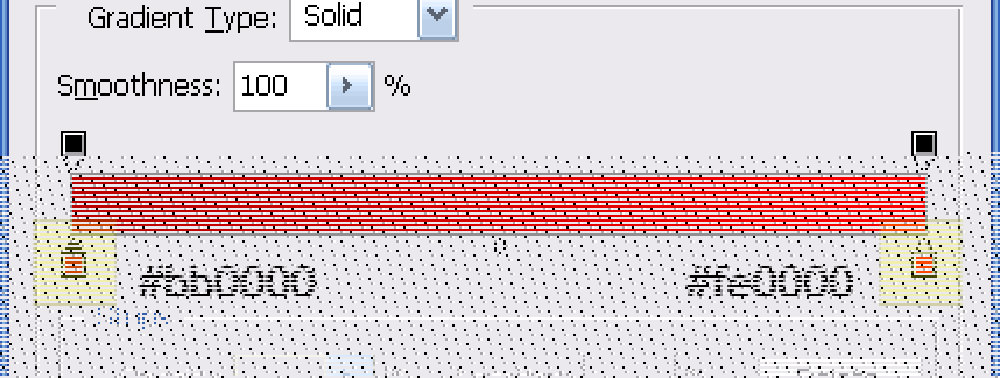
Gradient Overlay
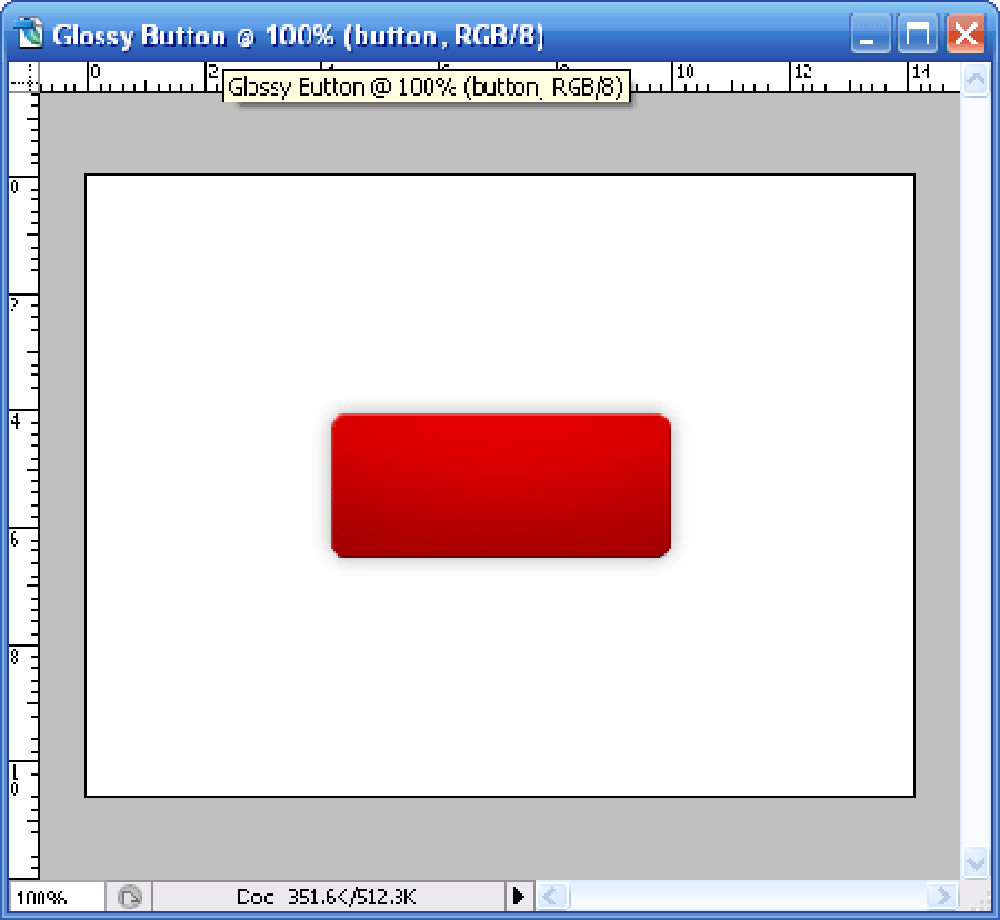
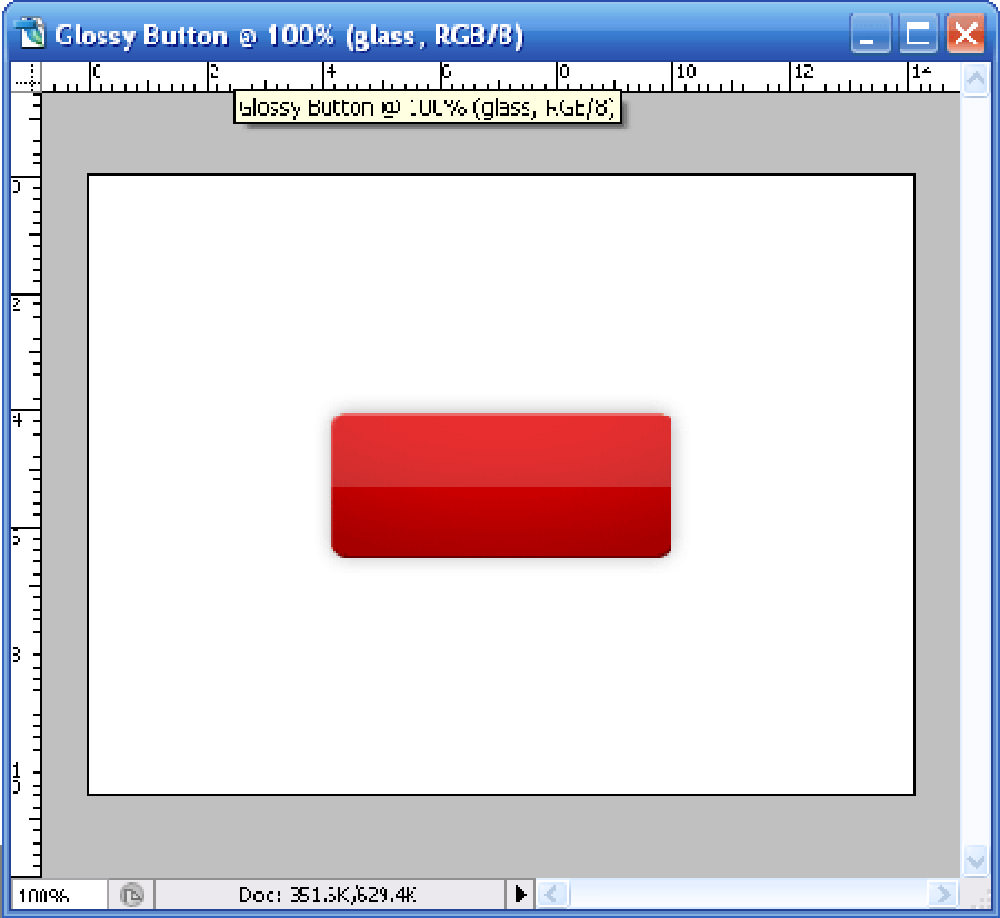
At this point, your button should look something like this.
Step 3 – Add the Glossy Highlight
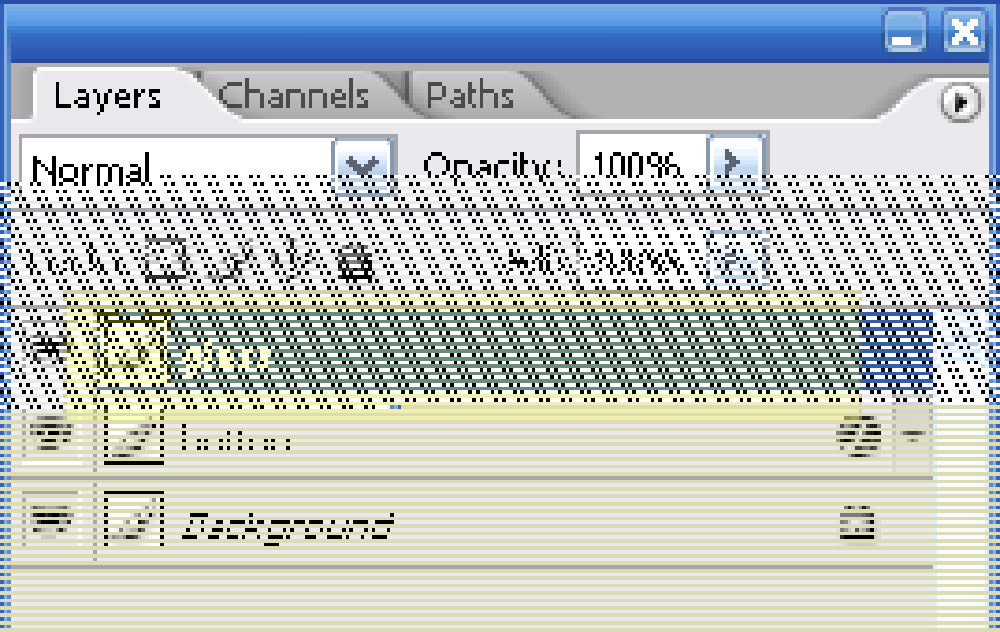
Create another layer and name it Glass.
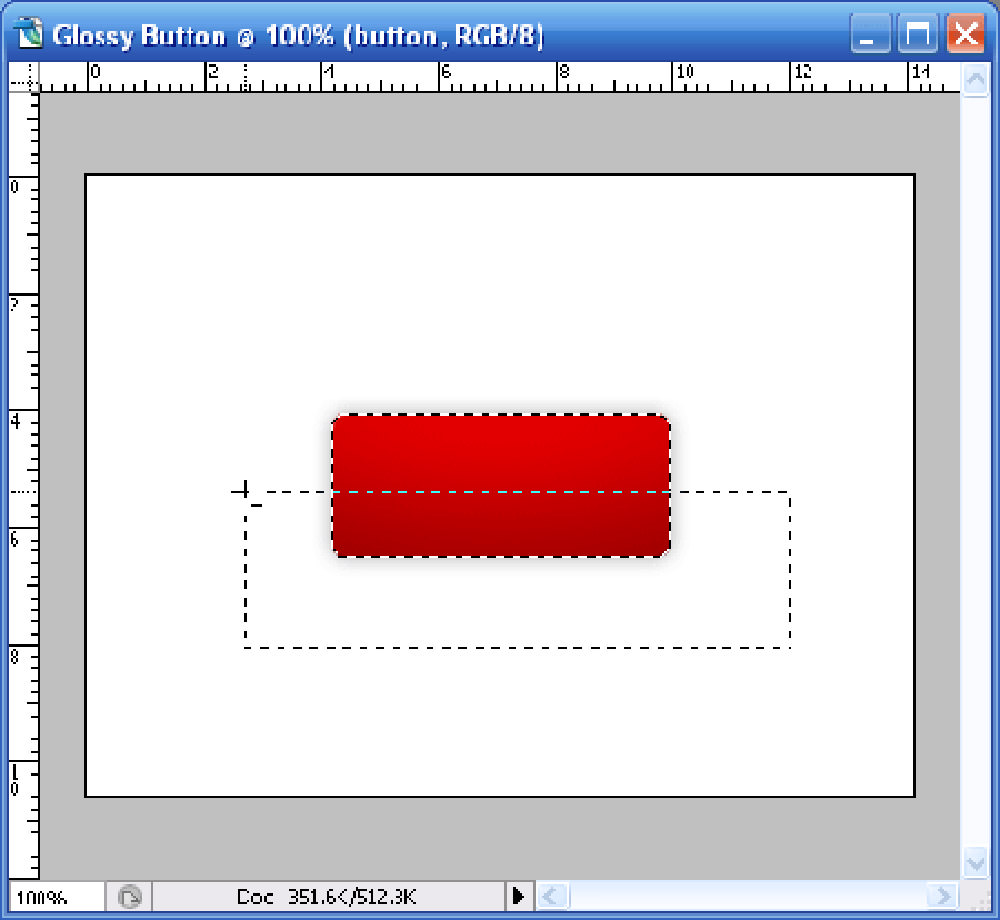
Choose the Rectangular Marquee Tool. To load the shape of the button as a selection, hold Ctrl and click the Button layer thumbnail.
Select the Glass layer, then hold Alt and drag a selection across the lower half of the button to remove that portion from the active selection.
Fill the remaining selected area with white (#ffffff) using the Paint Bucket Tool.
Reduce the layer opacity to 18%.

You should now have the glossy finish shown below.
Step 4 – Add a Pattern Overlay
To give the button a little texture, create a new layer named Pattern between the Button and Glass layers. If you have not made one yet, this companion guide on creating custom patterns in Photoshop will get you there first.

Open Blending Options, enable Pattern Overlay, then choose Stripe5px or any custom pattern you created earlier.

With the Rectangular Marquee Tool still active, hold Ctrl and click the Button layer thumbnail again to load the shape. Fill the selected area on the Pattern layer, then reduce that layer’s opacity to 5%.
Step 5 – Insert the Button Text
Add some text in white (#ffffff) using the settings below.

Apply this layer style to the text.
Drop Shadow

Step 6 – Final Output
You should end up with a glossy button like this.
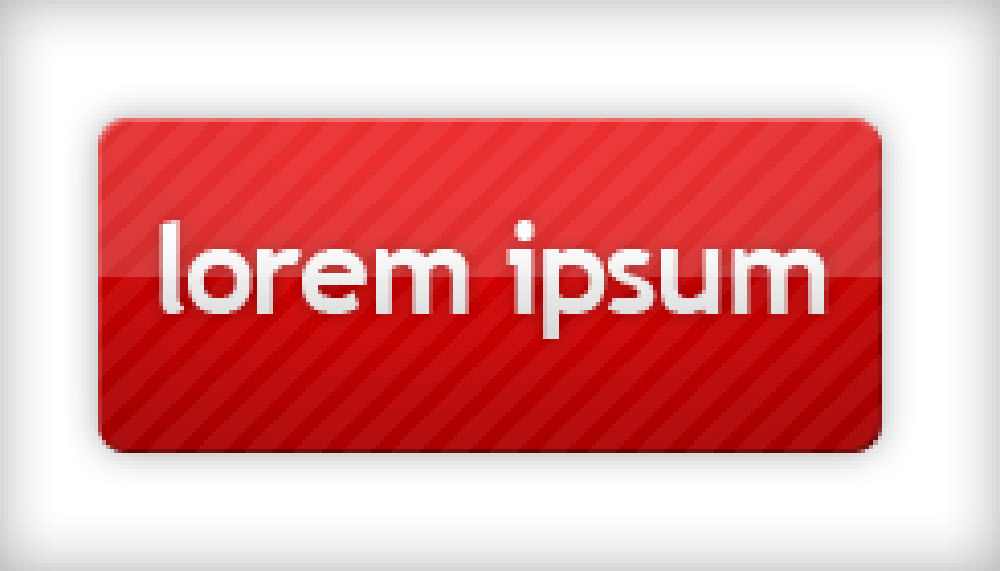
It is a very 2000s look, no question, but it is still a handy exercise for learning how gradients, highlights, textures, and layer styles work together.