How to Create a Static Blog with Cactus
Update: The Cactus app is no longer available. Consider checking out How to Build a Static Blog Using Assemble for an alternative.
If a CMS is not required and you’re interested in a static site or blog, Jekyll is a great option. However, for those who prefer a graphical user interface over command line tools, Cactus might be the better choice.
Cactus is a robust static site generator that offers an array of powerful tools to build websites locally. It provides four pre-designed templates to jumpstart your project, allowing for a quick and efficient setup.
When you work on a project using Cactus, it monitors all your changes and automatically updates the browser view, whether you’re on a Mac or a mobile device. This means you can see your updates in real time. It also seamlessly integrates with SASS/SCSS and Coffeescript, automatically processing changes in these files.
Getting Started
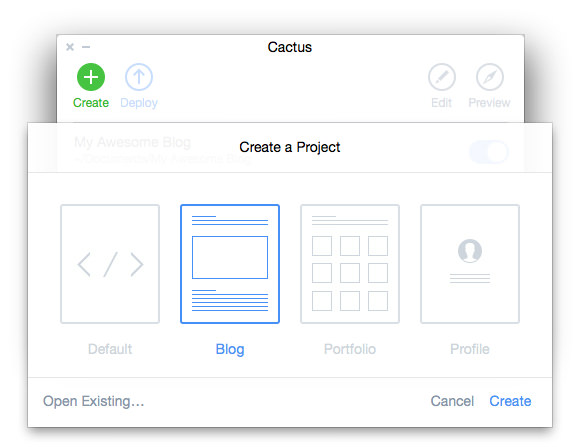
Begin by downloading Cactus from its official website and completing the installation. After installation, open the application, and you’ll find four main options: Create, Deploy, Edit, and Preview.
To start a new project, click Create. You’ll find four templates available; for this guide, select the Blog template and click Create again.
Next, you’ll need to name your project and select a storage location. For example, here we’ll name it “My Awesome Blog”. Once configured, you’ll see your new project active in Cactus.

Modifying Files
The project created using the Blog template is now accessible through your Finder. We’ll explore the essential components required to build our blog. Navigate to the directory where your files are stored. The key directories we’ll focus on are Templates, Pages, and Static. We’ll ignore the others for now.
To summarize, here’s the purpose of each directory:
- Templates: Holds HTML files that serve as templates. These are used by pages to construct the website.
- Pages: Contains all HTML files that are directly converted into pages on your site. For example, hello.html will appear as http://yoursite.com/hello.html
- Static: Stores all static resources like CSS, JavaScript, and images.
We will focus on editing three primary files: base.html and post.html in the Templates directory, and index.html in the Pages directory.
Cactus employs the Django Template Engine for its templating. This allows for including HTML elements from other files within your project, helping to avoid code duplication. The features most commonly used are template inheritance and variable management.
Let’s start by opening base.html from the Templates directory.
<!DOCTYPE html>
<html lang="en">
<head>
    <meta charset="utf-8">
    <meta http-equiv="X-UA-Compatible" content="IE=edge,chrome=1">
    <meta name="viewport" content="width=device-width, initial-scale=1">

    <title>{% block title %}Blog{% endblock %}</title>
    <link rel="shortcut icon" href="{% static '/https://assets.hongkiat.com/uploads/static-blog-with-cactus/favicon.ico' %}">
    <link rel="stylesheet" href="{% static '/css/style.css' %}">
    <link rel="alternate" type="application/rss+xml" title="My Blog Feed" href="/rss.xml">
</head>
<body>
    {% block content %}
    Main content
    {% endblock content %}

    ---

</body>
</html>
The base.html file acts as a fundamental template for your site, containing common elements. Within this file, you’ll notice several “blocks” designed to be overridden by child templates.
Next, let’s open post.html, which is located in the same directory as base.html.
{% extends "base.html" %}
{% block title %}{{ title }} | Cactus{% endblock title %}
{% block content %}

---

<header>
    <h1>{{ title }}</h1>
    <h2 class="headline">{{ headline }}</h2>
</header>
<section id="post-body">
    {% block body %}
    This is where the post content is.
    {% endblock body %}
</section>

---

{% endblock content %}
The post.html file structures the markup for our blog entry page. It begins by extending base.html, allowing us to override the predefined blocks in base.html with new content specific to each post.
Within post.html, we encounter variables like {{ title }} and {{ headline }}, which will be assigned values in each individual blog post later on.
The {% block body %} block in post.html is designed to be replaced by the child template containing the actual content of our blog posts.
Navigate to the pages/posts directory to view our post entries.
title: My Post Entries
headline: My Post Headline
author: Agus
date: 15-01-2015

{% extends "post.html" %}
{% block body %}

{% filter markdown %}

Lorem ipsum dolor sit amet, consectetur adipisicing elit. Earum, perferendis inventore dolorem rerum et tempora sint nemo illum ab saepe, assumenda, amet illo deleniti officiis, voluptatem maxime atque vero sunt.

---

{% endfilter %}
{% endblock body %}
In each post entry, values are assigned to variables such as title, headline, author, and date. These values are then utilized when the variable names are called within the parent template. The content of our blog is written using Markdown.
Next, let’s open the index.html file from the pages directory, which displays a list of our blog entries and links to each one. The primary code is as follows:
{% extends "base.html" %}
{% block content %}

--

<ul id="post-list">
{% for post in posts %}
<li>
<a href='/{{ post.path }}'><aside class="dates">{{ post.date|date:"M j" }}</aside></a>
<a href='/{{ post.path }}'>{{ post.title }} <h2>{{ post.headline }}</h2></a>
</li>
{% endfor %}
</ul>

--

{% endblock content %}
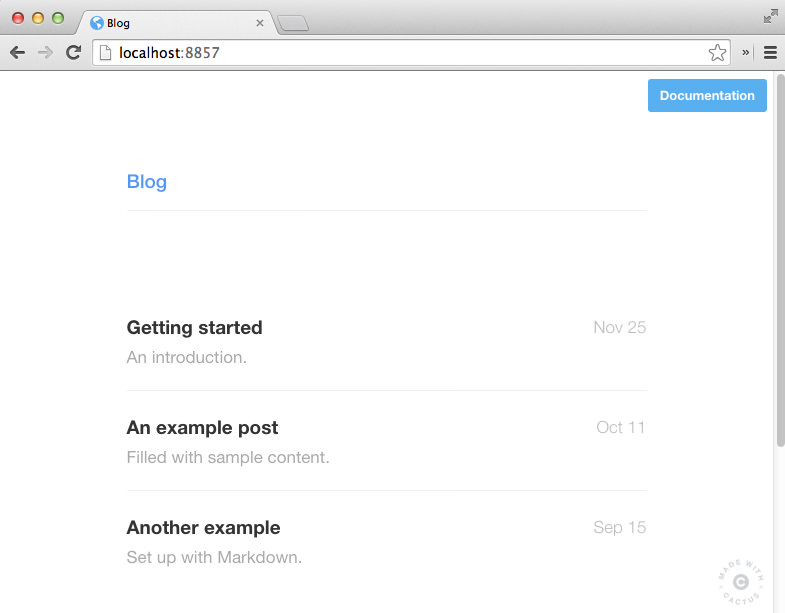
At this point, we have established a simple blog consisting of two main pages: the index page, which displays the blog entries, and the blog entry page itself.
Go to the Cactus application window and click the preview button to start the server. This will automatically launch your website in the browser.
Styling the Blog with SCSS
One of the key features of Cactus is its built-in support for SASS/SCSS. Simply drop your .sass or .scss files into the static directory. Each time these files are edited and saved, Cactus automatically compiles them into CSS.
As an example, let’s use bootstrap-sass to style our blog. If you’re using Bower, open the terminal, and navigate to the static directory of our project using the cd command. Install bootstrap-sass with the following command:
$ bower install bootstrap-sass-official
Once the download completes, a bower_components directory will appear inside the static directory, containing bootstrap-sass-official.
Next, go to the directory: static/css. Create an SCSS file named style-bs.scss and add the following code:
@import "../bower_components/bootstrap-sass-official/assets/stylesheets/_bootstrap";
This code imports all components from bootstrap-sass. After saving style-bs.scss, a corresponding CSS file named style-bs.css will be generated in the same directory, containing all the styles from bootstrap.
Note: This is just an example. In practice, it’s not advisable to import all styles from bootstrap-sass because it is designed to be modular – you should only import what you need. You can see my selections in my demo.
Deploying Your Project
Finally, when your project is ready for the public, you can easily deploy it to a live environment using Amazon S3.