How to Create a Blog Using Jekyll: A Guide for Beginners
Originally just a blogging platform, WordPress has evolved into a fully featured CMS. With WordPress, you can create nearly any type of website, from a portfolio to an e-commerce site.
But what if your main interest is blogging and you don’t need all the extra features of WordPress like custom taxonomy, user management, comment moderation, and a robust media uploader?
If you’re focused on just writing and publishing your content, consider using Jekyll, a static blogging engine.
How to Create a Github Page for Your Project
So here is the story: you built a cool open source project and shared it to the world... Read more
About Jekyll
Jekyll allows for the creation of a simple, maintainable static HTML blog. Unlike dynamic blogging platforms like WordPress, which rely on server-side languages like PHP, a static website offers two main advantages.
First, it delivers content and performs faster. Second, it uses fewer web resources such as memory and database I/O. Additionally, Jekyll enables you to host your blog on GitHub Pages at no cost.
Install Jekyll
First, let’s get Jekyll installed on your system. Open your Terminal and enter the following command:
sudo gem install jekyll
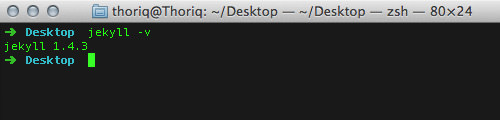
After installation, run the following command to check if the jekyll command is working:
jekyll -v
This command should display the installed version of Jekyll, as shown below:
Create a Jekyll Site
To start a new blog with Jekyll, type jekyll new followed by your desired site name in Terminal. For instance:
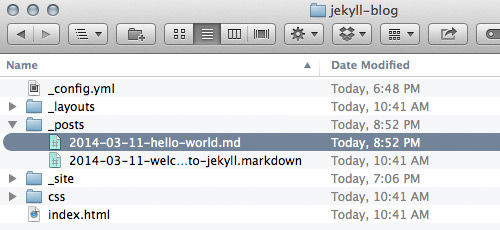
jekyll new jekyll-blog
This command will create a new directory named jekyll-blog and include the necessary files and folders for your site, as seen here:

To launch the Jekyll server, enter this command:
jekyll serve
You can also start the server with the --watch option to automatically apply changes to your blog as you make them.
Then, open your browser and type http://localhost:4000, or the address displayed in your Terminal, to view your blog.

The Document Structure
Jekyll requires a specific document structure to ensure the blog functions correctly. Here’s a breakdown of what’s typically found in a Jekyll blog directory:
|-- _config.yml
|-- _layouts
|-- _posts
|-- _site
|-- css
`-- index.html
First, there’s _config.yml, the blog’s configuration file, written in YAML. This file allows you to set options like the blog name, permalink format, host, and port number.
The _layouts directory is where you place custom layouts for pages or posts.
The _posts directory is where all blog posts are stored. Posts can be written in Markdown or Textile and will be compiled into the _site directory. This is where Jekyll serves the posts to the browser.
Lastly, the css directory and index.html file are also present.
For now, we will leave these settings as they are and start writing our first post.
Writing a New Post
As we’ve mentioned, in Jekyll, posts can be written using Markdown or Textile. If you’re unfamiliar with Markdown, consider reading our guide on how to write with Markdown before proceeding.
Naming Convention
To create a post, you need to create a new file following this naming convention: year-month-date-{post-slug}.{file-extension}, for example: 2014-03-11-hello-world.md. This file should be saved in the _posts directory.
Post Front-matter
Before writing the content of a post, you must define the post’s front-matter, which includes the title and the post layout. You can also specify categories and tags, but these are optional. The front-matter should be enclosed within triple-dashed lines. Here is an example:
---
layout: post
title: Hello World!
---
After setting the front-matter, you can proceed to write your content:
Hello world! Welcome to Jekyll. This is your first post.
Save the file, and you will see the post generated and displayed on your blog.

Wrap up
This guide has shown you how to install Jekyll and write your first post. These are the basics that will help you get started with Jekyll. There’s much more to explore with Jekyll, and we’ll cover those topics in future posts. Stay tuned.