How to Quick-launch Screen Sharing in Mac
To connect to a nearby computer from your Mac using Screen Sharing in Finder, you need to do the following in sequence:
- Open Finder.
- Click on “Network”.
- Double-click on the nearby computer you want to connect with.
- Select “Share Screen…”.
- Enter your username and password.
- Press “Enter”.
Doing this repeatedly can be inconvenient. In this article, we will share two ways to simplify the process of connecting to a nearby computer using Screen Share in Finder. These methods allow you to connect with just one or two steps.
Method 1: Using a Bash Script
We will be using a simple command-line bash script in this method to connect to a nearby computer of your choice using VNC (Virtual Network Computing).
Step 1
Launch Terminal and type the following command and hit Enter. This will create a new file call ‘screenshare’ with the .sh extension:
nano screenshare.sh

Step 2
Copy and paste the following script into the editor:
#!/bin/bash
open vnc://192.168.1.1
Replace 192.168.1.1 with the IP address of the Mac you want to connect to.

Step 3
Hit Control + O to save the file, and then press Control + X to exit nano.
Step 4
Next, we will need to make the file executable. Enter the following command and hit Enter.
chmod +x screenshare.sh

Step 5
To run it, enter the command below and hit Enter.
./screenshare.sh
That’s it. The Screen Sharing application should open and connect to the nearby Mac with the IP address set it the bash script.
Method 2: Using Mac’s Automator
The last method we talked about requires you to use a bash script, which involves opening the Terminal application and typing a command to run it. If you don’t use Terminal often or find it difficult, don’t worry! We have another method that achieves the same goal and is easier to use.
This method uses Mac’s Automator to create an application that connects to a nearby Mac through screen sharing automatically.
Step 1
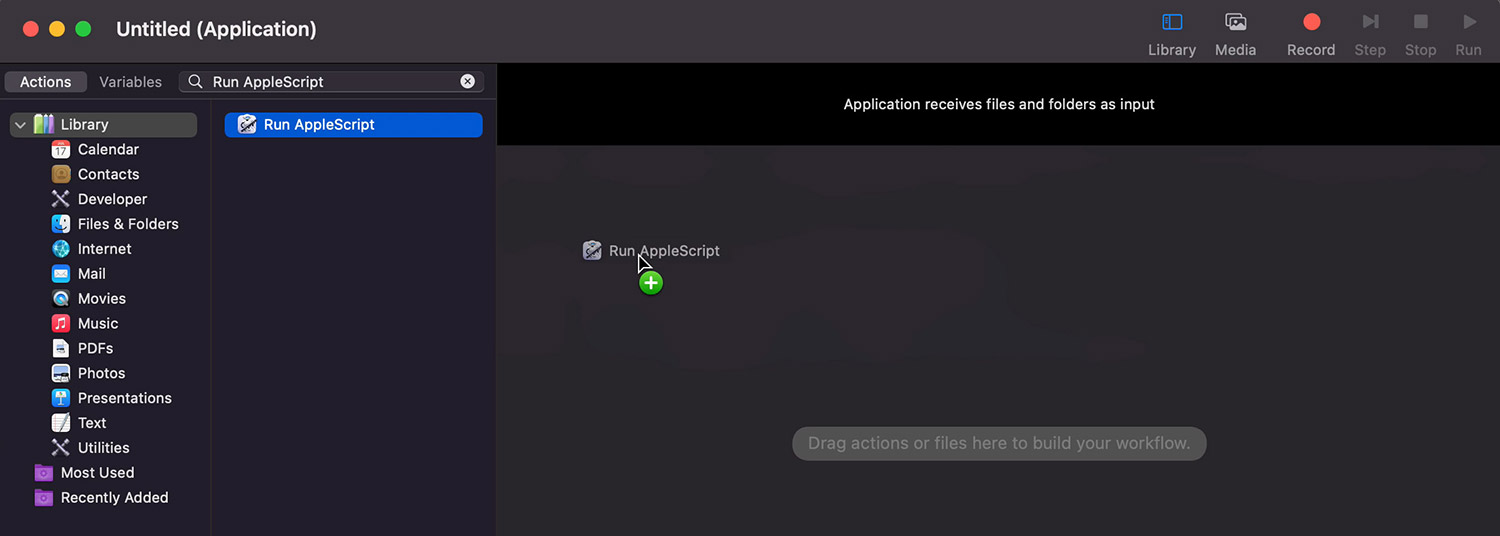
Open Automator on your Mac, select “Application” as the document type.

Step 2
In the search bar, type “Run AppleScript” and drag the “Run AppleScript” action to the workflow area on the right.
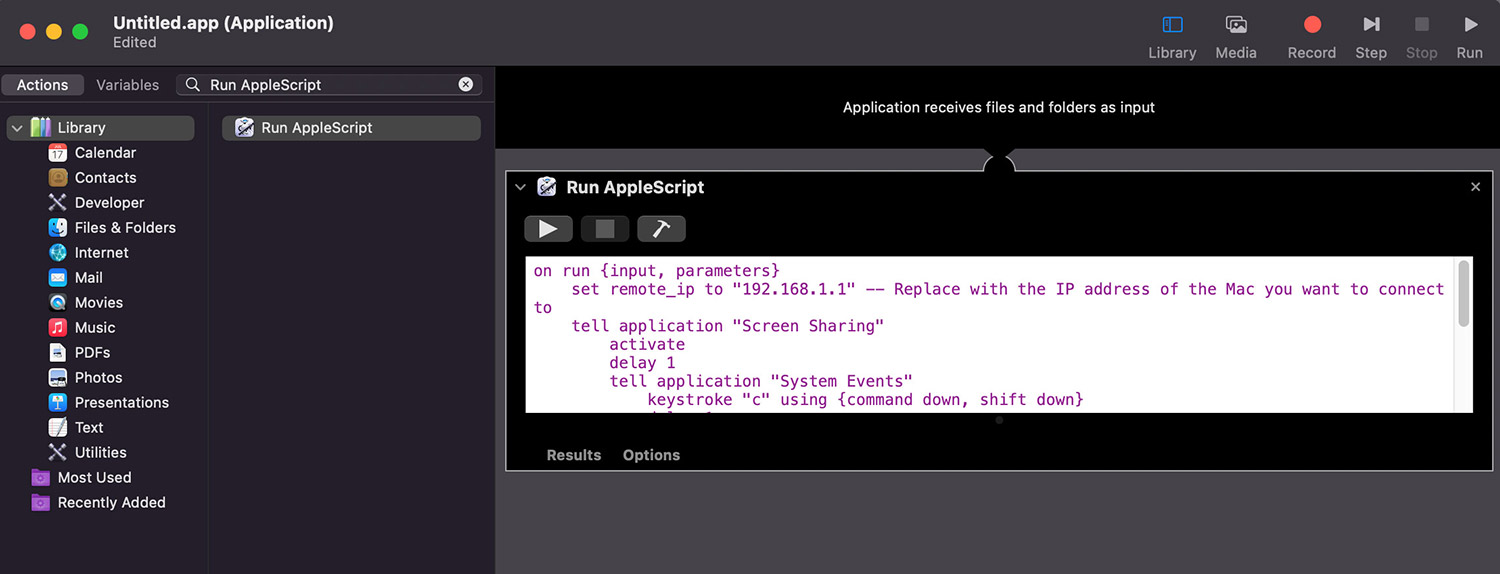
Step 3
In the AppleScript action, replace the default code with the following code:
on run {input, parameters}
    set remote_ip to "192.168.1.1" -- Replace with the IP address of the Mac you want to connect to
    tell application "Screen Sharing"
        activate
        delay 1
        tell application "System Events"
            keystroke "c" using {command down, shift down}
            delay 1
            keystroke "v" using {command down}
            keystroke return
            delay 5
            keystroke tab
            keystroke tab
            keystroke return
        end tell
    end tell
end run
Step 4
Replace 192.168.1.1 with the IP address of the Mac you want to connect to.
Step 5
Save the workflow and give it a self-descriptive name, for example – ‘Auto Connect Screen Sharing‘.

Step 6
You have completed the necessary steps, but since this program requires keystrokes to run, you need to grant it permission to execute.
Here are the steps you need to follow to grant authorization:
- Open “System Preferences” on your Mac and go to “Privacy & Security”.
- Scroll down and click on “Accessibility”.
- Click the plus icon (+) at the bottom, and select the application we created earlier with Automator.
That’s it! Now, simply double-click the app and it will automatically open the Screen Sharing application and connect to the computer we have set.