How to Migrate Your WordPress Site from Local to Remote Server
Working on a local server is the best practice for building your WordPress website securely. Once you’re done with the development, the next move is to transfer your site to a live server so it’s available on the internet.
In this guide, we’ll cover two methods to achieve this. First, we’ll walk you through the manual steps for migration. Next, we’ll introduce you to helpful plugins that can simplify the process of moving a WordPress site.
How to Install WordPress Locally With Vagrant
Developing locally is one of the best things that can happen to you. Not only does it let... Read more
How to Manually Move Your WordPress Site
This guide will walk you through the steps to manually transfer your WordPress files and database from your local computer to a live server.
Note: For this tutorial, we’re using MAMP on the local computer and Hostgator with cPanel for the live server.
Step 1: Download Your Local Database
First, let’s make a copy of your existing WordPress database. Follow these steps:
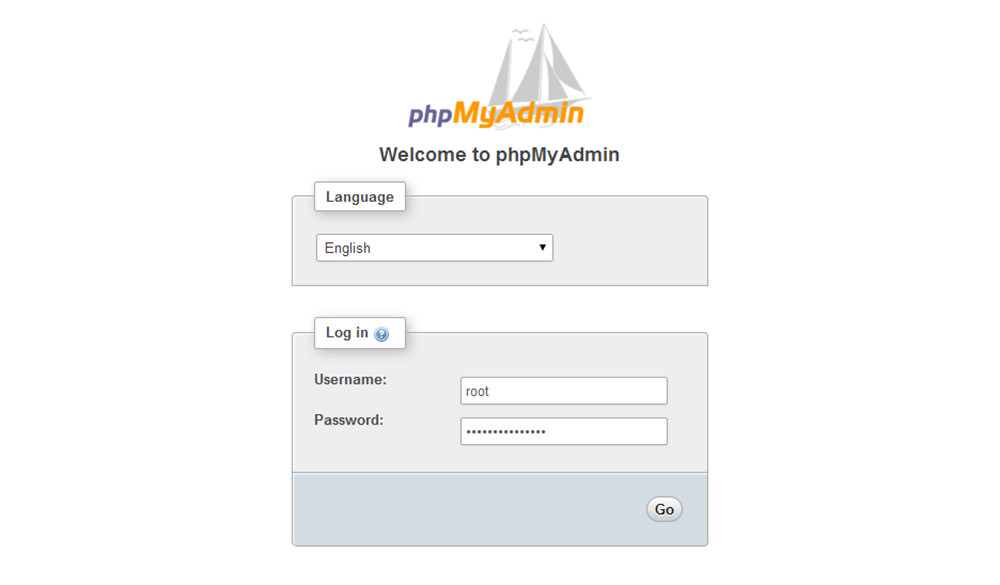
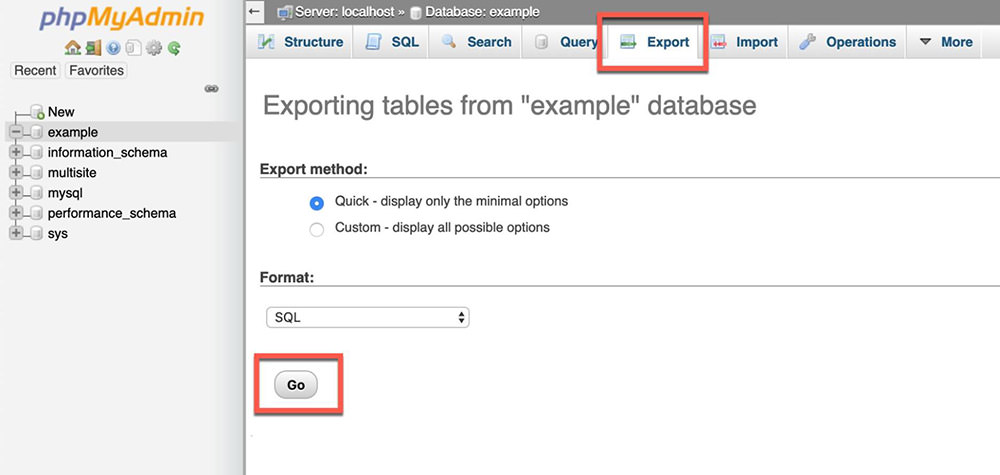
- Open your web browser and navigate to
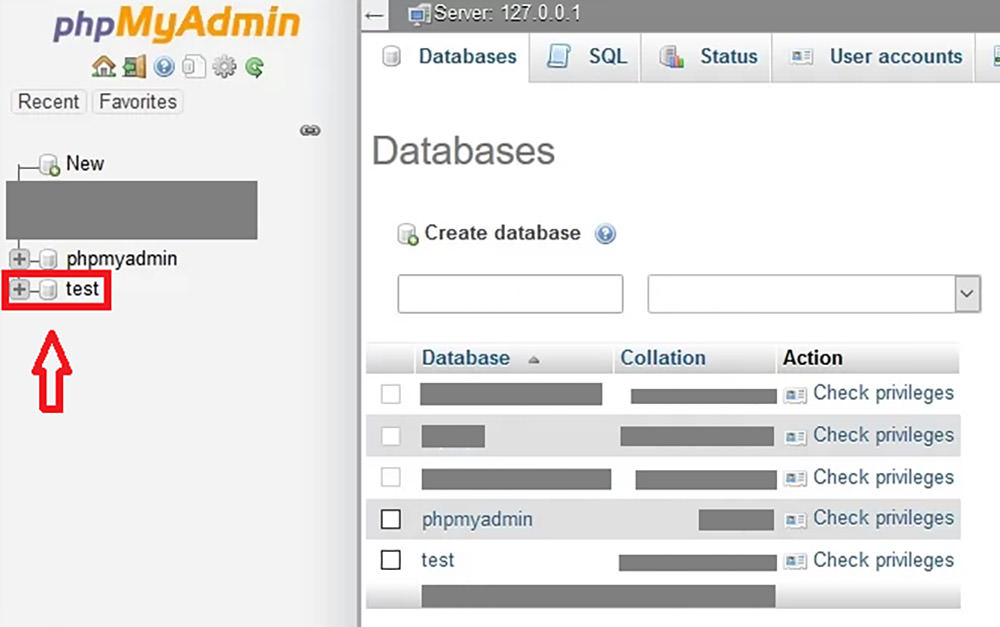
http://localhost/phpmyadmin/. - In the left sidebar, click on your WordPress database name.
- Click on ‘Export’, choose ‘Gzip’ under Format, and then click ‘Go’.
Step 2: Create a New Database on the Live Server
Before uploading the local database to the live server, you’ll need to create a new database in your hosting account.
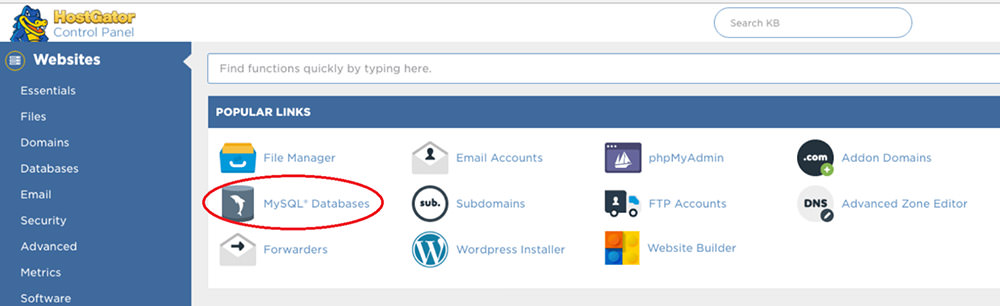
- Log in to your hosting account. In the cPanel or admin page, find and click on something like “MySQL”, “MySQL Database”, or “Database”. Then click on “Create New Database”.
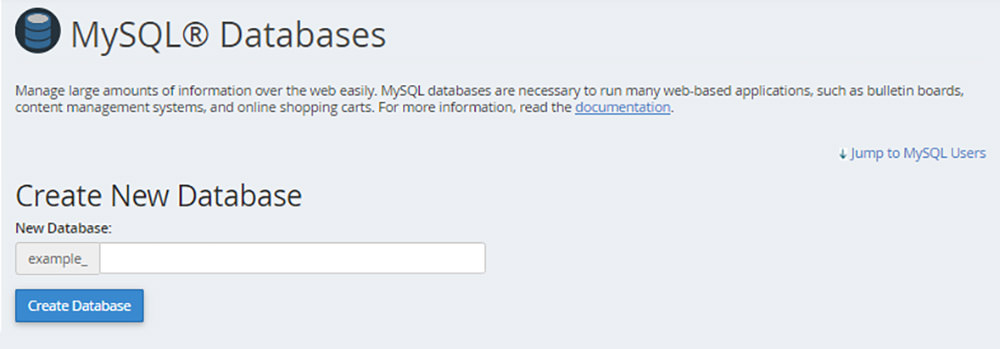
- Name your database and click “Create Database”.
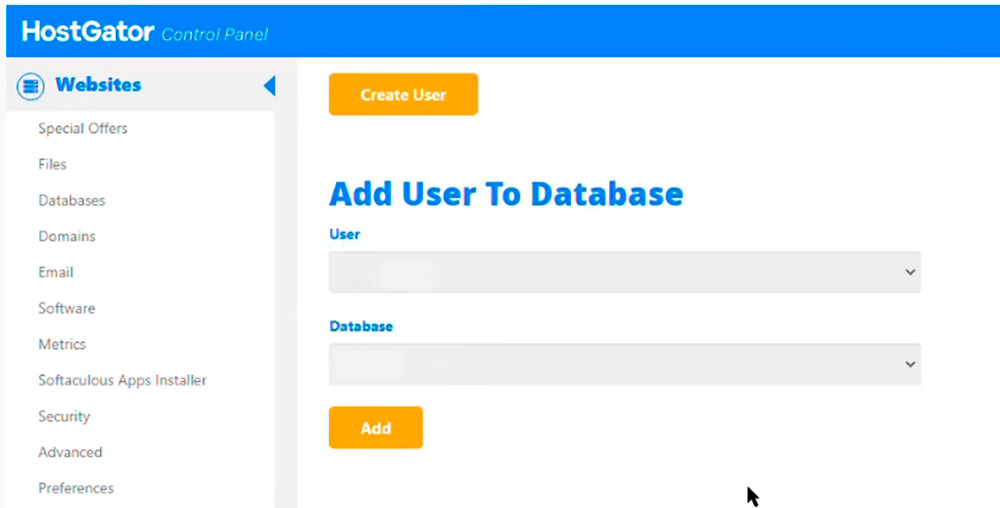
- Next, create a user for this database. Enter a username and password, then click “Create User”.
- Link the new user to the database. Select both the User and Database names, then click “Add”.
- If prompted, ensure all privilege boxes are checked and click “Make Changes” or “Done”.


Note: Make sure to save the username and password – you’ll need them later.
How to Upload Your Database to a Live Server
Now that you’ve exported your local database and created a new one on the live server, it’s time to import the database there.
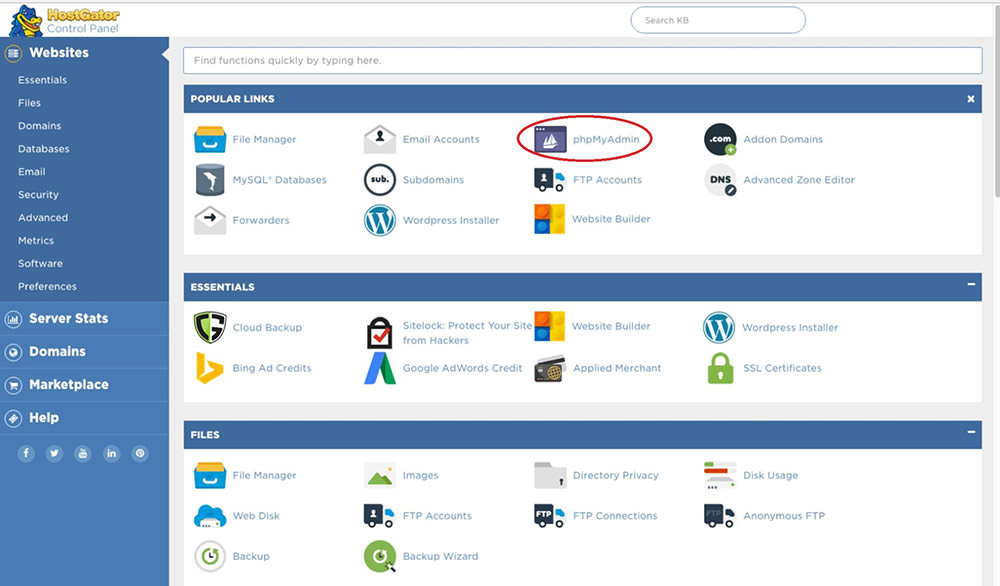
- Go to the admin area of your web hosting account, find the Database section, and click on “PhpMyAdmin”.
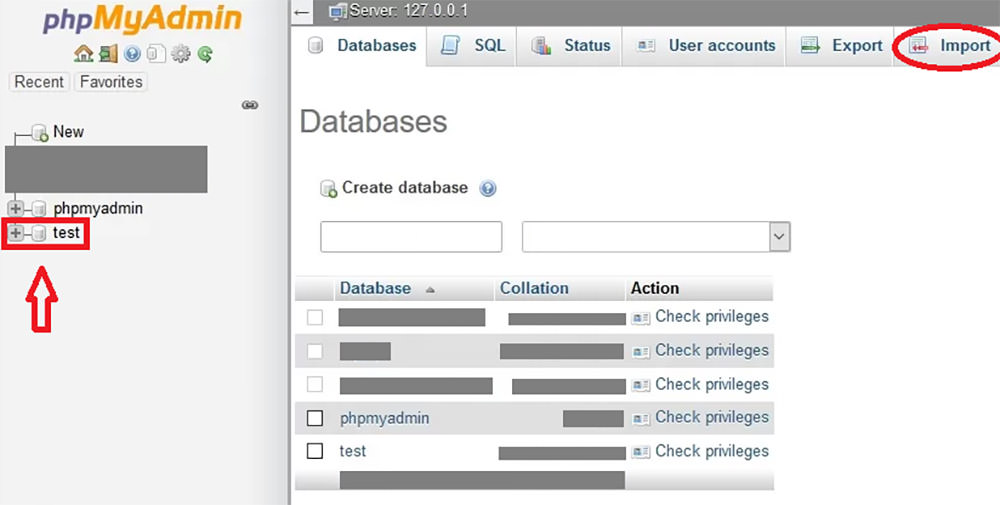
- In the left sidebar, click the name of the database you created earlier. Then, click “Import” in the top menu.
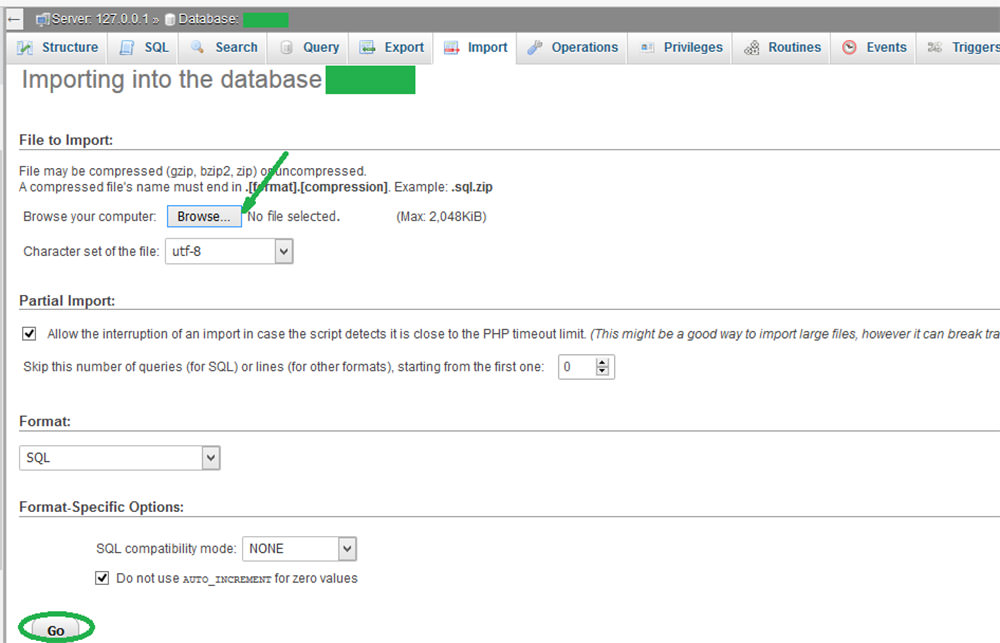
- Click “Browse,” select your local database file (in .gzip format), and click “Go.”
Update Settings in Your Live Server Database
Once the database is uploaded, you’ll need to update the site URL. Navigate to the wp_options table in the database and locate the siteurl and home entries.
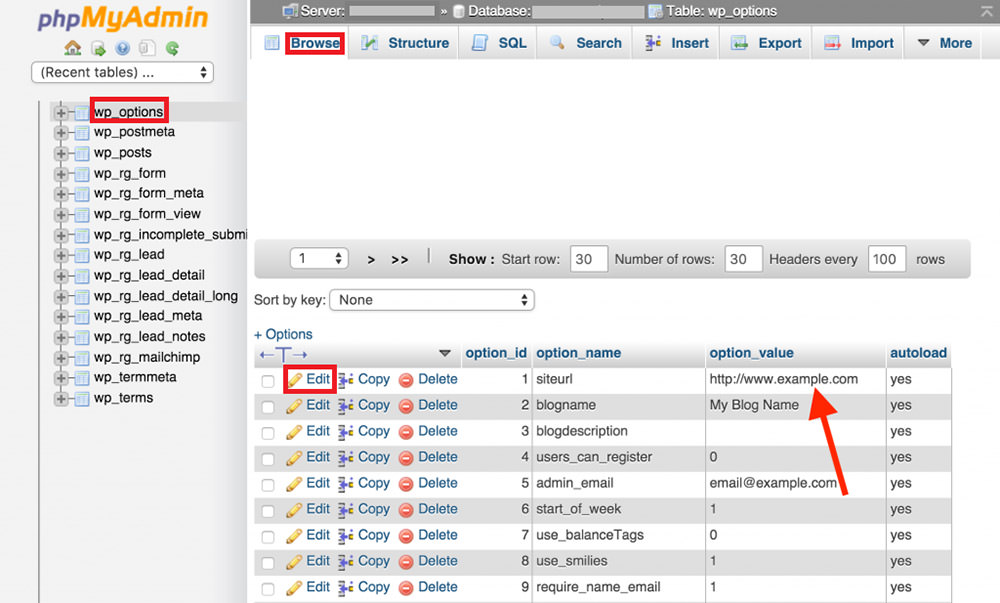
Change the siteurl and home entries from http://localhost to your domain, for example, http://mywpblog.com.
Transfer Files to the Live Server
You’ve successfully migrated the database. Now it’s time to upload your WordPress files to your web hosting account. We recommend using an FTP client for this.
If you don’t have an FTP client, you can download FileZilla, or check out our list of free FTP clients. Connect to your web hosting account and start transferring your WordPress files.
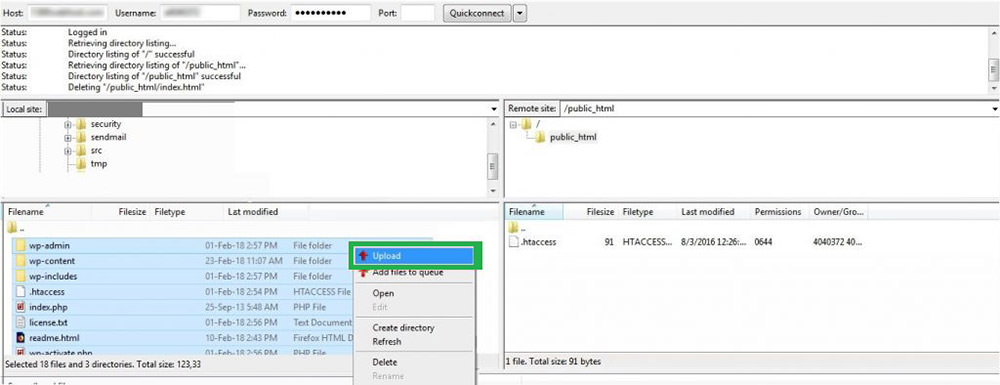
Note: Ensure you’re transferring files to the correct directory, usually public_html/.
Edit the WordPress Configuration File
Finally, you’ll need to edit the wp-config.php file on the live server to connect it to the database.
Open wp-config.php in a text editor and find the following section:
define('DB_NAME', 'your_database_name');
define('DB_USER', 'your_database_user');
define('DB_PASSWORD', 'your_database_password');
define('DB_HOST', 'localhost');
Replace the placeholders with the actual database information you set up earlier.
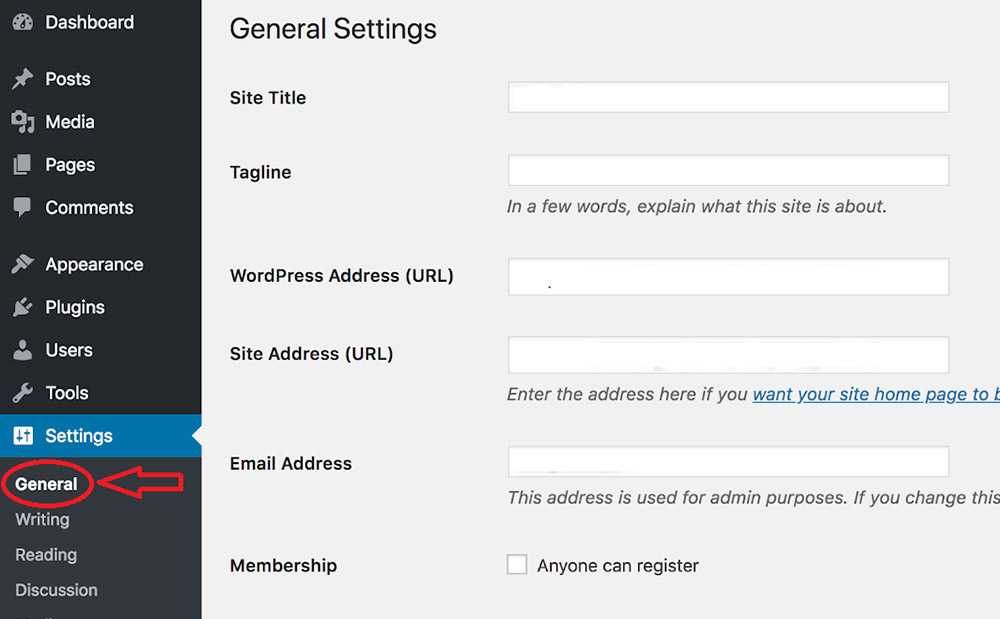
Verify Settings and Test Your Site
If everything is set up correctly, your site should now be live. Go to the WordPress Dashboard, navigate to Settings > General, and confirm that the URLs are correct. Then, save your changes.
Open a new browser tab, enter your site’s URL, and your WordPress site should appear just like it did on your local machine.
Easy Ways to Move Your WordPress Site With Plugins
If you’d rather avoid the hassle of manually transferring files and databases, you can use WordPress plugins to make the migration process easier.
Here are some plugins I highly recommend:
UpdraftPlus
UpdraftPlus is a comprehensive backup plugin for WordPress. It allows you to automatically back up your site and store it on various remote servers like Google Drive, FTP, Dropbox, and more. The plugin offers incremental backups and the option to restore your site directly from the admin panel. The premium version even includes a migration tool for easy site transfers.

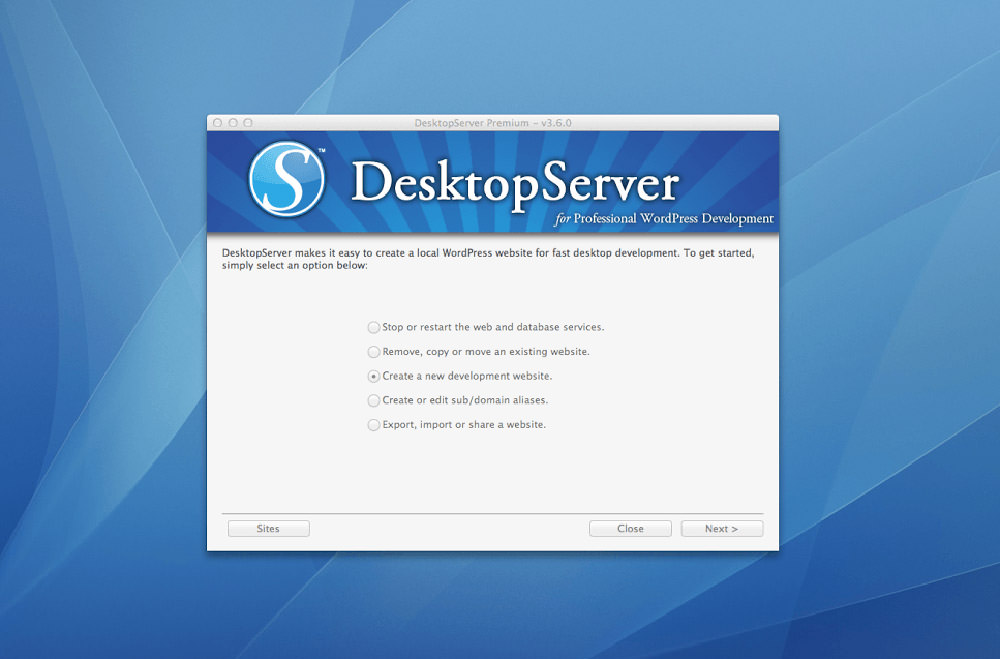
DesktopServer
DesktopServer is a desktop app available for macOS and Windows that lets you run WordPress locally on your computer. It simplifies the process of setting up virtual hosts, cloning test sites, creating local multisite networks, archiving sites, and migrating your site.
The application’s Wizard GUI makes the migration process as simple as a few clicks.
All-in-One WP Migration
All-in-One WP Migration is a user-friendly plugin that simplifies the process of transferring your WordPress website. It takes care of complicated steps like moving the database, files, and updating web addresses.
You have the option to leave out specific folders from the transfer, such as spam comments, media files, and blog posts.
Related: Learn how to use the All-in-One WP Migration plugin.
Duplicator Pro
Duplicator Pro is another user-friendly WordPress migration plugin. It’s designed to be easy to use, regardless of your technical expertise. The plugin allows you to move your WordPress site from a local environment to a live server, or between different servers.

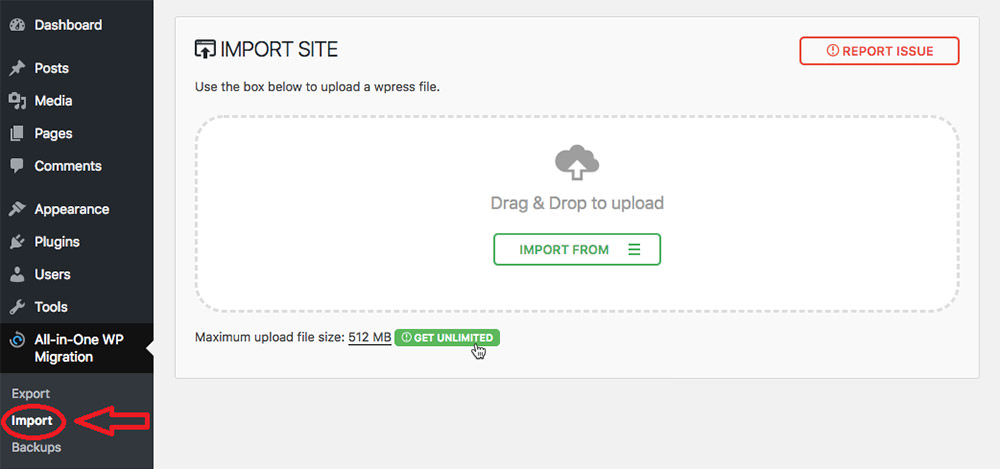
Extra Tip: How to Migrate Using the All-in-One WP Migration Plugin
This guide will show you how to use the All-in-One WP Migration plugin to move your WordPress site.
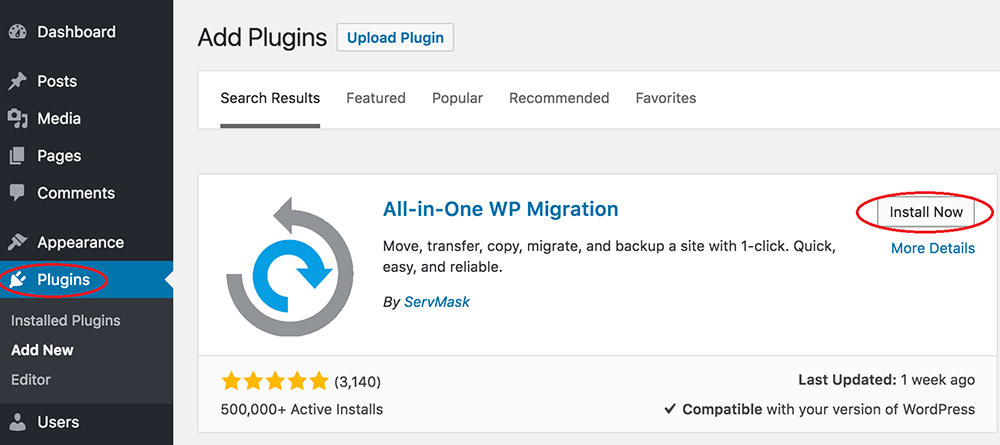
- First, go to your local WordPress site and install the All-in-One WP Migration plugin. Activate it.
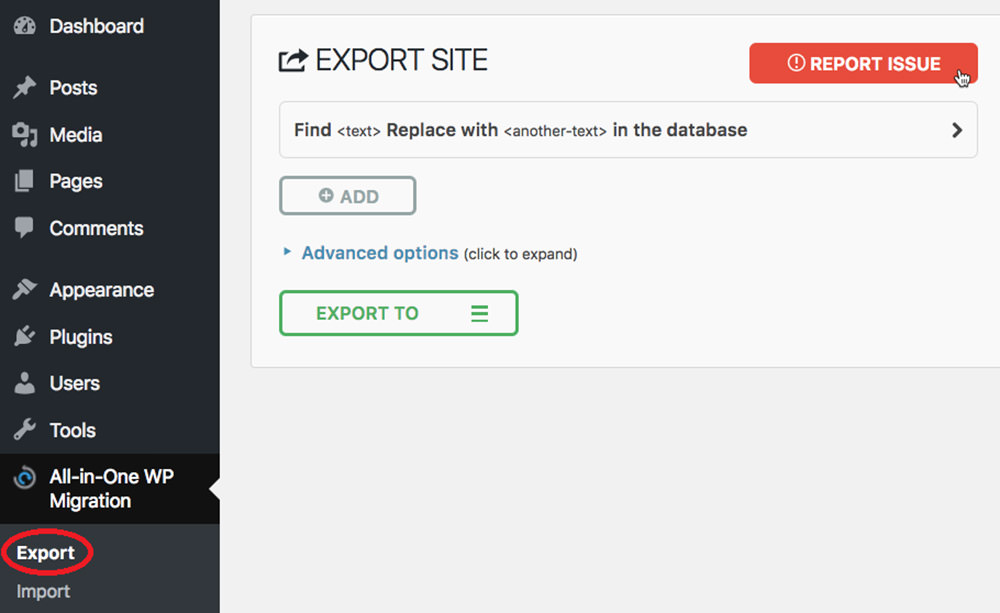
- Next, look for the “All-in-One WP Migration” link on the left sidebar of your WordPress dashboard. Hover over it and click on “Export.”
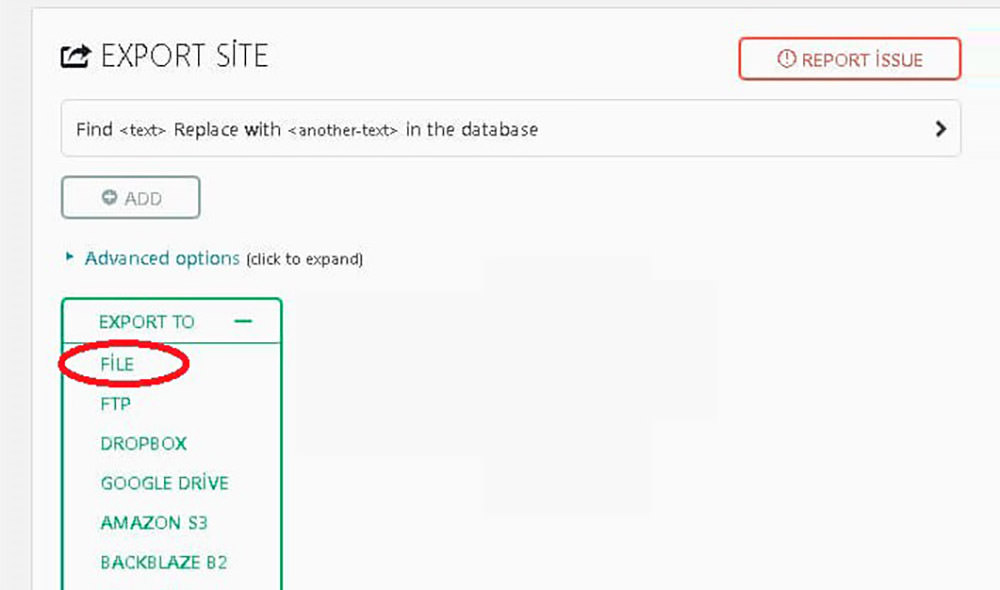
- Choose “Export to,” and then select “File” to download a backup of your database.
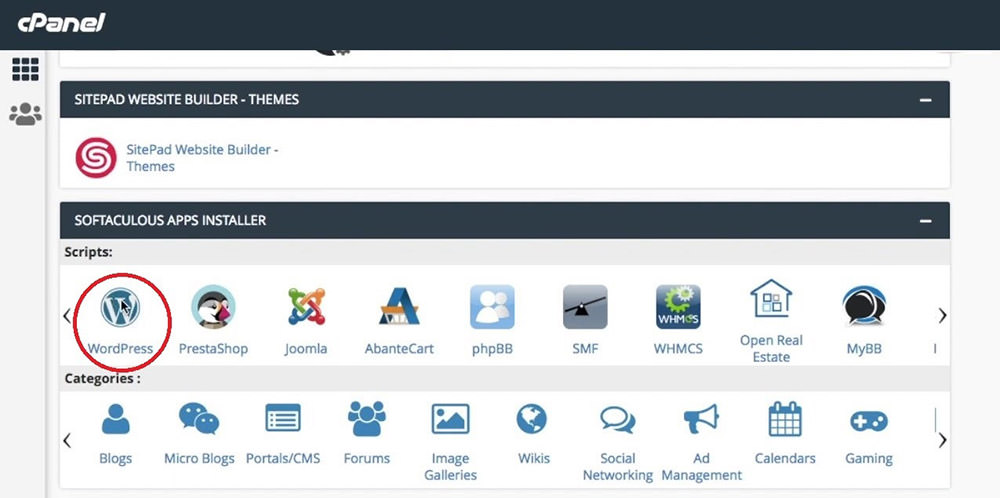
- Now, install a fresh WordPress on your live server. Don’t forget to install and activate the All-in-One WP Migration plugin there as well.
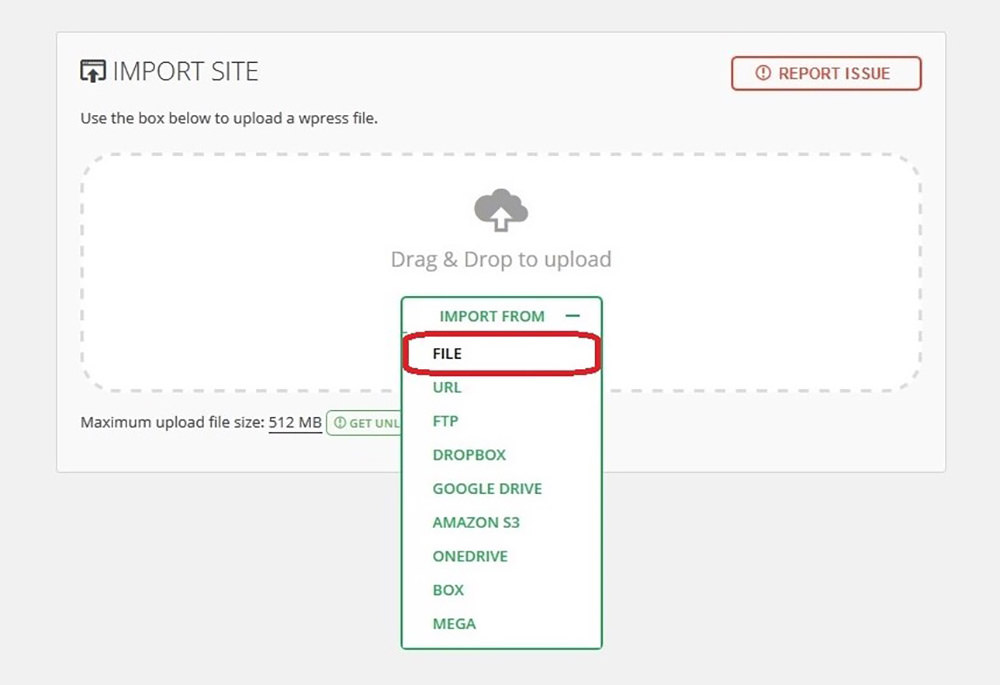
- Go back to the left sidebar and under “All-in-One WP Migration,” click on “Import.”
- Select “File,” then browse your computer to find the database backup you downloaded earlier.
- Finally, click “Proceed” to replace the existing database with the one from your local setup.