Launching a New WordPress Site – Part 2: On-Site Tasks
Launching a new WordPress site involves many different tasks. The first part of this article looked into off-site tasks you need to execute outside of the WordPress dashboard, such as hosting, FTP connection, search engine registration, etc. In this second part, we’ll have a look into on-site tasks you need to accomplish from the administration panel of your WordPress website.
On-site tasks mainly involve the configuration of WordPress settings and the installation of plugins and a theme. There are other tasks developers may want to do, for instance adding custom functions, but I won’t discuss these in this article.
You need to perform all of these tasks from your WordPress admin area to which you can log in at the http://www.yoursite.com/wp-admin URL with the username and password you created when you installed WordPress.
Launching a New WordPress Site – Part 1: Off-Site Tasks
While WordPress and other content management systems make launching a new website much easier than before, it's still... Read more
1. Install a security plugin
WordPress sites are hacked like crazy, so the first thing you should do after logging into your new WordPress site is installing a security plugin.
There are many security plugins you can choose from, however use only one at the same time, as the features frequently overlap, and it can cause problems if two plugins try to do the same thing such as login security or IP blacklisting.
If you want to host comments or have a contact form you’ll also need an antispam plugin for security reasons. You can choose a separate antispam plugin such as Akismet, however some security plugins, such as BulletProof Security, also offer antispam features.
Read Also: 9 WordPress Plugins To Detect Malicious Code In Your Site
2. Configure your settings
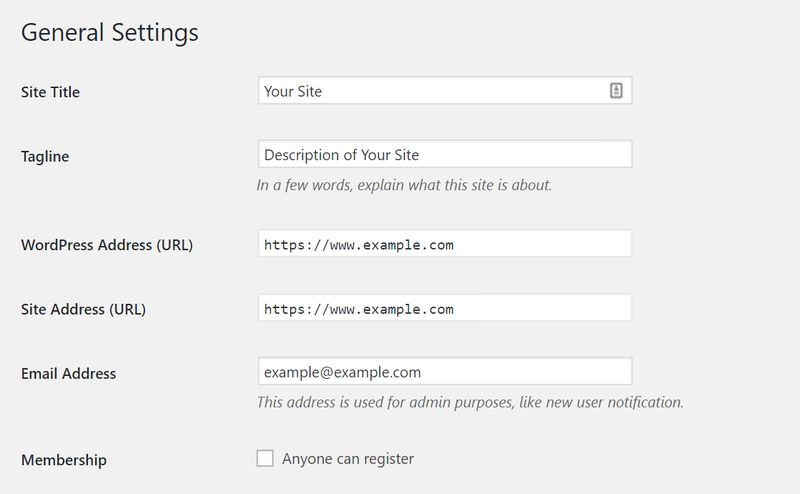
In the WordPress admin, there are a bunch of settings you need to configure. You can find them under the Settings menu in the left sidebar. Go through them one by one. WordPress admin has a good UX, therefore most of the settings are self-explanatory. Here, I just mention two things you shouldn’t forget about.
If you use an SSL certificate on your site, pay attention that the WordPress Address (URL) and Site Address (URL) options in General Settings use the HTTPS version of your URL.
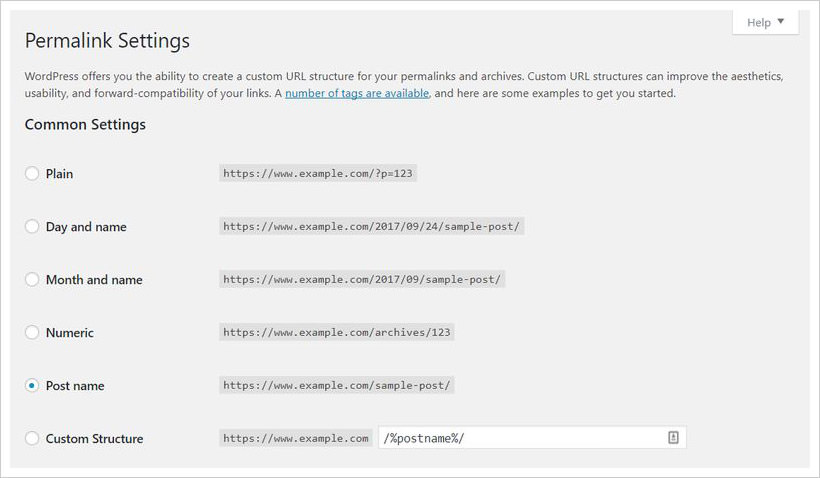
WordPress comes with a default permalink structure you can find on the Settings > Permalinks admin page. The default structure doesn’t include the name of the post, just an ID (for instance, http://yoursite.com/?p=12). This permalink structure is not search engine friendly at all, always change it to one of the other options.
According to Yoast, the most SEO-friendly URL structure is the post name based structure. Think about which permalink structure would be the best for you before you launch the site because later it can be hard to change (as search engines will point to the old URL ).
3. Create users
Before launching your site, it’s worth thinking through how you want to manage your users. WordPress has different user roles (admin, editor, author, contributor, subscriber). Never give users higher role than what they really need. For instance, a subscriber (a reader who follows your blog) shouldn’t be able to write or edit posts.
Even if your site will have just one user, it’s a good idea to create a separate non-admin user who authors the posts that go public. This way, it will be harder to find out the username of the admin user. As a rule of thumb, use the admin user only for configuration and site management.
You can create new users under the Users > Add New menu in the left sidebar.
Read Also: 10 WordPress Plugins To Improve User Management
4. Install an SEO plugin
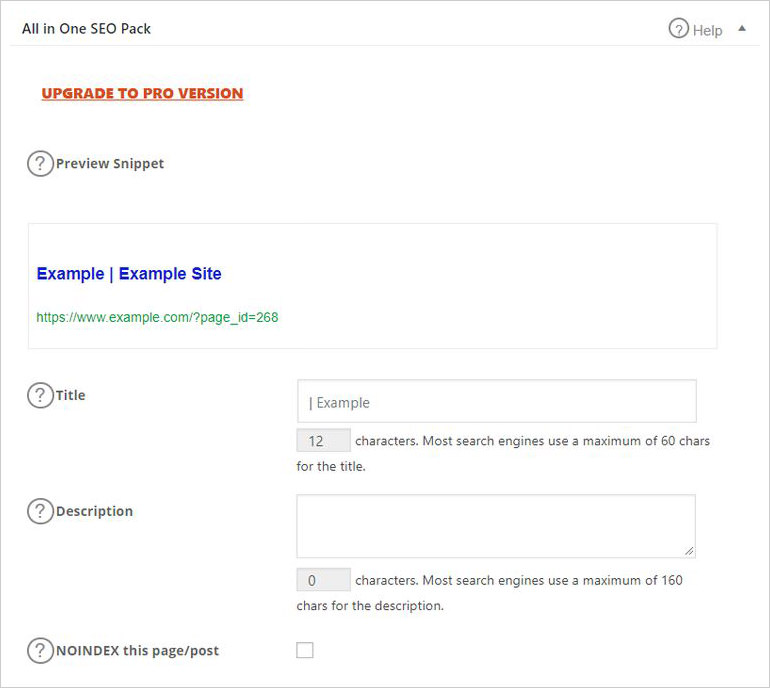
To perform well in search engines, you need an SEO plugin on your site. It’s the best to install and configure the SEO plugin before you start to create the content, as it adds extra fields to the “Add New Post” and “Add New Page” admin pages. (On the screenshot below, you can see some of the extra fields the All in One SEO Pack plugin adds below the post editor.)
The two most popular SEO plugins are All in One SEO Pack and Yoast SEO. Both are great, choose whichever you like more (or a third one if you want to experiment). WP Beginner has an excellent (and fresh) Yoast SEO vs. All in One SEO Pack article, it’s worth a look.
Both All in One SEO and Yoast SEO allow you to link your Google & Bing Webmaster Tools accounts to your WordPress site.
Read Also: WordPress For Beginners: Power Charge Your Site For SEO
5. Create your content
You will also need some content on your site. A basic WordPress install allows you to create two page-level content types: posts and pages. Posts are dated therefore excellent for a blog, while pages come without dates therefore great for permanent content such as About pages, Contact pages, and legal documents.
Also pay attention to taxonomies: tags and categories, as they highly impact how your users perceive your site. You can manage your tags and categories under the Post > Categories and Post > Tags menus in the left sidebar.
Read Also: Ultimate Guide to WordPress Post Revisions
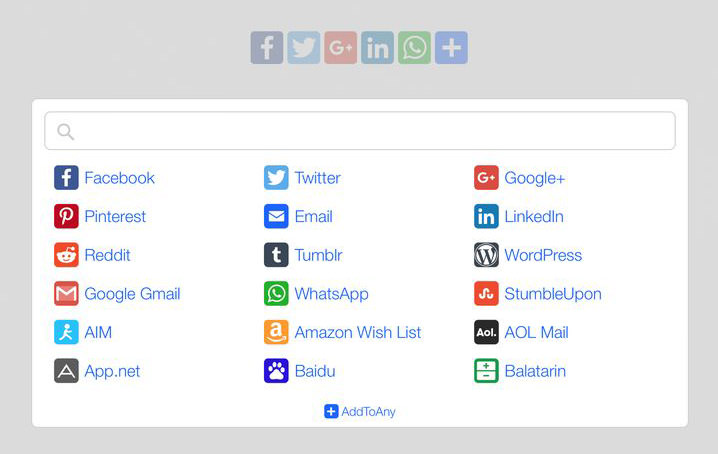
6. Add social buttons
There are two kinds of social buttons you can add to your site: share and follow buttons. Share buttons go before or after each post (or page) and they allow users to share that particular post on different social media websites such as Facebook or Twitter.
Follow buttons usually go either to the header or to the footer (sometimes to the sidebar), and they let users follow your social media accounts. You need a separate account on each social medium in order to connect it to your WordPress site.
There are many free social media plugins in the WordPress repo. You may need different plugins for follow and share buttons, however there are some, for instance the AddtoAny Share Buttons plugin, that perform both tasks.
Read Also: WordPress Speed Optimization with Custom Social Sharing Icons
7. Activate & customize a theme
Apart from plugins, your WordPress site will also need a theme. Your default WordPress install comes with either the annual default WordPress theme (Twenty Seventeen, Twenty Sixteen, Twenty Fifteen, etc.) or with a theme authored by the hosting provider.
There are several free and commercial (paid) WordPress themes, choose one that fits with the goals of your website. For instance, there are portfolio themes, business themes, multipurpose themes, church themes, accessibility-ready themes, and many others.
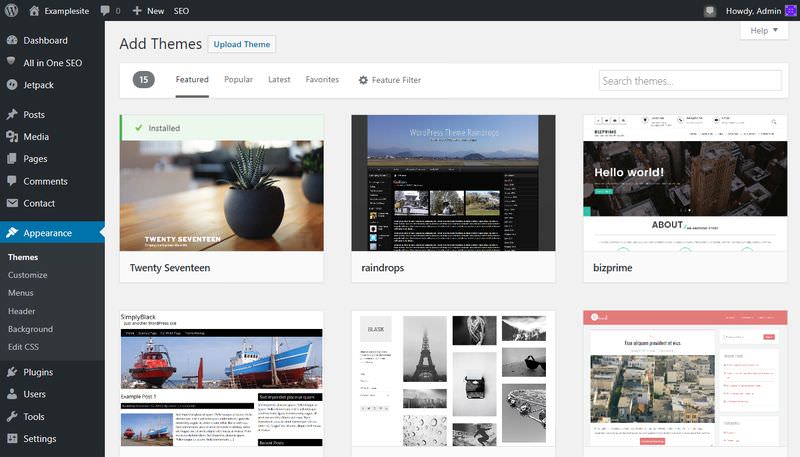
You can browse official (reviewed by the Theme Review Team) WordPress themes either in the WordPress Theme Directory or in your WordPress admin area, under the Appearance > Themes > Add New menu.
After activating the theme, you can customize it, using the theme customizer under the Appearance > Customize menu.
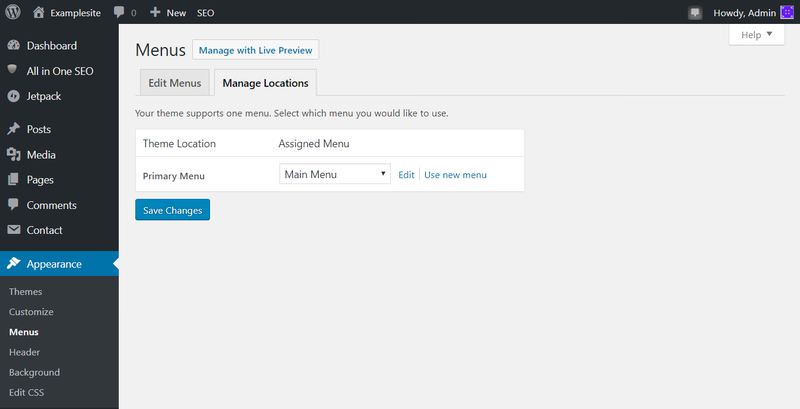
You can perform most of the theme customization using the theme customizer, however need to create the menu(s) separately. You can do that on the Appearance > Menus > Edit Menus admin page.
Note that some themes have more than one menu locations (header menu, footer menu, sidebar menu, etc.). You need to create a separate menu for each location. You can assign a menu to a menu location on the Appearance > Menus > Manage Locations admin page.
8. Connect your site to Google Analytics
To connect your WordPress site to your Google Analytics account, you need a plugin. There are many free Google Analytics plugins in the WordPress plugin repo, their features usually overlap, so only use one at the same time.
The main goals of a Google Analytics plugin are to add the belonging JavaScript code to your site and to connect your Google Analytics account to it, however it can have other additional features as well. You have to add your Google Analytics ID on the admin page of the plugin.
WPMUDev has a great article that compares different Google Analytics plugins. I personally use GA Google Analytics by Jeff Starr, as it’s about two minutes to set up and does the job well, however concerning your own site, don’t listen to anyone and decide based on your own needs. For instance, support for the Force SSL feature is important for me, that’s one of the reasons I use the aforementioned plugin, however you may have different needs.
Read Also: 20 Must-Know Tips & Tricks To Master Google Analytics Data
9. Install a caching plugin
Your WordPress site will also need a caching plugin, as caching highly improves performance (your site will load faster). Caching basically means that web documents, such as HTML pages, and static assets, such as images and scripts, that don’t change frequently are loaded from a temporary storage (cache).
Make the installation of the caching plugin the last thing you do before the site launch, as when caching is activated you don’t always see the result of changes immediately unless you flush the cache.
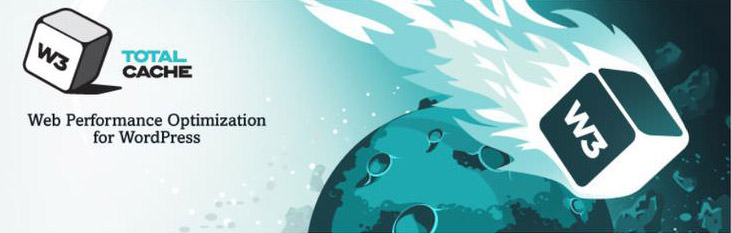
There are many caching plugins available in the WP repo, however the two most popular ones are WP Super Cache and W3 Total Cache. WP Super Cache is easier to set up, therefore it’s a better choice for beginners or for sites that want a reliable caching solution with a quick setup. W3 Total Cache comes with more options but it’s harder to configure. Choose according to your needs.
10. Test the site
Finally, don’t forget to test if everything works as excepted. Check all posts and pages, if you have a contact form test if it properly works, try out the social buttons & all the other features you have on your site.
Don’t forget to check the site from different browsers and from different mobile devices as well. You can also use external tools, such as the Pingdom Website Speed Test or Google’s Mobile-Friendly Test Tool, to analyze performance and discover potential issues.