A Guide to WordPress Post Revisions
One of the greatest features of WordPress is its built-in revision control system. You don’t have to worry about losing a previous version of your content, as each revision is separately saved in the database, allowing you to easily move back and forth between them.
WordPress’ revision system functions similarly to code version control systems like Git or Subversion, but it’s almost completely automated (no need to deal with command line tools). This enables an advanced content management workflow and significantly reduces the risk of content loss.
Mastering Version Control Management in WordPress for Better Workflow
I used to be very reluctant to use Git during my development. I thought I didn't need Git... Read more
Managing Revisions in WordPress
Revision management is somewhat hidden within the WordPress admin area, as it doesn’t have a dedicated menu in the sidebar.
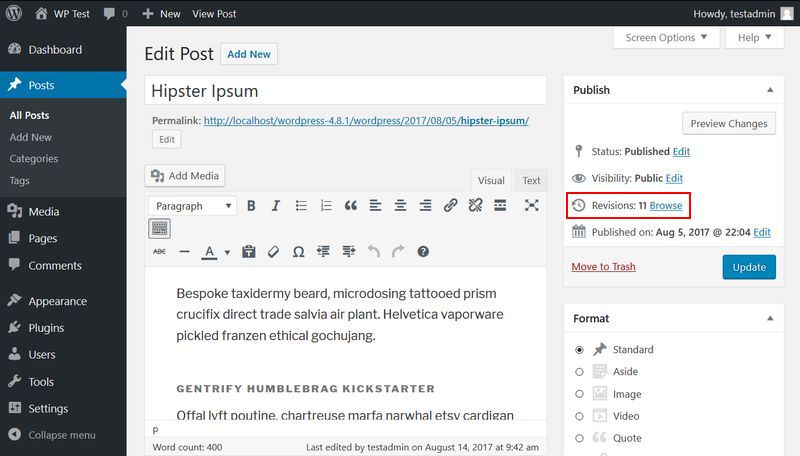
You can access revisions from either the “Edit Post” (Posts > All Posts > Edit) or the “Edit Page” screen (Pages > All Pages > Edit). The “Revisions” menu is located next to the WordPress editor, inside the “Publish” box. Click the “Browse” button to access the revision management screen.
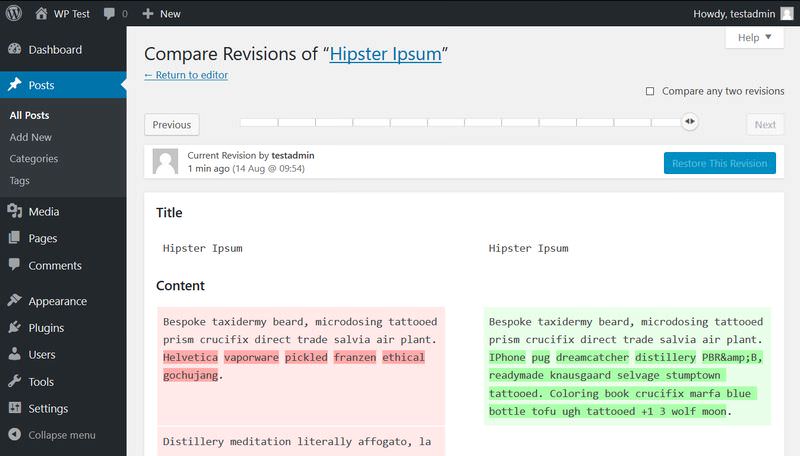
The revision management screen allows you to compare differences between different versions of your post. The main part of the page is dedicated to a diff comparison tool.
Text strings removed from the previous version are highlighted in red, while strings added in the new version are highlighted in green.
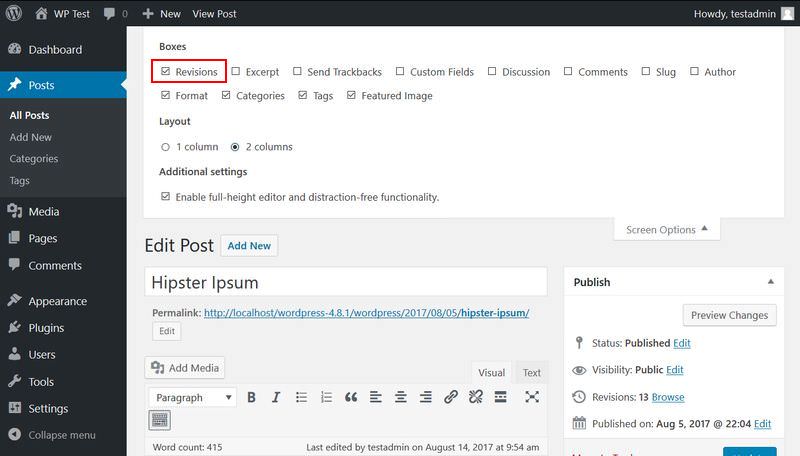
Another way to access revisions from the “Edit Post” (or “Edit Page”) screen is by opening the “Screen Options” menu at the top of the page and checking the “Revisions” option. This adds an extra box below the WordPress editor where you can access the revisions.
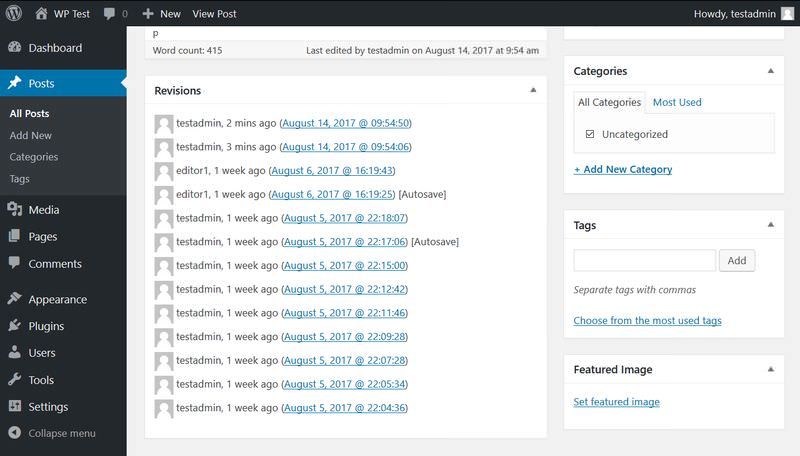
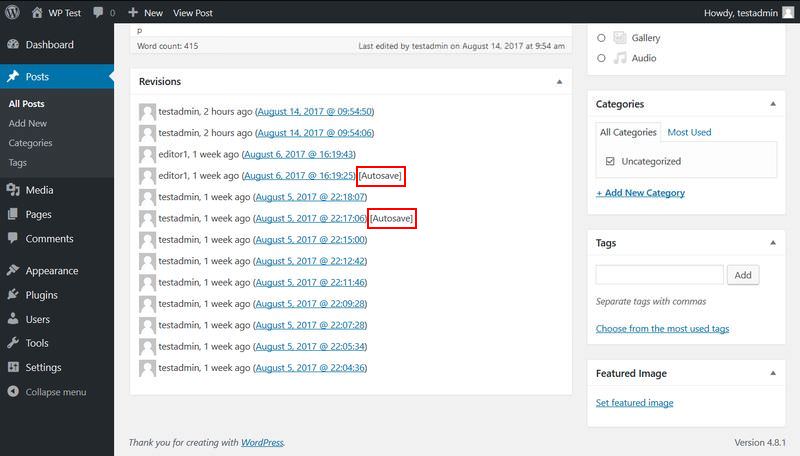
The “Revisions” box lists all available revisions. You can easily choose the one you want to view by clicking on it.
Create Revisions
How can you create revisions in WordPress? As mentioned earlier, WordPress’ revision system is highly automated. Each time you save a post or page, a new revision is automatically generated in the database, and a new entry is added to the “Revisions” screen.
Autosaves
WordPress also creates revisions through its autosave feature. Autosave is enabled by default for all posts and pages, and it cannot be turned off. However, you can adjust the autosave interval (instructions provided below). The default autosave interval is 60 seconds.
You don’t need to worry about excessive autosaves cluttering your database, as new autosaves overwrite the previous ones. Unlike regular revisions, autosaves are stored as a special revision type. Their primary function is to enable you to restore an autosaved backup if your browser crashes or shuts down unexpectedly.
Compare Revisions
Comparing revisions in WordPress is simple. You can compare two revisions by adjusting the range slider at the top of the Revisions screen. You can also use the “Previous” and “Next” buttons to move the slider and select different revisions to compare.
It’s important to note that this screen allows you to view differences between revisions but does not permit direct editing of the revisions themselves.

By default, you can compare two adjacent revisions. However, if you check the “Compare any two revisions” checkbox, you can also view differences between non-consecutive versions of the post.
When this option is enabled, the range slider displays two handles, and a “From … To … ” box appears below it, making it easy to identify which two revisions you are comparing.
Restoring a Previous Revision
You can restore any previous revision by selecting the desired revision and clicking the “Restore This Revision” button.
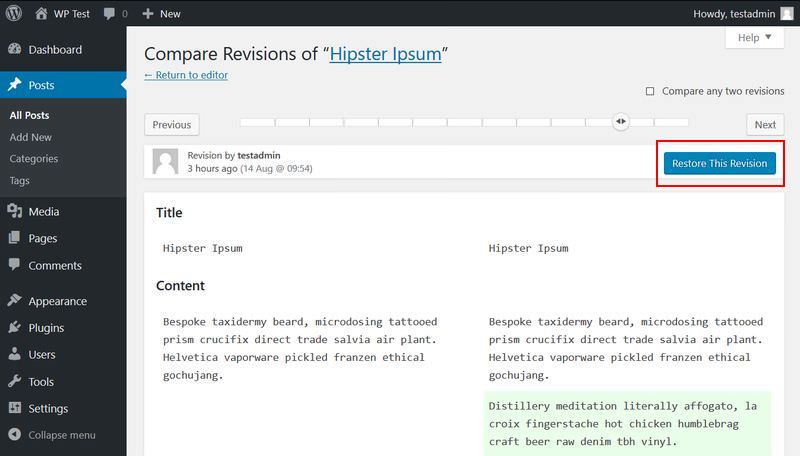
Once you click the button, the selected revision appears within the WordPress post editor, and you’ll receive a notification at the top of the screen, confirming the restoration.
After reviewing the restored content, simply update the post, and the restored version will be published on your site.

Restoring a previous revision does not delete the latest version of the post from the database; you can return to it at any time using the same Restore feature.
Configuring Revisions in wp-config.php
You can configure various revision-related settings within your wp-config.php file. This file is located in the root directory of your server and can be accessed via FTP.
If you’re not comfortable editing root files on your server, it’s advisable to use a revision management plugin instead (a few options are mentioned below).
Limiting the Number of Revisions
To conserve database space, you can limit the number of revisions by adding the following line near the beginning of your wp-config.php file (right after the opening <?php tag).
# Limits each post to 5 revisions
define( 'WP_POST_REVISIONS', 5 );
Disabling Revisions
If necessary, you can also completely disable the post revision feature.
# Disables the post revision feature
define( 'WP_POST_REVISIONS', false );
Changing the Autosave Interval
As mentioned earlier, the default autosave interval is 60 seconds. You can modify this interval in your wp-config.php file by adding the following code snippet. Remember to define the autosave interval in seconds.
# Sets the autosave interval to 180 seconds
define( 'AUTOSAVE_INTERVAL', 180 );
Revision Management Plugins
There are several revision management plugins available in the WordPress plugin repository. Below is a curated selection of tested plugins, though it’s not an exhaustive list. You can explore all official revision-related WordPress plugins here on this link.
WP Revision Master
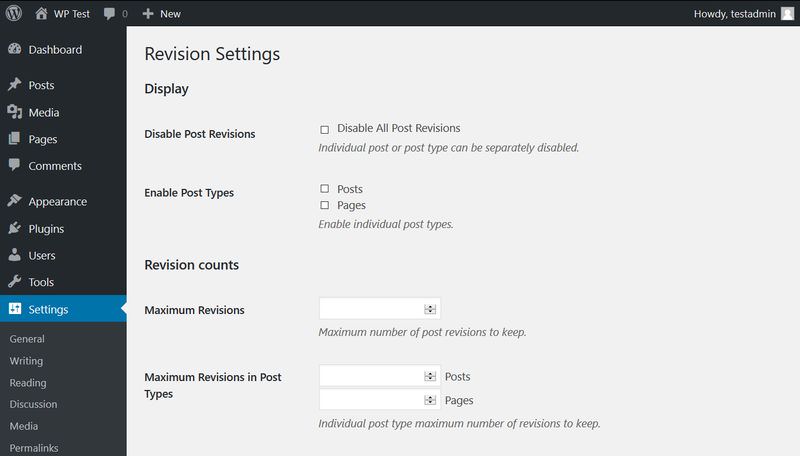
The WP Revision Master plugin allows you to configure revision settings directly from your WordPress admin panel. You can disable revisions for specific post types (posts, pages, products, etc.) and set a maximum number of revisions, so you don’t need to manually edit your wp-config file.
Simple Revisions Delete
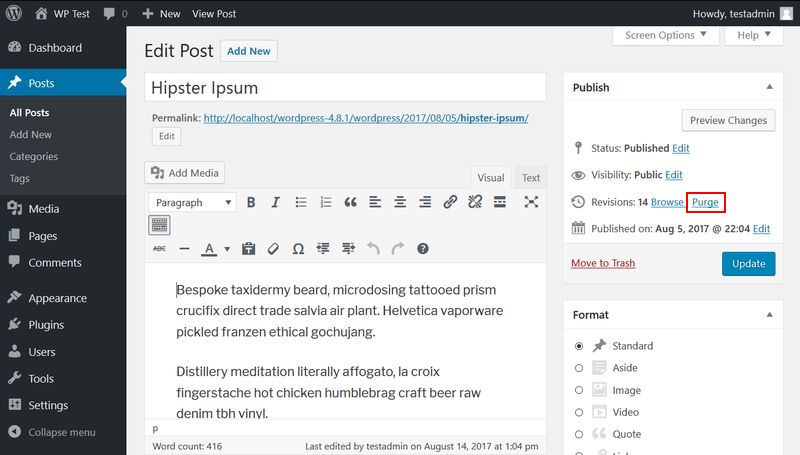
Simple Revisions Delete is a straightforward yet highly effective plugin. It doesn’t add a separate plugin page to the WordPress admin area but instead integrates a convenient “Purge” button into the “Edit Post” screen. This button deletes all post revisions associated with a specific post, making it an excellent tool for quickly reducing database size.
Be cautious, as the Purge button instantly deletes all revisions. Ensure you won’t need them in the future before using this feature.
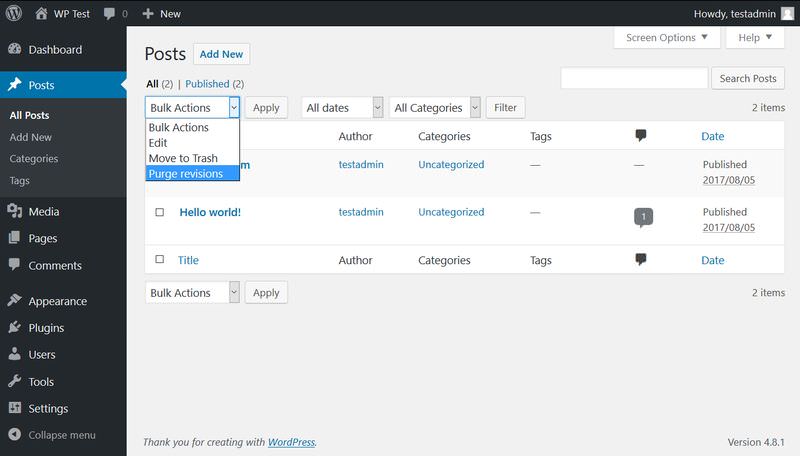
The Simple Revisions Delete plugin also adds a “Purge revisions” option to the “All Posts” and “All Pages” screens, allowing you to delete unwanted post revisions in bulk.
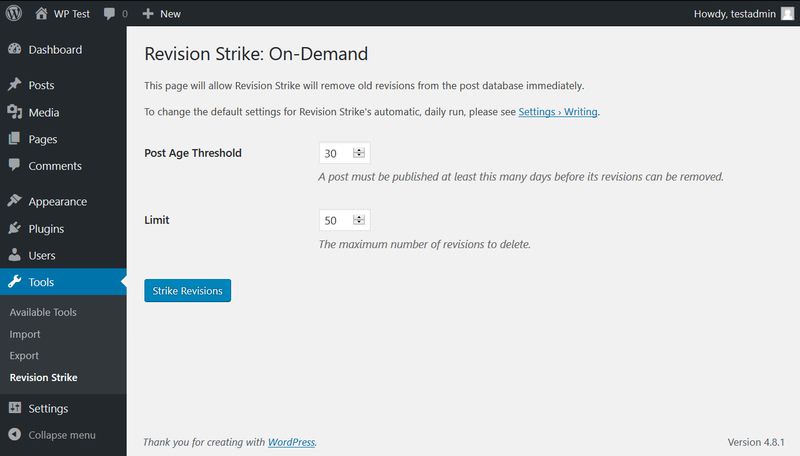
Revision Strike
Revision Strike is another simple yet useful plugin that helps you keep your database clean. It allows you to specify the number of days after which revisions are automatically deleted and to set the maximum number of revisions to be removed at once.
Best Practices to Trim Your WordPress Database
A clean WordPress installation starts with 12 database tables by default, however, with time, data quickly adds up.... Read more