How to Convert Windows Mail (.eml) to Mac Mail (.mbx) Format
Migrating from a Windows PC to a Mac often involves transferring your email data. This can be tricky, especially if your email client on Windows stores emails locally using POP3 mail servers. While copying email files is straightforward, opening them on a different operating system isn’t as simple.
Office emails on Windows are typically managed using Outlook or Windows Live Mail. On a Mac, however, emails are handled by a different system that uses another format. If you’re using Thunderbird on your Windows PC, the transition is smoother because Thunderbird is available for Mac as well, allowing for easy migration.
But if you’re using Windows Live Mail, you will need to convert your .eml files into .mbx format to make them compatible with Mac. This is crucial because Mac Mail cannot natively open .eml files. If you use an IMAP mail server, however, the process is much simpler. IMAP synchronizes your emails across devices by storing them on a server, thus bypassing the need for file conversion.
This guide outlines the steps to import your Windows Email (.eml) into Mac Mail (.mbx) using Eml2Mbx, a straightforward tool that converts .eml files to .mbx format.
Step-by-Step Guide to Converting and Importing Windows Mail to Mac
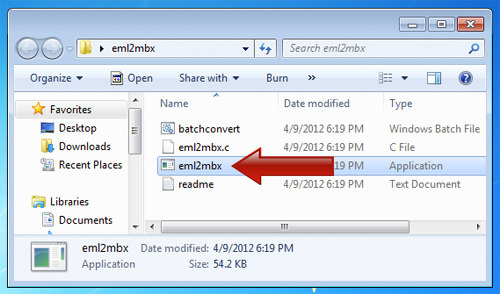
Begin your migration from Windows Live Mail to Mac by first downloading Eml2Mbx from the official site. Scroll down to find ‘Eml to Mbx’ and start the download.
Once downloaded, unzip the folder to a convenient location and open the file named ‘Eml2Mbx’.
Before converting, ensure that you have exported your Windows Email files in .eml format. If you have completed this step, proceed to Step 2.
1. Export Windows Email
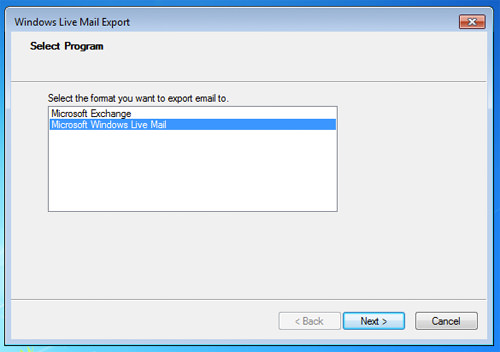
Start the export process by opening your Windows Email client, click the ‘File’ button, choose ‘Export email’, then select ‘Email messages’.

Select ‘Microsoft Windows Live Mail’ and click ‘Next’.
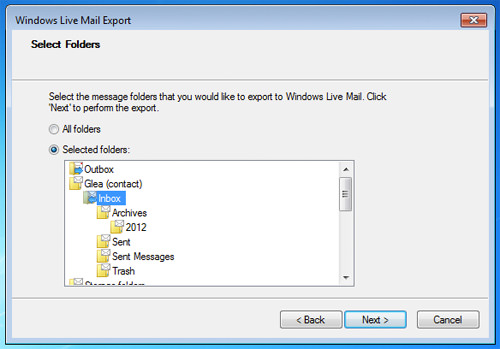
Choose an empty destination folder and click ‘Next’.

Specify the email folder you want to export, click ‘Next’, and your export is complete.
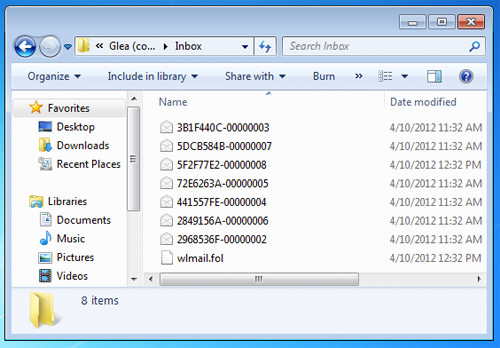
Your emails are now saved in the designated folder with a .eml extension.
2. Convert Email Extensions from .eml to .mbx
To convert your .eml files to the .mbx format for Mac, open the Eml2Mbx application, navigate to the folder with your email files, select the file you want to convert, and click ‘Open’.
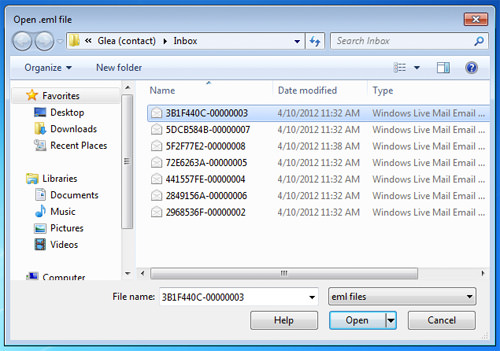
The application will automatically duplicate the file and convert its extension to .mbx.
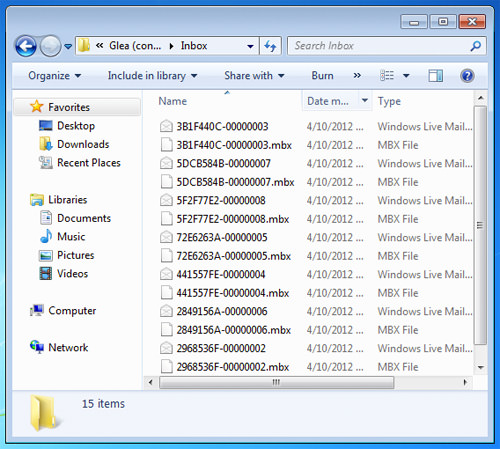
Although Eml2Mbx.exe can convert only one file at a time, batch processing is possible. Simply copy the ‘batchconvert’ and ’eml2mbx.exe’ files into the directory with your email files.

With both files in the same folder, execute the ‘batchconvert’ file to convert all your emails in the folder to .mbx format.
3. Import Windows Email to Mac
After converting your emails to .mbx format, transfer these files to your Mac in preparation for importing them.
Launch your Mac Mail client, navigate to ‘File’, and select ‘Import Mailboxes’.
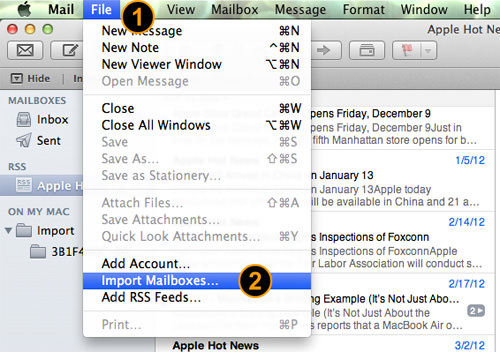
Choose ‘Files in mbox format’ and click ‘Continue’.

Select the .mbx files you want to import and click ‘Choose’.
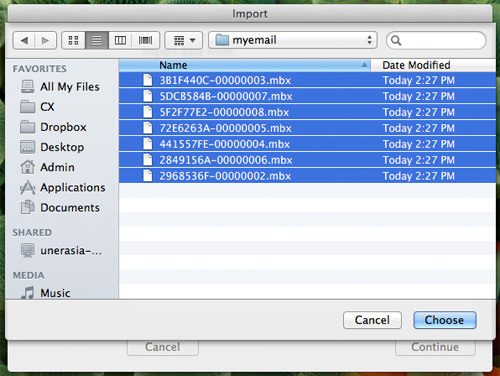
Your emails are now successfully imported into your Mac Mail client and can be found in the new ‘Import’ folder in the left sidebar.

Conclusion
The process might seem lengthy, but it is well worth the effort to ensure that your emails are preserved, even when transitioning between computer systems.