CloudReady is the Best Free Alternative to Chrome OS
If you wish to try out Chrome OS without a Chromebook, you can always opt for its emulator; however, it will not provide you with enough performance if you are a designer or developer. So, what’s the solution then?
Chrome OS is a proprietary software built on top of Chromium OS, which comes for free. However, being developer-centric, it is not very user-friendly; which brings us to our old problem. How to try out Chrome OS freely?
In such a case, CloudReady can be a good alternative to Chrome OS. It’s also built on the top of Chromium OS but offers much more intuitiveness than its underlying platform. It may not offer you “all of Chrome OS” but it does provide the best.
Do you wish to try it out on your system? Let me demonstrate to you the process of installing CloudReady on a computer — as easily as possible.
Read Also: 9 Cloud Operating System You Can Try Out for Free
CloudReady features
Neverware CloudReady is based on Google’s Chromium OS, the same open-source architecture like Chrome OS. That means it packs in the best features of Chromium OS including its speed, simplicity, and security.
Minimal hardware
Neverware boasts of CloudReady as a cutting-edge operating system that also runs on non-cutting-edge hardware. It works on numerous hardware configurations including the ones designed and sold several years ago. That means you do not need to upgrade your old machine to make it usable.
Automatic updates
CloudReady supports automatic updates, like Chrome OS, so you can rest assured that you always get the latest bug fixes and patches automatically. Chromium OS, another free alternative, does not provide this essential security functionality, making CloudReady an optimum choice for everyone.
It delivers the automatic updates every six weeks including feature and security updates. It is available in all editions counting the free “Home” edition.
Security essentials
CloudReady is built on the same foundation including the security features as Chrome OS. It packs in user data encryption to support enhanced yet secured multi-user experience. It also features secure sandboxing that eliminates the accidental authorization of any malicious program taking control of all.
Enterprise features
CloudReady is not just a personal operating system; it packs in enterprise-grade features like cloud-based management and mass deployment options. It is also compatible with Chrome Management and Google Admin consoles, allowing you to manage CloudReady devices along with Chromebooks easily.
Install CloudReady
Neverware CloudReady is easy to install if you know the steps. It is almost the same as installing a Linux distro — you need to make a boot disk and install the operating system by booting up your system using the boot disk.
Prerequisites
First of all, let’s check the essential requirements that you must meet before installing CloudReady. Below are the essentials you require:
- A pen drive with 8 GB (minimal) or 16 GB (preferred) space.
- A working (minimal) or high-speed (preferred) internet connection.
- A Windows, macOS, or Chrome OS device to create the boot disc.
Furthermore, you need a computer with the basic requirements. Although these requirements are usually found in every system manufactured in last ten years yet do check them before trying the installation of Neverware CloudReady. Also, you can also check the list of officially certified computer models.
- RAM: 2 GB (minimal) or higher (4 GB is recommended).
- Hard disk: 20 GB (minimal) or higher based on your needs.
- Connectivity: An active internet connection as it is a cloud system.
Create a boot disk
You need a bootable flash drive to install Neverware CloudReady. You can create it by following the below steps in Windows. If you are using a different operating system, follow these steps for Chrome OS and macOS. Alternatively, you can create it on a Windows PC even if you need to install it on another system.
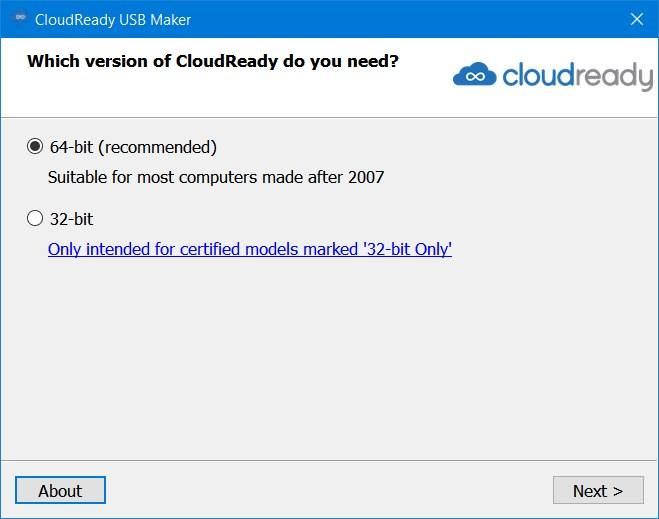
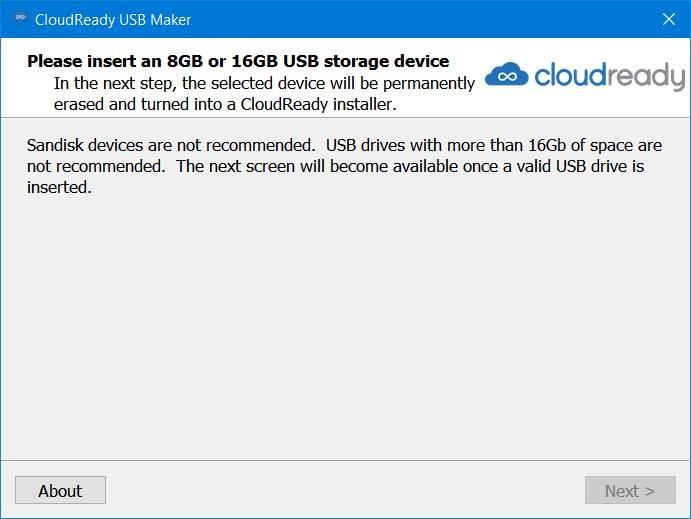
- Download the “USB Maker” for CloudReady.
- Open the downloaded executable and follow its instructions. Please insert a flash drive (of 8 GB or 16 GB storage) when asked, and do note that it will take 20-30 minutes to copy all the needed files and make the boot disk.
Installation
After you have created the boot disk, you can begin with the installation. You need to boot your computer with the created boot disk (check this wiki page if you do not know to boot from a disk), then follow the below instructions:
- You will see the welcome screen of CloudReady Installer. It may take some time to load this screen after you have booted the computer.
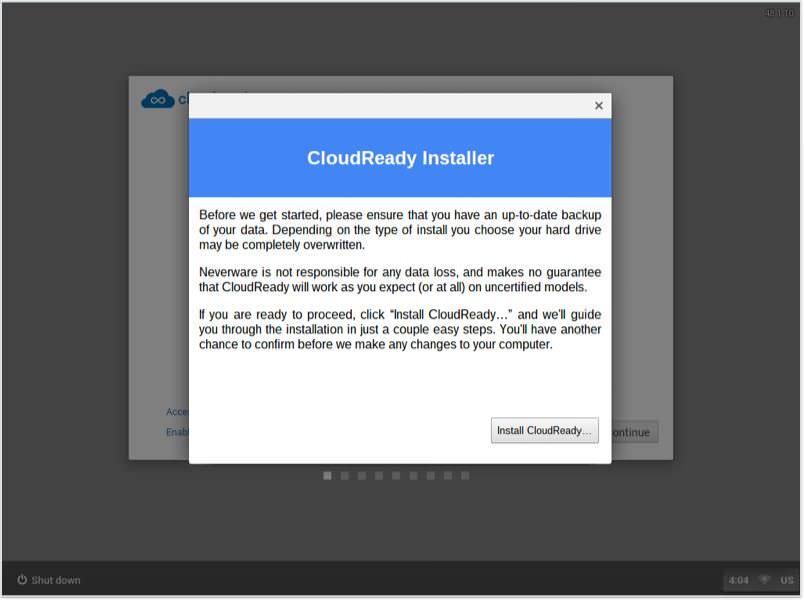
- Click at the clock shown in the right-bottom of the screen. You will see a vertical menu. Here choose the option “Install CloudReady“.
- In the new window, click the button “Install CloudReady“. You must read and agree to all warnings and terms and conditions before the installer will continue the installation process, which will take some time.
- After the installation has finished, your computer will shut down by itself. Now remove the boot disk from the computer and start it again.

Finally, let’s set it up
Once you’re done installing CloudReady, there are some configuration options you must set before using your system. These settings are most essential ones, and you can tinker with more of them in the Settings of CloudReady.
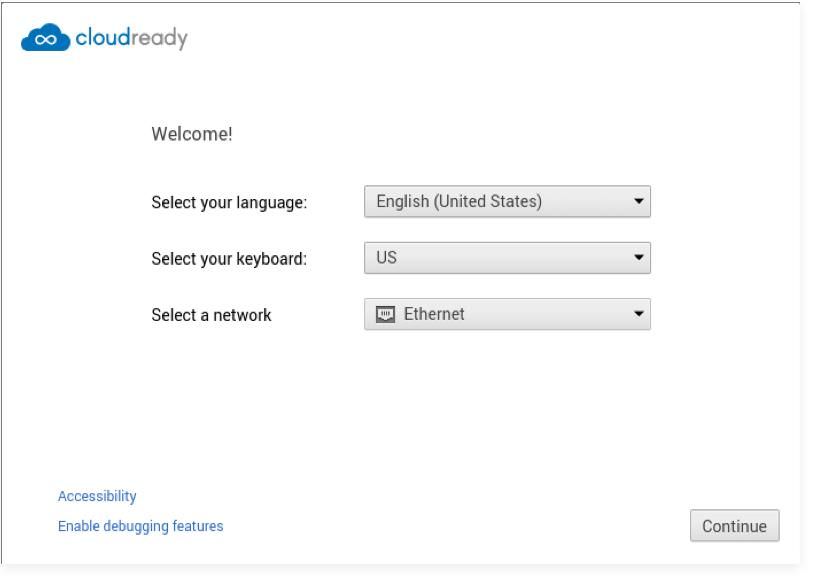
- When the computer boots up again (without the boot disk), you will see the welcome screen of CloudReady. It is the same setup screen that is also presented to the users of Chromium OS or Google Chrome OS.
- On this welcome screen, you can choose your language, keyboard layout, and connect to a network as well. When done, click Continue.
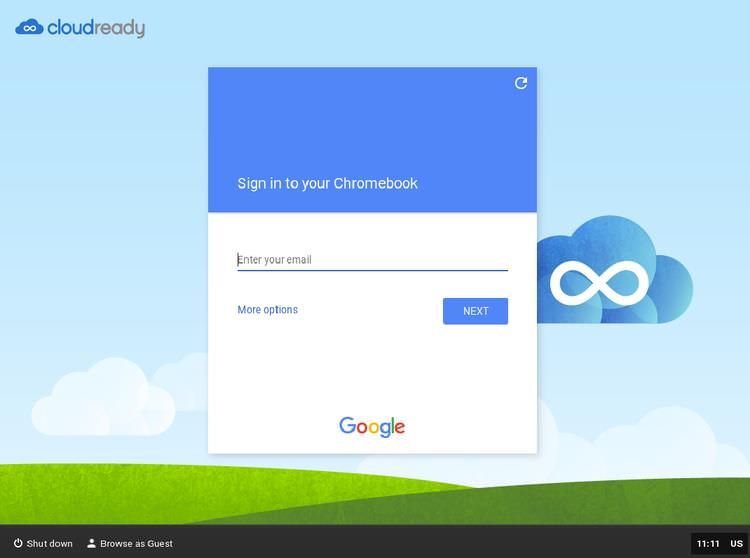
- Now your computer will check for updates and install the latest ones for your system. After it is done, it will show you the login screen.
- You must log in with your Gmail or Google account in CloudReady. Once you are done signing in, you will see its classic desktop.
- At last, you must install some third-party media codecs and plugins to enable your system to play proprietary or restricted media.
- Click at your user account icon or photo shown in the bottom-right of the desktop screen and select Settings from the given options.
- You will see three options under the title “Media Plugins“: “Adobe Flash”, “Proprietary Codecs”, and “Widevine Content Decryption Module”. Click the Enable or the Install button below each of these options.
- Finally, you can close the window and enjoy your CloudReady.
Troubleshooting FAQs
Q. CloudReady USB Maker does not recognize my flash drive.
A. CloudReady USB Maker needs a flash drive with 8 or 16 GB storage. If your flash drive has less or more than the preferred storage, USB Maker may not accept or recognize your input device. Also, some of the flash drives are not meant to be bootable, so it will not work with such devices as well.
Q. I cannot boot my computer with the created boot disk.
A. You must know how to set boot priority in your system’s BIOS to boot from any bootable disk. If you do not know this, kindly check this wiki page. If you know this and you believe you are doing it right, then maybe the disk is not created correctly. Kindly check the boot disk using some other computer.
In case the boot disk is created correctly, i.e., you can boot some other system with it, then please check the wiki page given above. If the boot disk is not created correctly or is corrupt, kindly create the boot disk again.
Q. I have some other problem. Where can I get help now?
A. You can check the knowledge base of CloudReady to read the commonly asked questions and solutions to many common problems. If it does not help solve your issue, kindly write a post to get help from its community.
In case you believe the issue is common to Chromium OS-based or Chrome OS like OSs, then you may ask its vibrant community at G+ for help.
Give it a try
CloudReady is hardly any different from Chrome OS in its design and ease of use features. I am a big fan of the design found in products and services from Google and Chrome OS, which means, CloudReady is nothing different.
That being said, Chrome OS does have few unique features including the support for Android apps. However, if we exclude a few proprietary features of Chrome OS, CloudReady will not disappoint you. We know it is its best alternative.