A Look into VeraCrypt – A Powerful Data Encryption Tool
VeraCrypt, the successor of TrueCrypt, is a free, multi-platform, on-the-fly encryption program similar to the Microsoft‘s BitLocker. The former, surprisingly, works on various platforms including Windows, MacOS, Linux and Raspbian, unlike the latter.
The tool offers numerous features to create encrypted file containers, encrypt volumes or partitions, or encrypt the whole operating system, etc. VeraCrypt also adds advanced security to its features and immunizes various bugs found in TrueCrypt, making it secure against brute-force and other types of modern attacks. Sounds interesting? Then let’s read on.
Read Also: How to Encrypt Files and Documents in Windows 11
In this post, we’re going to introduce you to VeraCrypt, share some of its best advantages, guide to install and use the tool secure your data in various ways.
- Advantages of VeraCrypt
- Install VeraCrypt
- Create an encrypted container
- Create a hidden encrypted container
- Mount an encrypted container or partition
- Encrypt a normal partition
- Encrypt a system/OS partition
- Tips for making best use of VeraCrypt
Advantages of VeraCrypt
Below are some of its most advantageous features:
- On-the-fly encryption: The data is magically encrypted right before it’s saved and decrypted just before it’s used without any user interference.
- No time constraints: The process of encryption or decryption can be interrupted anytime and can be resumed from the point it was stopped.
- Hidden volumes: The encrypted data can contain a hidden encrypted volume, which is hard to search or identify.
- Portable mode: The tool can run in portable mode, allowing you to carry it on a flash drive and run without installing on a system.
Install VeraCrypt
Let’s start with installing VeraCrypt on your system. You just need to follow the below steps:
- Download VeraCrypt for your platform from its download page/
- Open its installer after the download is completed/
- Check “I accept the license terms” and click Next.

- Choose the Install option, click Next and click the Install button to start the installation process.

Congrats! VeraCrypt is now installed in your system.
Create an encrypted container
An encrypted container is an encrypted file on your system that forms a virtual partition on your computer. In this virtual partition, you can save files to encrypt them on-the-fly. Please follow the below steps to create an encrypted volume using VeraCrypt:
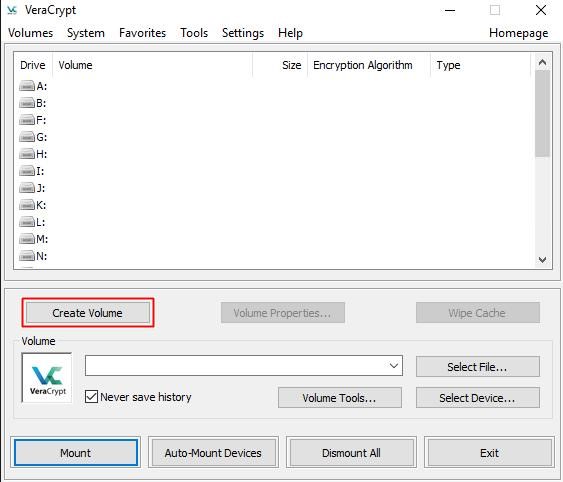
- Open VeraCrypt and click Create Volume.
- Choose the option Create an encrypted file container and click Next.

- Choose Standard VeraCrypt volume as the volume type and click Next.

- Now you need to specify the location where you wish to create/save the volume (file container). Click the Select File button and choose a name and location.
Note: An encrypted container is just like any normal file and so can be moved or deleted. Also, if you choose an old file in this step, then it won’t be encrypted but just be replaced with the new encrypted container.

- After selecting the file name and its location, click Next.
- In this step, choose the encryption algorithm and hash algorithm for encrypting the container. If unsure, please stick to the default options and click Next.

- Specify the size of the VeraCrypt volume based on your needs and click Next.

- Now enter the password you wish to keep as the key for your VeraCrypt volume and click Next. It’s recommended to set a strong password using a combination of letters, numerals and special symbols. You can use online password generator tools to create a strong password.

- Now choose the filesystem (leave default if unsure) and move your mouse as randomly as possible within this window until the randomness indicator (above the buttons) becomes green. It’s advised to move the mouse for at least 30 seconds. Click Format and then click OK to begin the process.

Your VeraCrypt volume is now ready. You can mount it using steps given below and start securing your confidential data using this volume.
Create a hidden encrypted container
A hidden volume is a volume created inside an existing encrypted volume or container. This hidden volume is untraceable from outside and is protected using a different password. This means one can’t access a hidden volume even if one knows its container.
You can create an encrypted hidden container using the following steps:
- Open VeraCrypt and click Create Volume.
- Choose the first option Create an encrypted file container.
- Choose the second option Hidden VeraCrypt volume.

- Now you’ll see two options (as detailed below) to create a hidden encrypted container/volume. Please select the Direct mode option and click Next (if you haven’t created a container yet, please make it using steps given above)
- Normal mode: In this mode, you’re directed to first create the outer volume and then the inner hidden volume.
- Direct mode: In this mode, it’s assumed that you already created an outer volume and need to create the inner hidden volume only.

- Select the existing encrypted volume (that will act as the outer volume) and click Next.
- Enter the password for the outer volume, click Next.

- Set the two algorithms for encryption (leave default if unsure) and click Next.

- Set the size of the hidden volume and click Next. Do understand that the size of the hidden volume must be lesser than the size of the outer volume.

- Move your mouse randomly as fast as possible within the window and click Format after the randomness indicator becomes green.

After finishing these steps you have successfully created the hidden VeraCrypt volume, which you can now use to store crucial data without the fear of anyone knowing about it.
Note: The hidden volume resides inside the outer volume, hence you must always have a free space of the size of hidden volume in the outer volume, else your inner volume’s data will get corrupted.
Mount an encrypted container or partition
Want to access your encrypted files? This can be done as follows:
- Open VeraCrypt and select one of the drive letters from the list.
- Click Select File to mount an encrypted (or hidden) container/volume or click Select Device to mount an encrypted partition on your system.

- Choose the file if mounting an encrypted container or choose the partition if mounting an encrypted partition and then click Mount.
- Enter your secret password and click OK.

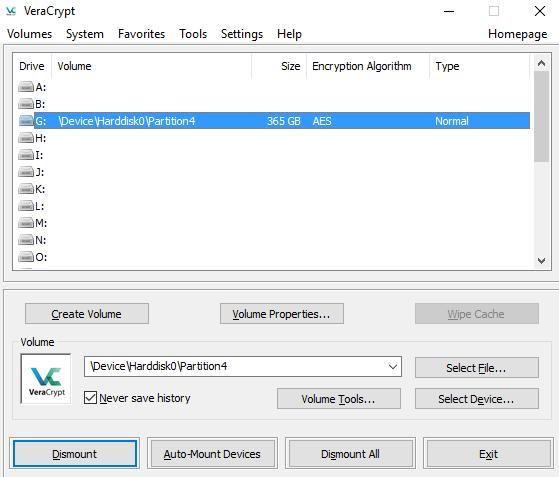
You’ll see that the partition has been mounted.
Encrypt a normal partition
VeraCrypt can also encrypt partitions like BitLocker, which means you’ll have a whole partition encrypted on your system’s hard disk using a password. You can mount it just like an encrypted container (as described above).
To encrypt a normal partition using VeraCrypt, follow these steps:
- Open VeraCrypt and click Create Volume.
- Select the second option Encrypt a non-system partition/drive and click Next.
- Choose the partition you want to encrypt and click Next.
Note: Please don’t choose a system partition in this step, i.e., any partition where you may have installed Windows, MacOS, Linux or any other OS on your system.

- Select the second option Encrypt partition in place and click Next.
Note: Please don’t choose the first option else you may lose your important data because it will format the partition and all data on the chosen partition will get lost.

- Select the encryption algorithms (if unsure, leave default) and click Next.
- Set the password for the encrypted partition and click Next.

- Now move your mouse in random order in the window as fast as possible and click Format or Next after the randomness bar changes to green.

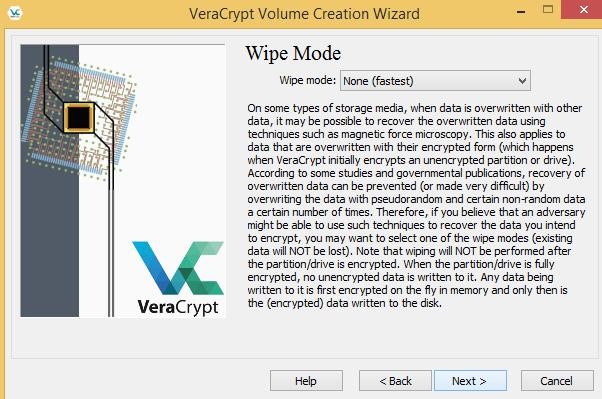
- Choose the wipe mode (choose none, if unsure), click Next and then click Encrypt to start the encryption.
Note: Wipe mode is essential for situations where you have some crucial data on the chosen partition that you can’t risk getting exposed anytime. Though VeraCrypt will encrypt your drive with its full data, yet people may recover some unencrypted data using modern technologies if you don’t select a wipe mode, so choose any option but none.
Well done, you’ve successfully encrypted the partition. Now you can mount it to store and encrypt your data on automatic basis.
Encrypt a system/OS partition
In this encryption scheme, a password is needed to start or boot up your PC. VeraCrypt currently does not support encrypting a system partition residing on a dynamic disk.
If you’re unsure, press Win + X choose Disk Management and check what’s written under Disk 0. You’re good to proceed if it’s Basic there.
Please start with the system encryption as follows:
- Open VeraCrypt, click on System menu and choose Encrypt System Partition/Drive.

- Select the option Encrypt the Windows system partition and click Next.

- Select the option Single-boot if you have just one OS in your system. In case you have miltiple operating systems, choose Multi-boot.

- Set the encryption algorithms (don’t change if unsure) and click Next.
- Set the password and click Next.

- Now move your mouse randomly within the VeraCrypt’s window, click Format after the bar becomes green and click Next.

- Now it will ask you to create a rescue disk, which helps get your system running if your system doesn’t boot up or some data gets damaged. Just enter the location where you want VeraCrypt to store the disk’s ISO image (that you can later burn to a CD), click Next and then click Next again.

- Choose the mode to wipe data (in case it’s important data that you don’t wish anyone to restore from your disk using advanced tools), click Next and then click Test.
- Please read the instructions given or print them if possible (preferred) and then click OK to continue the process and restart your system.

- On reboot, VeraCrypt will greet you to ask for the password (before Windows starts loading), so enter the password, press Enter, and after it verifies your password, your system will boot normally.

- After a successful boot, click Encrypt to start the encryption.

Tips for making best use of VeraCrypt
- After downloading the VeraCrypt, do check for the installer’s integrity using its digital signatures to be sure the downloaded file is not modified by an attacker.
- Don’t forget to backup your files before an encryption process (especially in the case of encrypting a partition in place) to avoid data loss in case of any failures.
- Do create the rescue disk in case of encrypting system partition on an external device (like CD or flash drive) as it helps to restore in case of system failure.
- Use strong passwords using multiple combination of letters, digits, and symbols, and save them handsomely as losing your password means losing your data.
- Choose hash and encryption algorithms per your security requirements – greater the algorithm’s complexity, greater is the security but lesser is the speed.
- Avoid mounting/using encrypted volumes on notebooks or laptops when low power because VeraCrypt may fail to auto-dismount volumes in the cases of emergency hibernation or similar system techniques during power outages.
Well, that was all about VeraCrypt. Hope you’ll find encrypting your data or system easy using the above guides. And yes, don’t forget to backup your data first.
Did we miss something? Did you get an error? Please reach to us using comments.
Read Also: Data Encryption – What You Need to Know