How to Enable SSL for Localhost using MAMP
Note: The content in this article may be outdated. Check out our latest tutorial on how to enable HTTPS on localhost.
Having an SSL (Socket Secure Layer) installed is one way to secure your website. Basically, SSL will encrypt data transactions between the browser and the server. Thus, you would probably want to test your website in an SSL environment as early as during the development stages.
URLs and other website assets such as CSS and JavaScript are pointed correctly via the https protocol. So, how do we enable SSL in our localhost? It will require some command lines, file modifications, configurations and a few more cumbersome steps. But let’s bypass all that and use MAMP Pro instead.
Enabling the SSL
Launch MAMP, and create a VirtualHost with a custom domain; this domain can be set in an extension like .dev or .local. In this case, I’ve created www.hongkiat.dev which is used to host www.hongkiat.com development.
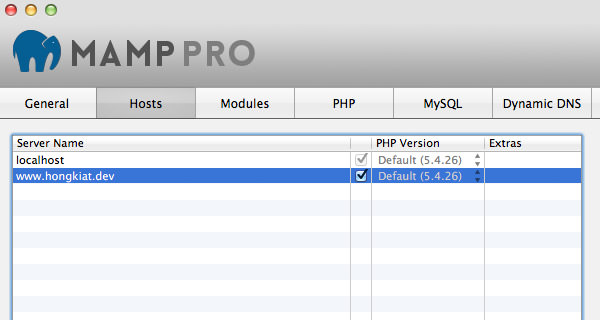
Each of the VirtualHost you create in MAMP will have individual options on which you can do some configurations.
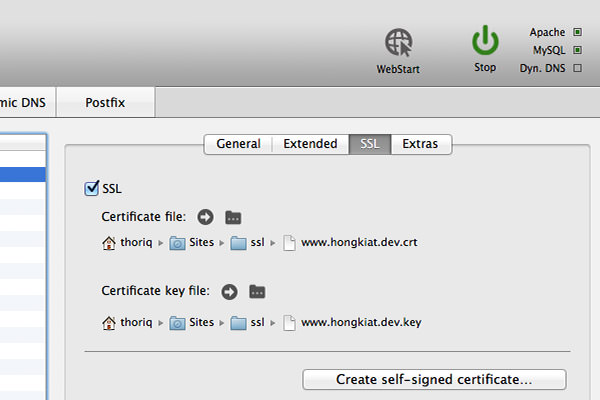
To enable SSL for the VirtualHost, go to the SSL tab and tick the SSL option. Afterwards, you would need to locate the SSL certificate files. If you have got one, locate and assign the files. If not, click the Create self-signed certificate button to let MAMP create the certificates for you.
To create one, MAMP will ask you some information like the Country Code and State to assign in the certificate, like so:

Save the file in a proper folder, and SSL is set.
Make Chrome Trust Your Website
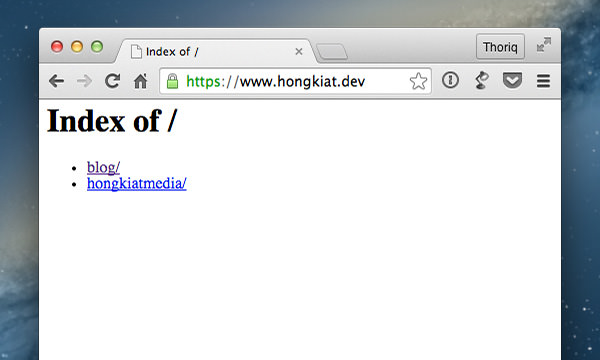
Once SSL is set, you should now be able to view your website through the https protocol. But hold on, instead, you see an error (like below) as the SSL certificate is not recognized by the browsers in this case, Chrome. Note that if you run WordPress-based websites, you would need to modify the siteurl and home entry from the wp_options table in the database.

Unless you have a trust issue with yourself, you could just go to the Advanced option and click Proceed to {your website name} to view your website.
If you are annoyed with the red cross shown in Chrome, you would need to force Chrome to trust your generated certificate:
First, Click that crossed-out padlock icon, and then click the Certificate Information link. Chrome will show you a popup with all the information of the SSL certificate assigned in the website. Drag-and-drop the Certificate icon onto your Desktop.
If you running OS X, opening this certificate file will bring you to the Keychain Access app.
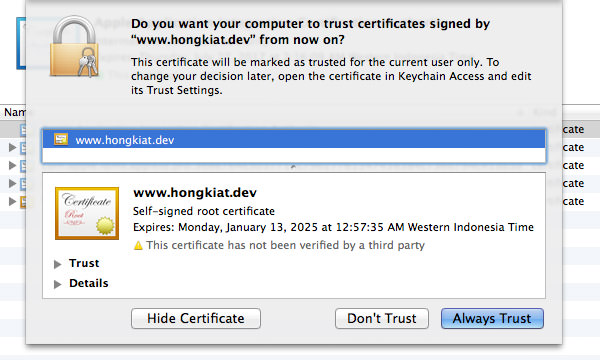
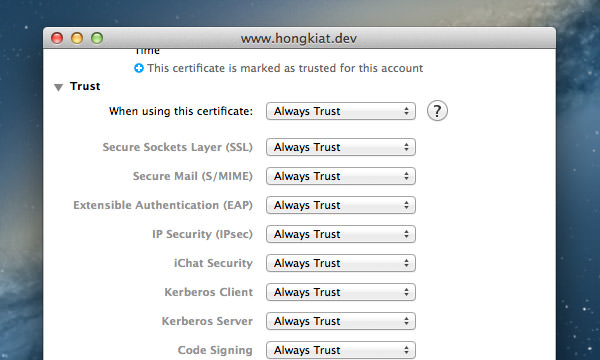
And, as you might be expected, you should select Always Trust. Select your website certificate, then click the [i] button to reveal the details of the certificate Trust level. Within the Trust tab, you will see the option that says ‘When using this certificate’. The default value is set to ‘Use Custom Settings’ at this stage. Make your certificate be trusted, by setting this option to ‘Always Trust’; you will be prompted for your password once to update this setting.
We are all set. Reopen the website on Chrome and you should now see the green padlock. Congratulations, your SSL certificate is now trusted.