Using Kit Language in Windows and Linux
In the previous post, we have discussed about Kit, a very simple HTML templating language. If you had been following this, you should find that the GUI application which is capable of compiling Kit into browser-compliant HTML format is Codekit.
Unfortunately, Codekit, is only available for OS X, there is currently no similar application for Windows and Linux that support Kit.
If you are working in Windows and Linux machine, yet would like to use Kit, you can use Grunt as an alternative. Grunt has a massive collection of plugins, contributed by generous developers around the world — this includes the plugin to compile Kit language, grunt-codekit. Let’s check it out.
Note: Even though the following tip is primarily aimed to show Windows and Linux users an alternative to Codekit, OS X user can also use it.
Getting Started
First, we will create a directory for our project. Let’s launch Terminal or Command Prompt, and type the following command lines:
 mkdir kit-grunt
 cd kit-grunt
We have created a new directory named kit-grunt; the second line lets us enter it. But if you have previously created a project directory, you may skip the first line, and immediately navigate to your own directory in Terminal with the cd command.
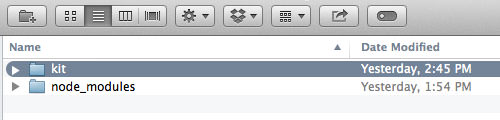
Within the project directory, we create a new folder named kit where we will put the .kit files. Type this command below:
mkdir kit
We then also install both Grunt and the plugin, with these commands. Note that you have to install Node.js in your system first.
 npm install grunt --save-dev
 npm install grunt-codekit --save-dev
Once the process is completed you will find a new folder, node_modules, containing the modules that we have installed.
Configuration
Create a new file named Gruntfile.js in the project directory, and put the following code in. This code is a Grunt Wrapper where we will register, configure and execute Grunt task. If you are using Sublime Text, you can easily insert this code using the Grunt Snippets.
 module.exports = function(grunt) {
 grunt.initConfig({

 });
 }
Then we define the codekit task within the grunt.initConfig, like so.
 module.exports = function(grunt) {
 grunt.initConfig({
 codekit: {
 your_target: {
 files : {
 'index.html' : 'kit/index.kit',
 }
 },
 },
 });
 }
This configuration will compile index.kit into index.html. To try this out, we can add this in index.kit.
 <!-- @var = This is the variable -->
 <p><!-- @var --></p>
…and run grunt codekit in Terminal.
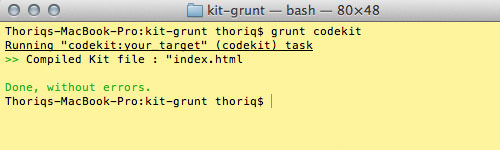
The index.html is successfully generated and as you can see below, the variable’s value is also successfully applied within the paragraph tag.

File Inclusion
As we have mentioned in our previous post, we can include/import files into a Kit file. Given that we have header.kit, sidebar.kit, and footer.kit (I assume that we have added corresponding content within these files), we can include them into index.kit, like so.
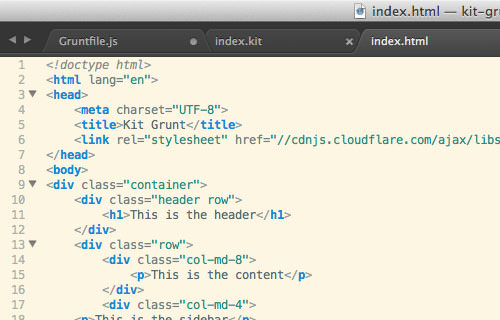
 <!-- @include inc/header.kit -->
 <div class="container">
 <div class="header row">
 <h1>This is the header</h1>
 </div>
 <div class="row">
 <div class="col-md-8">
 <p>This is the content</p>
 </div>
 <!-- @include inc/sidebar.kit -->
 </div>
 </div>
 <!-- @include inc/footer.kit -->
Let’s run the grunt codekit command again in Terminal. And here we go! The content from those files are put together into index.html. Nice!
Conclusion
Grunt is a great alternative to many web development tools, including compiling Kit file. I hope this tip is useful, particularly for Windows and Linux users who want to get their hands on Kit language.