Unlocking Your iPhone Without Face ID or Passcode (4 Methods)
If you are looking for ways to unlock your iPhone without using the passcode or Face ID, chances are you might have forgotten your passcodes or your Face ID just isn’t working. Well, in that case, this post is for you.
In this post, I’ll share with you four tried-and-true methods to regain access to your locked iPhone. Read on.
Here are four ways you can try:
- Unlock with a third-party app
- Unlock and restore with iTunes or Finder
- Unlock with your iPhone (with ‘Find My iPhone’ enabled)
- Unlock via iCloud.com
1. Unlocking iPhone Using iSumsoft iPhone Passcode Refixer
- A Windows PC or a Mac
- Installation of a third-party app
- USB cable
- Your iPhone
The iSumsoft iPhone Passcode Refixer is a third-party app designed to help you bypass various types of iPhone passcodes and locks. These include the lock screen passcode, screen time passcode, and even locked Apple ID accounts. It offers a straightforward method for unlocking your iPhone without requiring a passcode or Face ID.
Here’s a step-by-step guide on how to use the app. But first, of course, you’ll need to download and install it.
- Launch iSumsoft iPhone Passcode Refixer. You’ll see four options on the main screen. Choose ‘Unlock Lock Screen‘ to begin.
- Review the list of issues this option can address. If you’re sure, click the ‘Start’ button to proceed with unlocking your iPhone.
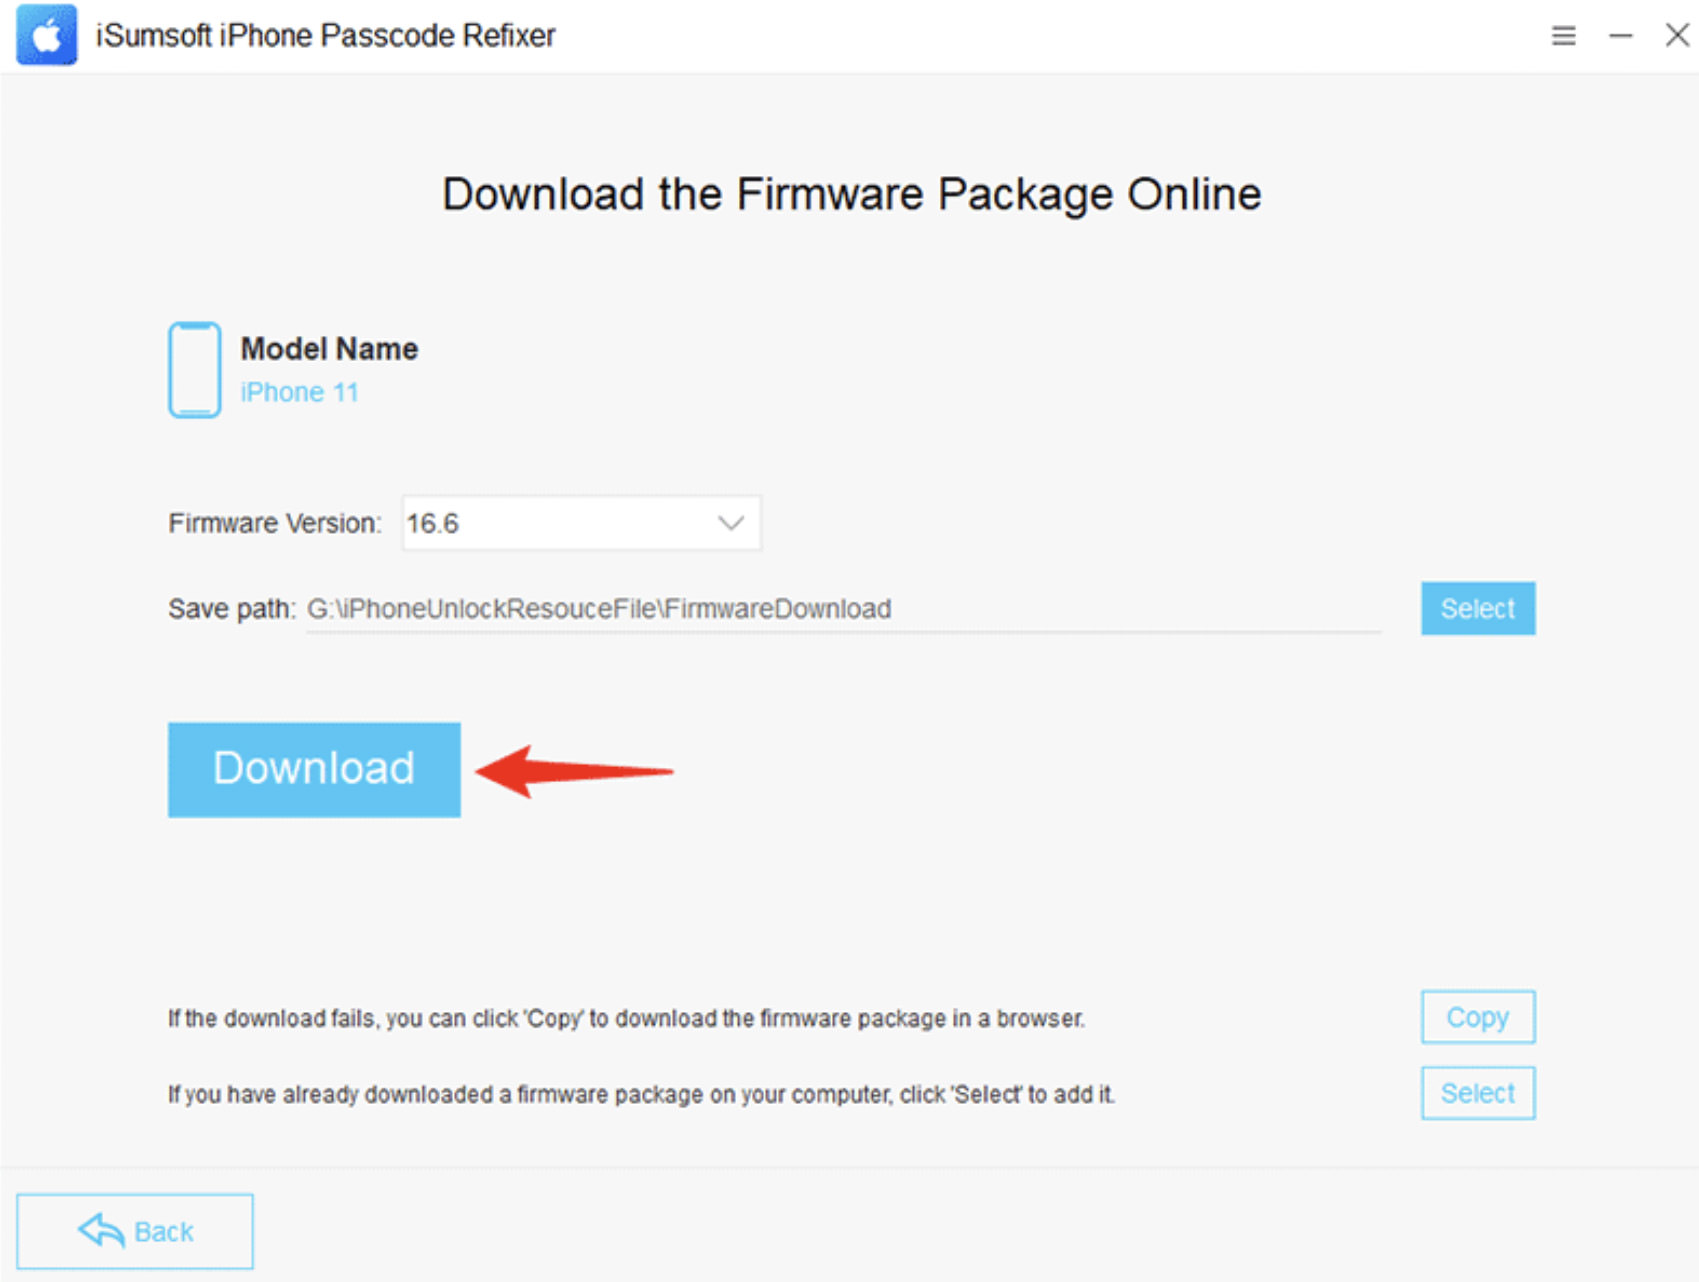
- Ensure your iPhone is connected to your computer via a USB cable. Click ‘Next’. The software will automatically detect and display your iPhone’s model information.
- Click ‘Download’ to let the software fetch the latest Apple firmware required for the unlocking process. Wait for the download to complete.
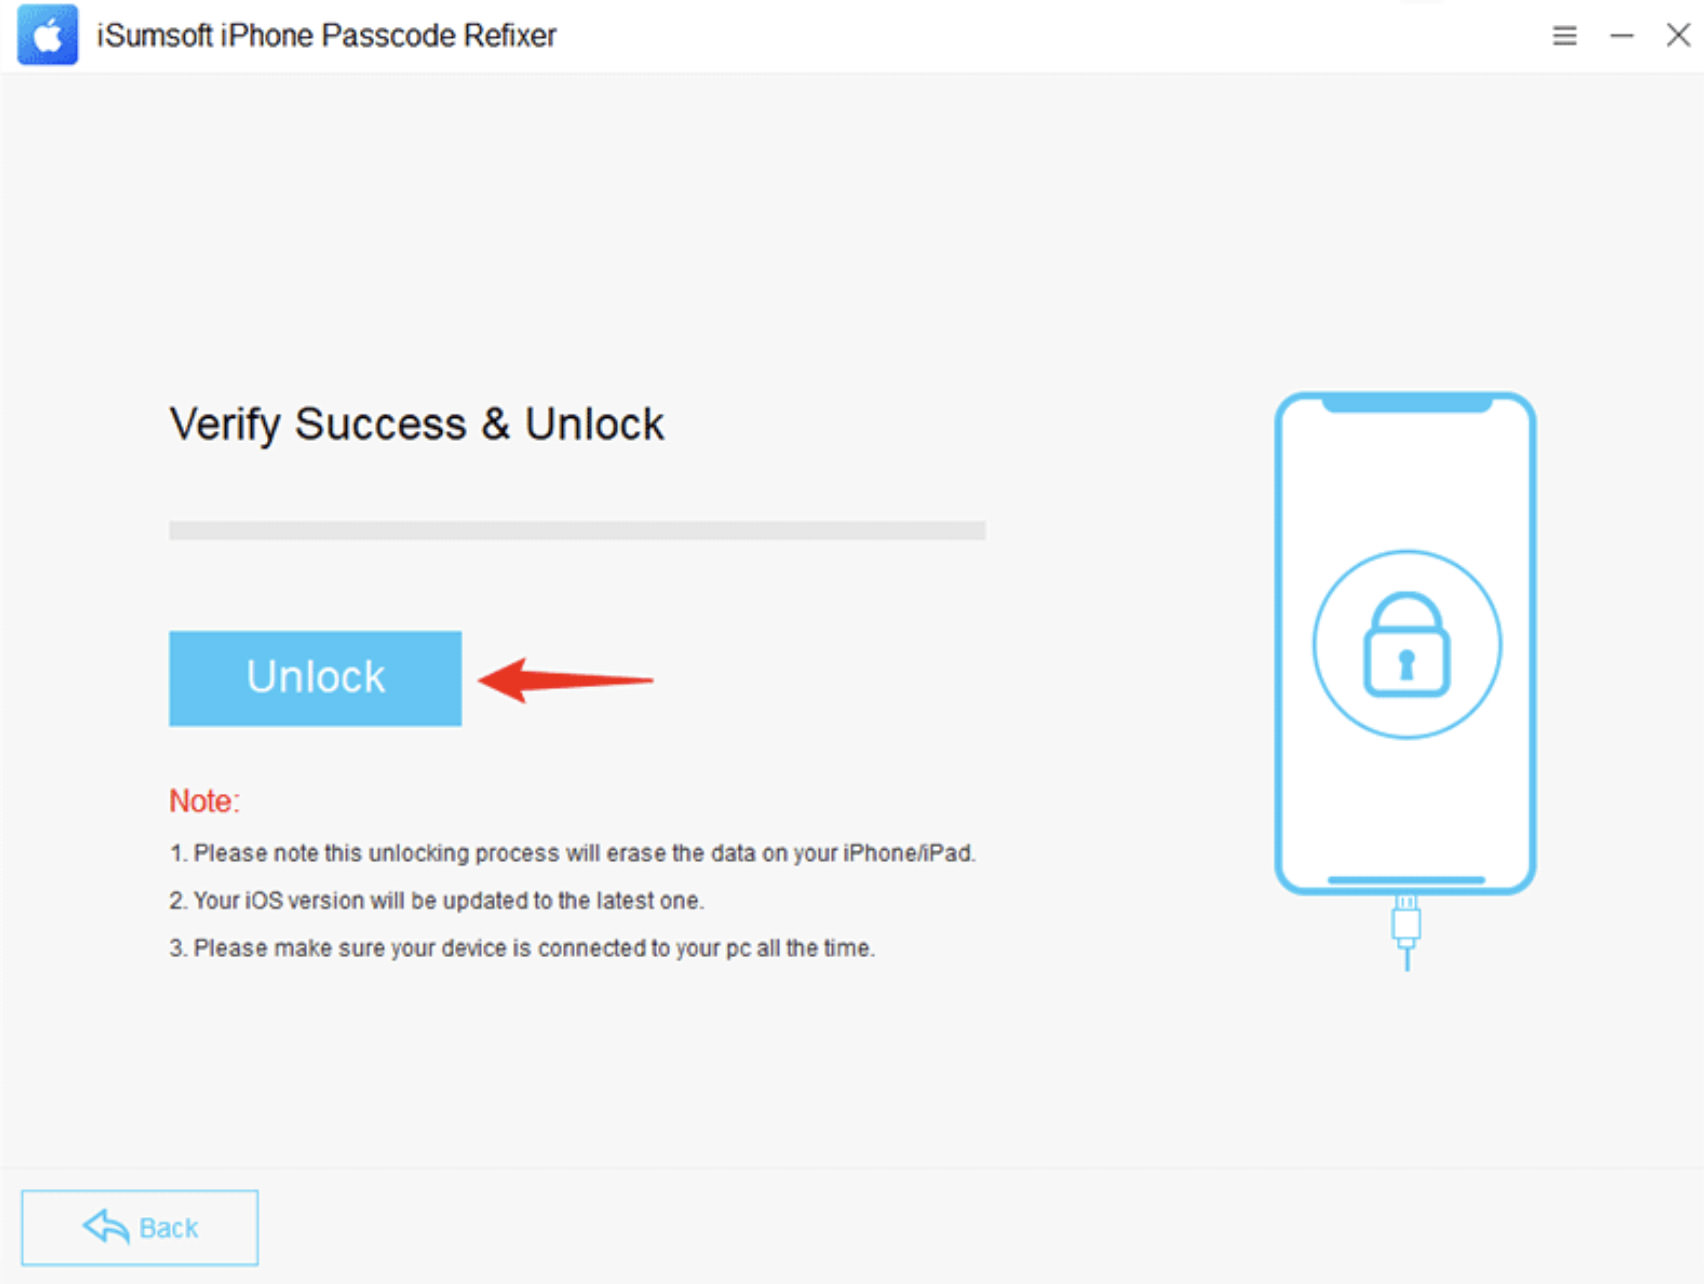
- Once the firmware is downloaded, click ‘Unlock’. The software will start the unlocking process, erasing all data on your iPhone, including the passcode.
- After a short while, a message saying ‘Unlocked Screen successfully‘ will appear. Your iPhone will then restart, allowing you to set it up again with a new passcode and Face ID.


2. Unlocking iPhone Using iTunes or Finder
- A Windows PC or a Mac
- USB Cable
- Your iPhone
If you prefer to unlock your iPhone without installing any third-party apps, you can accomplish this using iTunes or the Finder app, depending on whether you’re using Windows or macOS.
Essentially, you’ll be restoring your iPhone to factory settings, which is the official method for unlocking your iPhone without a passcode or Face ID.
A few things to take note of:
-
Use the iTunes app if you are a Windows user, or a Mac user on macOS Mojave or earlier.
- Use the Finder app if you are a Mac user on macOS Catalina or later.
- Windows users: Click here to download iTunes for Windows.
Boot iPhone to Recovery Mode
First, connect your iPhone to your computer using a USB cable. To enter Recovery Mode, quickly press and release the Volume Up button, followed by the Volume Down button. Then, press and hold the Side button until your iPhone restarts.
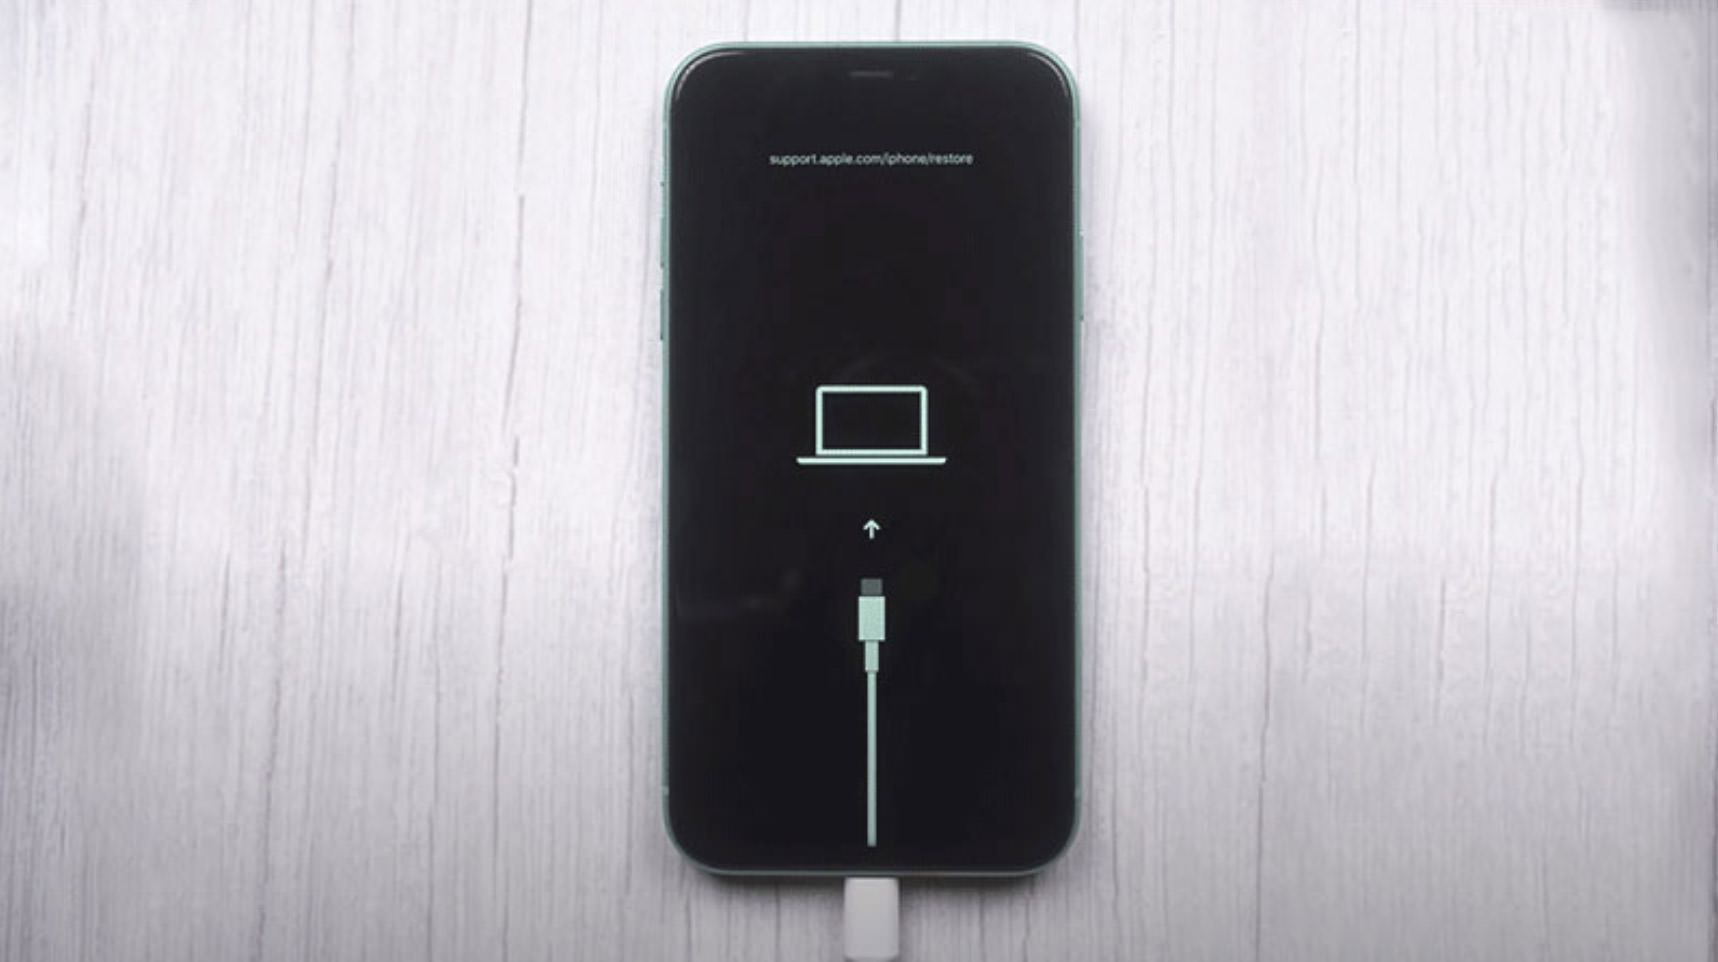
Restore with iTunes or Finder
With the iPhone in recovery mode, open iTunes or Finder on your Mac. Navigate to your connected iPhone and select the ‘Restore’ option when prompted. iTunes or Finder will automatically reset your iPhone to factory settings, removing the passcode in the process.
3. Unlocking iPhone Without Passcode, Face ID, or Computer
- Your iPhone
- ‘Find My iPhone’ enabled
- Your Apple ID credentials
Now, even without a computer to install an app, or if the previous method fails, solving the problem is still feasible using Apple’s Find My app.
This method requires ‘Find My iPhone‘ to have been enabled beforehand on your iPhone. To check if it is enabled, go to ‘Settings’ > [Your Name] > ‘Find My‘ > ‘Find My iPhone‘.
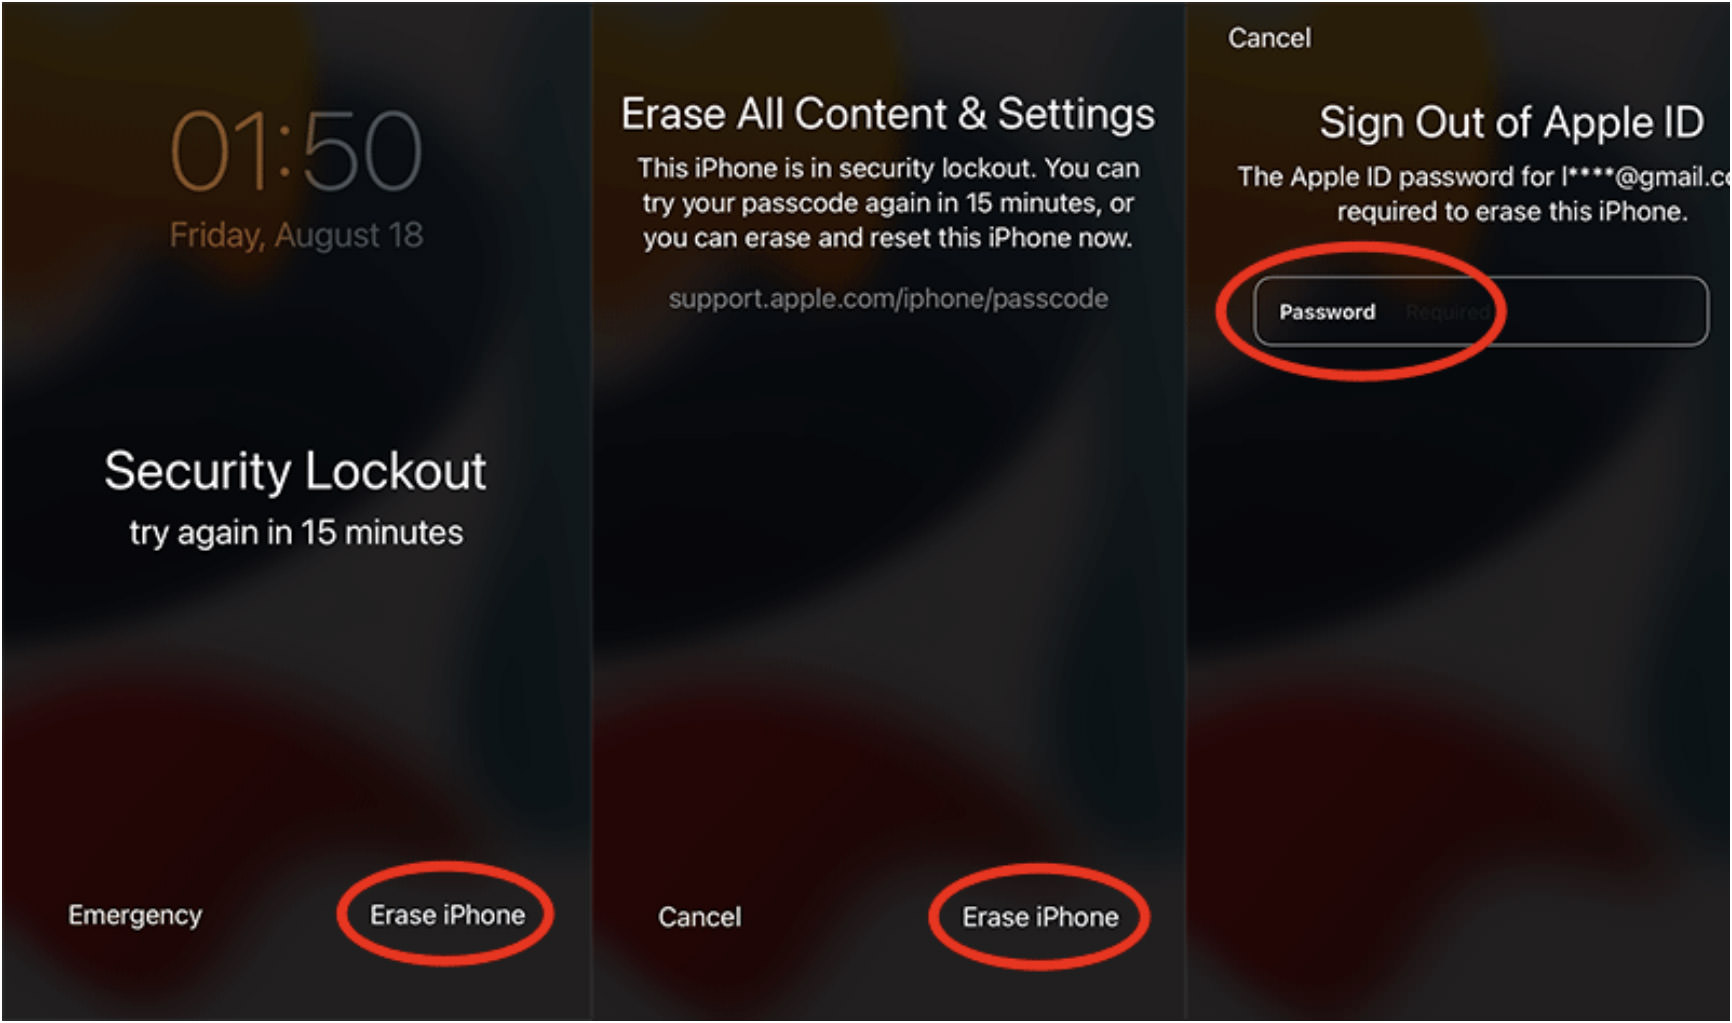
- Keep entering the wrong passcode on your iPhone until a message like ‘iPhone Unavailable‘ or ‘Security Lockout’ appears.
- Look for the ‘Erase iPhone‘ or ‘Forgot Passcode‘ option at the bottom right corner of the screen. Tap on it. If you don’t see this option, you may need to enter incorrect passcodes a few more times.
- Your iPhone will automatically erase and reset. After this process, you can set it up again and regain access.
4. Unlocking iPhone via iCloud.com
- Your iPhone
- ‘Find My iPhone’ enabled
- Browser
- Your Apple ID credentials
If you have enabled the ‘Find My iPhone’ feature on your device, you can also use it to remotely erase and unlock your iPhone. This provides another method for unlocking your iPhone without a passcode or Face ID, and without the need to connect to a computer.
Here’s how:
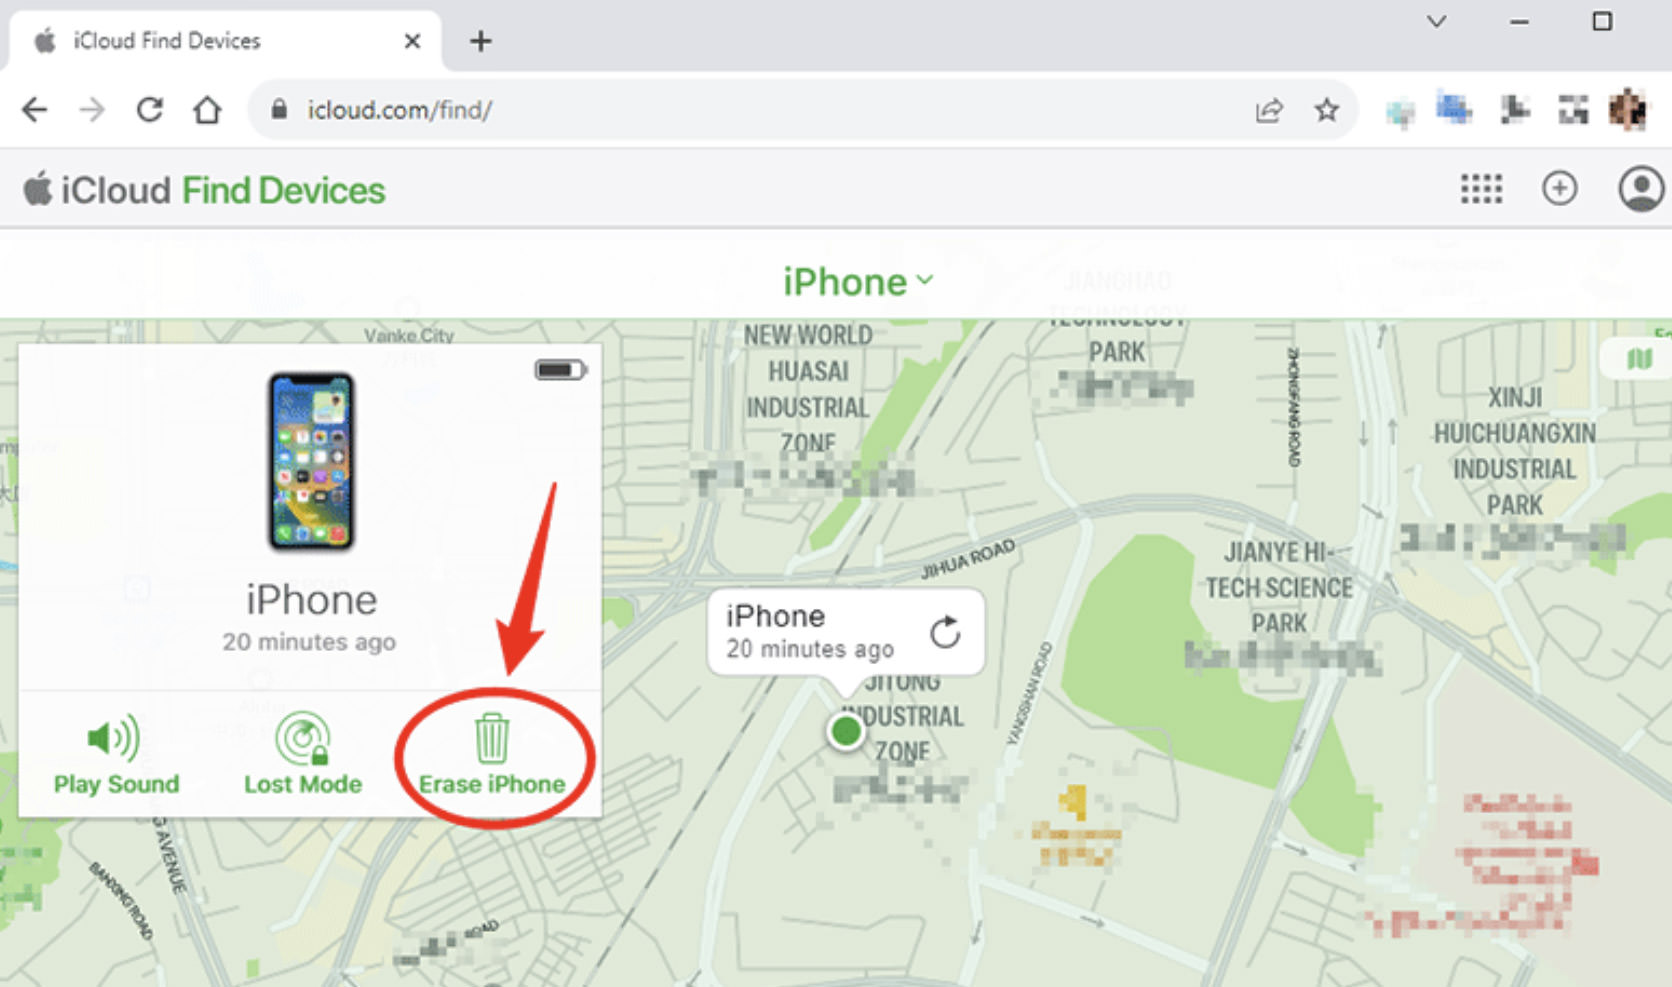
- Log in to www.icloud.com using your Apple ID from a trusted device or web browser. Make sure to use the same Apple ID that is associated with the iPhone you wish to unlock. If you are using a new device or browser and have two-factor authentication enabled, you will need to verify your identity with a six-digit code.
- After signing in, navigate to the ‘Find My iPhone‘ app. The app will automatically locate and list all devices associated with your Apple ID.
- Select the iPhone you want to unlock, then click ‘Erase iPhone‘. Follow the on-screen instructions to complete the erasure process.