How to Request Payment via Payoneer
Whether you are a freelancer or a business owner, it is vital to keep a good invoicing tool handy so you can get your clients to pay you professionally and convinietly.
In this post, I will show you how to request payment from your client using Payoneer, and we will do a detailed walk-through of the process of requesting a payment and tracking the payment.
What is Payoneer
Payoneer, similar to PayPal and Stripe, is a financial services firm that specializes in digital payments.
In addition to money transfer services, the New York-based company offers businesses and individuals prepaid debit cards and e-commerce payment processing solutions. Its prepaid debit cards can be used to withdraw cash from ATMs and make online and in-store purchases.
Requesting Payments via Payoneer
To get started, sign in to your Payoneer account, or if you haven’t already have an account, register one.
Step 1
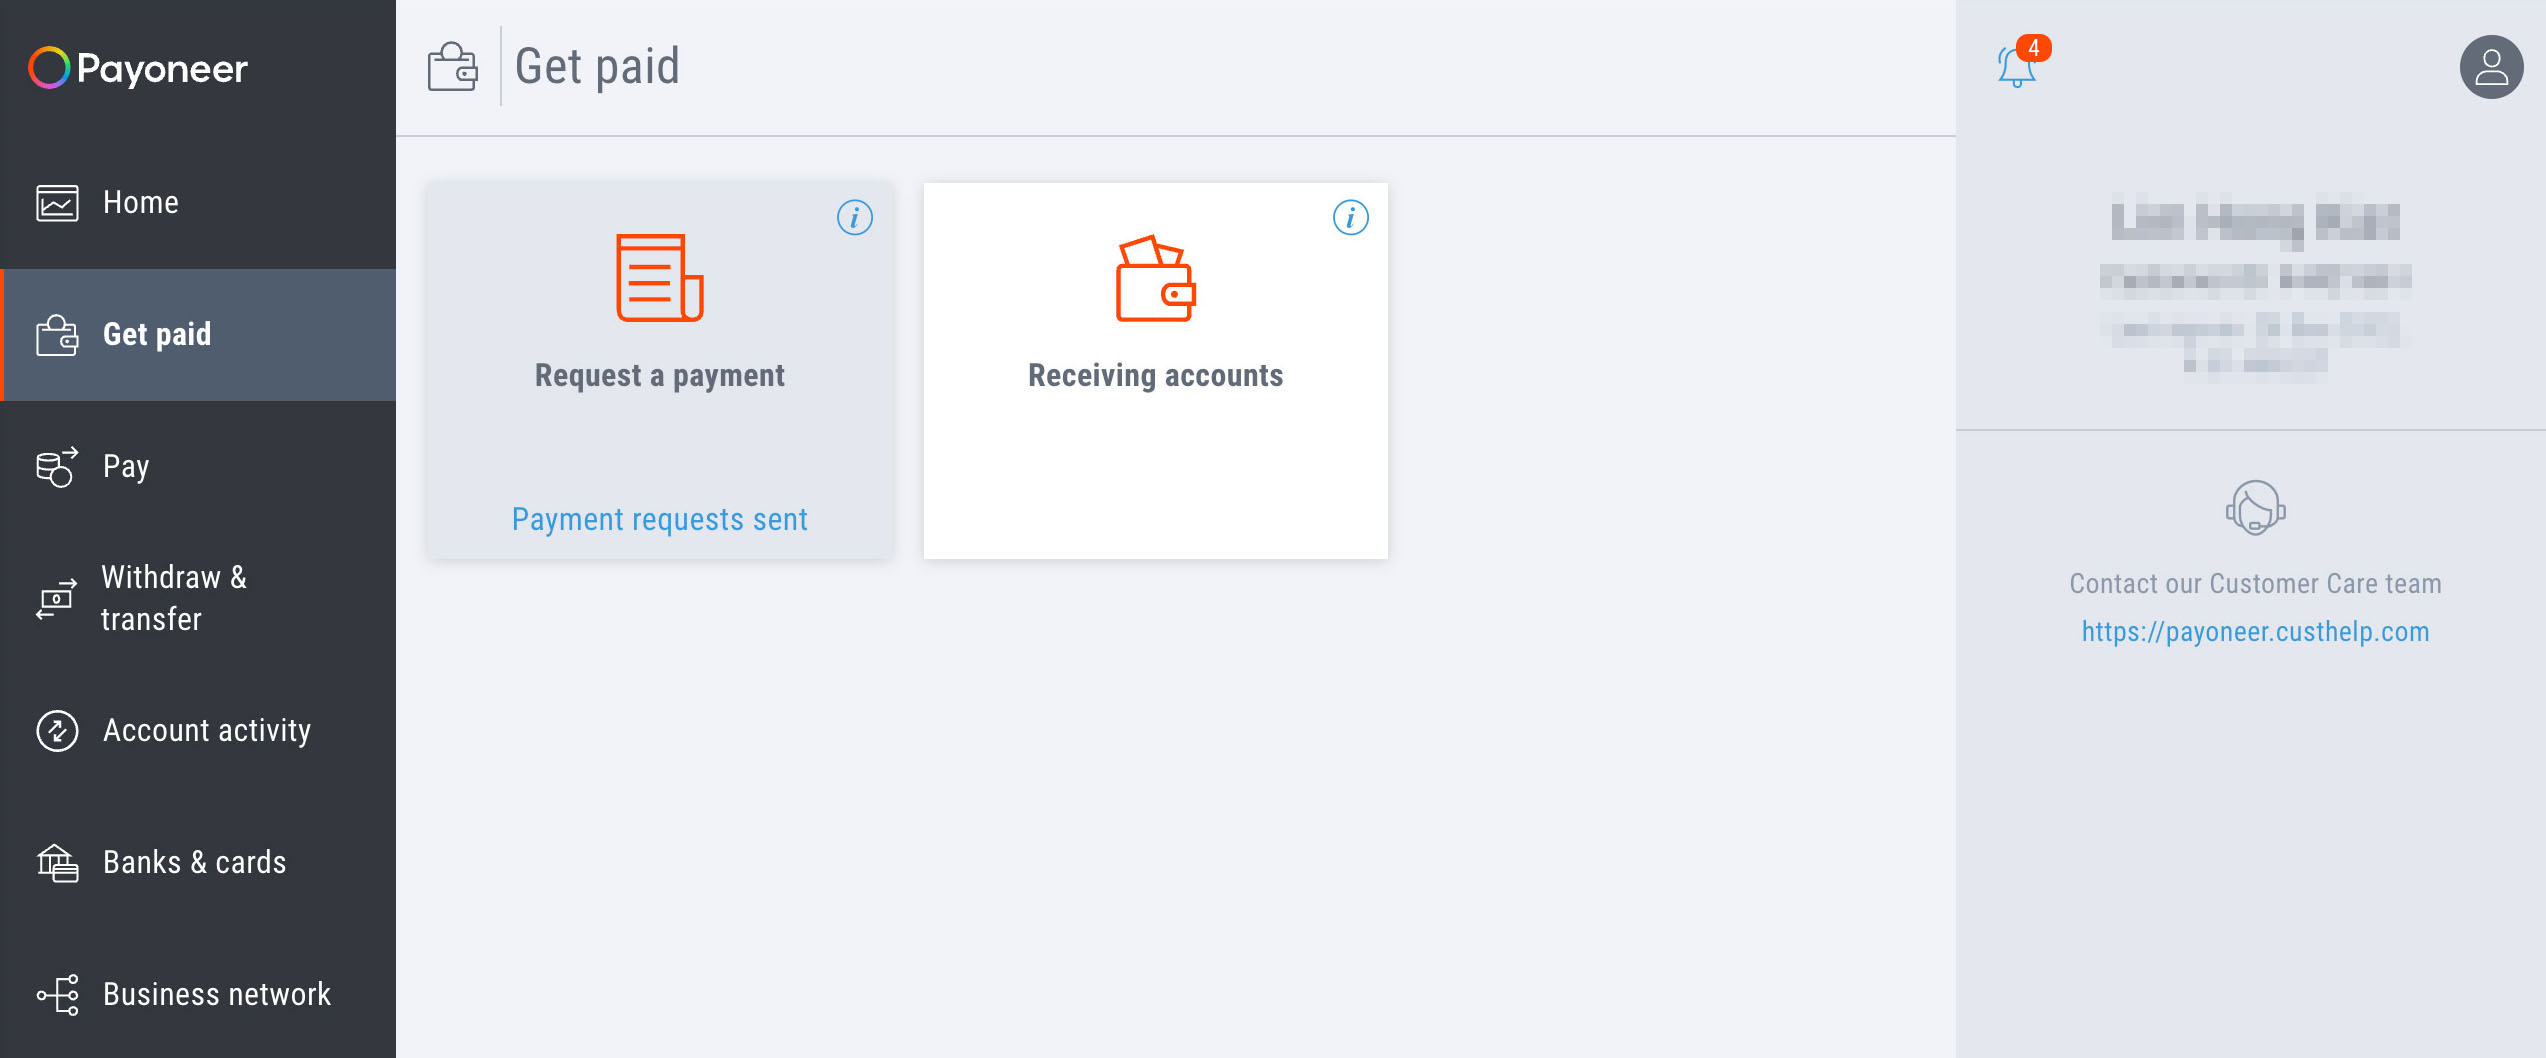
Sign in to your Payoneer account. On the left menu, click “Get Paid” and then go to “Request a Payment”.
Existing clients
If the client is already in your contacts, simply type in the name and choose from the drop-down, or you can check if they are amongst the names in the “Most recent” list below. Then click "Next".
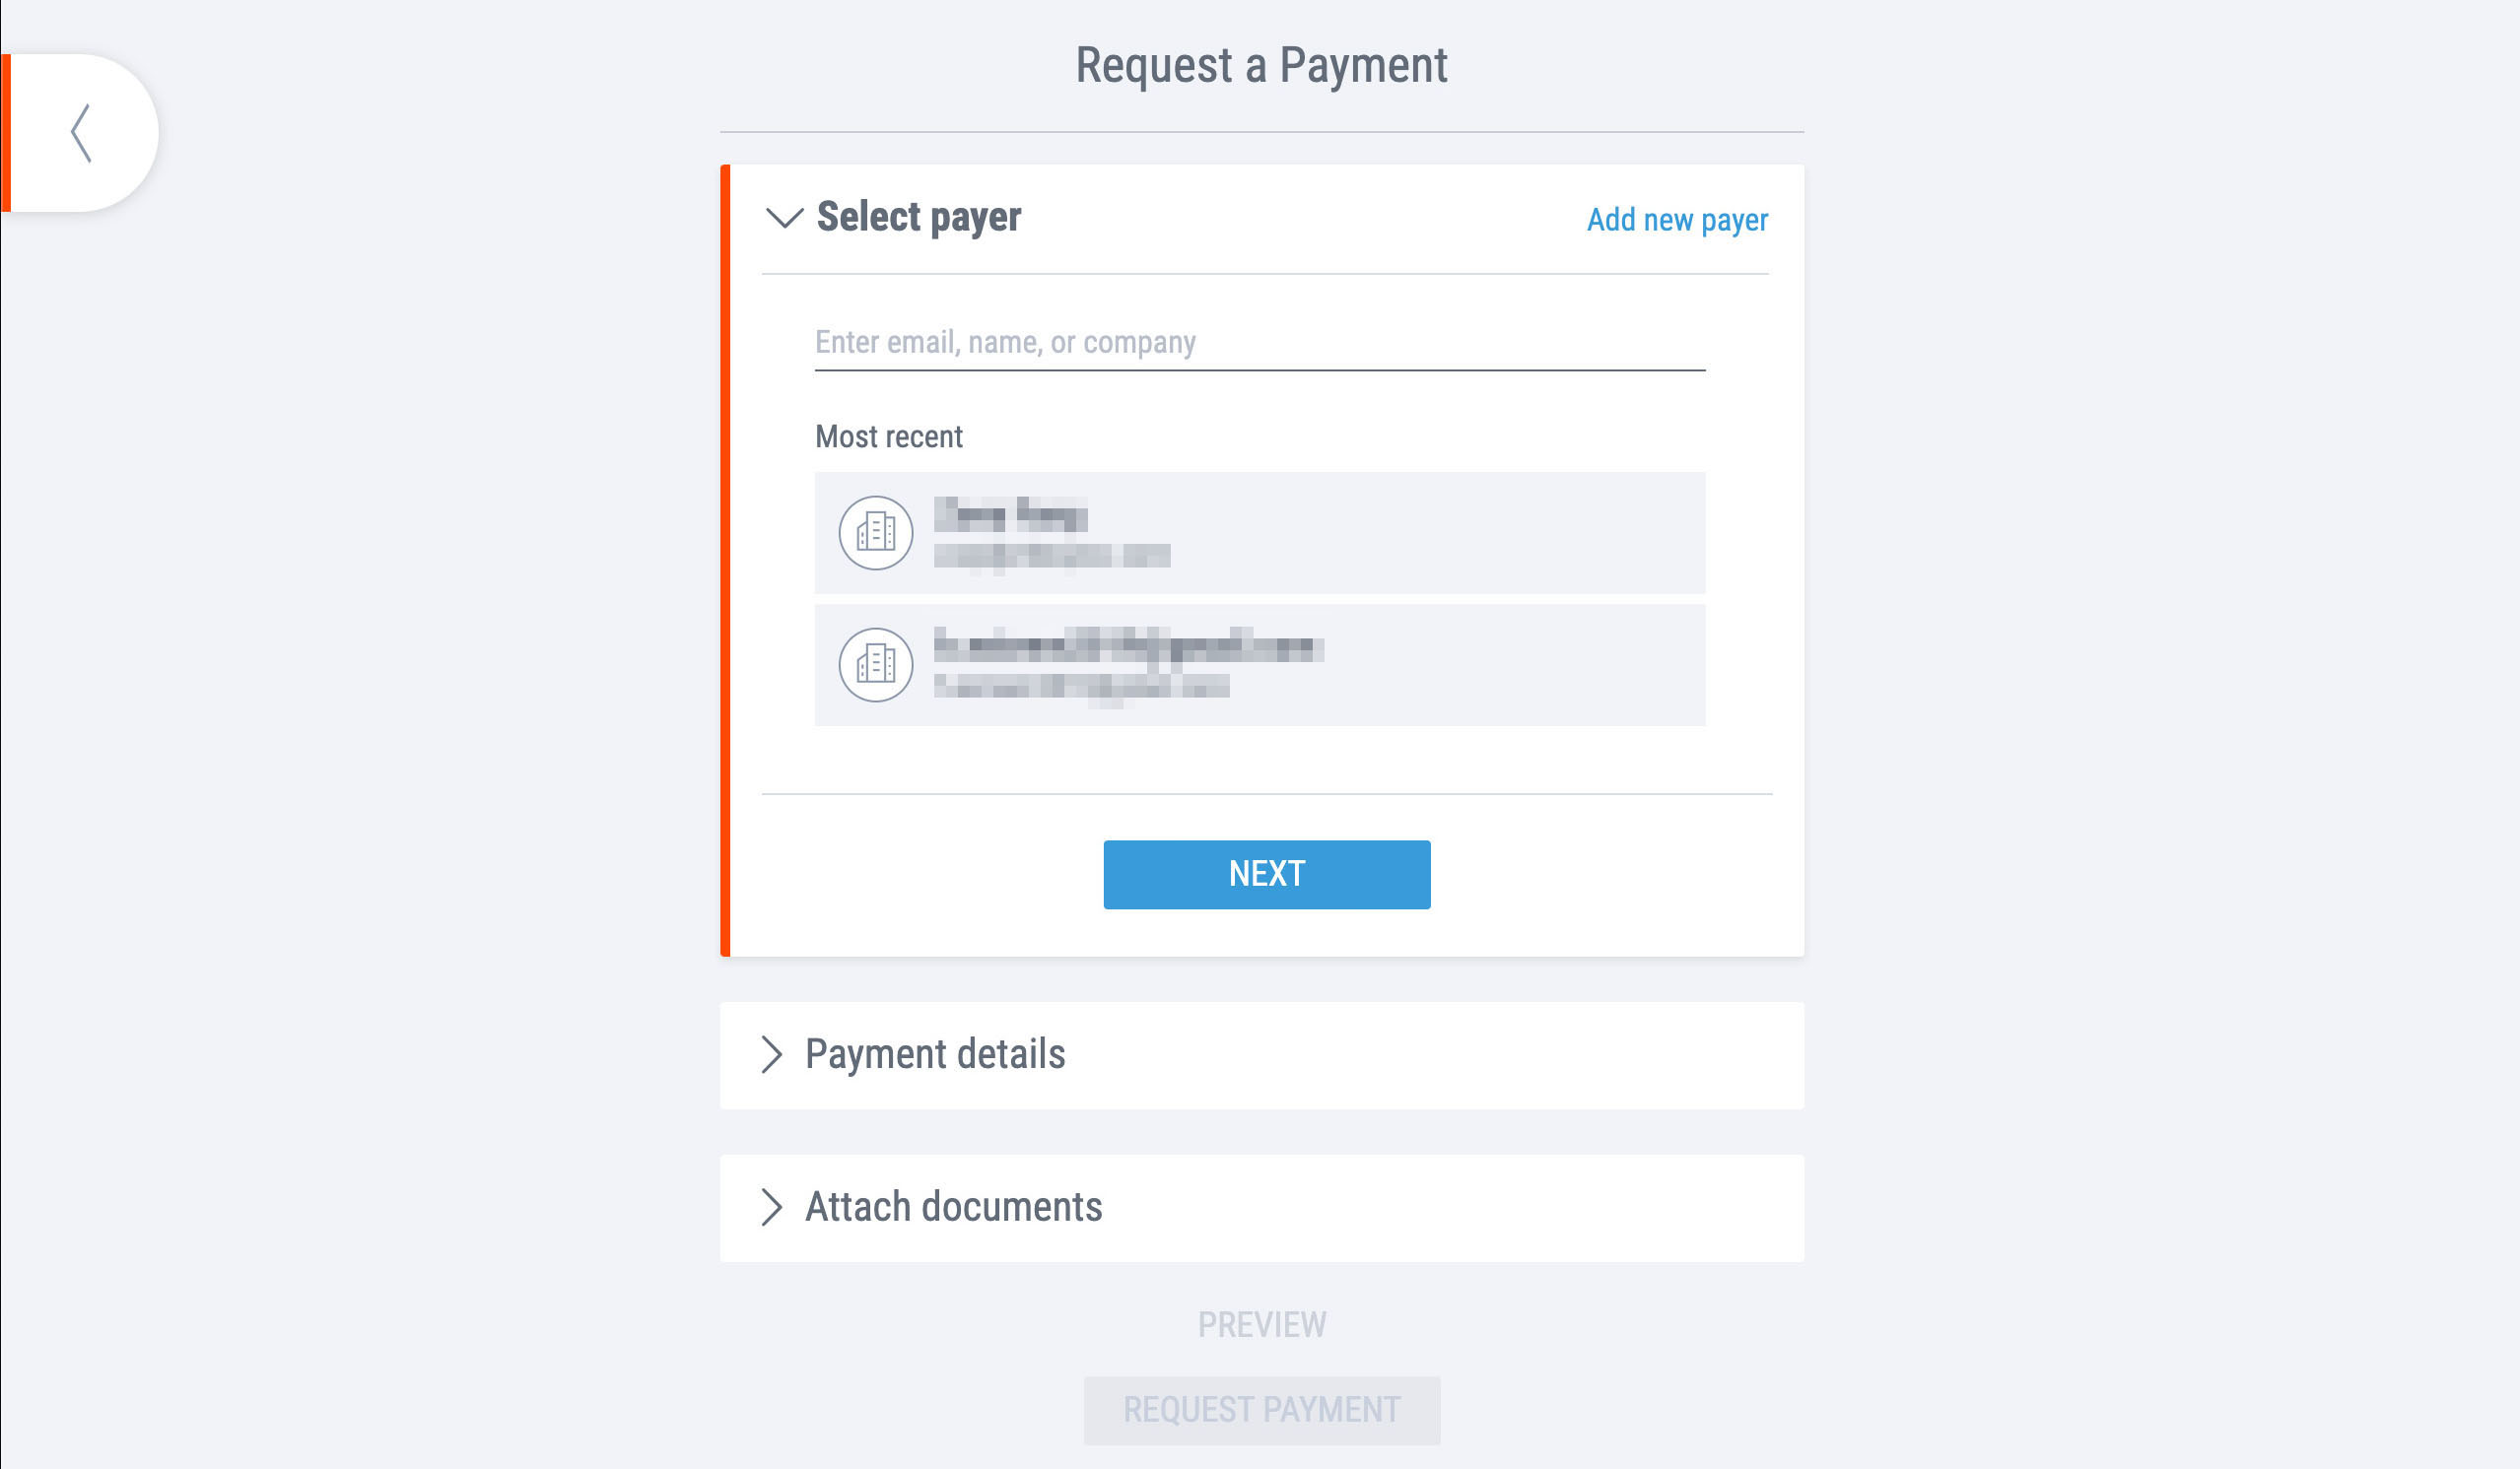
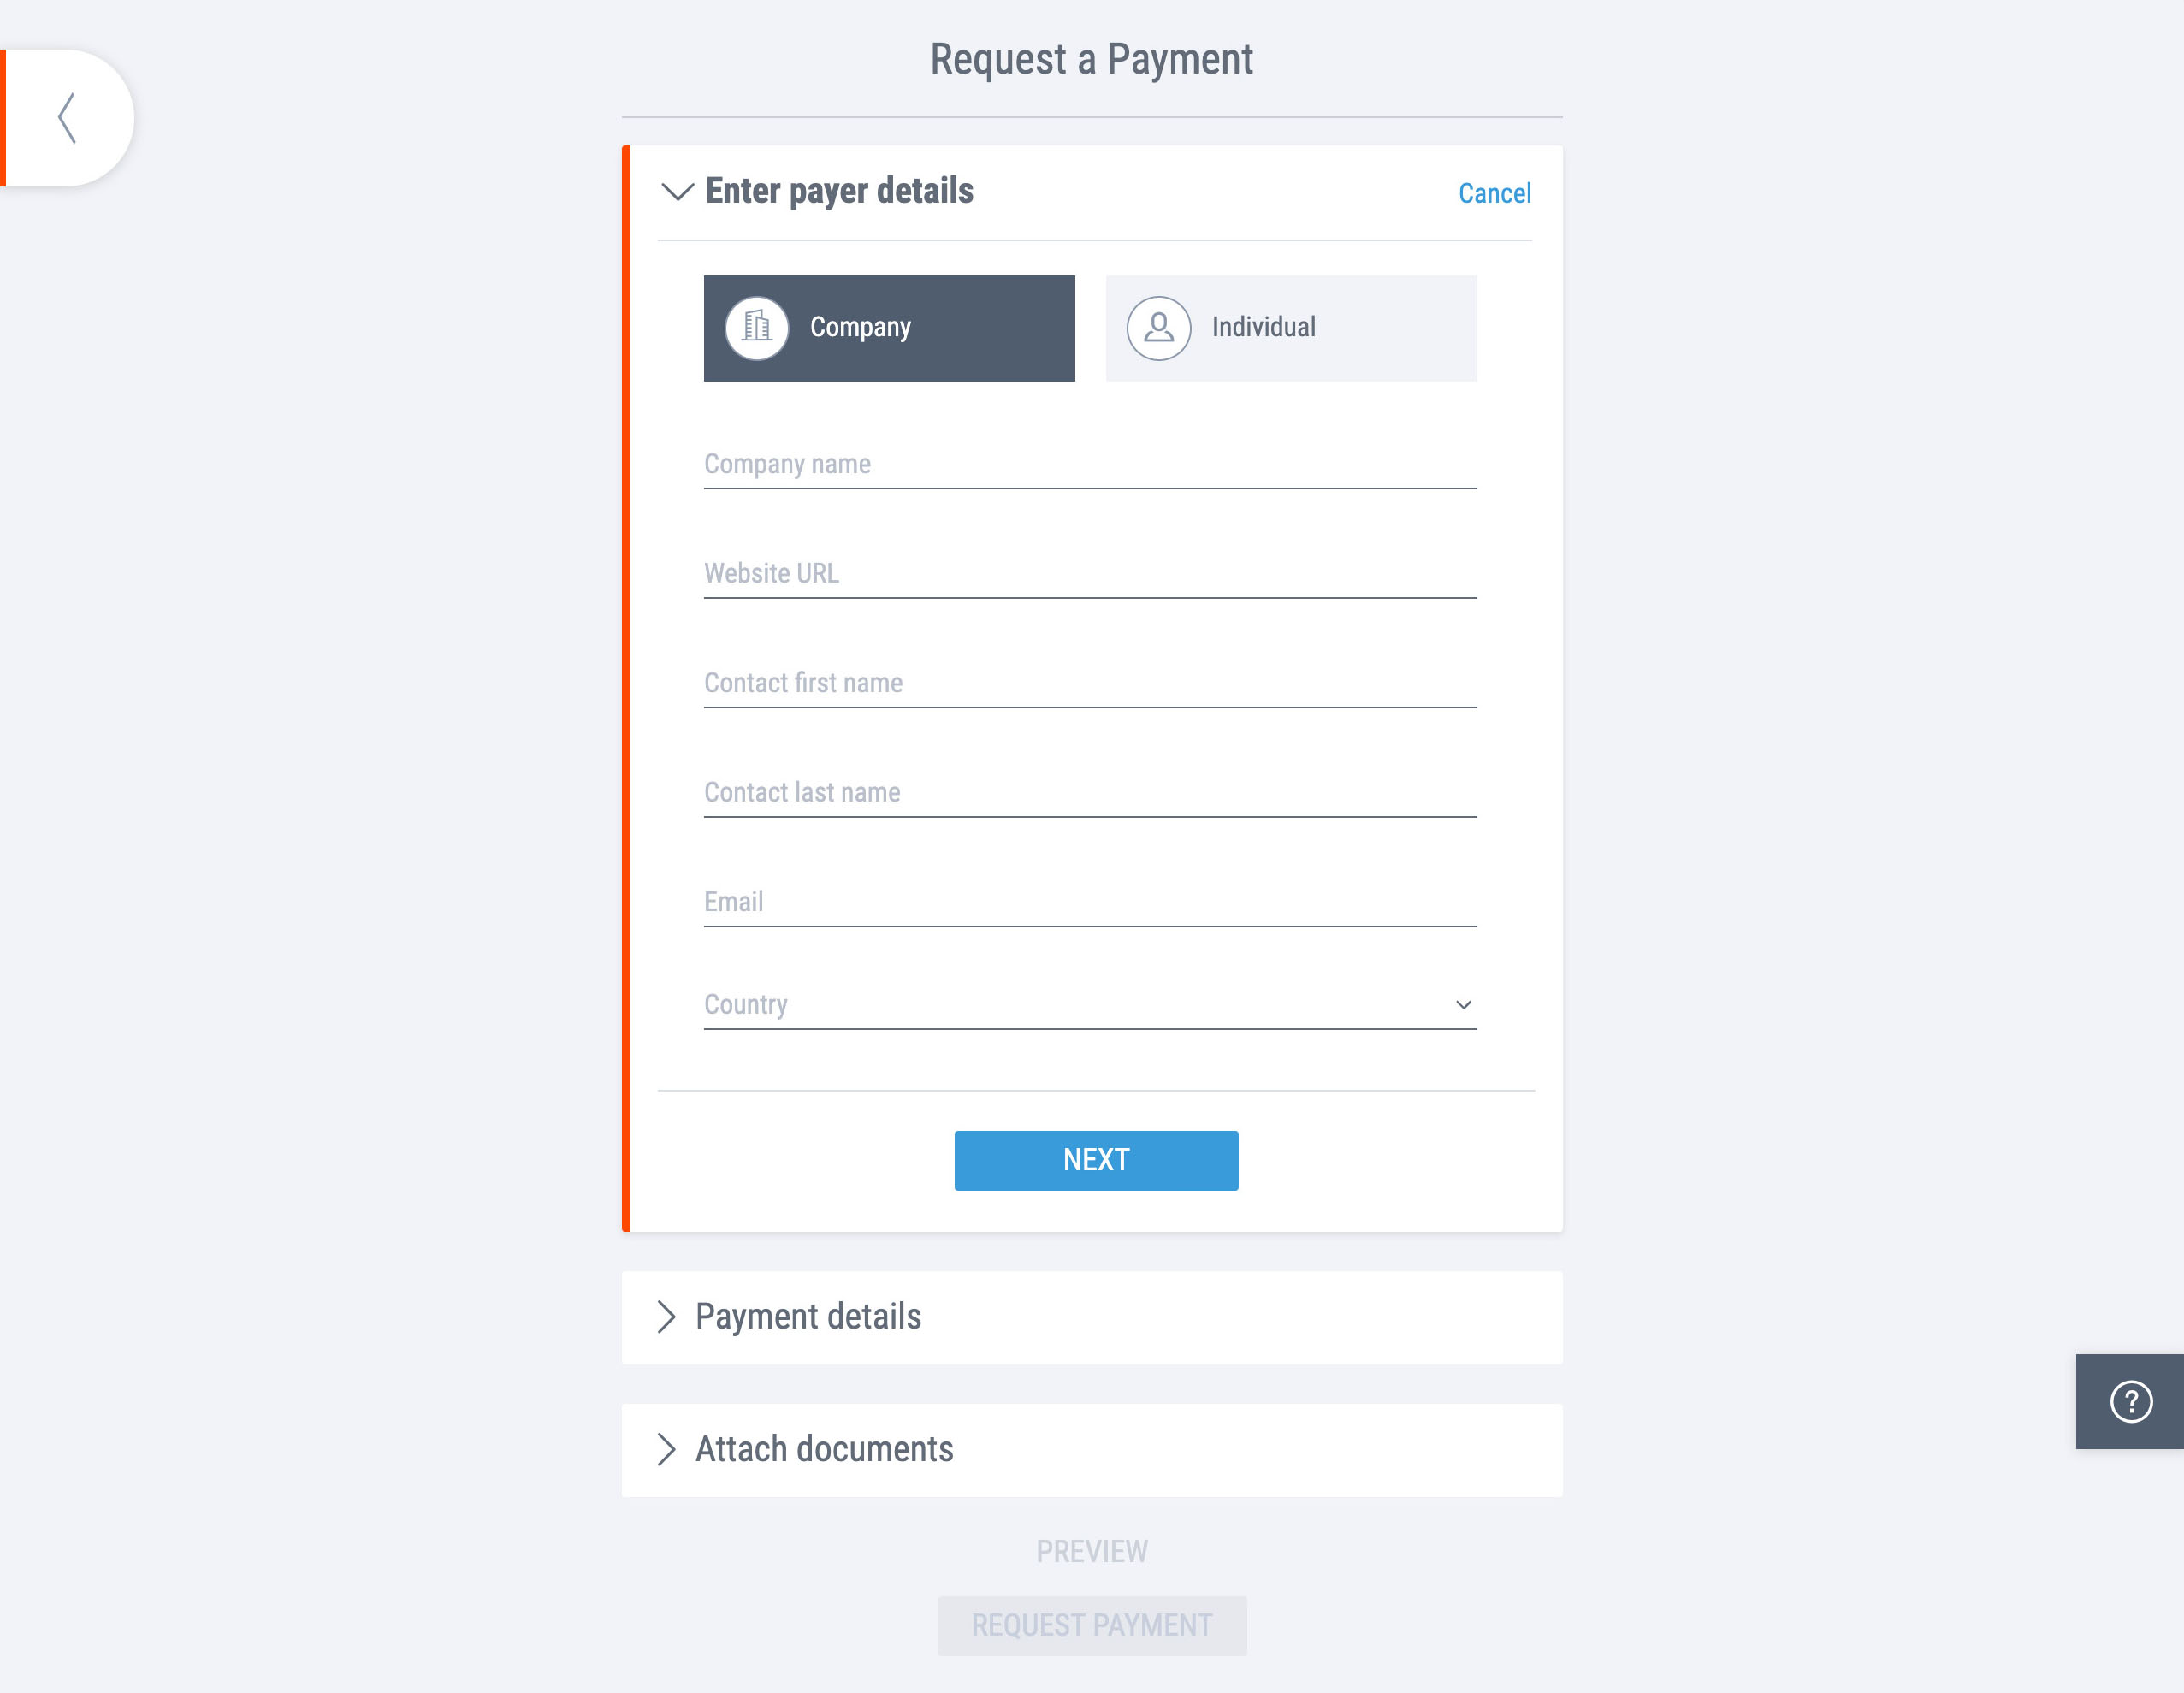
New clients
If this is the first time you are requesting payment from this client, then you will first need to add them as a contact.
Click "Add new payer", select the payer type (either company or individual), and enter the payer details, including the Name, Website URL (if you are requesting payment from a company), Email, and Country. Then click "Next".
Step 2
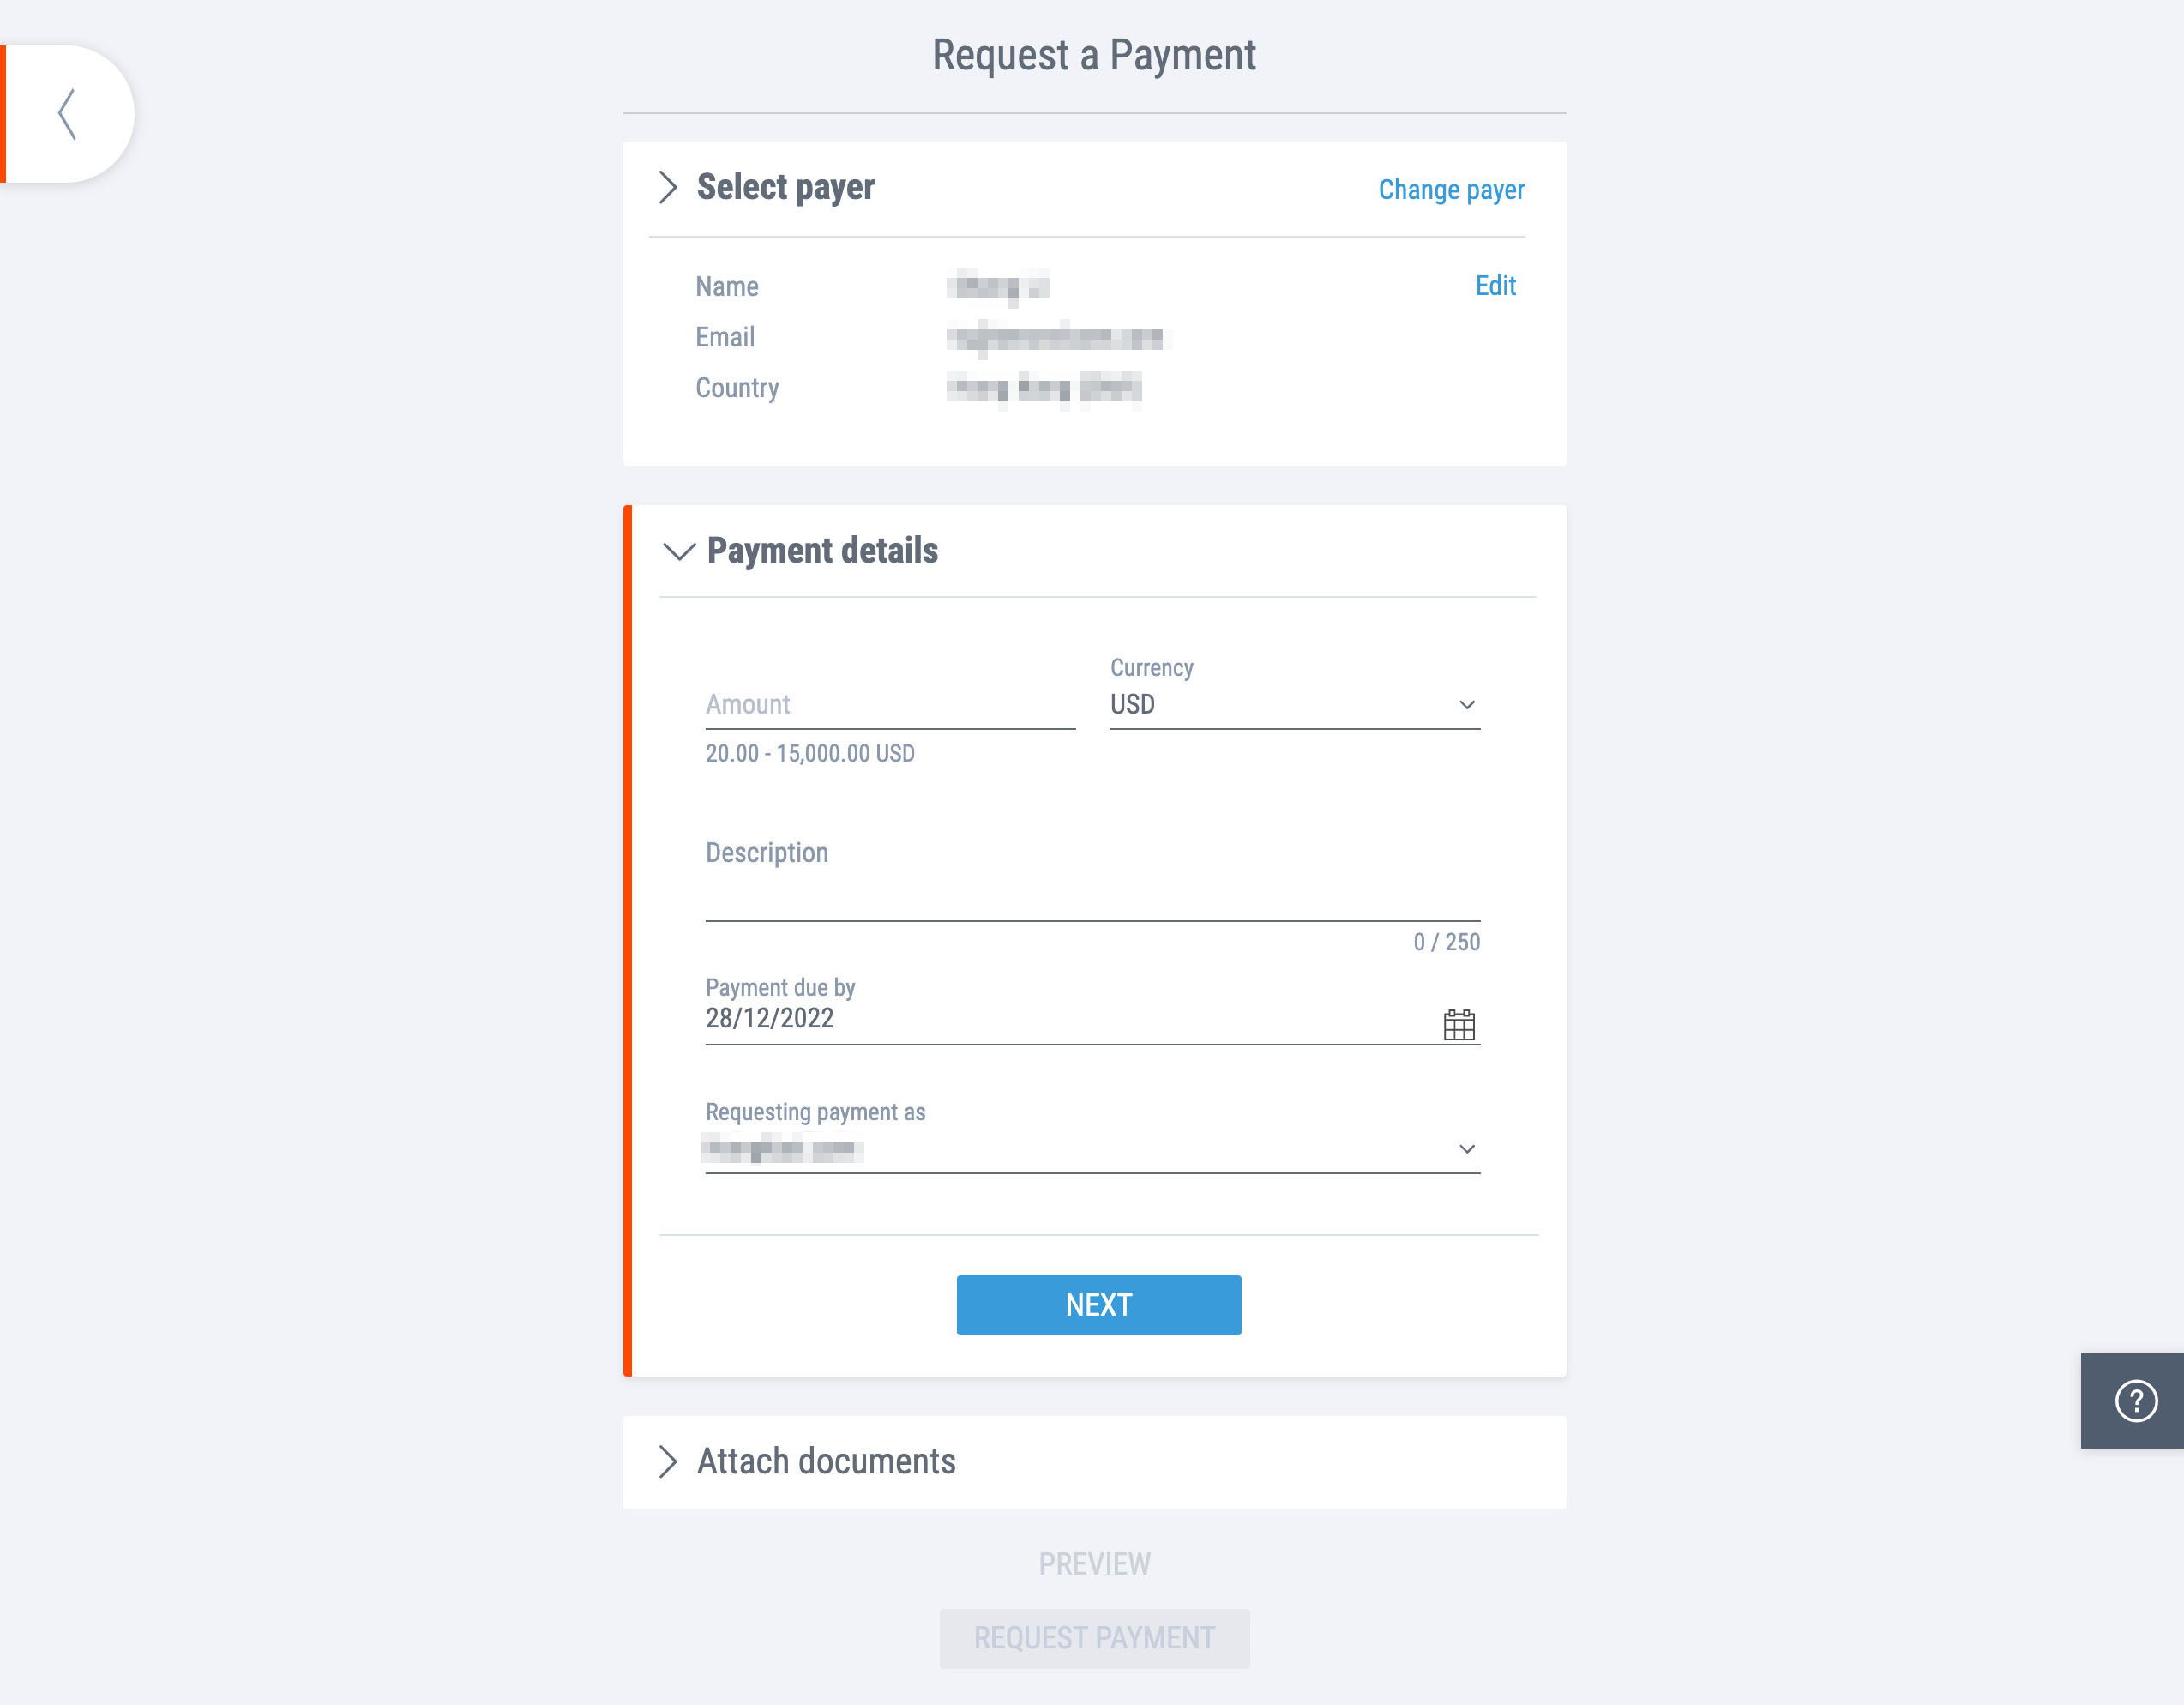
Now enter the payment details, including the amount you would like to receive from your client, followed by its currency. You can also enter a short description so your client knows what this payment is for.
Next, include the date you would like to be paid by using the date picker on the right or entering it manually. This date will also act as a reference point for sending payment reminders. Once done, click Next.
Step 3
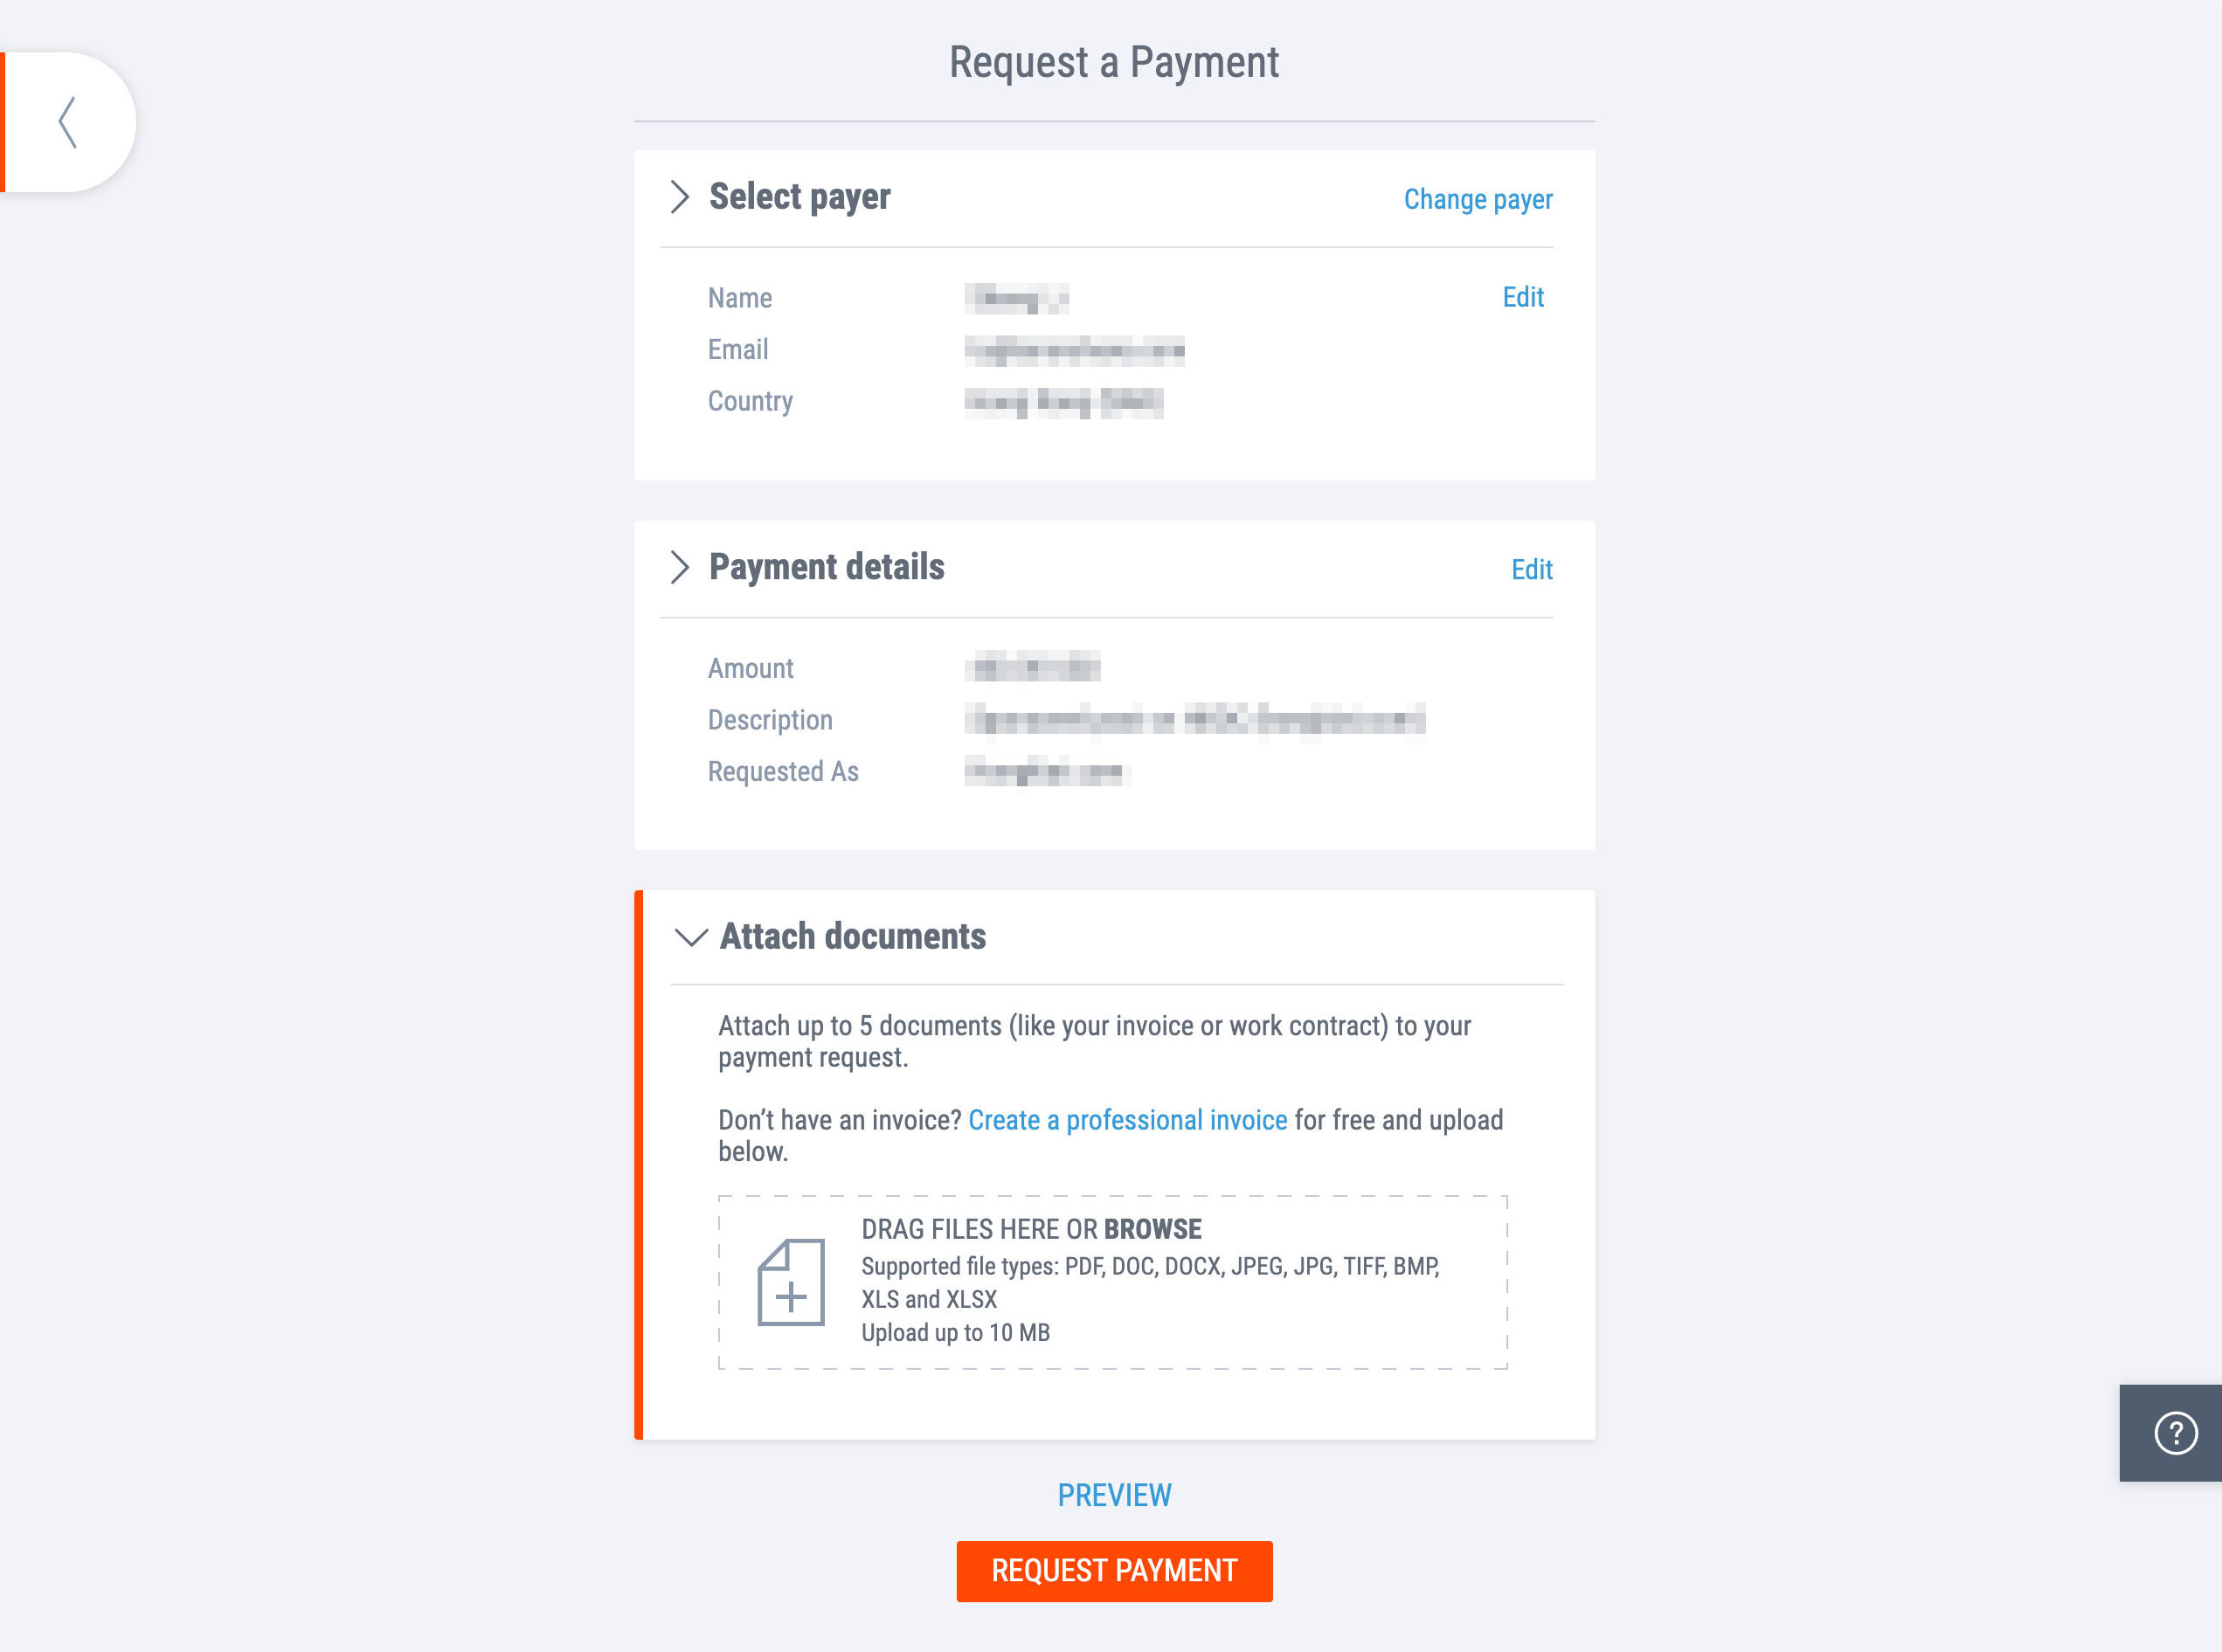
As an optional step, you can add relevant documents, such as an invoice or a contract. You can attach up to 5 files here, and the supported formats are .pdf, .doc, .docx, .jpeg, .jpg, .tiff, .bmp, .xls, and .xlsx,
Before you hit the “Request Payment” button, it is advisable that you click “Preview” to see the email, aka the payment request, that your client will receive.
That’s it! Your payment request will be sent along with the payment details. Your client will also be notified.
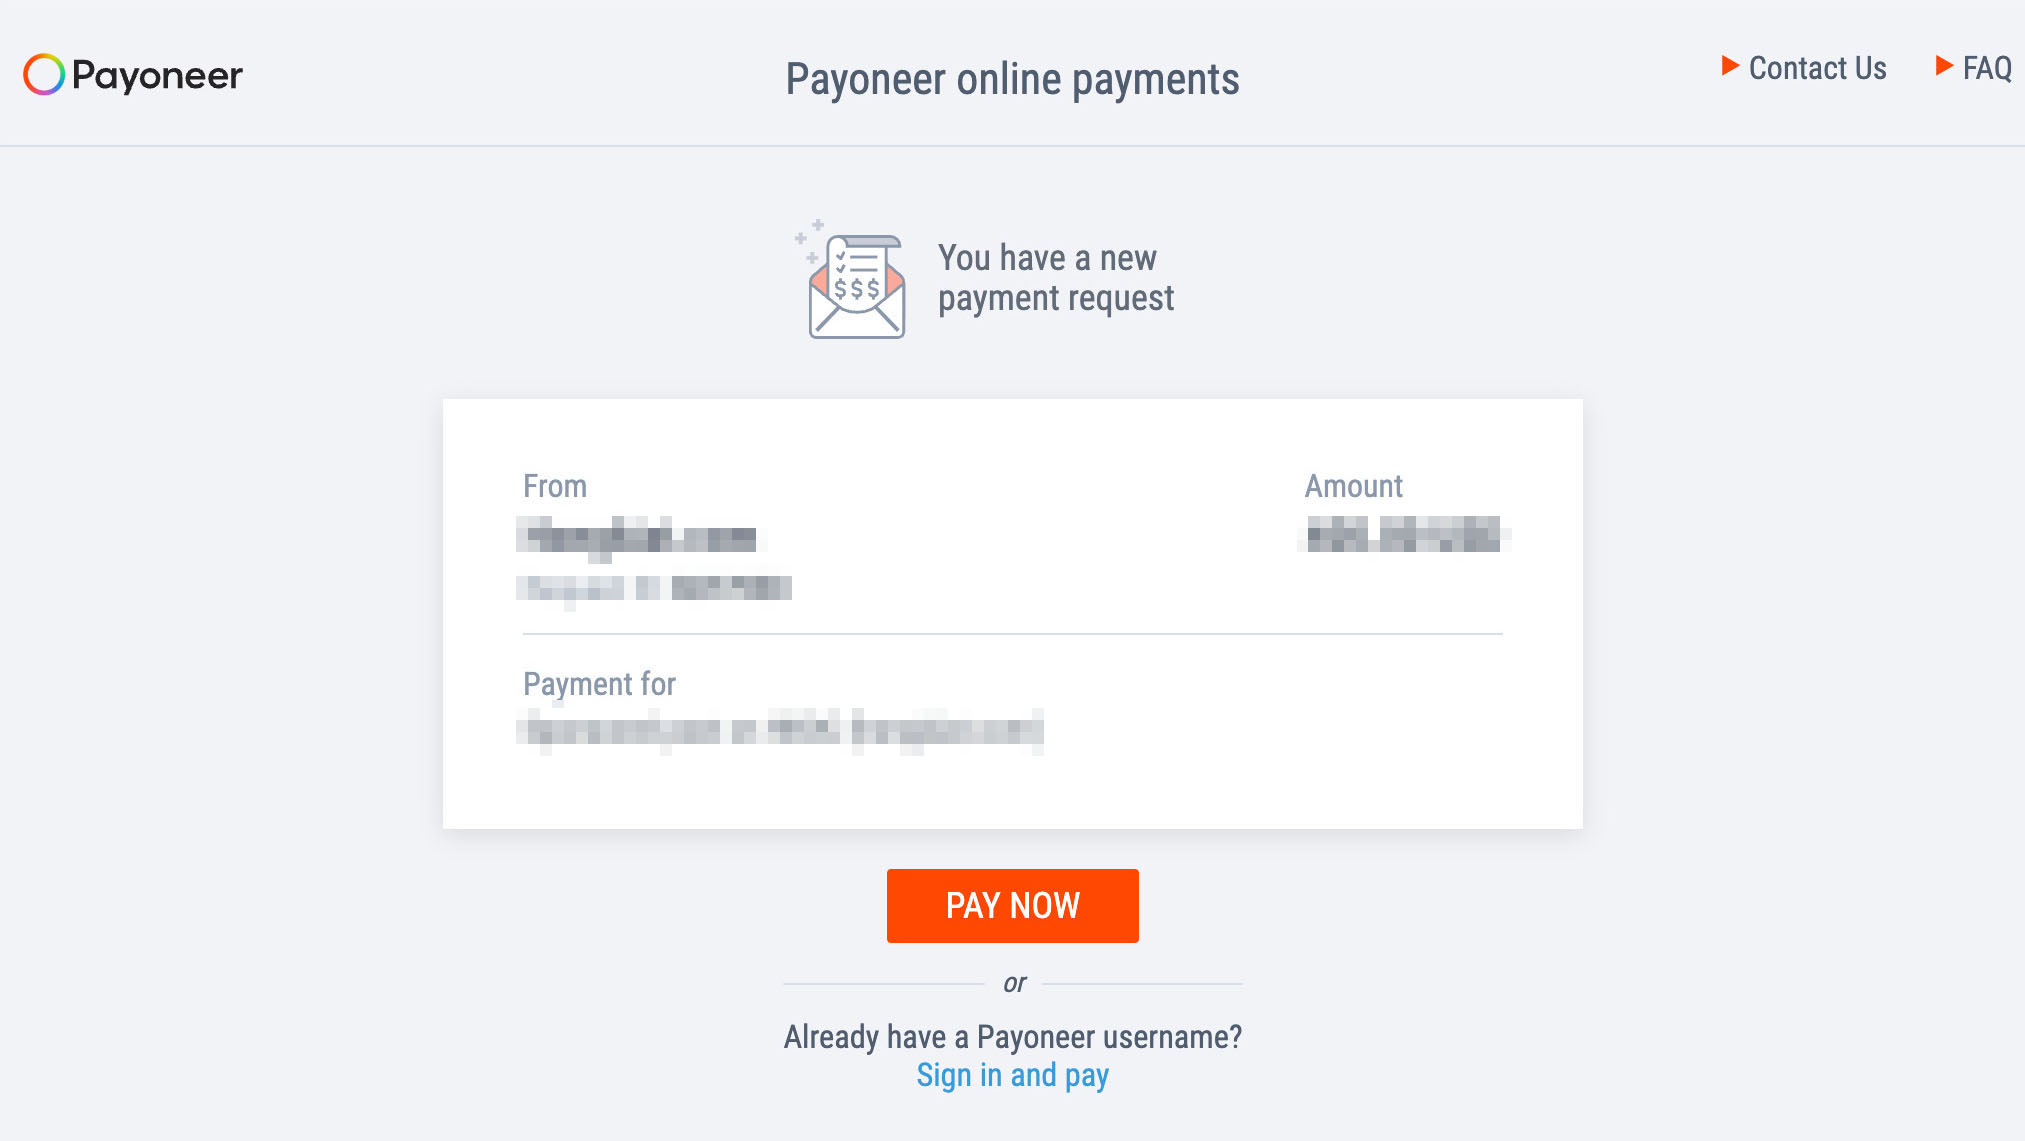
Note: If you prefer to reach out to the client personally, you can share a direct link to Payoneer’s payment platform, where your clients can complete the payment on the spot.
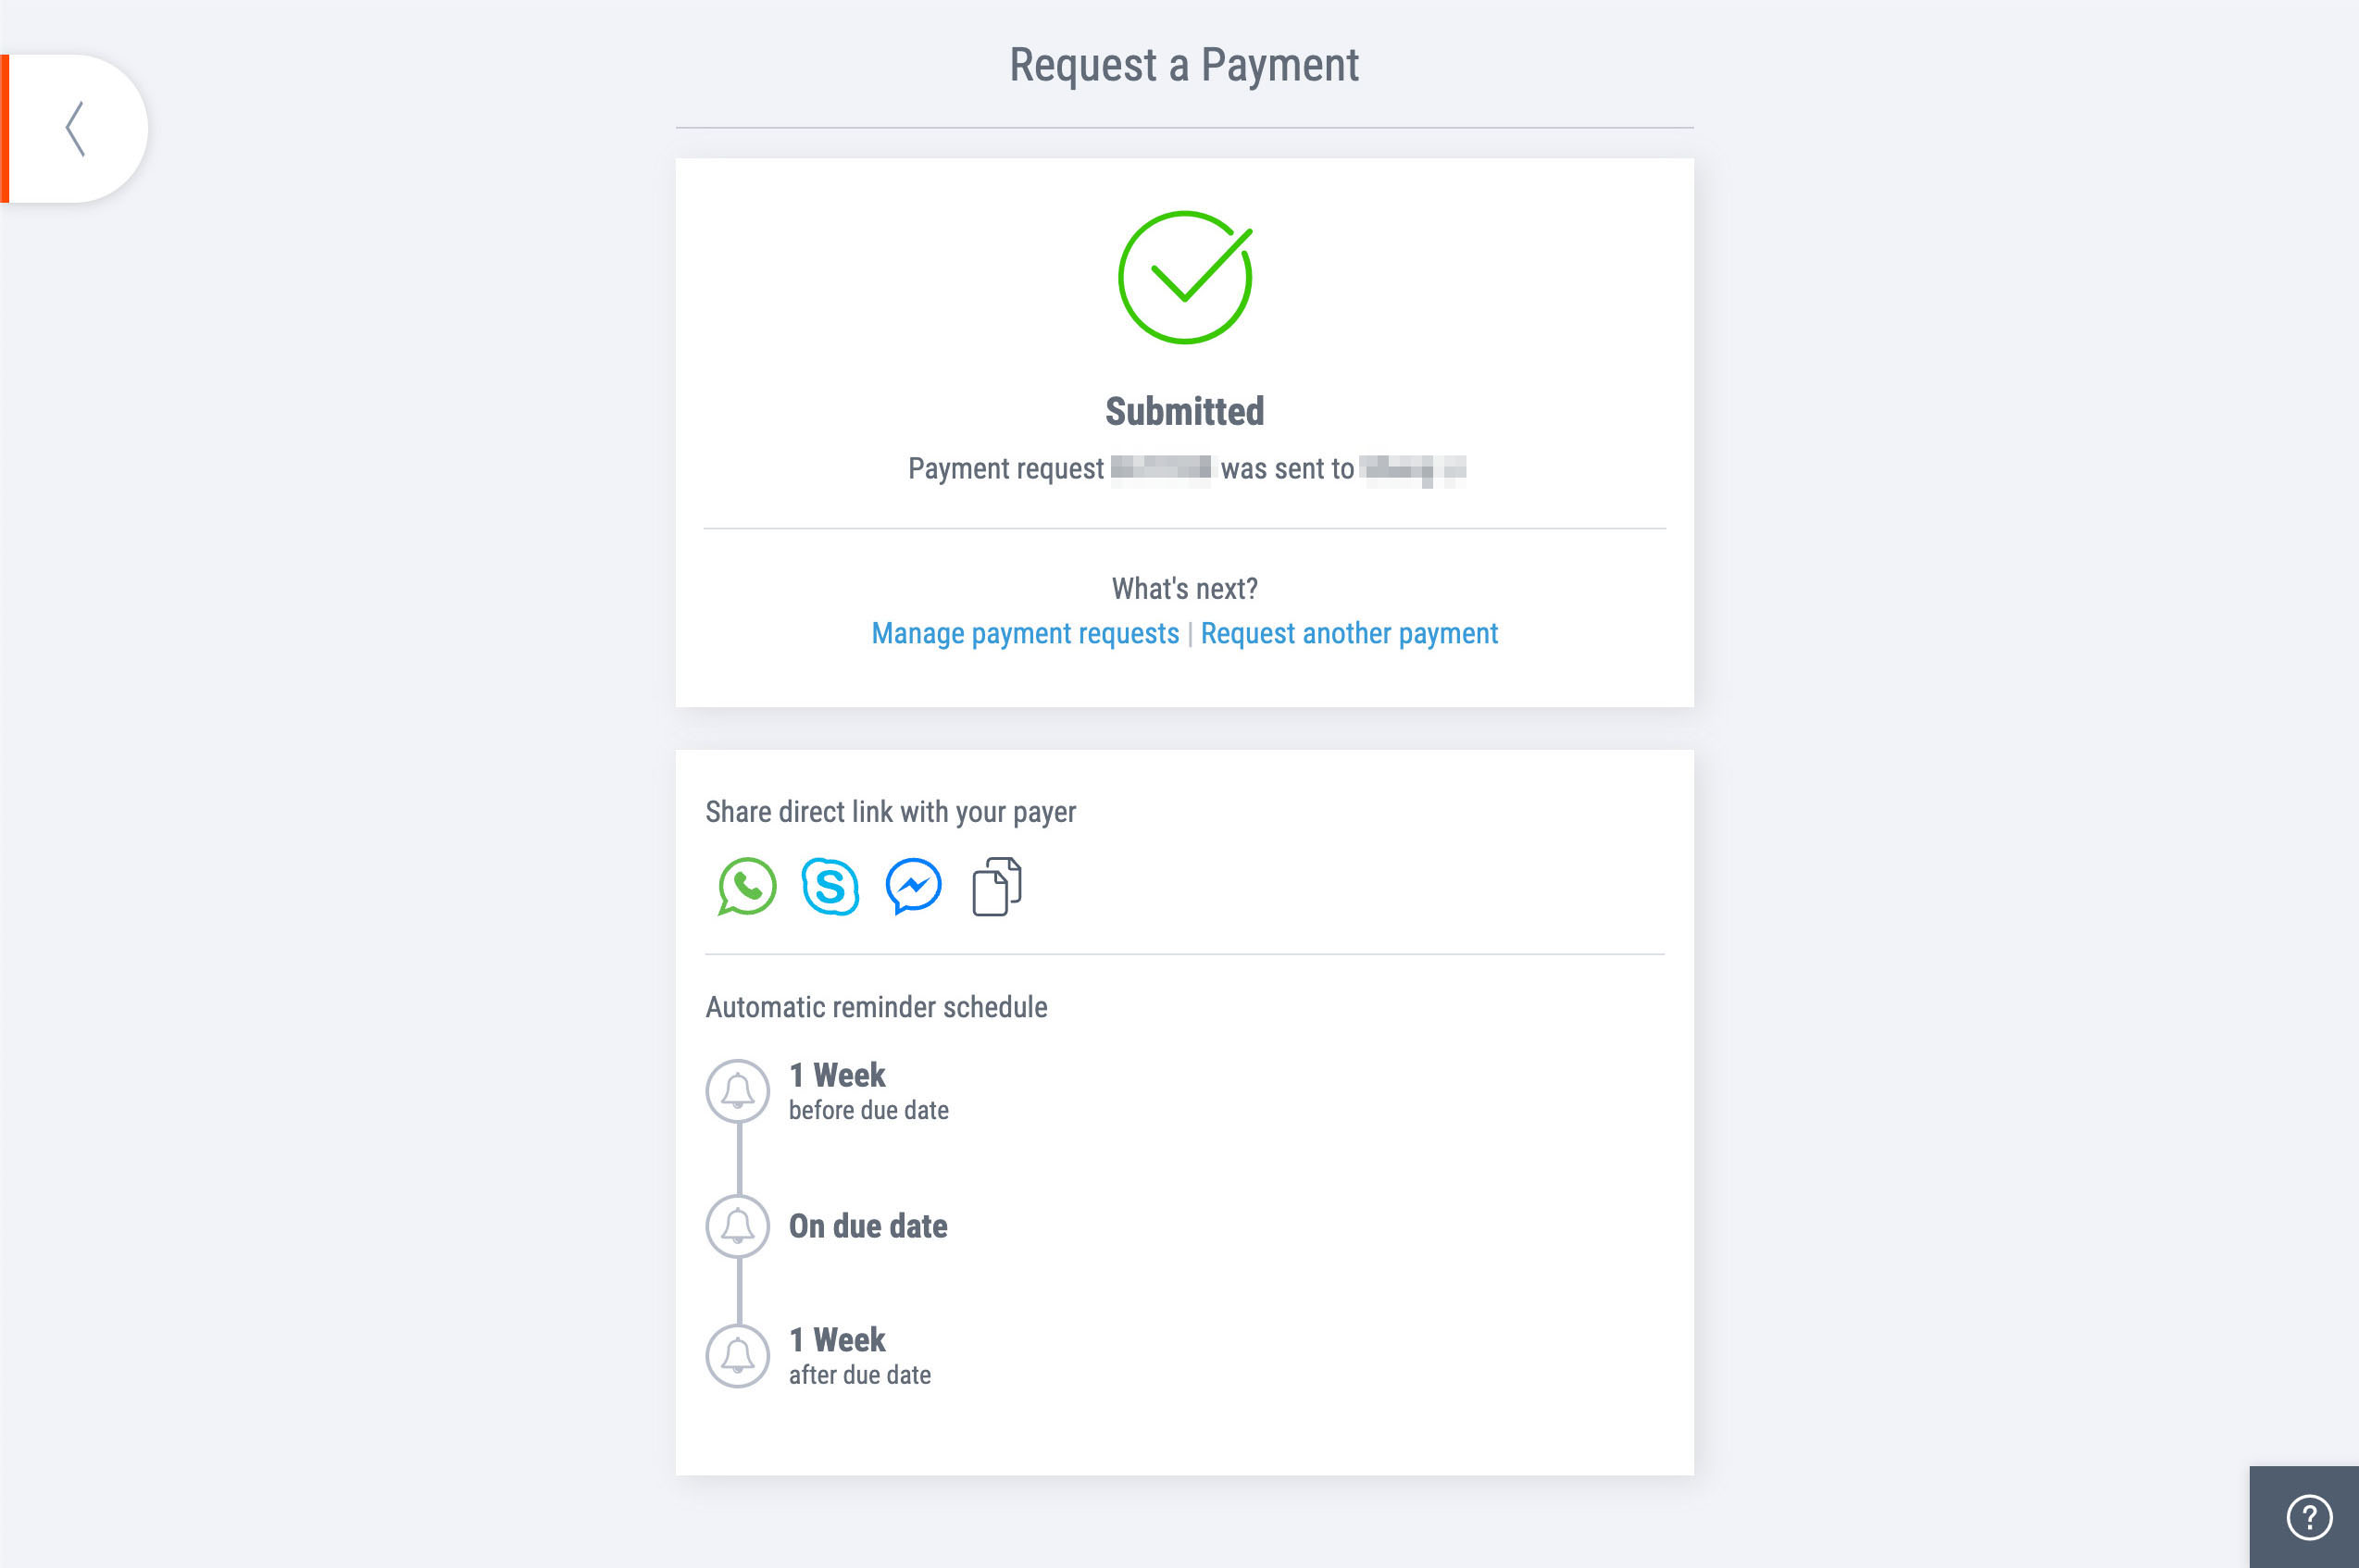
Here’s how the direct link would look like when they open it:
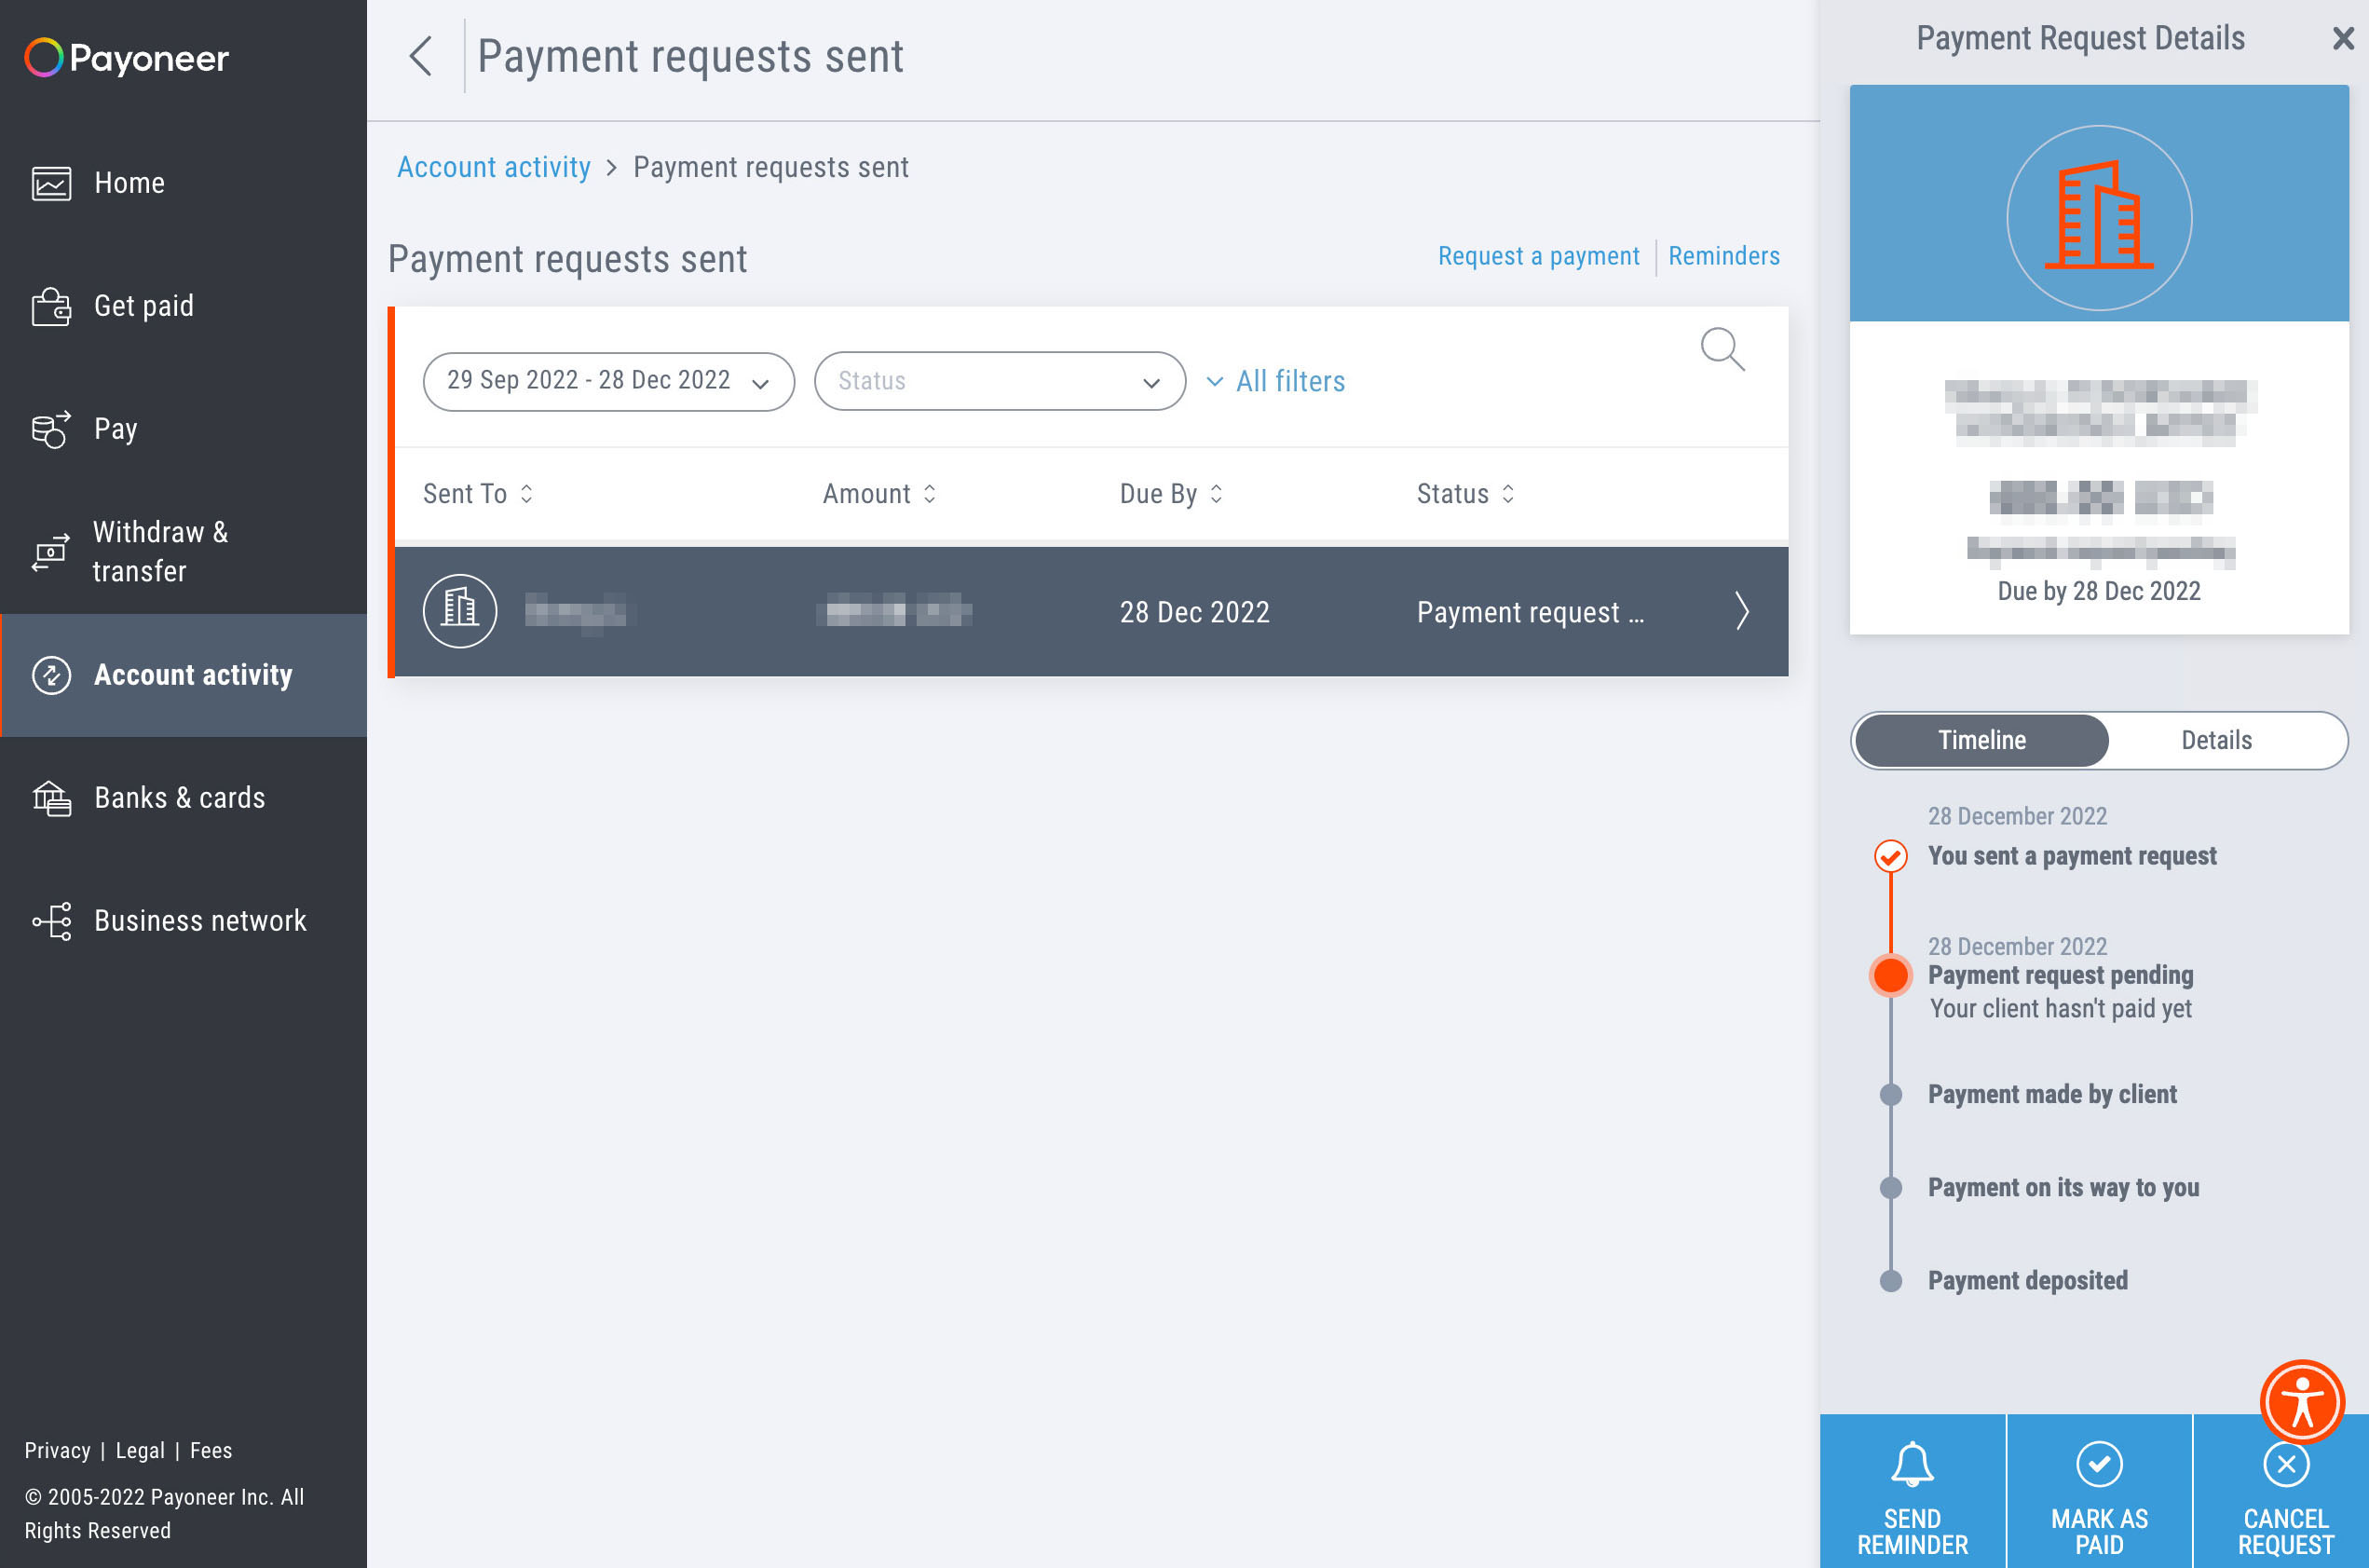
Tracking Payment’s Status
To track the status of your payment request, go back to the Account page, then click “Account activity” and go to “Payment request sent”.
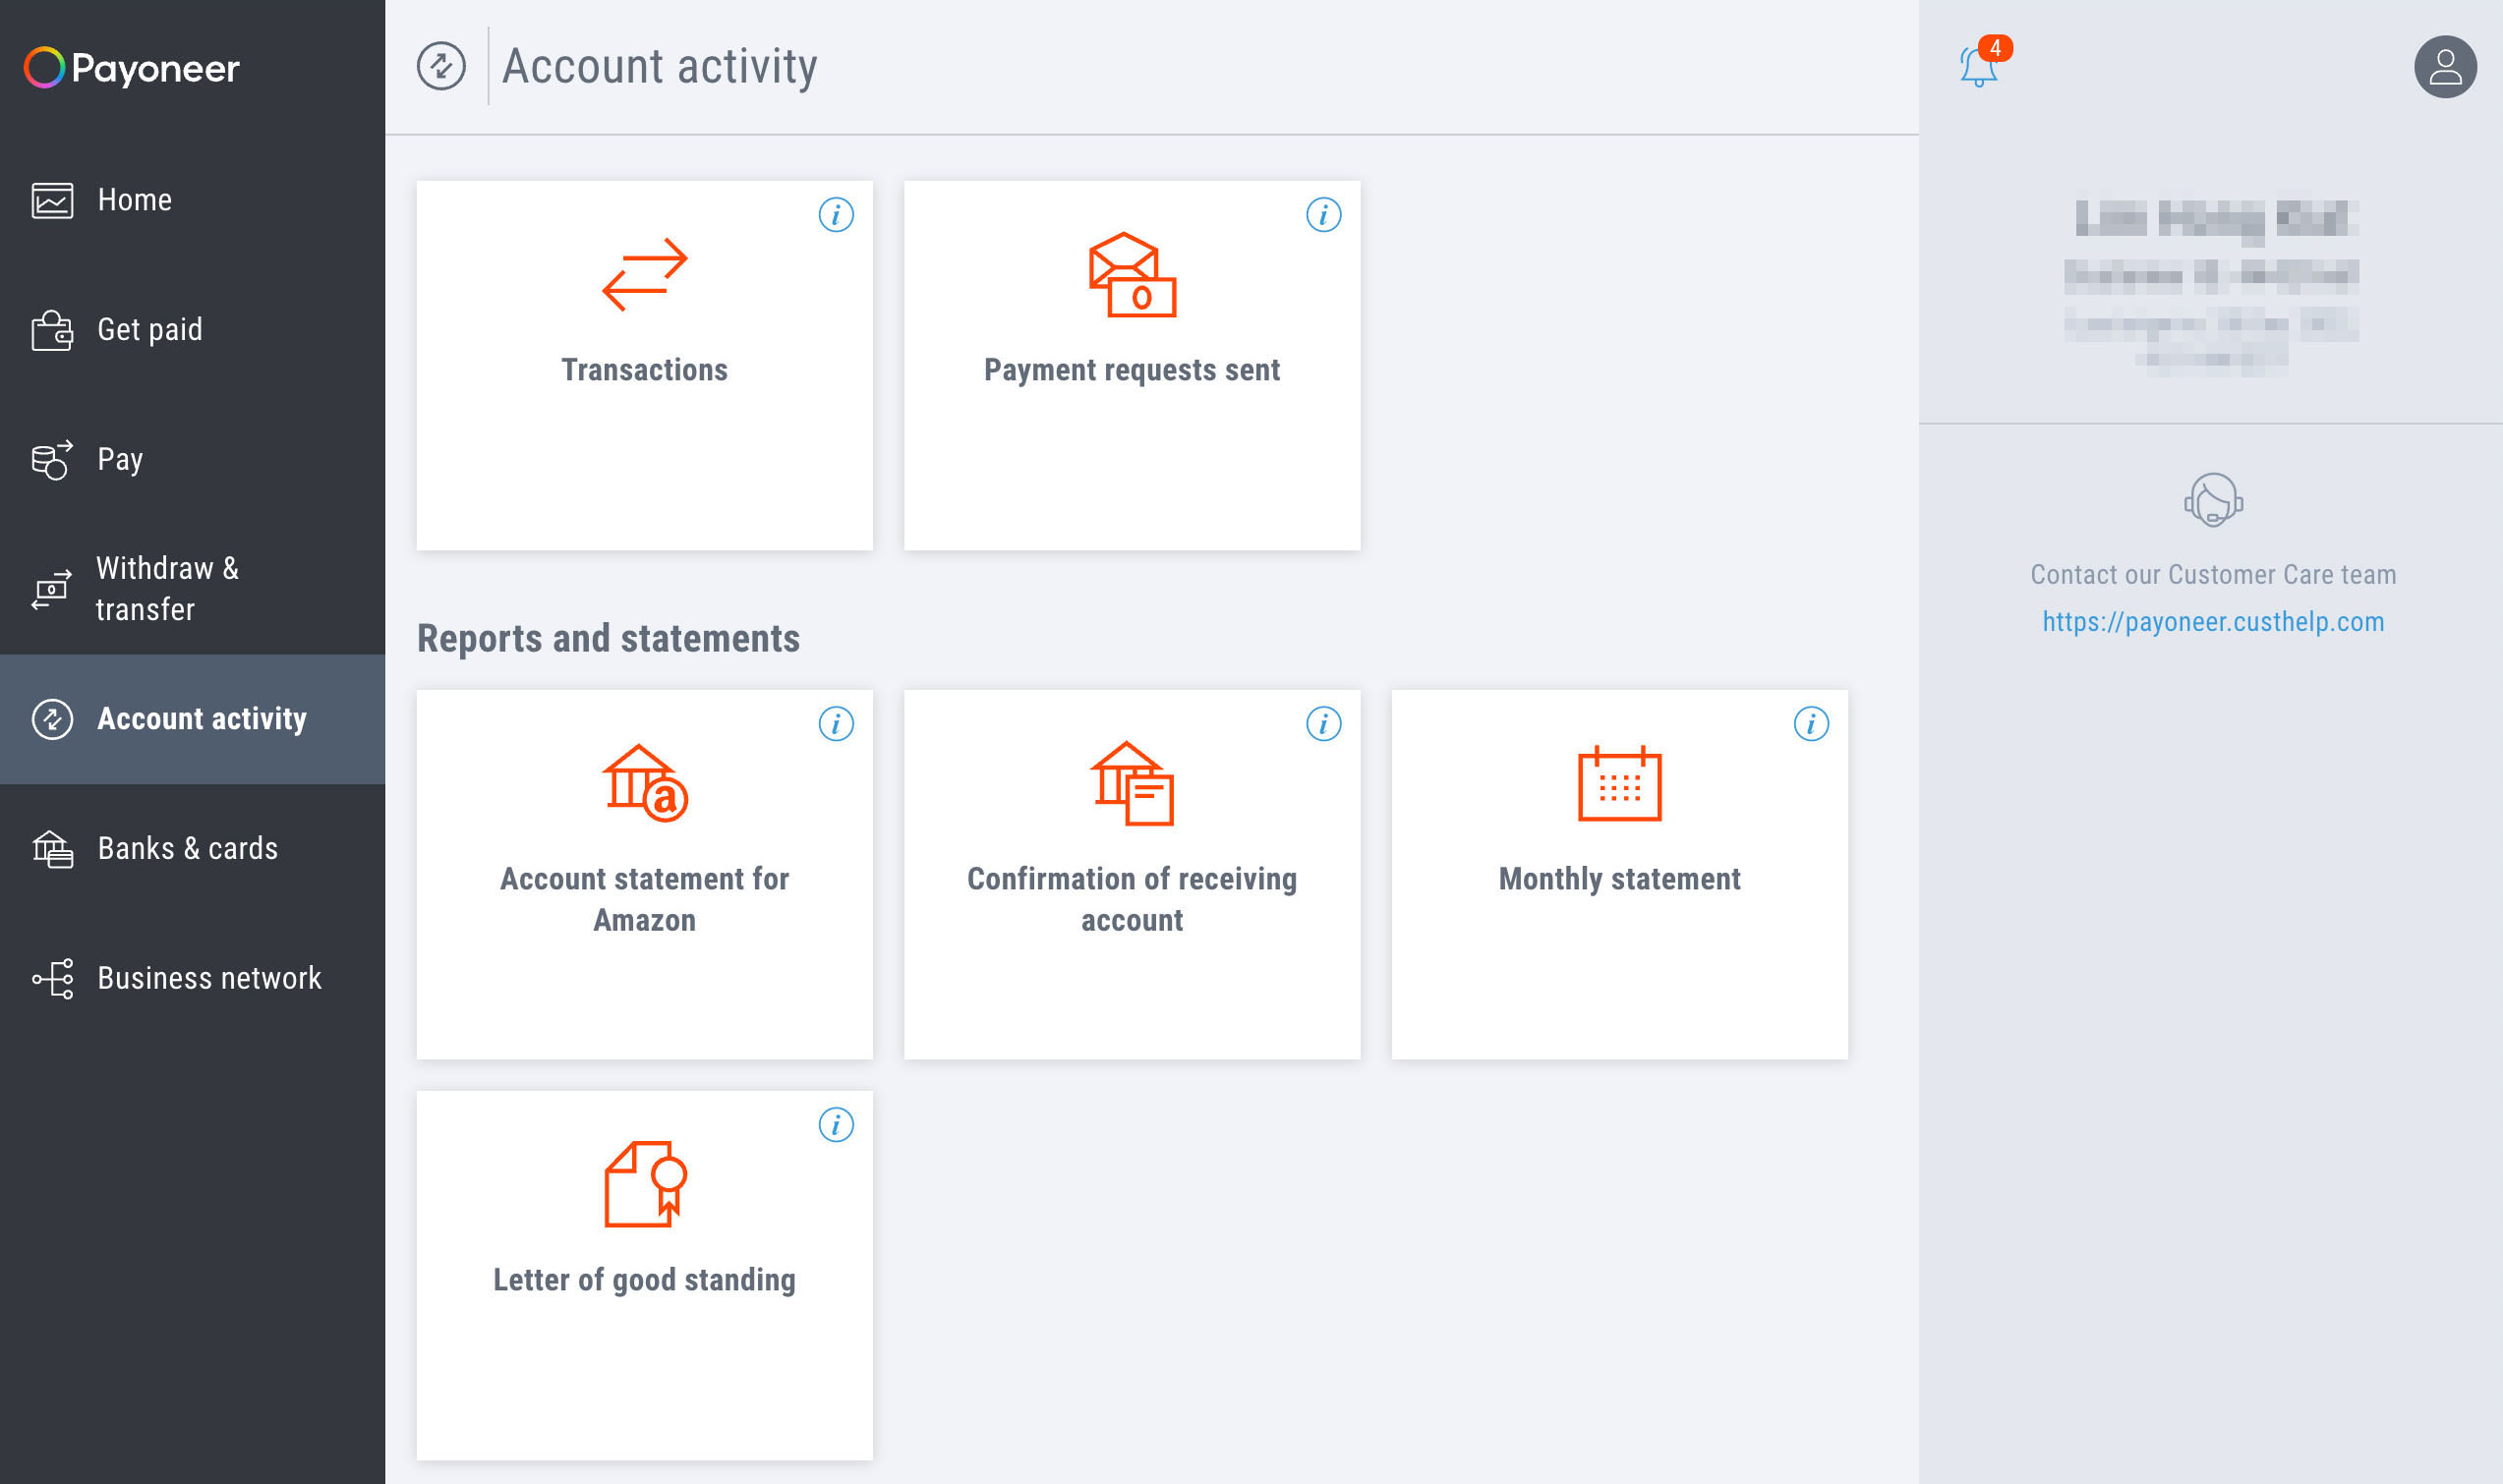
You will see a list of your payment requests and their respective statuses. You can click on a payment request to view additional details.
You can also cancel any pending payment request or send an immediate manual reminder to your client.