How to Set Up a ‘Request for Price’ Catalog in WooCommerce
WooCommerce provides a seamless platform to list your products, making it straightforward for customers to make purchases and for you to handle orders. However, there might be times when you prefer not to sell your products directly but simply display them.
In this guide, I’ll demonstrate how to easily set up a compelling catalog with a price request feature using native WooCommerce capabilities and some simple custom code.
Benefits of Creating a Catalog
Opting for a product catalog over a traditional online store offers several advantages:
Here are a few scenarios where a catalog could be particularly useful:
- If you’re not interested in online sales but still want to showcase your products online. Customers can view your catalog online and then visit your physical store to make purchases.
- If you offer custom pricing or cannot determine a price until a specific component is sourced.
- If you’re looking for a cost-effective solution without investing in a plugin to handle price variations based on cart content, shipping locations, or product dimensions.
- If you wish to keep your pricing confidential from competitors.
- If you prefer to control who views and buys your products.
Advantages of Using WooCommerce
WooCommerce is equipped with a plethora of features right out of the box, simplifying the management and functionality of your catalog. Naturally, you can add various attributes and details to your products, organize them into categories, and label them with tags. It also makes it easy to distinguish your catalog from your main website or blog.
WooCommerce can recommend related products automatically or allow you to set up suggestions manually. Additionally, it enables your visitors to filter and sort products according to their preferences, enhancing their shopping experience.
Moreover, setting up a WooCommerce catalog provides a straightforward way for potential customers to request prices. They can add items to their cart to form a wishlist and inquire about prices for those items. You can collect their contact information, and these price inquiries will be recorded as Orders, keeping everything organized.
Step-by-Step Guide to Setting Up Your Catalog
Before diving in, it’s important to determine if you want to enable a price request option for the products showcased in your catalog.
Step 1: Decide on Pricing Strategy
Opting Out of Price Requests
If you choose not to enable price requests, simply leave the price field blank. This action ensures that WooCommerce does not display any shop-related fields like amount fields, prices, or ‘add to cart’ buttons.
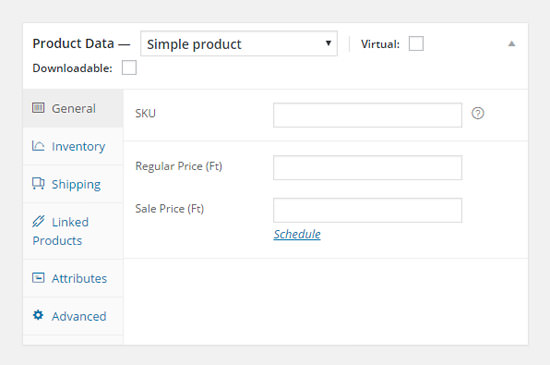
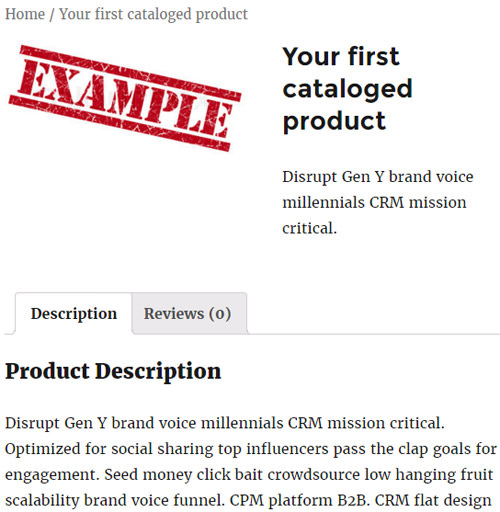
This is great news because if this is your chosen method, your catalog setup is complete. Simply add products to your new catalog and you are ready to launch!
Enabling Price Requests
If you prefer to allow price inquiries, begin by setting your product prices to zero. Enter ‘0’ in the price fields.

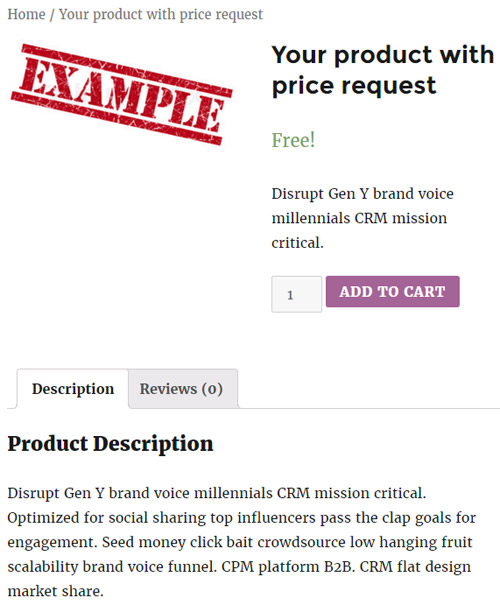
This setup allows visitors to add catalog products to a wishlist without financial commitment, enhancing their shopping experience and engagement with your catalog.
Step 2: Configuring Shop Options
This step is straightforward as it requires no coding. Here are the key settings to adjust in your WooCommerce admin area:
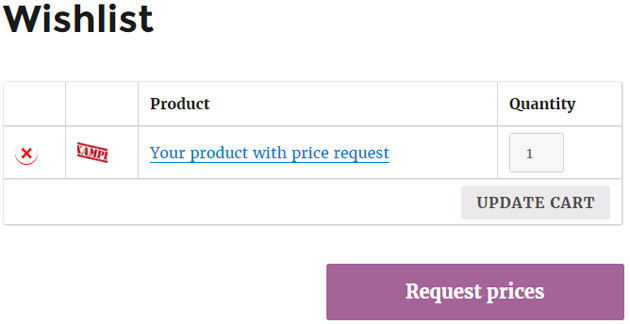
- Change the names of your original Cart and Checkout pages to ‘Wishlist’ and ‘Request Prices’, respectively (Pages).
- Prevent the use of coupons to eliminate discount notifications on shop-related pages (WooCommerce > Settings > Checkout tab).
- Turn off all payment methods to ensure they do not appear on your checkout page (WooCommerce > Settings > Checkout tab).
- Either completely disable shipping or, if you want to allow visitors to request shipping prices, enable two different shipping methods, relabel them, and set both to be FREE.
- Prohibit registration at checkout and on the account page, and avoid showing login reminders unless you plan to manage user interactions on your catalog site as well (WooCommerce > Settings > Accounts tab).
- Disable all customer emails, or if you choose to send confirmation emails about price requests, disable only the emails for completed orders to prevent unnecessary duplicates and invoices for free orders (which essentially don’t exist) (WooCommerce > Settings > Emails tab).
Step 3: Relabeling and Hiding Notices
In this step, we’ll ensure your site doesn’t appear as if you’re giving away products for free. To achieve this, we will revise your button texts and conceal any notices indicating free offers.
Simply add the following code to your theme’s functions.php file or into a custom plugin you create.
3.1: Eliminating ‘Free’ Labels
The initial task is to remove any free shipping notices and labels found on the single product page and throughout product loops, such as shop and product category pages.
add_filter( 'woocommerce_free_price_html', 'hide_free_price_notice');
add_filter( 'woocommerce_variable_free_price_html', 'hide_free_price_notice' );
add_filter( 'woocommerce_variation_free_price_html', 'hide_free_price_notice' );

function hide_free_price_notice( $price ) {
    return '';
}

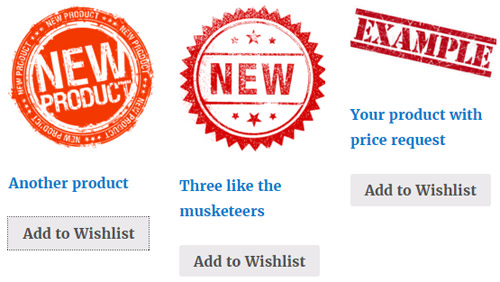
Step 3.2: Button Labels
As we build your catalog, we’re transforming your cart into a wishlist and your checkout page into a price request form. Our next task is to update the button labels.
add_filter( 'woocommerce_product_single_add_to_cart_text', 'woo_custom_cart_button_text' );

function woo_custom_cart_button_text() {
    return __( 'Add to Wishlist', 'woocommerce' );
}

add_filter( 'woocommerce_product_add_to_cart_text', 'woo_custom_cart_button_text' );

function woocommerce_button_proceed_to_checkout() {
    $checkout_url = WC()->cart->get_checkout_url();
    <?php
    <a href="<?php echo $checkout_url; ?>" class="checkout-button button alt wc-forward"><?php _e( 'Request prices', 'woocommerce' ); ?></a>
    ?>
}

add_filter( 'woocommerce_order_button_text', create_function( '', 'return "Send me an offer";' ) );
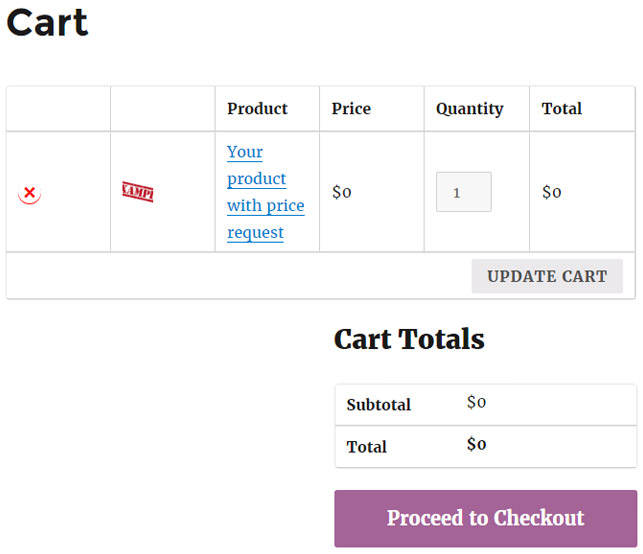
Step 3.3: Hide Your Free Prices Everywhere
Since WooCommerce displays $0 prices in your cart (now your Wishlist), we need to remove those columns. You have two methods to choose from:
First, you can hide them using CSS by adding this code to your child theme’s style.css:
.cart_totals h2, .cart_totals .shop_table, .cart-subtotal, .order-total, .woocommerce-shipping-fields, .product-total{
 display:none;
}
Second, you can remove the unwanted columns completely by modifying the cart template files as follows:
- Create a woocommerce folder with a cart subfolder in your (child) theme’s directory, like this: wp-content/themes/mytheme/woocommerce/cart/
- Download and open the original WooCommerce cart.php file from wp-content/plugins/woocommerce/templates/cart/
- Delete these lines:
<th class="product-price"><?php _e( 'Price', 'woocommerce' ); ?></th>
    <th class="product-subtotal"><?php _e( 'Total', 'woocommerce' ); ?></th>
and the sections from<td class="product-price"to</td>and from<td class="product-subtotal"to</td> - Download and edit the original woocommerce cart-totals.php file, found in the same location as cart.php
- Delete these lines:
<h2><?php _e( 'Cart Totals', 'woocommerce' ); ?></h2>and the entire table from<table cellspacing="0" class="shop_table shop_table_responsive">to</table> - Upload both edited files back into the woocommerce/cart directory within your theme folder
If you enabled any shipping options in Step 2, you’ll also want to disable the free shipping notice:
add_filter( 'woocommerce_cart_shipping_method_full_label', 'remove_free_label', 10, 2 );

function remove_free_label($full_label, $method){
    $full_label = str_replace("(Free)","",$full_label);
    return $full_label;
}
Step 4: Email Text Settings
We’re almost ready with our customized WooCommerce catalog featuring a price request option. If you chose to disable all customer emails in Step 2, you can skip ahead to Step 5.
If you’d like to maintain a touch of professionalism by sending customer confirmations, we need to ensure the email subjects are appropriate and that no $0 prices are sent. We might also need to tweak the email body text.
Email Subject and Heading Adjustments
In the admin area, under WooCommerce > Settings > Emails, modify the Processing order and New order subjects and headings. These changes ensure clarity as these orders will be processed without immediate payment.
Step 4.2: Remove Price from Emails
By default, WooCommerce includes prices in order confirmation emails, which we need to eliminate:
- Download and open the file woocommerce email-order-items.php from wp-content/plugins/woocommerce/templates/emails/plain
- Delete this line:
echo "\n" . sprintf( __( 'Cost: %s', 'woocommerce' ), $order->get_formatted_line_subtotal( $item ) ); - Download and open woocommerce email-order-details.php from the same directory
- Delete these lines:
if ( $totals = $order->get_order_item_totals() ) { foreach ( $totals as $total ) { echo $total['label'] . "\t " . $total['value'] . "\n"; } } - Upload the modified files back to the woocommerce/emails/plain directory within your theme folder
Step 4.3: Rewrite Flavor Texts
The default introduction in WooCommerce emails states: “Your order has been received and is now being processed. Your order details are shown below for your reference.” If you wish to change this:
- Download and open woocommerce customer-processing-order.php from wp-content/plugins/woocommerce/templates/emails/
- Modify the line as desired:
echo __( "Your order has been received and is now being processed. Your order details are shown below for your reference:", 'woocommerce' ) . "\n\n"; - Upload the revised file to the woocommerce/emails folder within your theme directory
Step 5: Enjoy Your Catalog
Your personalized WooCommerce catalog is now operational. Relax and enjoy your creation. Whenever someone sends a price request or creates a wishlist, you will receive an email notification, and the request will appear in your admin area under WooCommerce > Orders.
Each order will include the customer’s email address, allowing you to send them a customized price offer or even contact them by phone if necessary.