Fixed: iPhone Stuck on Verifying Update and Won’t Turn Off
“My iPhone has been on the ‘Verifying update’ screen for a day now, and it won’t even turn off because the screen is unresponsive and won’t let me slide to power off. I’ve tried locking and waking it a dozen times to no avail. What can I do? Please help!”
Sounds familiar?
Or did your iPhone, too, get stuck on the “Verifying update” screen when you tried to install the latest version of iOS 15 or iOS 16?
This article will come in handy as we explain why this problem occurs and how to fix it so you can update your iPhone without any issues.
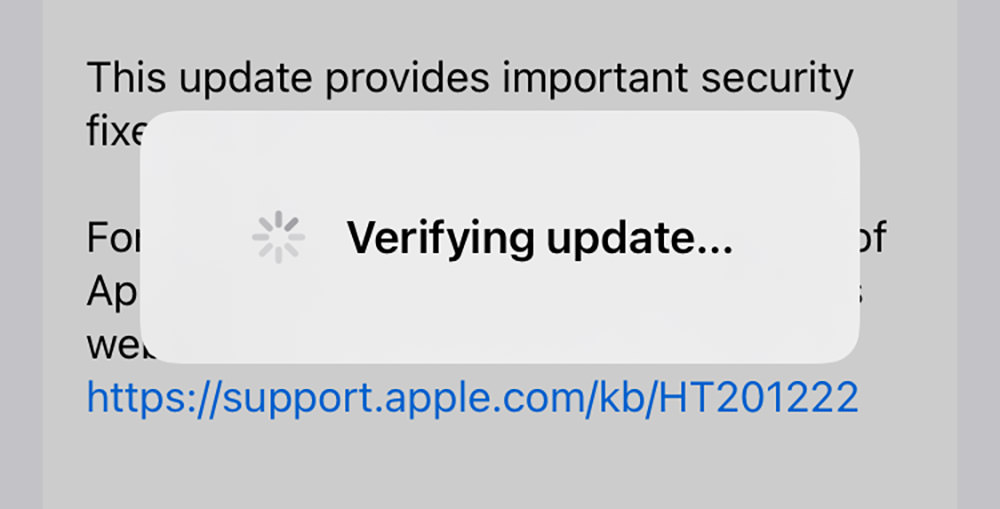
Why is my iPhone stuck on the “Verifying Update” screen?
After downloading the update, the iPhone will verify it before beginning the installation process. This is a necessary step.
Typically, the iPhone verification process for the update takes only a few seconds or minutes to complete. If it takes more than 10 minutes, it’s probably a sign that something is wrong, but you can still wait a bit longer.
If it takes more than 30 minutes and still nothing happens, you’re essentially stuck. When you’re stuck on the “Verifying Update” screen, you can’t actually go back to Settings, quit, or even turn off your iPhone.
So, why is your iPhone stuck on the “Verifying Update” screen?
Busy Apple servers, software glitches, unstable network connections, insufficient storage space, etc., can all contribute to this issue. In any case, you’ll now have to get rid of the stuck “Verifying Update” screen before you can continue using or updating your iPhone.
Here are three ways to fix an iPhone stuck on “Verifying Update” without losing data.
Method 1: Try a Force Restart on your iPhone
Is your iPhone stuck on the “Verifying update” screen? You don’t need to panic. A force restart could be the solution. It simply means turning off your iPhone completely to clear the unresponsive screen, and then switching it back on for a clean start.
Here’s the easy step-by-step process:
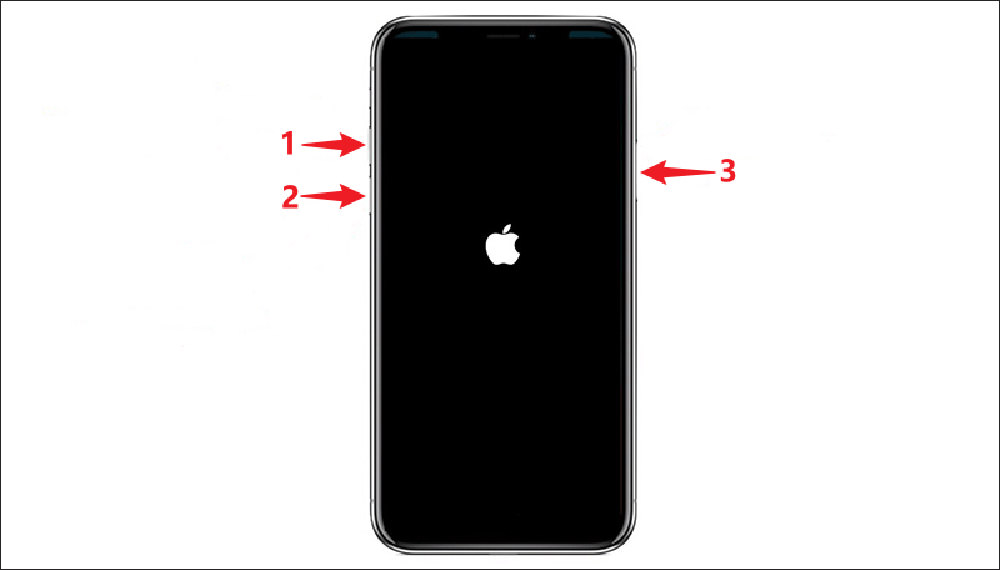
First, quickly press and release the Volume Up button, then do the same with the Volume Down button. Right after, press and hold the Side button (or the Sleep/Wake button, depending on your model) until you see the Apple logo on your screen.
As soon as the logo shows up, release the button and allow your iPhone to restart. Rest assured, this process won’t delete any of your data. It’s just a simple trick to fix software glitches that might be making your iPhone freeze or become unresponsive.
For details see How to force-restart any iPhone models.
Step 2 – Try again to update your iPhone
If your iPhone has successfully restarted, you may now attempt to update it again if desired. To prevent your iPhone from becoming stuck on the "Verifying Update" screen once more, follow the instructions below:
- Ensure that your iPhone is connected to a reliable Wi-Fi network and has at least 5GB of available storage.
- Navigate to Settings > General > iPhone Storage, locate the update in the list of apps, and tap Delete Update. This will remove the previously downloaded update.
- Proceed to Settings > General > Software Update, then re-download and install the latest update.
Method 2: Update Your iPhone with iTunes or Finder
If a forced reboot does not help and your iPhone remains stuck on the “Verifying Update” screen, you may need to update your iPhone using iTunes or Finder on your computer.
Step 1
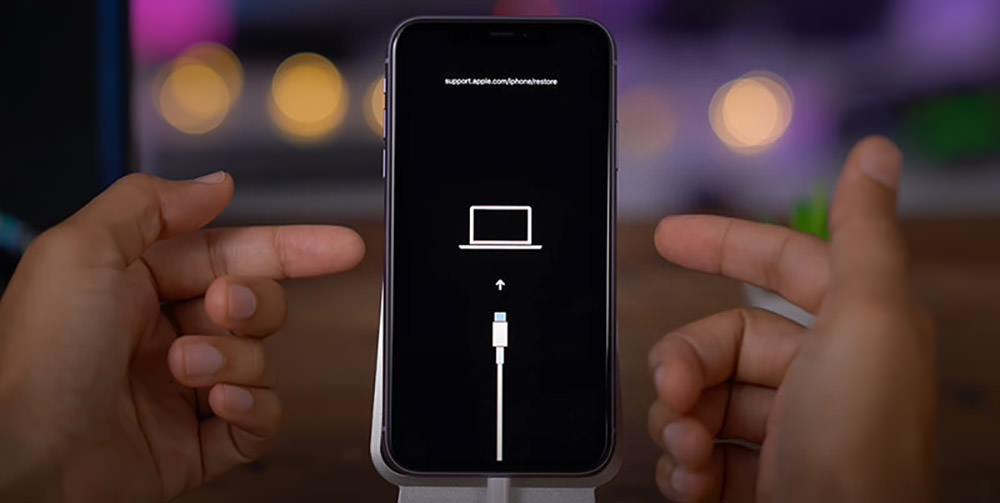
Connect your iPhone to your computer via a USB cable and force a reboot to enter Recovery Mode.
If you are using an iPhone 8 or later, the steps to enter Recovery Mode is as follows, in sequence:
- Press and quickly release the volume up button.
- Press and quickly release the volume down button.
- Press and hold the side button until the recovery mode screen appears.
Step 2
When your iPhone is in Recovery Mode, launch iTunes on your Windows computer or Finder if you are using a Mac.
Step 3
iTunes or Finder will automatically detect your iPhone and display a dialog box with “Update” and “Restore” options. Choose the “Update” option.

Step 4
Choose “Update” again to confirm, and iTunes or Finder will automatically download the latest software update and install it on your iPhone.
Method 3: Fix Stuck "Verifying Update" with iSumsoft iOS Refixer
Sometimes, updating your iPhone with iTunes or Finder can also fail or become stuck. We’ve seen instances where Finder or iTunes gets stuck while preparing for a software update. Therefore, another alternative to fix an iPhone stuck on the "Verifying Update" screen is to use iSumsoft iOS Refixer.
iSumsoft iOS Refixer is a specialized iOS system recovery tool that can fix various iPhone issues, including update failures and screen stuck problems, without losing data.
Download and install the software on your Windows PC, then follow the steps below to get your iPhone out of the "Verifying Update" screen and updated to the latest version of iOS.
Step 1
Launch iSumsoft iOS Refixer on your computer, select "Standard Mode", and on the next page, click "Start" to confirm that you want to use this option to fix your iPhone.

Step 2
When prompted to connect your device, ensure your iPhone is connected to your PC via USB cable, and then force restart it to enter Recovery Mode.
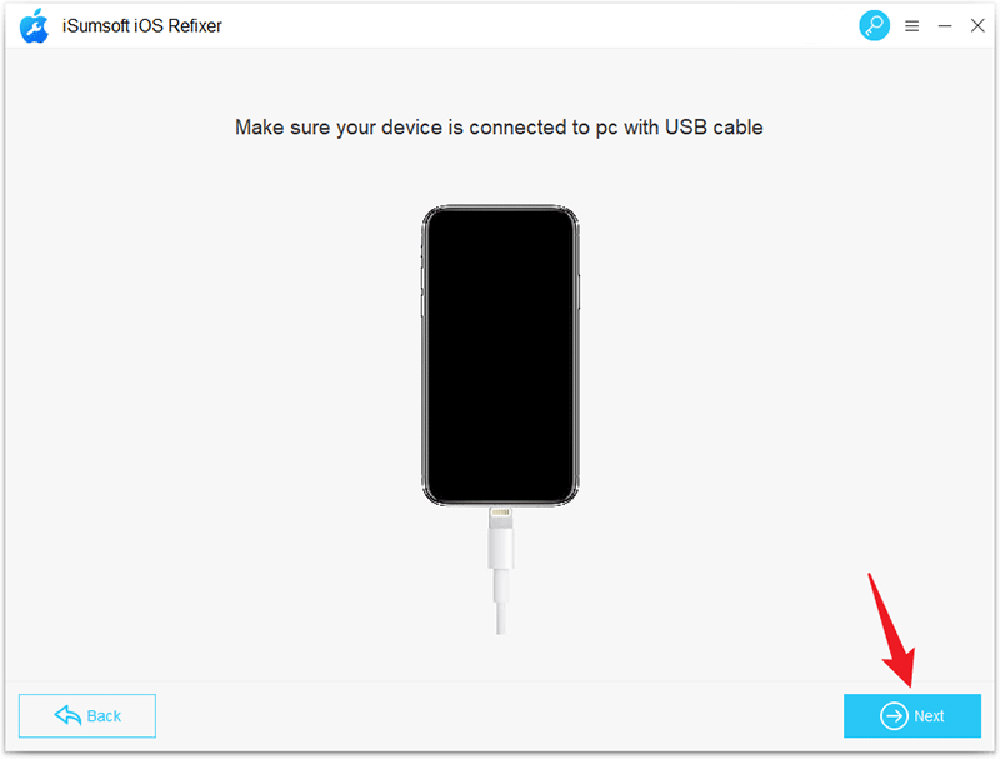
Step 3
Once your iPhone is in Recovery Mode, click"Next" on the software, and it will automatically detect your iPhone.

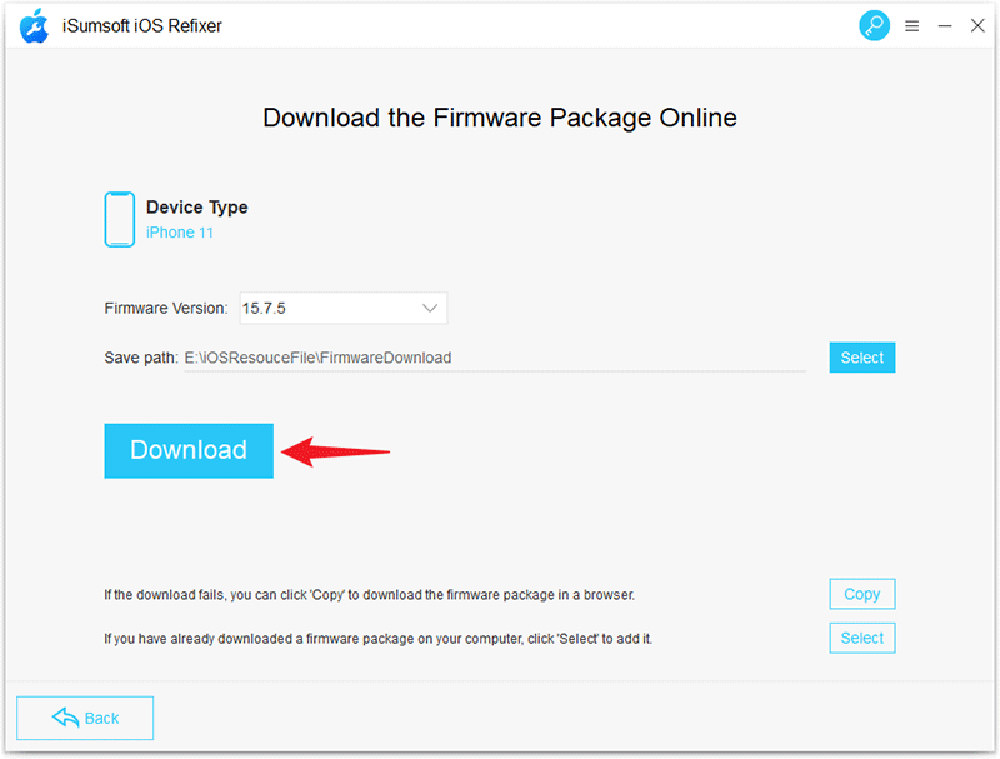
Step 4
Click the "Download" button to begin downloading the latest firmware package required to fix and update your iPhone from the Apple server. Wait a few minutes for the download to complete.
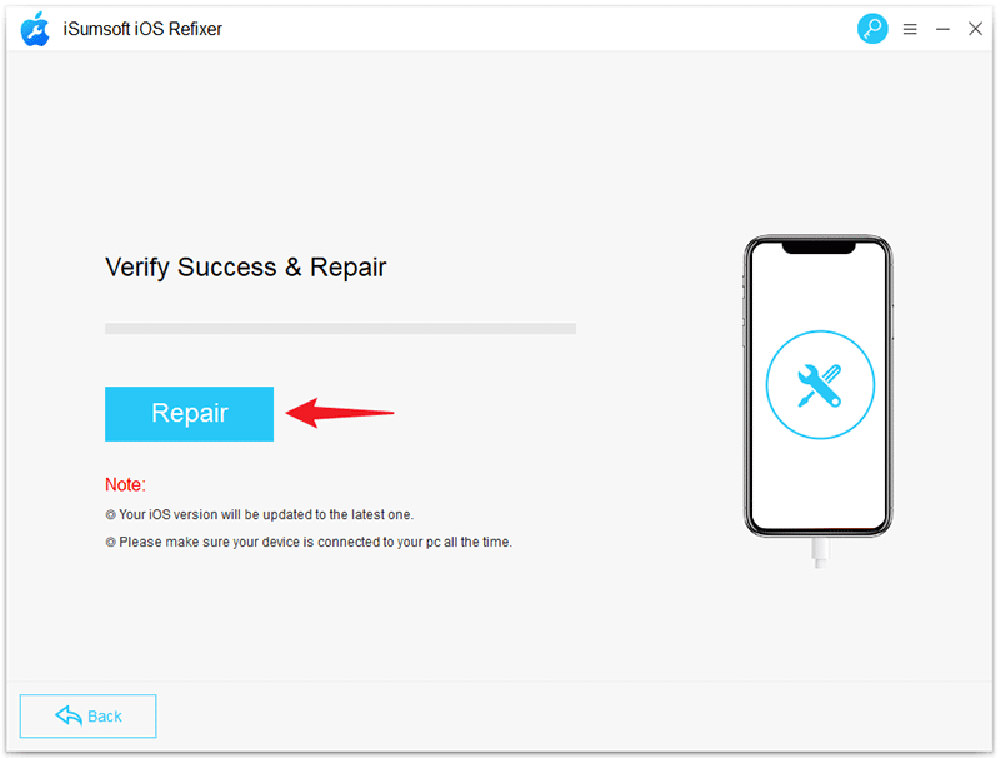
Step 5
After the firmware is downloaded, click on the "Repair" button, and the software will immediately start repairing your iPhone. This process will fix any software bugs that may be causing your iPhone to get stuck on the "Verifying Update" screen and install the latest version of iOS on your iPhone.
Step 6
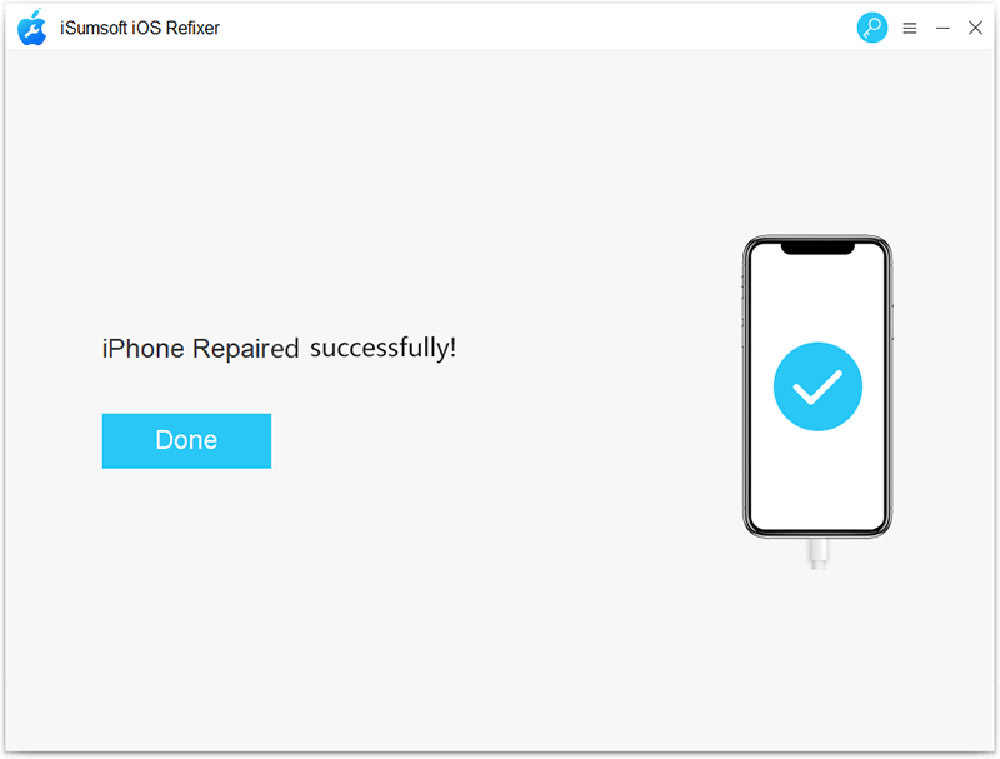
Wait a few minutes, and you will see the message “iPhone Repaired Successfully” on the software page. Your iPhone will then restart automatically. Afterward, you can continue using your iPhone without any issues, and you won’t need to update it again because it is already up-to-date.