How to Fix Windows Laptop Battery That’s Not Charging
Are you having problems with your laptop battery? Is it not charging like it used to? If so, don’t panic – you are not alone. Many people experience this problem ever so often. In this blog post, I will discuss five of the most common ways to fix a laptop battery that is not charging. Hopefully, one of these methods will work for you!
I will also provide some helpful tips on how to prevent this from happening in the future. Let’s get started!
8 Ways to Improve Windows’ Battery Life
Like its predecessors, Windows 10 also comes with a bunch of features to increase battery timing, including a... Read more
Quick Fixes
Before getting into more technical solutions, let us first, try these quick fixes and see if this helps solving the problem.
- Make sure that the laptop battery is tightly seated into its slot.
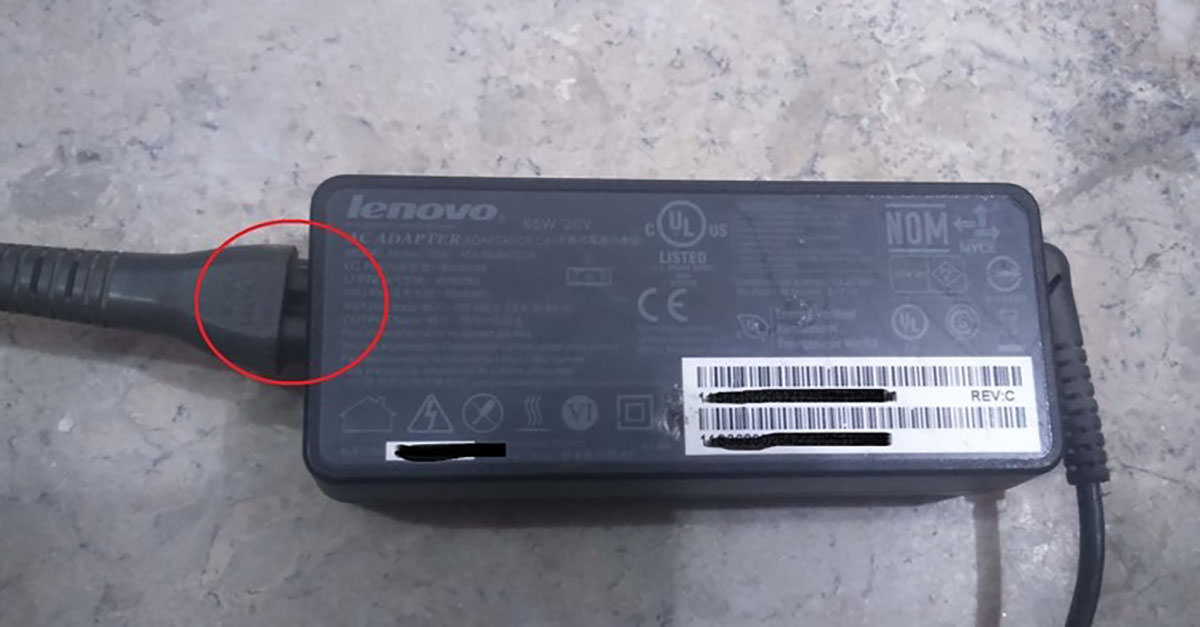
- Check to see whether you have tightly plugged the charger cable into the charger port as shown in the screenshot below.
- Check if you have connected the charging cable to the right port on your laptop. Modern laptops come with two or more USB-C ports that look the same. But one is for charging and the other is for data transfer. If you plug the charger into the data transfer port, your laptop might not be charged.
- Shut down your laptop and remove the battery (if your laptop has a removable battery). Clean the dirt from the battery compartment and power jack with a dry cloth. Wait for a minute or so, and then put the battery in its position again. Turn the laptop on and see if this resolves the issue.
If none of the above quick fixes work, below are some more detailed solutions to fix this issue.
1. Check the wall socket
First, check and see if you have plugged the charger properly into the wall socket. There’s no hope in charging a laptop that is not connected to a power source, so be sure to double-check that it is plugged in tightly.
If you have connected the charger properly, then check the wall socket. For this, remove the charger and plug it into some other socket. If this solves the issue, your previous wall socket has an issue.
2. Inspect your battery
The laptop battery is responsible for providing power and charge. If your laptop is not charging, there might be a problem within your battery.
To inspect your battery:
- Turn off the laptop and remove the battery.
- If the battery is non-removable, remove the laptop’s back cover. Now open the battery screws and remove them.
- With the battery detached from the laptop, press and hold the Power button for 20 seconds. It will remove the remaining charge from the laptop.
- Now plug the charger into the wall socket. If the laptop starts and receives the power, it means the charger is working fine and the battery is faulty.
3. Inspect your charger
Sometimes, the problem could lie with the battery or the charger might be the culprit. If your laptop isn’t charging, you should inspect your laptop charger for any possible issue with it.
To inspect your charger, try using another charger. If it works, then it’s a no-brainer that your current charger is the culprit.
To inspect the charger cable, look at the charger cable for damage all along its length. If any part of the cable is bulgy or if you notice a burning smell from the cable or adaptor, it indicates that the charger cable is burned out from inside.
4. Inspect the charging port and battery jack
Remove any dirt from the charging port with the help of a blower. If the charging port seems loose and the charger cable won’t fit in it firmly, there’s a chance that your power jack has been damaged or broken from the inside of the motherboard. You should consult a laptop technician in this case.
Sometimes a faulty battery jack also causes the battery to not charge. To inspect the battery jack, turn off the laptop and remove the battery. Clean any dirt from the battery jack. If it’s loose, go to the repair shop to fix it.
5. Inspect battery health
All the lithium-ion batteries have a certain life span and they wear out after a certain time.
To allow you to fully examine the laptop hardware, many modern laptop OEMs, such as HP, Dell, Lenovo, ASUS, and others include device diagnosis software.
If you are using an old laptop, follow the below steps to examine the battery health:
- Go to Start and type
powershell. Click Run as Administrator on the right side. - In the PowerShell window, type
powercfg /batteryreport /output "C:\battery-report.html(including the inverted commas). - The Windows PowerShell will generate a battery report in .html file format and save it to the C drive on your laptop.
- Now open the C drive and click the battery-report file.


This report shows the details of your laptop’s battery usage, a prediction regarding its remaining life based on previous charges, and other data.
It also includes the remaining cycles count of the battery. If the battery report indicates deterioration or shows the cycles count exceeding its limit, it’s time to replace the battery.
6. Check for overheating laptop
Overheating, like all other electronics, has a bad effect on batteries. If your laptop is overheating, it’s possible that the battery is becoming warm and causing damage.
The charging system may malfunction as a result of the battery sensor misfiring, falsely indicating that the battery is either entirely charged or completely discharged, resulting in the problems.
You may also discover that your system shuts down to prevent overheating and resulting in a fire. If the battery is heating up, shut down the laptop for a few minutes. When the laptop cools down, start it again.
7. Run the power troubleshooter
The power troubleshooter aids in detecting issues caused by any fault with the power supply. If your laptop is having issues with power consumption, you may benefit from learning how to use the Windows 10 Power troubleshooter.
To run the Power Troubleshooter:
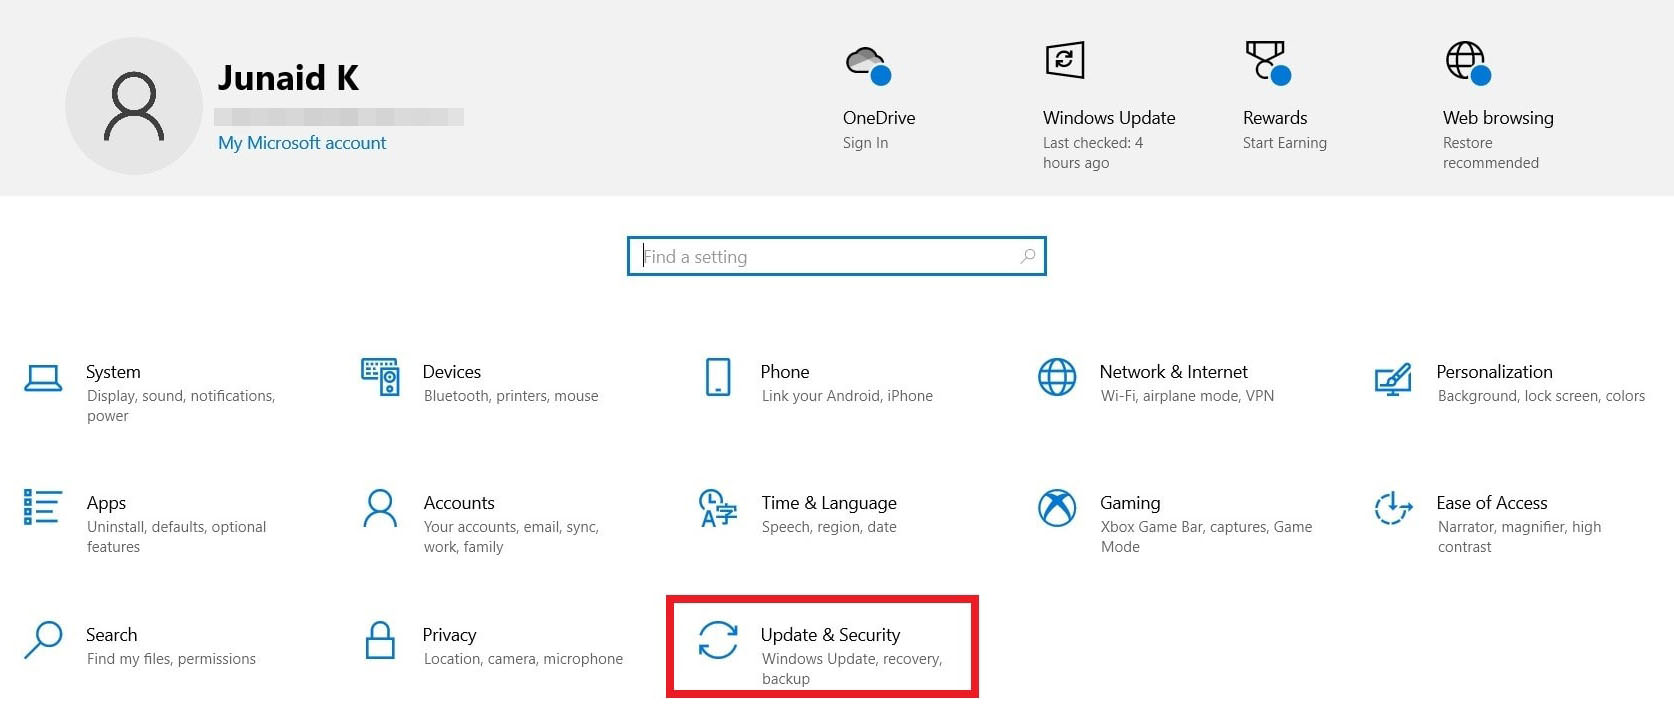
- Press Windows key + I. Go to Update & security.
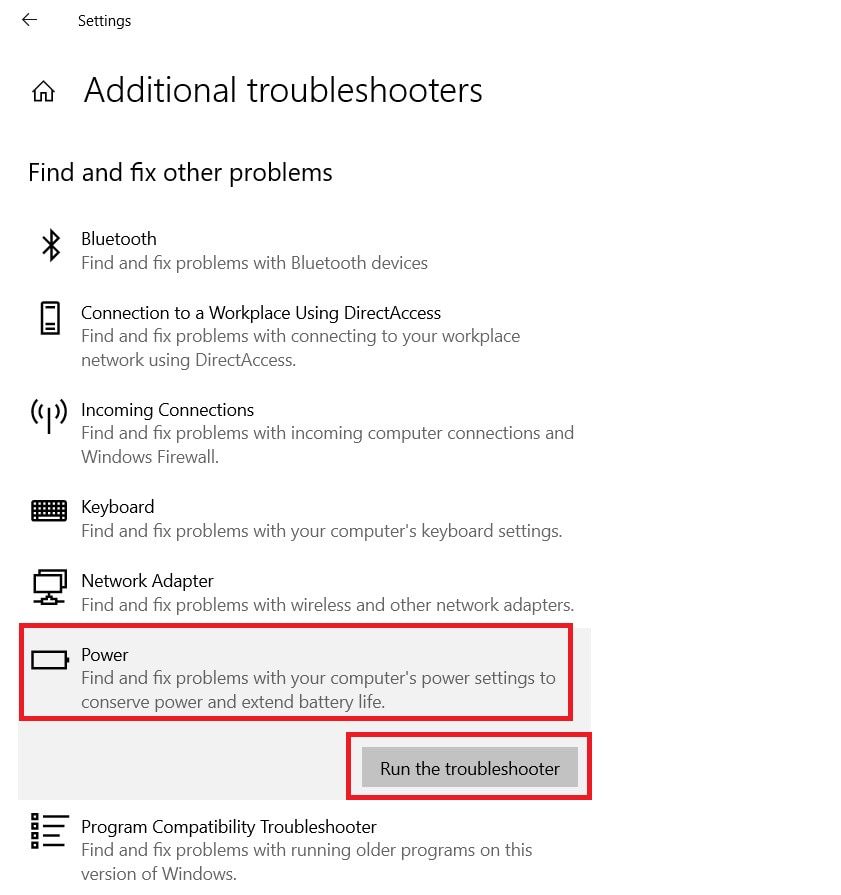
- Click Troubleshoot in the left pane. In the right pane, click Additional troubleshooters.
- Now select Power from the options and click Run the troubleshooter. The troubleshooter will start detecting any issue related to the power supply.
- The Power troubleshooter provides an analysis of the problem after the scanning. The Troubleshooter will most likely fix any issues with the power supply. However, in a few circumstances, it may provide some suggestions.

If there are any Power troubleshooting instructions, follow them.
Conclusion
In this article, I have discussed solutions to the laptop battery charging issue. In most cases, the quick fixes work for most users.
Different users encounter different issues. Sometimes, there may be a battery health issue, a charger cable burn out or an issue in the charger port.
When you’ve done all of your research and attempted every possible troubleshooting tip and trick, your last best option is to seek expert help. Take your laptop to a trusted repair shop for further detailed troubleshooting.