How to Use OpenClaw with DeepSeek
OpenClaw is a powerful open-source tool that transforms AI into an autonomous agent. Unlike basic chatbots that are confined to a browser tab or an app, OpenClaw allows AI to execute tasks directly on your machine, such as managing files, running terminal commands, reading calendars, and even sending messages to WhatsApp, Telegram, and Discord.
While OpenClaw offers seamless, out-of-the-box support for industry giants like OpenAI, Anthropic, and Google Gemini, unfortunately, it currently lacks native integration for DeepSeek.
This can be a significant hurdle because DeepSeek provides a model, DeepSeek v3, that rivals GPT-5, but at a staggering 95% lower cost.
In this guide, we’ll walk you through the steps, applying a few manual configurations, so we can have the best of both sides: OpenClaw’s automation capabilities with DeepSeek’s cost-efficient intelligence.
Let’s get started.
Prerequisites
Before we move further, make sure that you have the following ready.
- Node.js (v22 or higher) and NPM
- DeepSeek API key
Once you have them ready, you can proceed to install and set up OpenClaw.
Step 1: Installing OpenClaw
First, fire up your terminal and then hit the following command to install OpenClaw:
npm install -g openclaw
Note: This installation step might take a while depending on your internet connection speed.
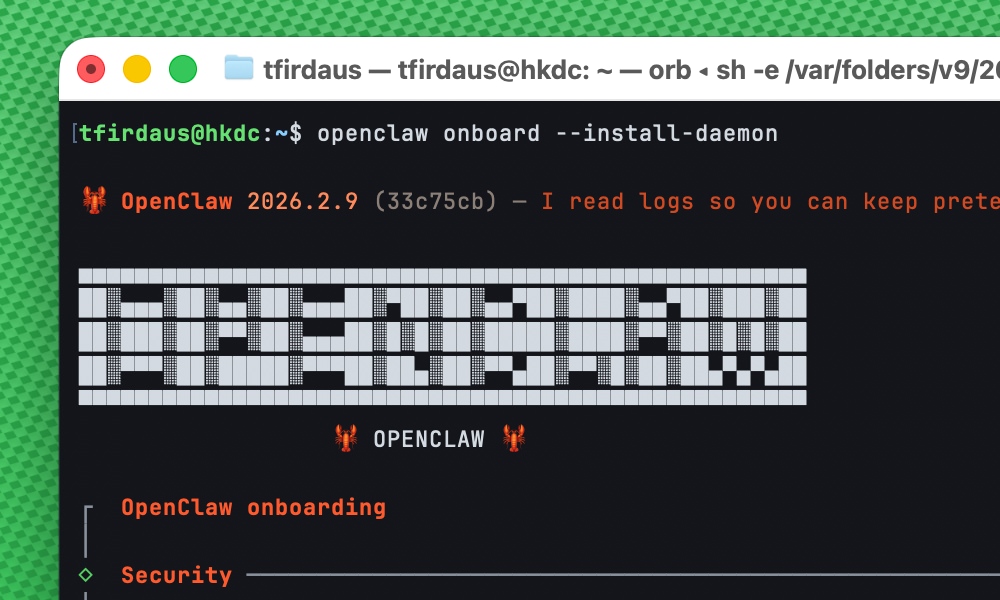
Step 2: Run Onboarding
Next, we need to run the onboarding process.
openclaw onboard --install-daemon
This will install the OpenClaw daemon and guide you through selecting models, providers, and communication channels.
In this example, we are going to focus on integrating DeepSeek. When prompted, use the left and right arrow keys to toggle between options, and hit Return to select the desired option. Here’s how you can answer the following questions:
- I understand this is powerful and inherently risky. Continue? Yes
- Onboarding mode. Quickstart
- Model/auth provider. Skip for now
- Filter models by provider. Minimax (Simply because it has 2 models, which makes it easier to select and cleanup later)
- Default model. minimax/MiniMax-M2
- Select channel. Skip for now
- Configure skills now? No (We can always reconfigure it later)
- Enable hooks? Skip for now (hit Space to select)
- How do you want to hatch your bot? Do this later (Right now, it won’t work since we haven’t configured DeepSeek yet)
Once you see Onboarding complete. Use the dashboard link above to control OpenClaw.
, you can hit Ctrl + C to exit the onboarding process, and proceed to our next step.
Step 3: Configure DeepSeek Models
We’ll need to modify the configuration file which is located in the ~/.openclaw/openclaw.json file. We’ll begin with defining DeepSeek models by editing the models section in the configuration file.
Now, let’s add the DeepSeek models configuration to the configuration file:
{
    "models": {
        "mode": "merge",
        "providers": {
            "deepseek": {
                "baseUrl": "https://api.deepseek.com/v1",
                "apiKey": "${DEEPSEEK_API_KEY}",
                "api": "openai-completions",
                "models": [
                {
                    "id": "deepseek-chat",
                    "name": "DeepSeek Chat (v3.2)",
                    "reasoning": false,
                    "input": [
                    "text"
                    ],
                    "cost": {
                        "input": 2.8e-7,
                        "output": 4.2e-7,
                        "cacheRead": 2.8e-8,
                        "cacheWrite": 2.8e-7
                    },
                    "contextWindow": 128000,
                    "maxTokens": 8192
                },
                {
                    "id": "deepseek-reasoner",
                    "name": "DeepSeek Reasoner (v3.2)",
                    "reasoning": true,
                    "input": [
                    "text"
                    ],
                    "cost": {
                        "input": 2.8e-7,
                        "output": 4.2e-7,
                        "cacheRead": 2.8e-8,
                        "cacheWrite": 2.8e-7
                    },
                    "contextWindow": 128000,
                    "maxTokens": 65536
                }
                ]
            }
        }
    }
}
Notice that the apiKey is using an environment variable ${DEEPSEEK_API_KEY}. This is to ensure that the API key is not exposed in the configuration file. Later we’ll need to set this environment variable before running OpenClaw.
Step 4: Configure Agents
Next, we need to configure the agents section, which sets the list of models and the default model to be used by the agent.
In this case, we’ll modify the agents section to use DeepSeek models that we’ve just defined in the previous step, as follows:
{
    "agents": {
        "defaults": {
            "model": {
                "primary": "deepseek/deepseek-chat"
            },
            "models": {
                "deepseek/deepseek-chat": {},
                "deepseek/deepseek-reasoner": {}
            },
            "workspace": "~/.openclaw/workspace",
            "compaction": {
                "mode": "safeguard"
            },
            "maxConcurrent": 4,
            "subagents": {
            "maxConcurrent": 8
            }
        }
    }
}
Step 5: Set Environment Variable
Now, we need to set the environment variable DEEPSEEK_API_KEY to the value of our DeepSeek API key.
Linux and macOS
On Linux and macOS, you can run the following command in your terminal:
export DEEPSEEK_API_KEY="your_api_key_here"
To persist the API key across sessions, you can also add the above line to your ~/.bashrc, ~/.zshrc, or /etc/environment file.
Don’t forget to replace your_api_key_here with your actual DeepSeek API key. And if you’ve just added it in one of the files, you’ll need to restart your terminal for the changes to take effect.
Windows
On Windows, you can set the environment variable for the current session in Command Prompt:
set DEEPSEEK_API_KEY=your_api_key_here
Or, setx, for example:
setx DEEPSEEK_API_KEY "your_api_key_here"
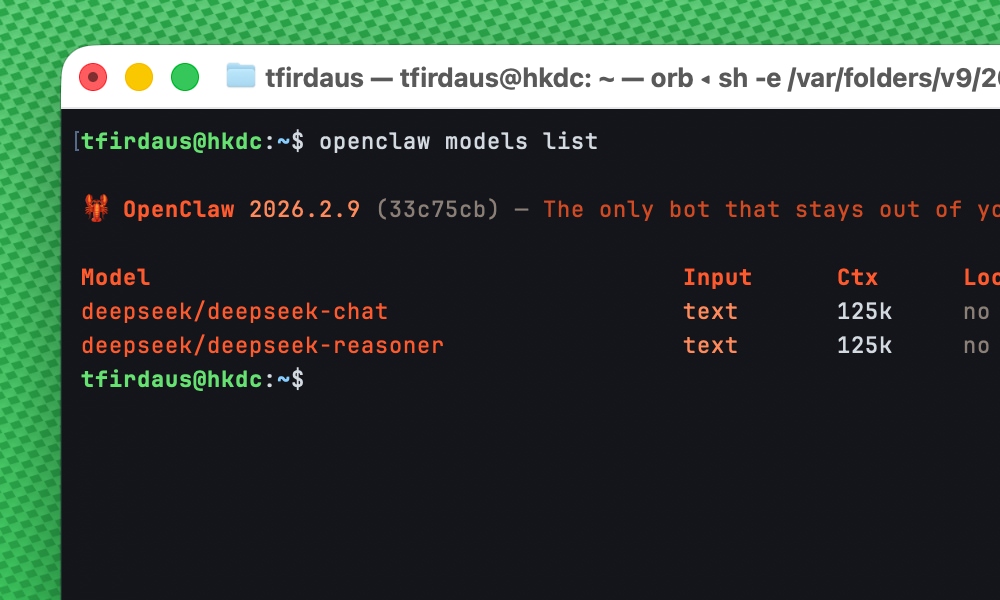
Step 6: Ensure DeepSeek Models are on the List
Now that we’ve configured the models and set the environment variable, we can verify that the DeepSeek models are available to OpenClaw by running the following command:
openclaw models list
You should see the following output:
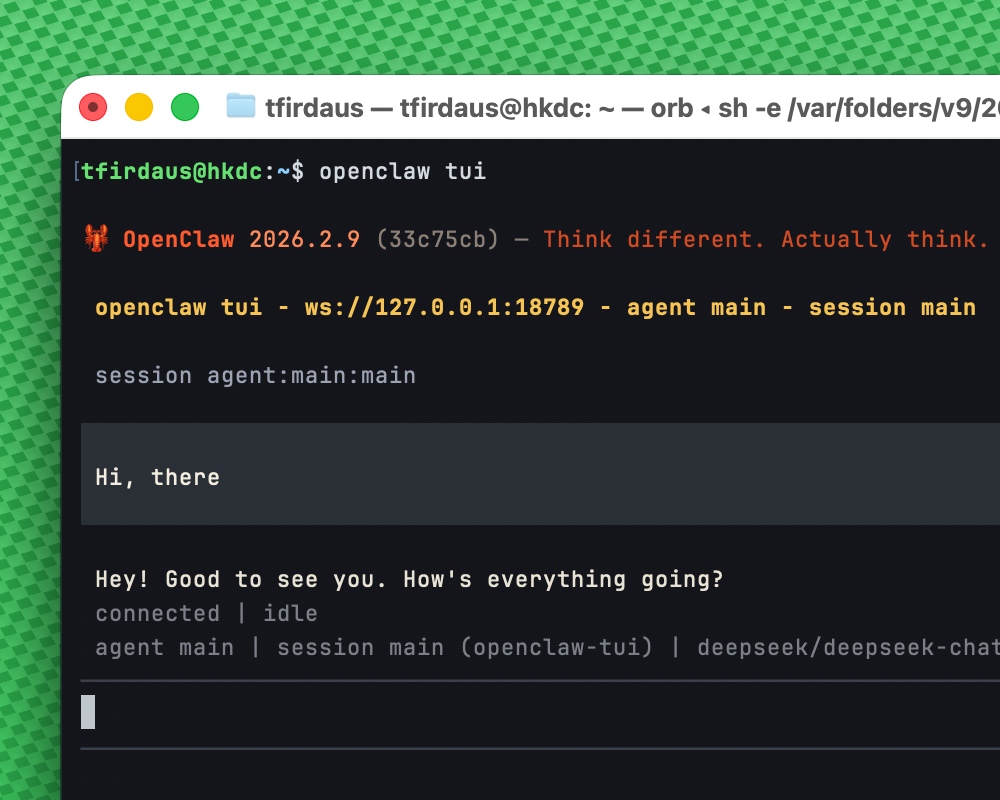
Step 7: Hatch Your First Agent
Everything is now configured. We can now hatch our first agent.
In this case, I’m going with TUI as the interface. So we run:
openclaw tui
This will start the TUI interface where you can chat with the agent. And we can see the model that’s currently being used is deepseek/deepseek-chat.
Note: If you have a previously active session or have previously installed OpenClaw, you need to restart the gateway before running a new TUI session. Run the following command:
openclaw gateway restart
Ensure you do this before running a new TUI session.
Conclusion
And there you have it! You’ve successfully bridged OpenClaw with DeepSeek.
Now it’s time to put your new agent to work. Whether it’s managing complex workflows, handling files, or automating tasks and messaging.
You’re all set to do more for less.