Building a URL Shortener with PHP
Having your page URL shorter has several benefits. First, it reduce the number of characters which would be handy for sharing on chats or social media that impose character limits like Twitter and Facebook.
You can also use short URL to mask a URL like those for affiliates that contains special parameters. And you can also track the number of visits from these URLs which can be useful tracking of a campaign or for analytics.
There are a number of service both or paid where you can shorten URLs easily. Bit.ly for example is one of the most prominents in this category. But did you know that you can actually build your own URL shortener?
Building your own means that you are in control of all the data. You can also use your own domain. Or, add customize functionalities or custom integration which might not be possible to have in the paid service. If you feel adventurous, follow along this article; we’ll show you how.
10+ Best Free URL Shortening Services
In this post we have 40 of them, most of which you probably have not heard of. Some... Read more
Requirements
Before starting this tutorial, we would assume that you’d already be familiar with web development process and comfortable working with the stacks like the PHP and MySQL to some degree. Also, you will also need the following:
1. Hosting Account
It does not matter where you host it as long as it could run PHP and MySQL. I would suggest to get one that provides cPanel and SSH access since we would like to have it set up directly on the host rather the computer localhost.
2. Domain
You can pick any TLD; the the shortest the domain the better.
3. Supporting Tools
It’ll also be nice if it also provides supporting tools like Composer and Git as we would need them to pull some PHP libraries.
Now we’ll start putting all these together to get our custom Short URL application up and running.
Step 1: Getting a hosting account
Get a hosting account. For this tutorial we are going to host our Short URL application using HostArmada.

Since we don’t need that high-specification, we choose Host Armada’s Web Warp hosting option. The hosting runs on Nginx, with:
- 30 GB of SSD,
- 4 Cores CPU, and
- 4 GB RAM.
It also includes free SSL certificate for each domain we added on the account, and it only cost $4.69/month.
On top of that it provides the base infrastucture that we need to run the application such as the cPanel with the SSH access, Git and Composer out of the box so we can start building our application rightaway instead of installing the tools.
Step 2: Point your domain
After you’ve got the hosting, you’d need a domain and point it to your hosting. This is done through the DNS manager which usually should be provided by the domain registrar where you register the domain or the hosting.
Basically you’d need to point the domain to the IP address provided by the hosting provider. But each provider would have slightly different panel as well as instruction to follow, so pick and follow one of the these references that would work with your provider.
- cPanel: How to manage the DNS Zones for your Domains in cPanel?
- VPS: How to Add Domains
- Cloudflare: Managing DNS in Cloudflare
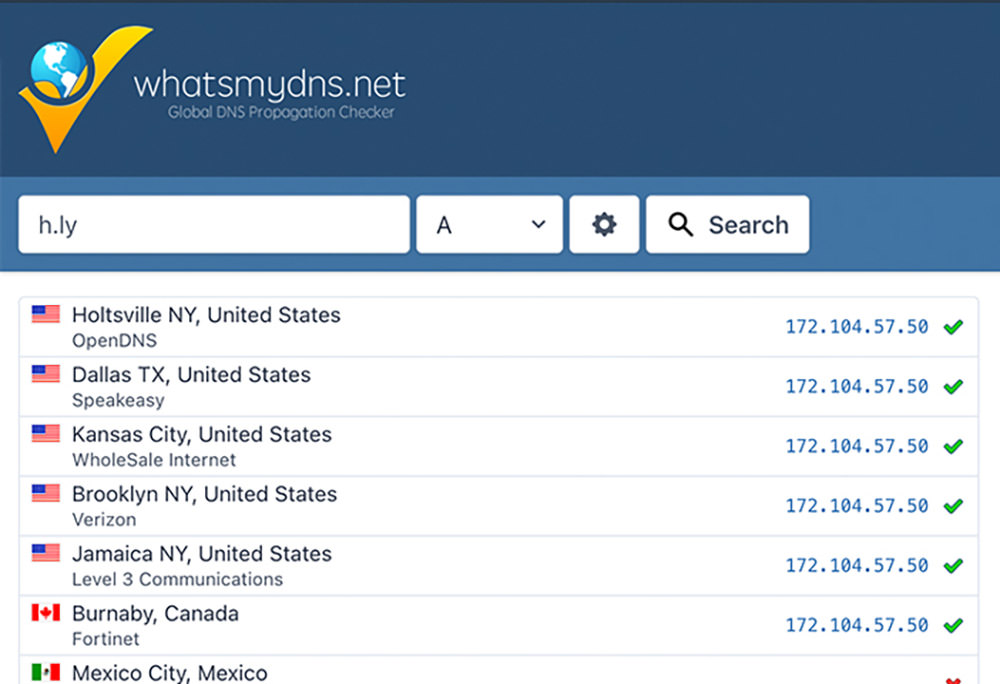
Keep in mind that DNS resolution may take about 24-48 hours after you’ve made the change to the IP. You can check the progress with tools like WhatsMyDNS.
Step 3: Logging in to SSH
SSH is a channel to run some application through command line. In this tutorial, we are going to run some command-lines like Git and Composer.
In cPanel, you can follow this article to setup SSH connection on macOS or Windows. If you find encounter issues on connecting to SSH, reach out to your hosting provider .
Step 4: Downloading Polr
Next you need to download Polr. It is an open-source PHP library that allows us to run and host your own URL shortener.

It provides the APIs and administration to manage the URLs, users, and some other customisations. We are going to download this library to the root directory (typically this directory is named public_html).
Run the following command:
git clone https://github.com/cydrobolt/polr.git --depth=1 .
Step 4: Configure the server
We are going to configure the host and Polr installation so it can run well and accessible from the domain. To do this, we’d first need to ensure that our host run on at least PHP7.2.
In cPanel, you can easily check and select it from Software > Select PHP version.

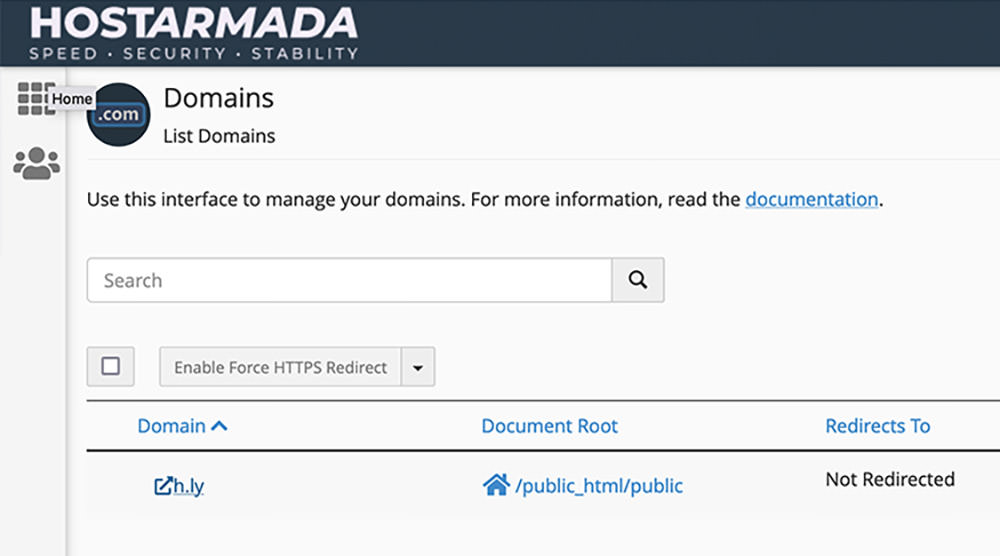
4.1: Configure the Root Directory
We also need to point the root directory to public that comes with the Polr library. This is the directory where the index.php file resides. This file will need to execute when the website get a request.
In cPanel, we can set it from Domains > Domains. Check the directory that the Document Root is pointing. In our case, this path directory is at ~/public_html/public.
4.2: Configure the Database
We need to create a new database to store the data like the ID, the URL, and the short URL itself. In cPanel, we can create a new database and attach a user from the MySQL Database Wizard. You simply need to fill in the input and follow the direction.
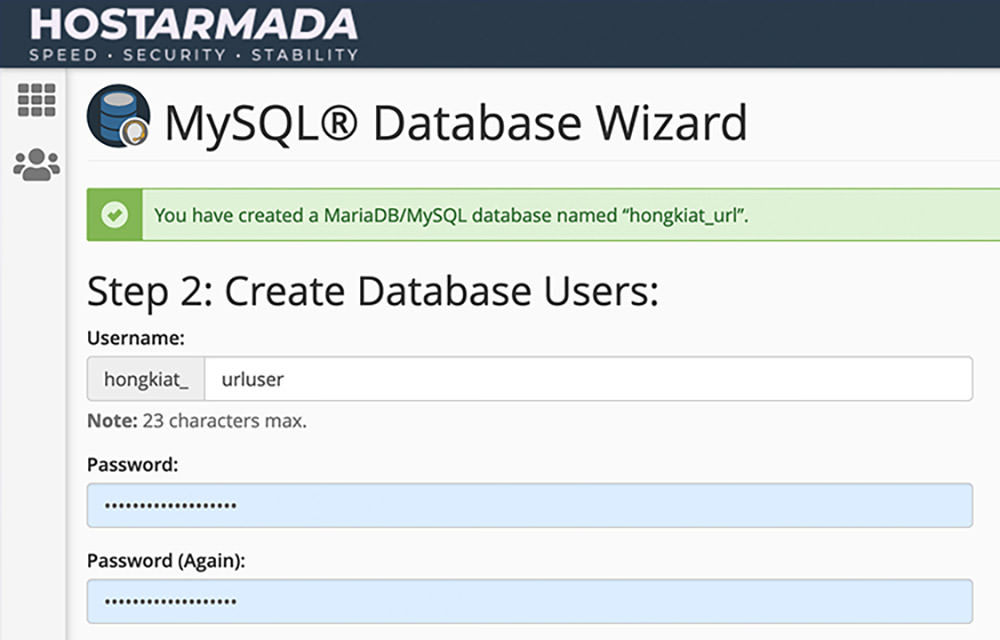
Note down the following as you will need it later:
- Database name.
- Database user and the user password.
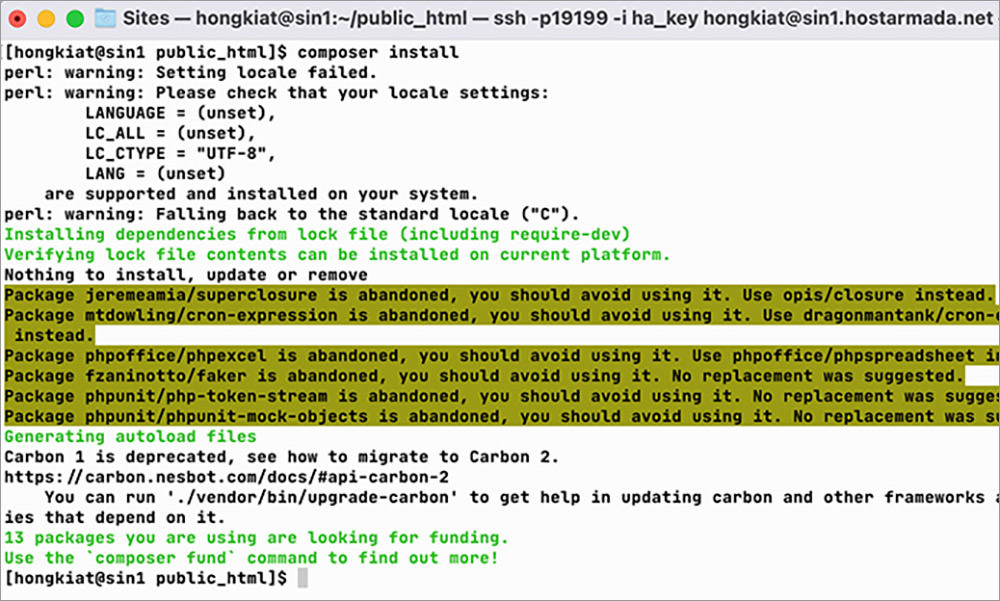
Step 5: Polr setup and installation
We can begin installing the library to our host. For this, run the composer command below to install the library dependencies.
composer install
…rename the file .env.setup to .env
mv .env.setup .env
Load the domain and /setup on the browser. On this page, you will see a form where you need to input the required information.
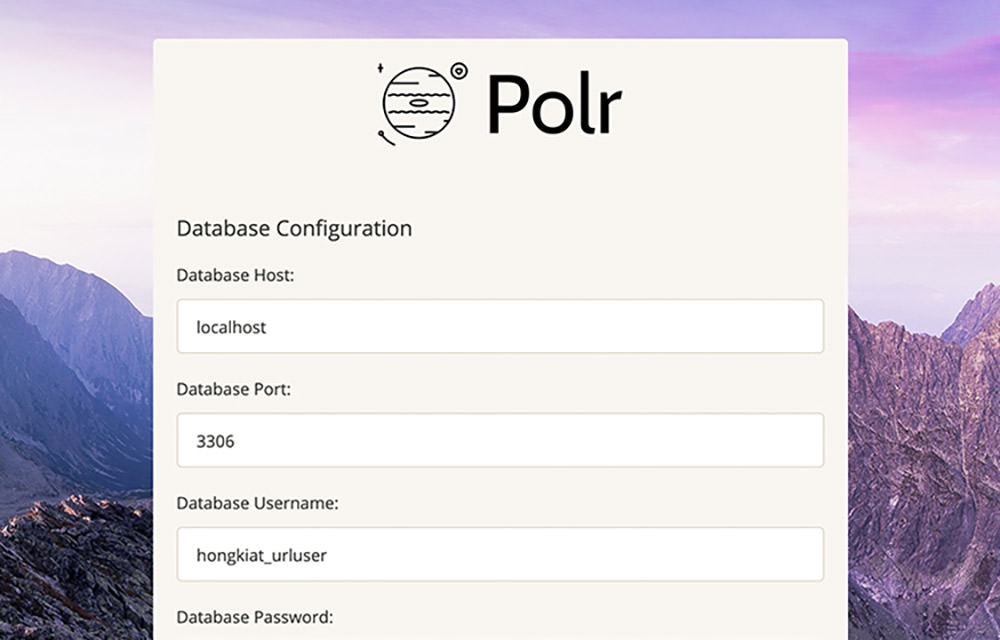
There are a number of inputs. But the most important ones are those in the Database Configuration and Application Settings.
Fill in the following information to connect to the database and the user.
- Database Host:
localhost - Database Port:
3306 - Database Username:
hongkiat_urluser(Change this with the one you set on Step 4) - Database Password:
*****(Change this with the one you set on Step 4) - Database Name:
hongkiat_urluser(Change this with the one you set on Step 4)
Once done, fill in the following in the main settings of the short URL application.
- Application Name: (fill this with anything)
- Application Protocol: (whether your application would run on HTTP or HTTPS. note that HTTPS requires SSL cert to be installed.)
- Application URL: (add the domain you’ve setup earlier in this tutorial)
You can proceed with setting up the rest of the optional inputs as you like. Click the Install button on that /setup page to install the application.
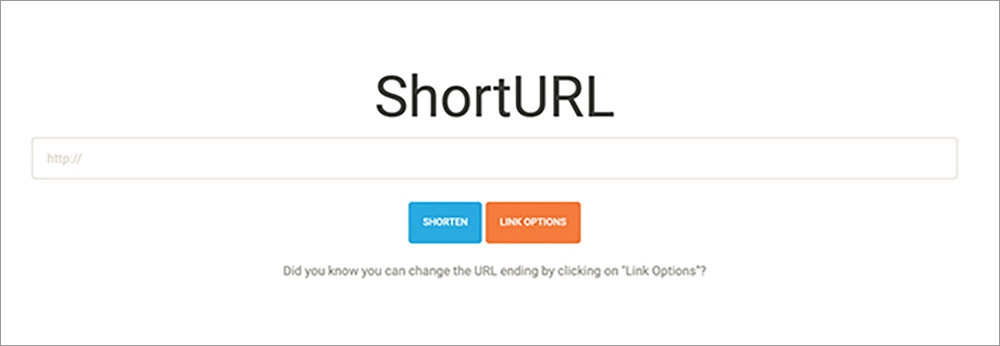
That’s all. The installation should be quick. Load the homepage when it’s done. You should see the input to shorten the URL as seen in the following screenshot.
Testing
To see if our short URL application works, we’ll try to add a URL, for example https://www.hongkiat.com/blog/windows-11-features/ and hit that Shorten button on the homepage.
Below, we can see that our application generated the short URL with our custom domain. It can also generate the QR code for the short URL if you intend to share the URL physically.
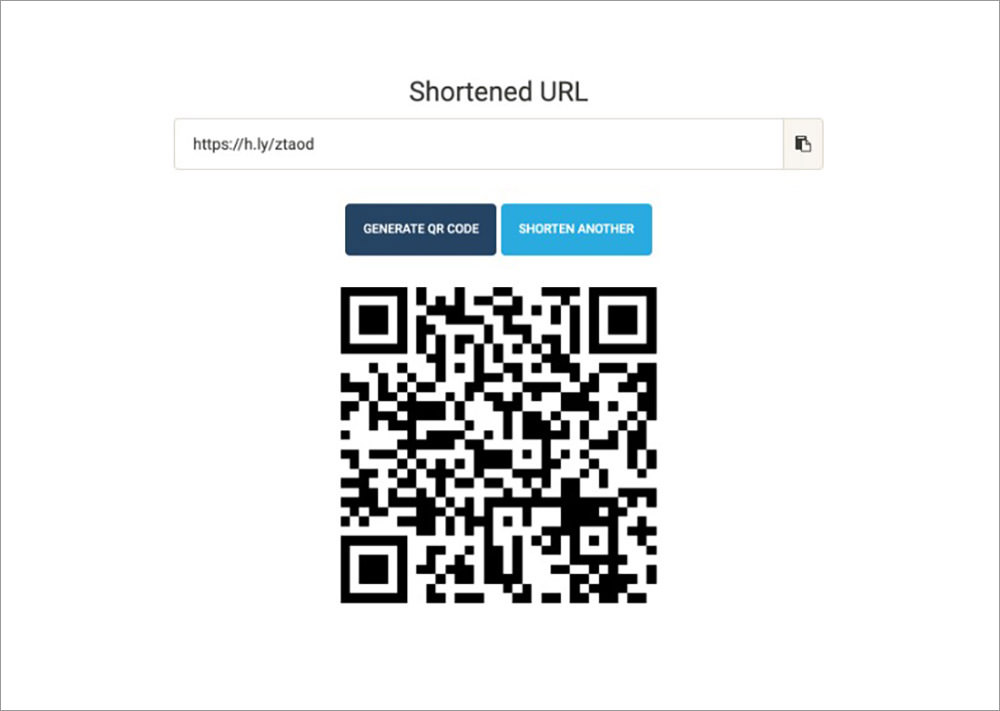
On top of that, you can also customize the short URL to generate instead of letting the application generating for you with random ID or character. To do this, click this Link Option and set the URL ending. Make sure to check if it’s still available and hit the Shorten button.

Wrapping up
Creating your own short URL application requires some technical know-how. It also takes time to setup. But as soon as you get through this you can potentially save money in the long run and have all the benefits that you can’t otherwise get on a paid SaaS.
You have all the data and you can use your own brandable domain without additional cost. If you’re a PHP developer you can build custom feature and utilise all the APIs without restrictions.
So, finally, I hope this tutorial can help you on building your own Short URL.