How to Properly Backup Your iPhone Data
Imagine losing all your valuable photos, essential contacts, and crucial documents in an instant. It’s a nightmare scenario that happens more often than you might think.
Your iPhone could get dropped, accidentally submerged in water, or become completely unresponsive. Our iPhones hold vast amounts of personal and professional data, making iPhone data loss a potentially devastating issue.
Thankfully, preventing data loss is simple; all you need to do is perform regular iPhone backups. In this guide, we’ll show you the best ways to back up iPhone data, ensuring your information is always safe and retrievable.
Note: If your primary concern is backing up iPhone photos and videos, check out our post on how to back up iPhone photos to your Mac.
Why Backup Your iPhone?
Key reasons to back up your iPhone regularly include:
- Recover data if your device is lost or damaged.
- Ensure a smooth transition to a new device.
- Restore data after resolving major issues.
- Protect against data corruption or malware attacks.
Methods to Backup iPhone Data
| Using iCloud | Apple’s cloud-based service for wireless backups, accessible from anywhere with internet. |
| Using iTunes/Finder | Local backup option using iTunes (Windows/older macOS) or Finder (macOS Catalina and later). |
| Using Third-Party Software | Applications offering flexibility and additional features for iPhone backups. |
Backup with iCloud
- Ensure your iPhone is connected to a stable Wi-Fi network.
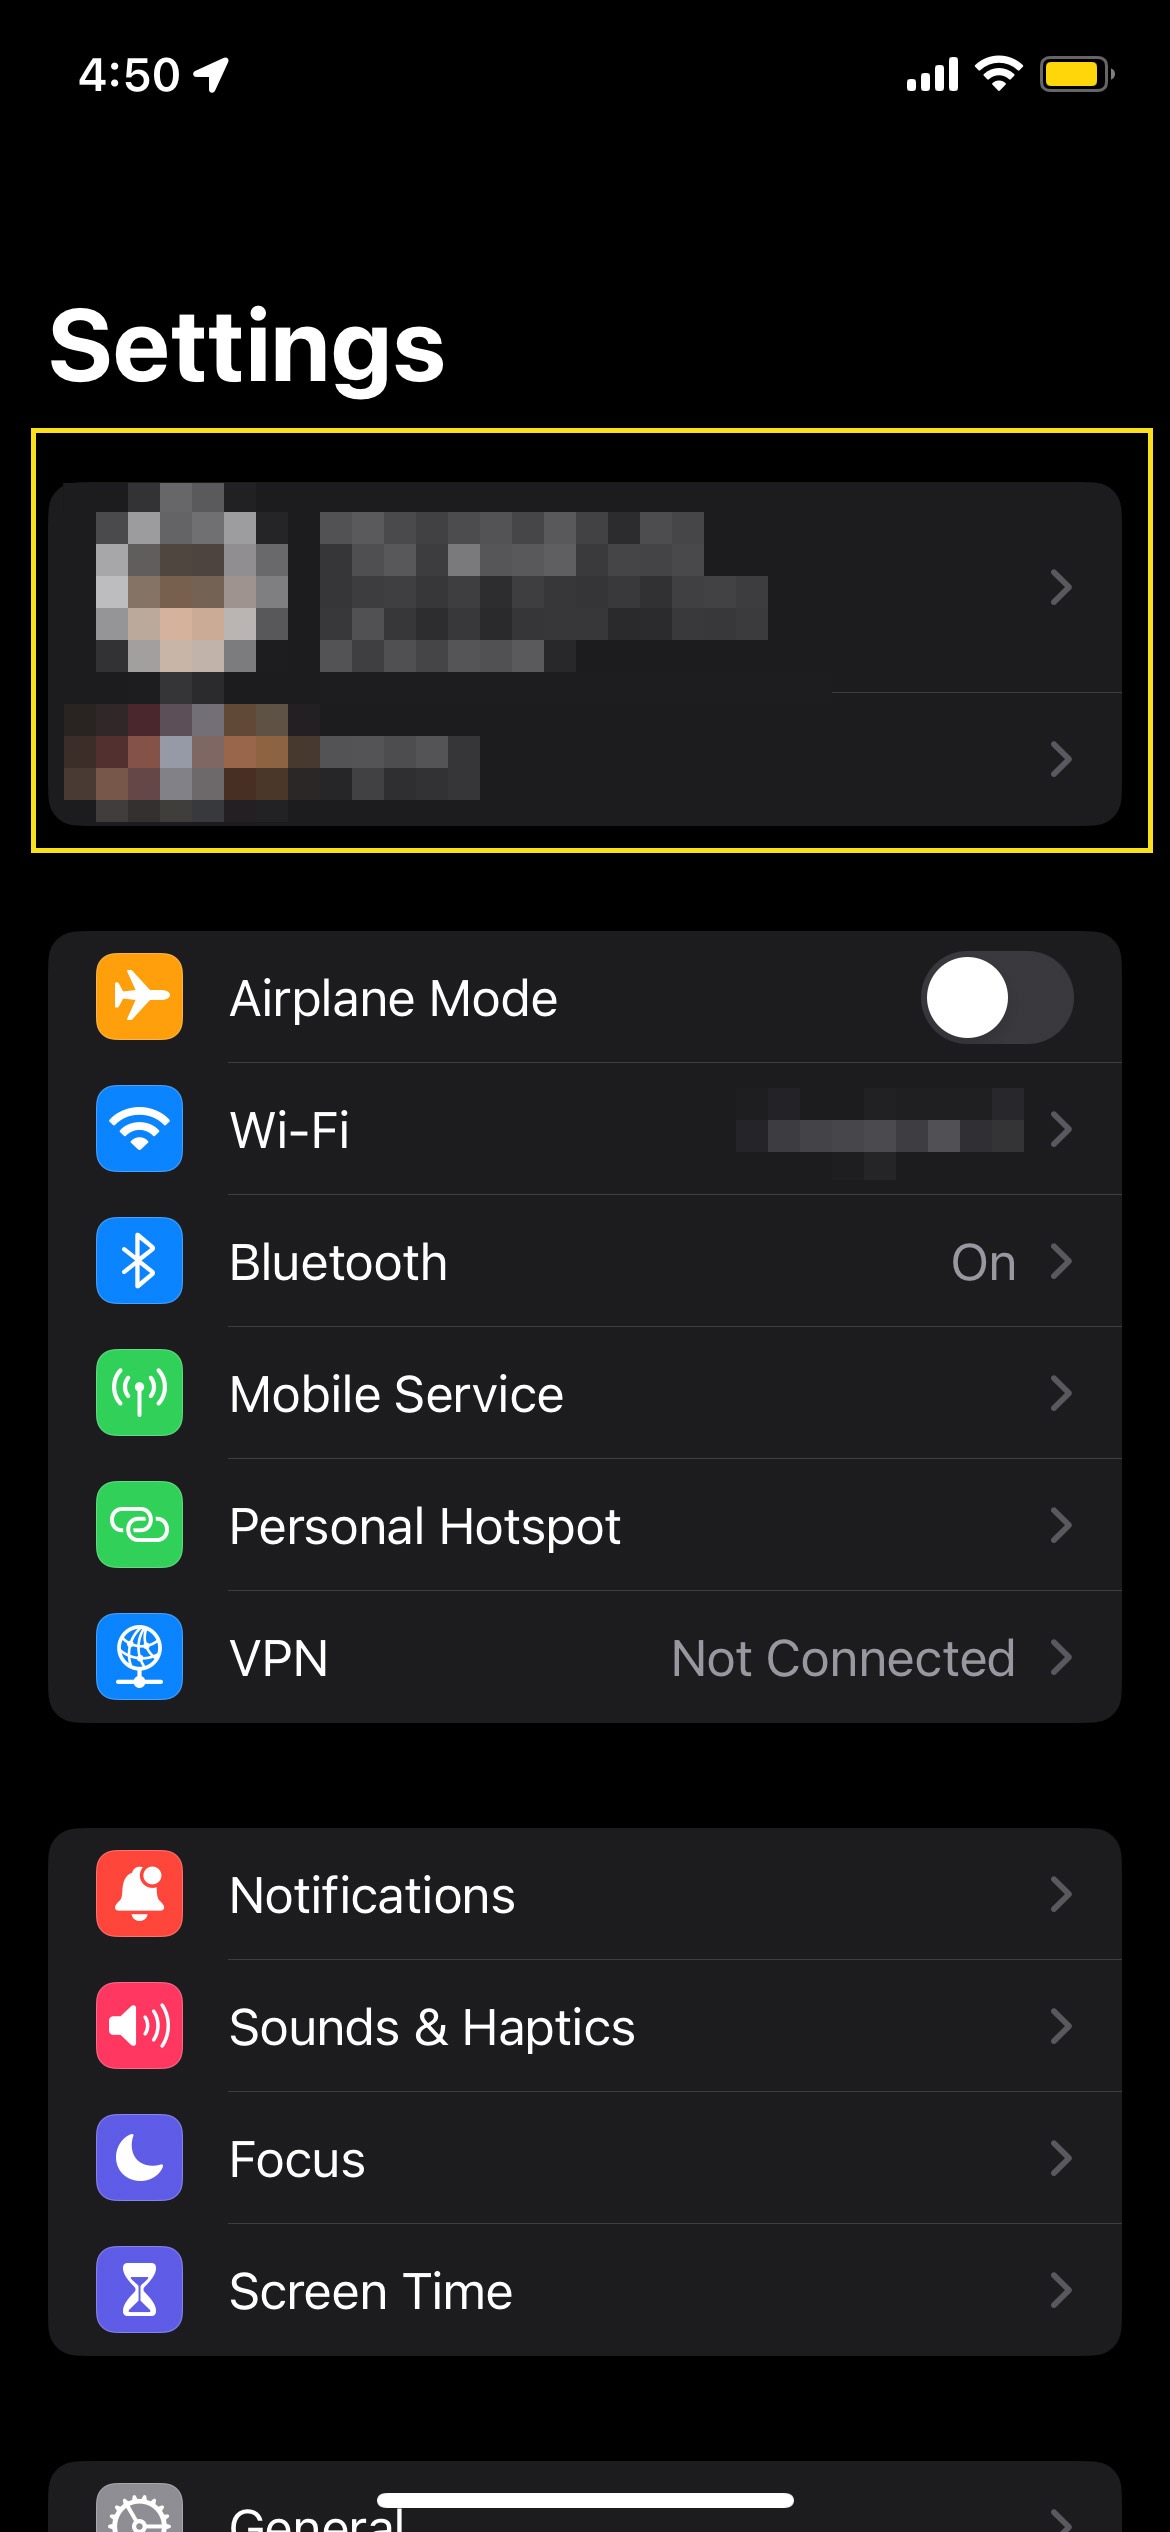
- Go to the Settings app on your iPhone and tap on your name at the top of the settings menu.
- Select iCloud from the list of services.
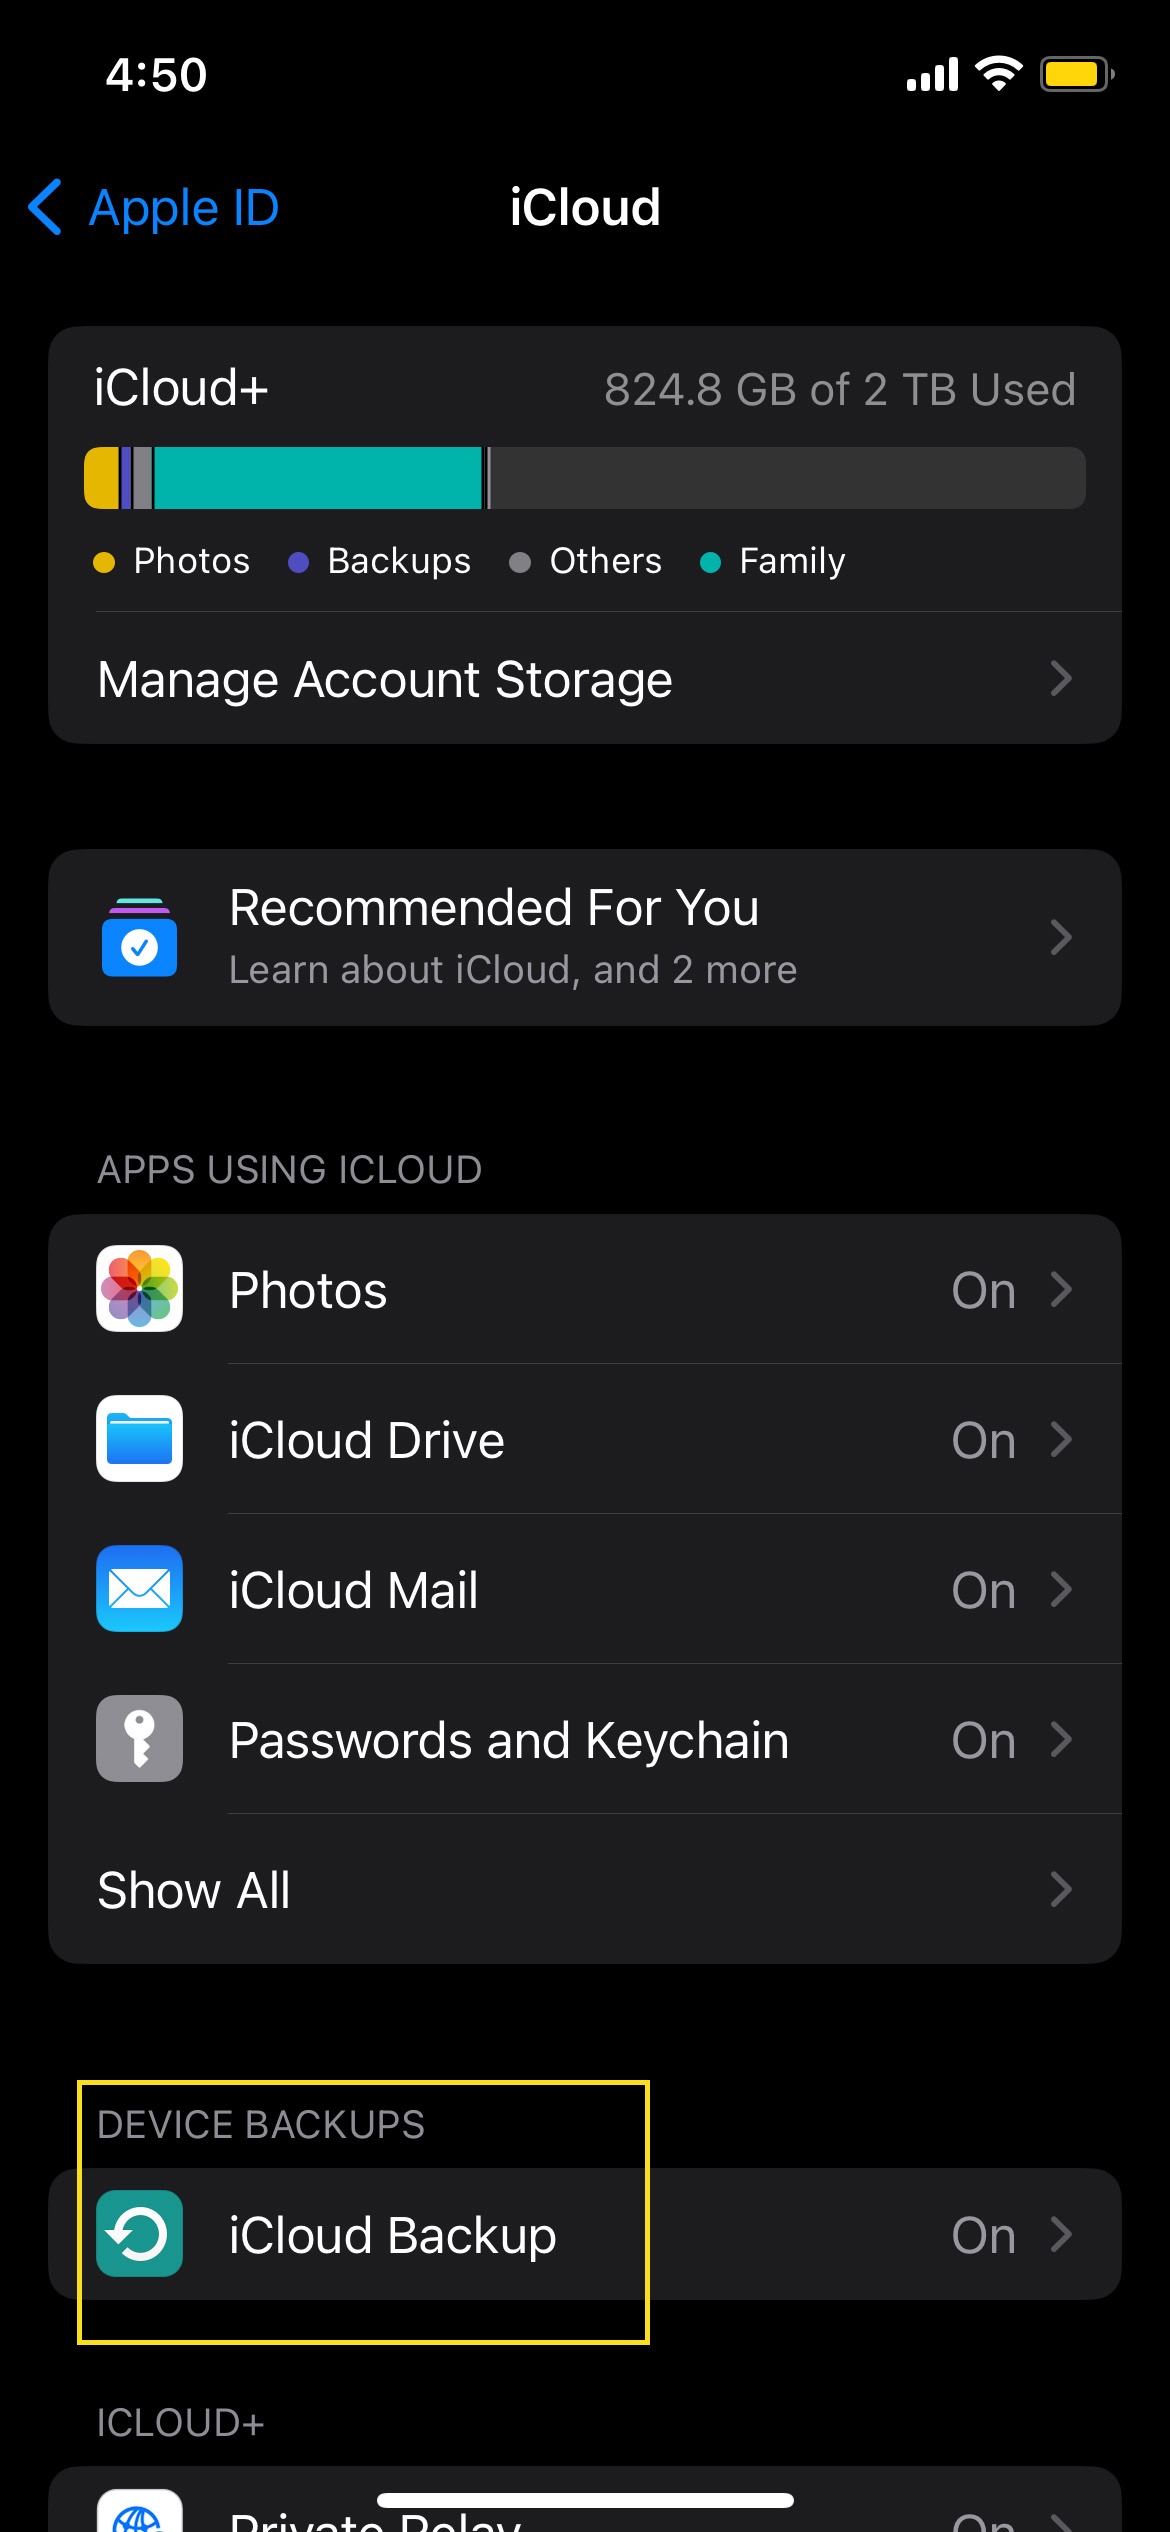
- Scroll down and select iCloud Backup.
- Turn on the iCloud Backup toggle, or tap “Back Up Now” to start the backup immediately.


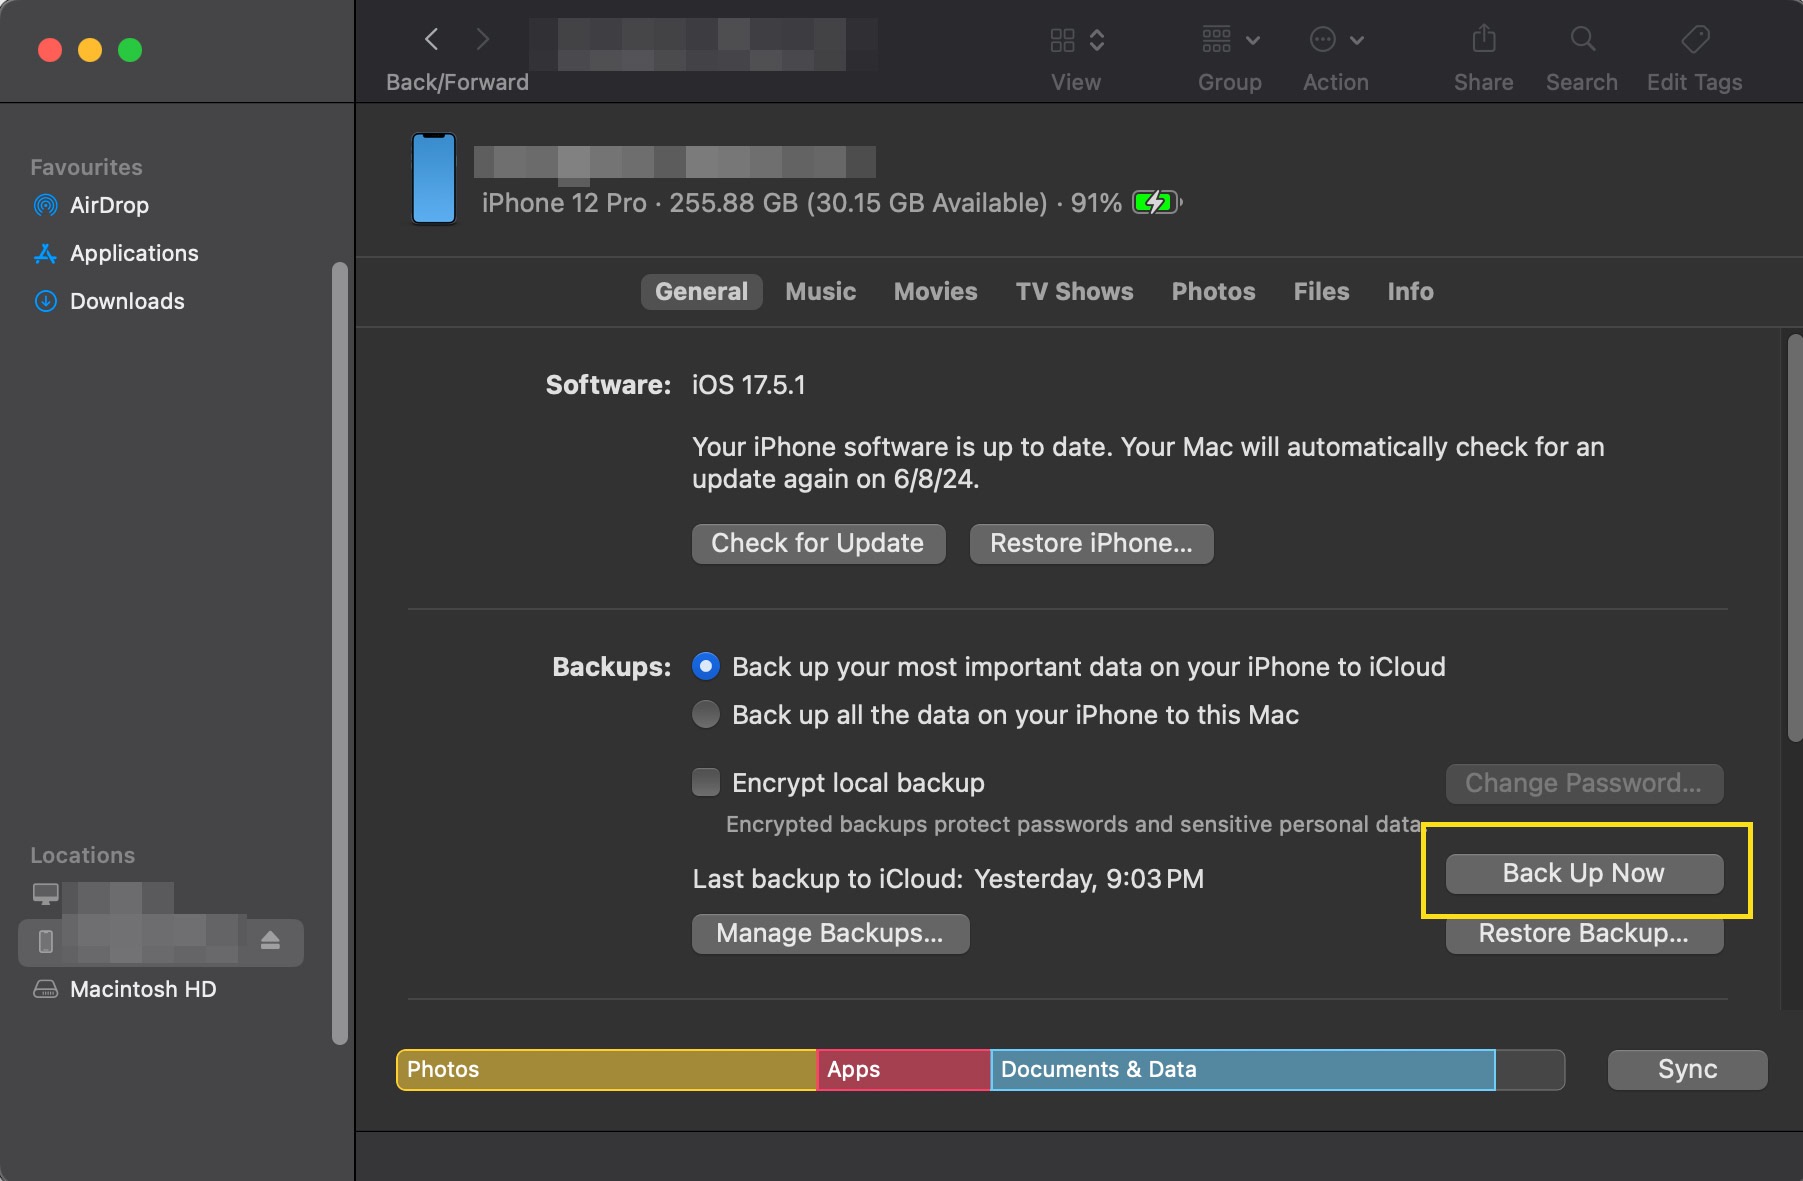
Backup with iTunes/Finder
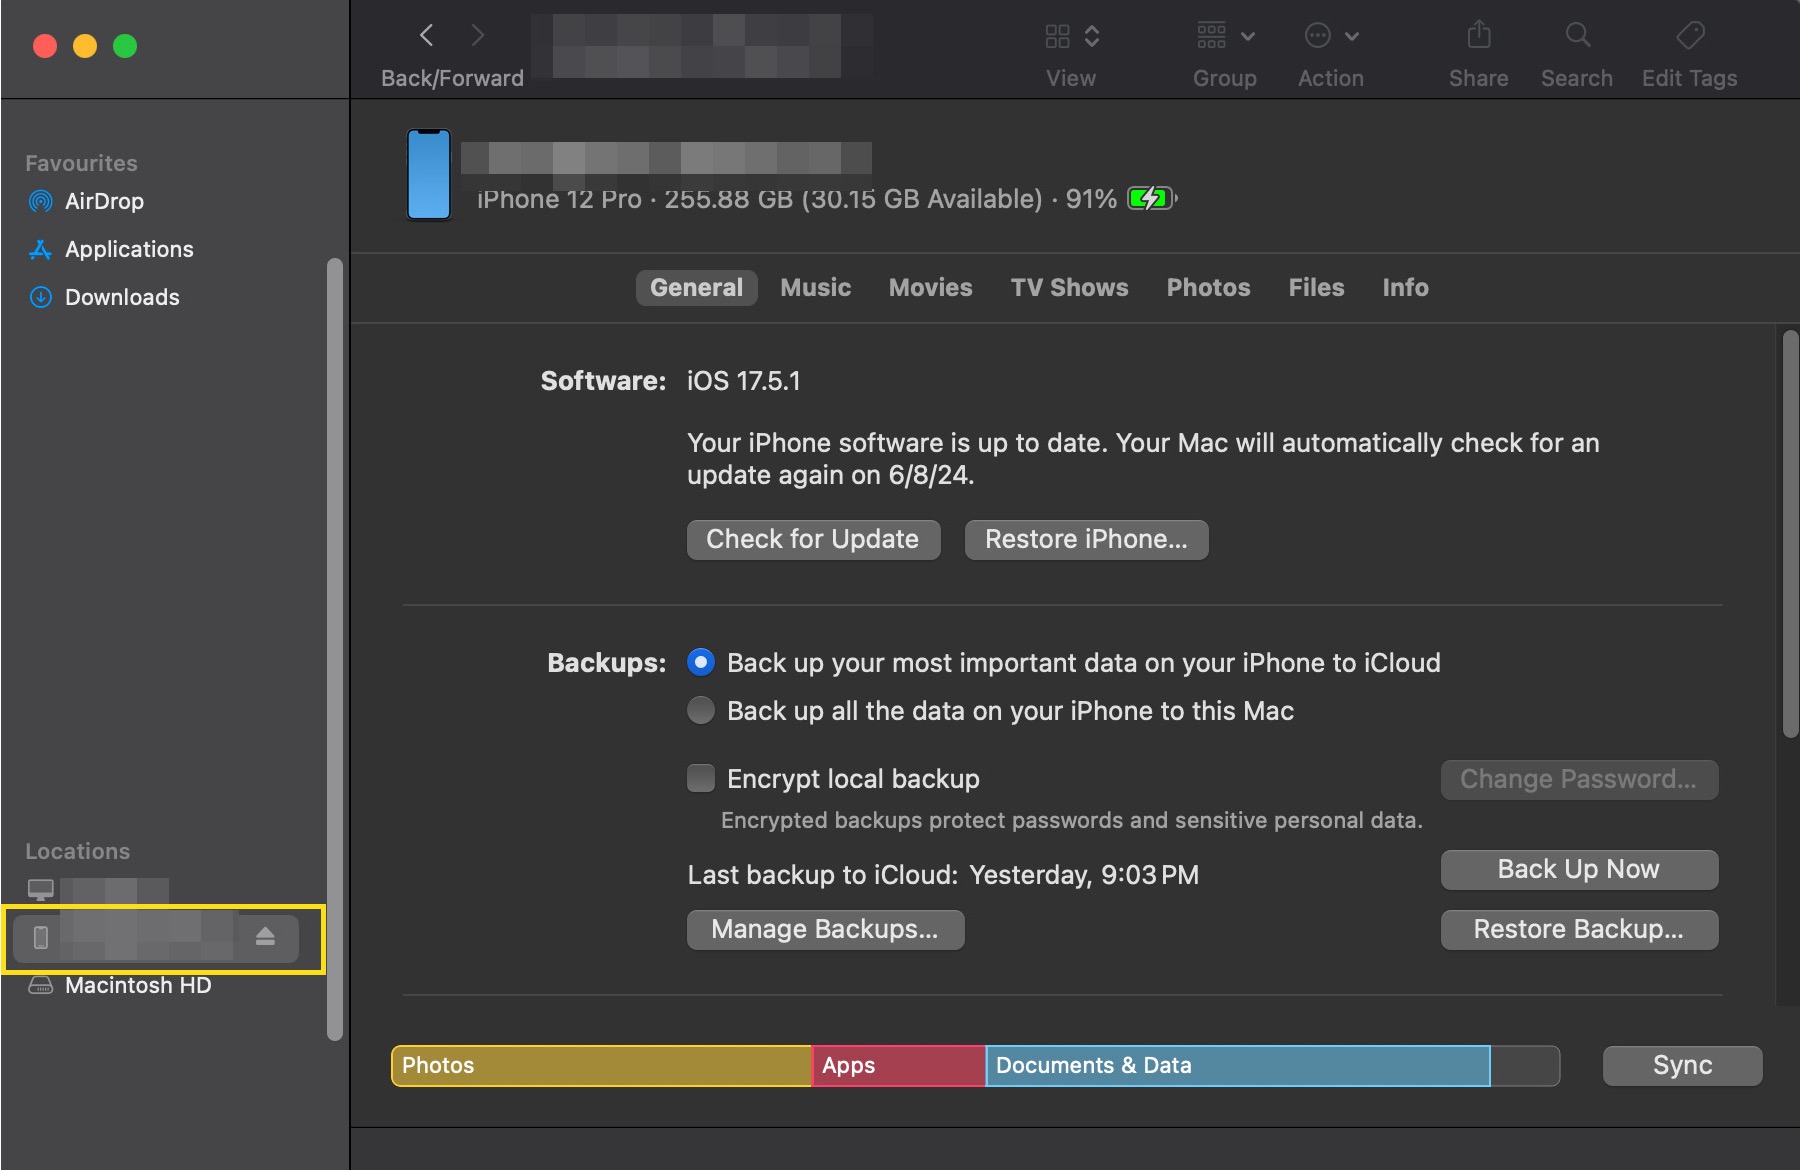
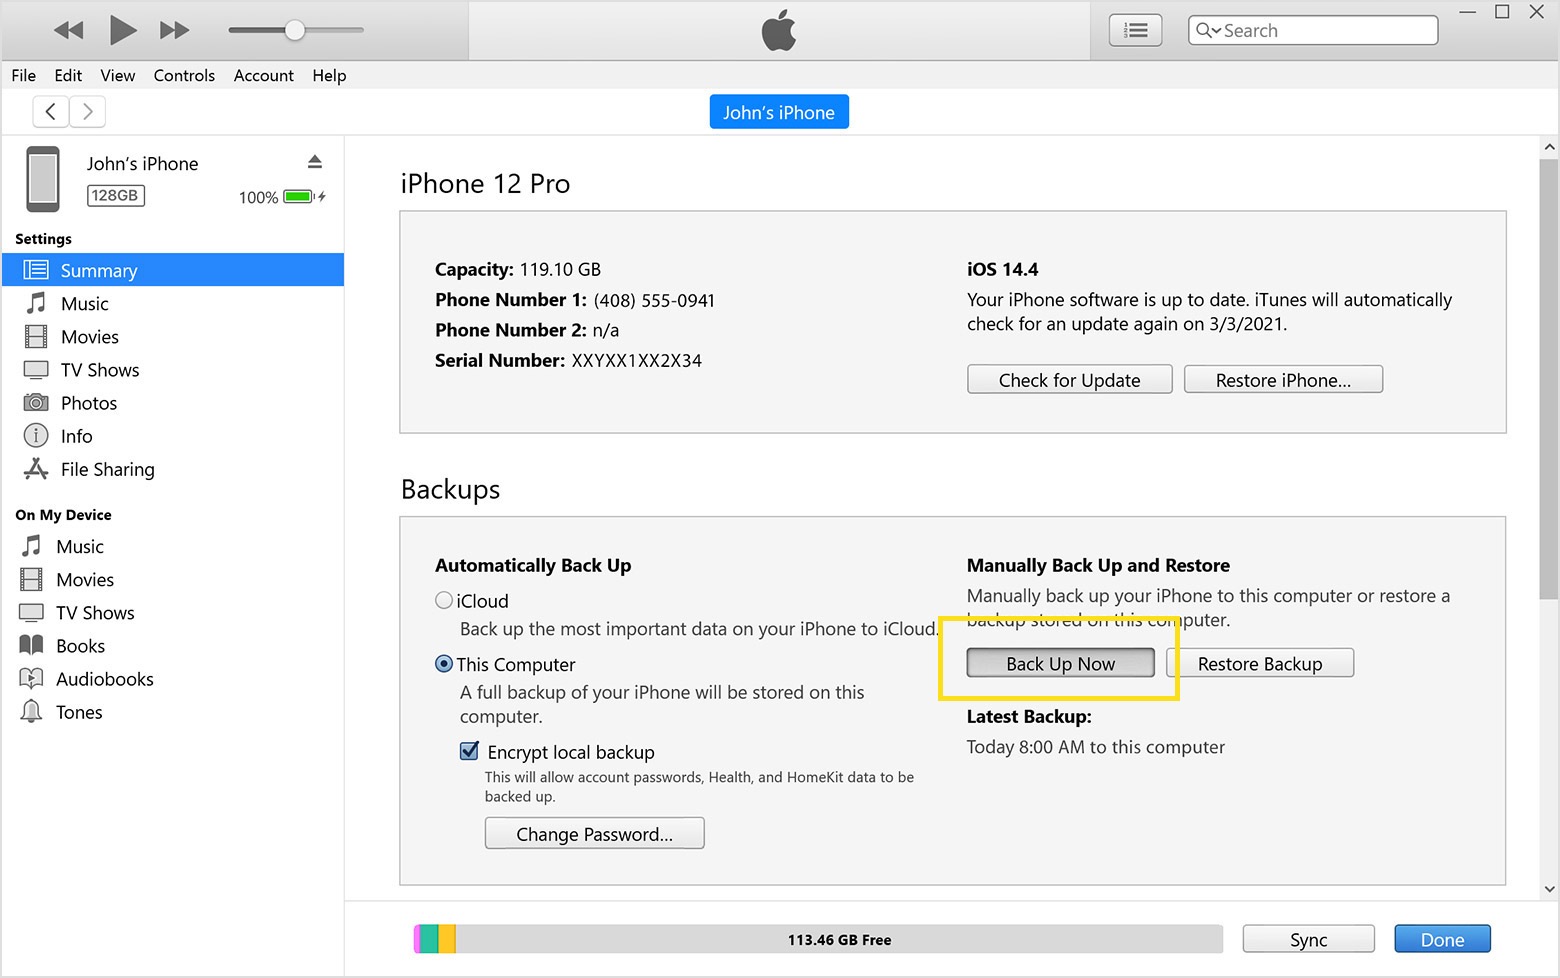
- Use a USB cable to connect your iPhone to your computer.
- Open iTunes if you’re using a PC or Finder on macOS Catalina and later.
- In iTunes, click on the iPhone icon or select your iPhone from the sidebar in Finder.
- Under the “Backups” section, select “This Computer” to store the backup locally.
- For added security, check “Encrypt iPhone Backup” and set a password (optional).
- Start the backup process by clicking “Back Up Now.“
Backup with Third-Party Software
First, select a reliable third-party backup software, such as Dr.Fone or iMazing. These apps are well-regarded for their efficiency and ease of use. Check out our previous review on Dr.Fone.
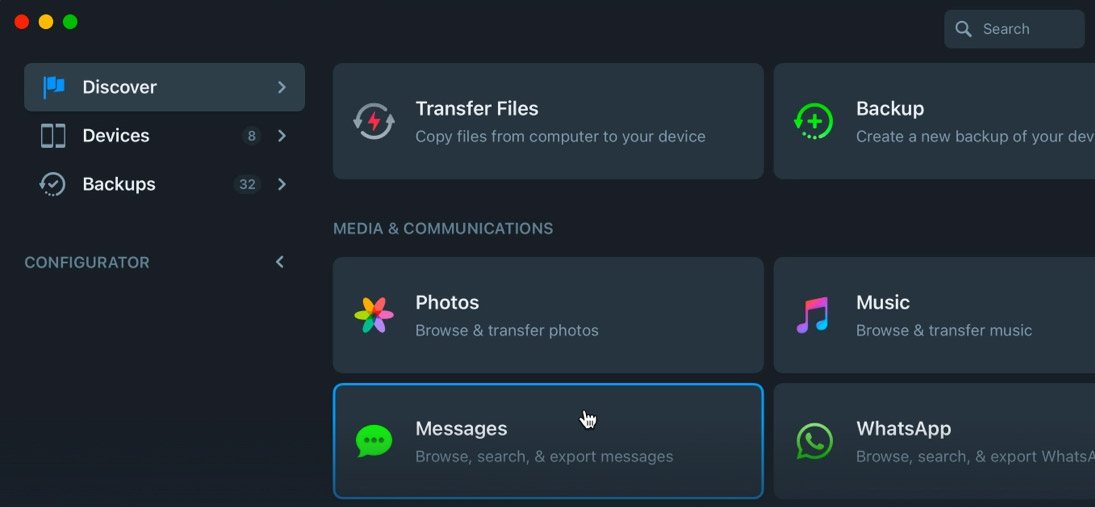
Next, download, install, and launch the chosen software on your computer. Ensure you follow the installation prompts to complete the setup process correctly.
After installing the software, use a USB cable to connect your iPhone to your computer. The software should automatically detect your device and prompt you with the next steps.
Follow the on-screen instructions provided by the software to back up your data. The process may vary slightly depending on the software you choose, but generally, it will guide you through the necessary steps to ensure your iPhone data is safely backed up.
Final Thoughts
Whichever method you choose – whether using Finder on macOS, iTunes on Windows, or backing up directly to iCloud from your phone – the key is to make sure you back up your iPhone regularly.