How to Enable Maintenance Mode on Your WordPress Site
Sometimes, you may need to put your website into maintenance mode for upgrades. This will make your website temporarily unavailable to public access. You wouldn’t want errors to pop up while you are running important updates in the background, right?
There are several ways to put a website into maintenance mode, and the technical details may differ. If you are using WordPress, here are three ways to enable maintenance mode on your website.
Smarter Way To Prevent Image Hotlinking with .htaccess
Have you noticed someone stealing your images, directly taking the URL and display on their websites without your... Read more
Using .htaccess
If you are using the Apache server, you can use .htaccess to control access to the directories within the server and send a server status response code.
To put the website into maintenance mode, you can use the 503 status code, which indicates that the server is temporarily unavailable.
Before specifying anything in .htaccess, create a new file in .html or .php format, and add a message in the file, for example:
Sorry we are down for maintenance, but we’ll be back up shortly.
Style your page. Next, open the .htaccess file in your server, and add the following:
<IfModule mod_rewrite.c>
RewriteEngine on
RewriteCond %{REMOTE_ADDR} !^123\.456\.789\.000
RewriteCond %{REQUEST_URI} !/maintenance.html$ [NC]
RewriteCond %{REQUEST_URI} !\.(jpe?g?|png|gif) [NC]
RewriteRule . /maintenance.html [R=503,L]
</IfModule>
This will set the server status code to 503, while also redirecting visitors to the maintenance page. You can set your IP address with the following line RewriteCond %{REMOTE_ADDR} !^123\.456\.789\.000 so that you will still be able to access your website.
WordPress Built-in Maintenance Page
When updating WordPress, plugins, or themes, you can create a file called .maintenance that says:
Briefly unavailable for scheduled maintenance. Check back in a minute.
This file will be automatically removed when the process is completed – if the process fails, the file could get stuck on your server, so you have to remove it manually.
The problem is that .maintenance is not customizable, as it is generated dynamically.
So, if your emphasis is on the overall appearance of your website, you can create a file named maintenance.php, which you can customize with CSS, then put it inside the wp-content folder. That way, the next time you update WordPress or plugins, WordPress will use the content inside this file.
The function is specified in wp-includes/load.php, like so:
if ( file_exists( WP_CONTENT_DIR . '/maintenance.php' ) ) {
    require_once( WP_CONTENT_DIR . '/maintenance.php' );
    die();
}
Using a Plugin
There are several WordPress plugins available to help put your website into maintenance mode, but my personal favorite is the Maintenance Mode plugin by Michael Wohrer. Although this plugin hasn’t been updated for about two years now, it still works perfectly.
Using the Maintenance Mode plugin, you can simply activate or deactivate maintenance mode with a few clicks. You can also specify how long the website will be in maintenance mode.
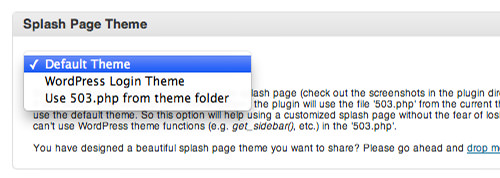
Additionally, this plugin comes with a default theme template to be displayed when maintenance mode is activated. You can also use your own theme by creating a 503.php file and uploading it to your theme directory. Just go to the Maintenance Mode Setting page and select the 503.php file you have created.
Conclusion
We hope you found this tutorial useful in helping you run your WordPress site more efficiently. For further reading on the subject, you can head over to the following sites:
- Redirect to Maintenance Page for Site Update – PerishablePress
- Function Reference: wp maintenance – WordPress Codex