Beginner’s Guide to Website SSL Certs
When building a web application that deals with personal data, security is the first priority. This is true not only true with online stores and shopping carts, but also just as much with popular social networks like Twitter and Foursquare. SSL is a secure protocol much like HTTP in that it can receive and transfer data over the Internet.
The whole concept is admittedly a bit convoluted but not so difficult to understand. If you’re a webmaster or someone just interested in learning about SSL certificates this guide should be perfect for you. I’ve put together this set of the most confusing terms to layout for beginners. Spend some time browsing here as well as reading other external articles on the topic. Security is vital to the success of any website and SSL is merely a stepping stone in the bigger picture.
Consumer Guide to Secure Online Transactions
Get insights on online transaction security, from understanding risks to adopting best practices for peace of mind. Read more
What is SSL?
SSL protocol stands for Secure Socket Layers and was originally developed by Netscape. It’s a process where data passed between the user and the server is encrypted/decrypted so that no external third party can hijack the connection.
SSL behaves like a digital passport which verifies the credentials of both yourself and the end web server. When both identities are verified, SSL grants a secured connection through HTTPS. This process is performed using certificates. I’ve broken down key aspects of an SSL certificate, which includes:
- The owner’s name
- Certificate’s serial number used for identification
- The Certificate’s expiration date
- The Certificate’s public key used to encrypt information
- The Certificate’s private key used to decrypt information (usually coming from a web server)
You don’t need to fully understand the use for all of this information. In some instances, you’ll receive a certificate with even more information. Yet none of it will directly affect the user; it affects only the connection between the server and the remote computer.
Setting Up a Cert
You can most likely figure out the gist of how SSL works. It’s a more complex form of the passing of data – like transferring a message inside a locked safe. It’s not necessary to memorize key elements of an SSL certificate or learn how it connects with a web server, but it is good to at least understand the basics of the process before setting up your own.
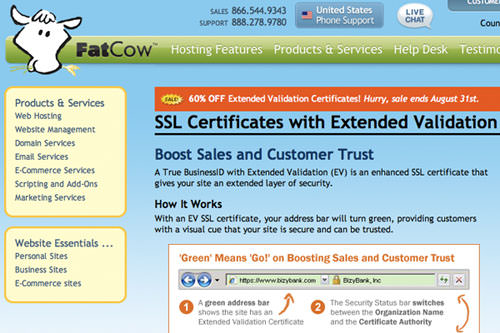
SSL certificates are actually purchased from a number of reliable vendors on the Web. Each certificate has an expiration date, which means you’ll have to renew it to keep your website secured (usually this is every year). It seems like a real pain to deal with, but luckily many popular web hosts such as FatCow will aid you in the setup process.
First you need to generate a CSR or Certificate Signing Request on your own web server. The CSR is needed before you can obtain an SSL cert. It is possible to create this yourself if you have full administrative privileges on the webserver. However, it’s highly recommended that you contact your web host first as they will likely not allow you to do this by yourself. No harm in that, in fact, it actually makes your job that much easier!
After you have this encrypted CSR you can then contact a certificate provider. There are just a handful of trusted vendors such as Verisign or Thawte. Once you have the certificate purchased just contact your web host support and they’ll happily install it for you.
Different Types of SSL
The most common way to set up an SSL certificate is on your own primary IP address. This is known as a Dedicated SSL Certificate. It will only apply to your domain and web server. Not everybody has enough money to purchase a dedicated hosting plan, but lucky for all of us, there are other solutions available.
Generally there are three different types of SSL certificates you could use. Some service providers may offer a free certificate as a limited-time trial offer but these certs are by no means any more secure than a standard HTTP connection and they expire quickly.
- Dedicated SSL – This is the most secure and evidently the most expensive solution. An HTTPS connection is only verified for your root domain targeted via a designated IP address.
- Shared SSL – Web hosts which offer shared hosting will sometimes have multiple domain names pointing to the same IP address. In this case, it’s much easier for the host to manage one single SSL on each server spanning an array of different websites.
- Wildcard SSL – These can be similar to a dedicated or shared SSL certificate based on server configuration. Wildcard SSL certs will target multiple subdomains for your website. This is a viable solution if you split up different functions of your website e.g. shop.domain.com, checkout.domain.com, etc.
If you are just getting started I highly recommend using a shared SSL setup. It’s unlikely you will be able to afford a dedicated web host/IP address right away. And even if you can, the costs of a dedicated SSL certificate are atrocious. But it’s absolutely something you should look into if possible.
However, since this guide is targeted at beginners I think a shared certificate is more than enough to get started on.
Step-by-Step Walkthrough
The best way to feel comfortable with SSL certificates is through a working example. Let’s put together a small Comodo certificate from Namecheap. They have very reasonable pricing which is perfect to get beginners started. And since we only need to go through the process and outlines this will be the perfect material for this tutorial.
Generate a CSR
Now to start, we need to create the signing request on our server’s backend. I’m using a business hosting account through HostGator to test one of my domains. Each web host is a bit different, so you’ll have to check with the support staff if you are having trouble. This URL is used for a CSR generation on HostGator accounts.
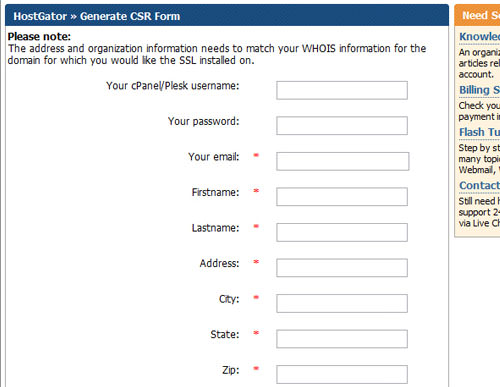
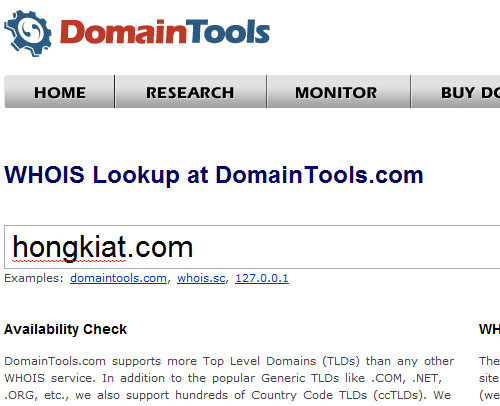
Notice that much of this information has to be matched with my domain’s Whois web data. I use the Whois Domain Tools app which provides all the information this form requires. If you have domain privacy installed you need to use this data instead of your own so the CSR will match.
This process may take up to 24 hours to complete registration. I got my response within 15 minutes. Let’s move on and purchase our certificate now so we have it ready to install with the signing request.
Let’s Purchase!
The Comodo plans range from $9/year up to almost $100. I’m looking at the EssentialSSL package which only costs $25 yearly. This isn’t a bad deal considering some of the alternatives.

This plan comes with a 15-day return policy if we aren’t satisfied with the certificate. Additionally, our domain name will be secured for the www subdomain and non-www. After adding this package to my shopping cart we can check out. Namecheap will require that I log in to an existing account or signup for a new one.
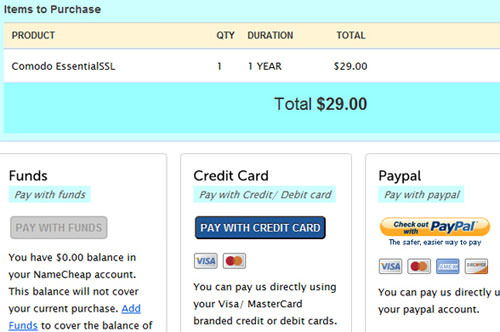
After entering all of my account data the final payment screen will come up. We have the option of paying with funds stored in my account, credit card, or PayPal. If everything goes through properly we are re-directed to an order confirmation form(you should additionally receive an e-mail with this information). Everything looks good so far!
Final Installation
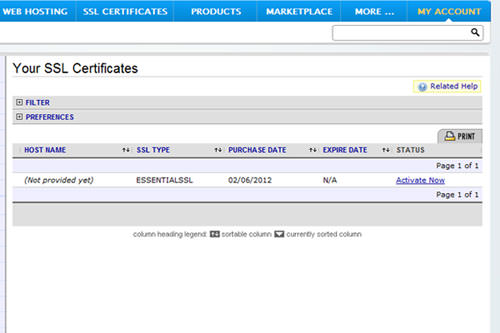
The CSR should appear in an e-mail from your web host. The key is more like a block of jumbled-up characters and keys. This is what we need to provide for the SSL verification. Moving back into Namecheap let’s find the SSL certificate’s page and click “Activate”.
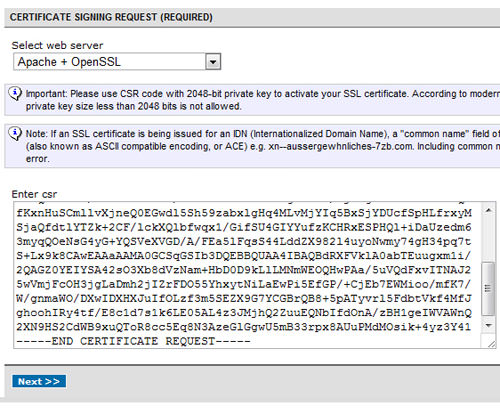
On this new page we need to select a server type and input the CSR key. I’ve chosen Apache + OpenSSL as the default selection. This is a common setup for Apache, but if you are unsure, just check with your host beforehand. Notice that your web host should have returned a longer RSA Key which is used for private authentication on the server’s end. All we need to do is copy-paste the shorter CSR key into the box and submit.
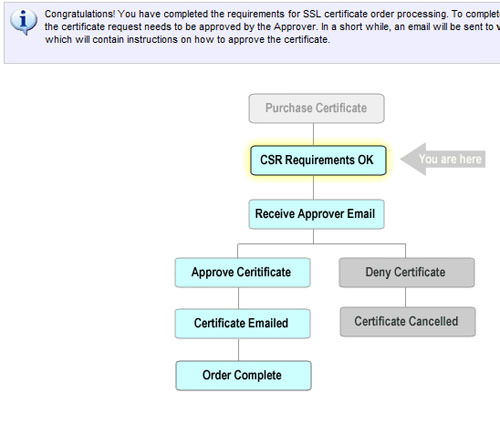
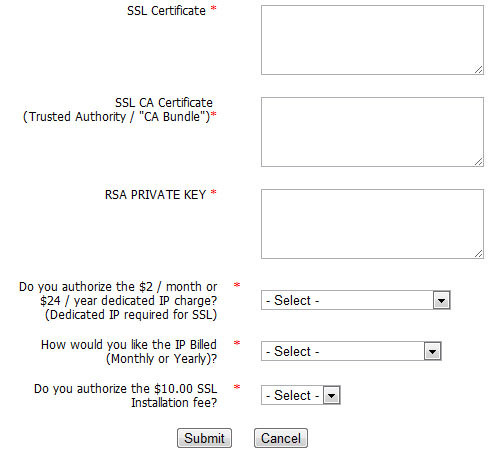
We then generate an e-mail sent to the “approver” of the domain name. This will contain some information about your SSL certificate and how to activate it on the host. This last submission form will require our RSA secret key as well as some additional SSL bundle information. This is all supplied from Namecheap after we pass in the CSR.
It’s worth noting that on some web hosts you may not be able to use SSL in a shared environment. HostGator allows businesses to upgrade their accounts to a primary IP address so there won’t be any conflicting errors with the cert. The SSL install form from HostGator is straightforward and also validates very quickly.
After your host confirms everything is okay then we should be all set to go. Understand that this could take between a couple of hours and a day or more. Be patient and keep checking your e-mail. Once verified, try accessing your website via HTTPS and all the certificate details should be in the address bar. It’s always a struggle when you are just starting out but don’t be afraid to ask for help from your SSL provider or web host if needed.
Managing a Secure Connection
I have found this Hostgator support article to be immensely helpful in understanding the setup process. Even if you aren’t a customer of HostGator you will most likely use cPanel to manage any remote web server. This is true for 1&1 Hosting, Bluehost, etc.
But the best part about using an SSL setup on a 3rd party web host is that you need not make changes (or at most minute changes) to your code! After you go through purchasing a certificate, most web hosts will be courteous enough to install them for you. After everything is running smoothly all connections via HTTP and HTTPS should work identically.
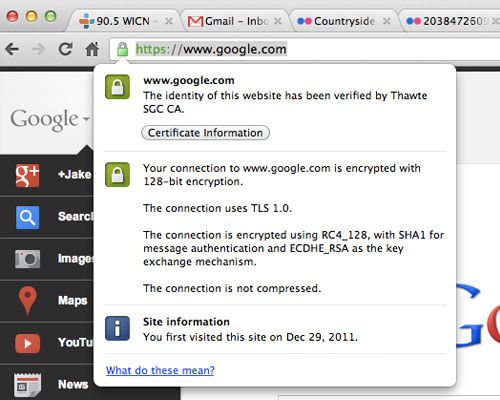
You can test if the certificate is authenticated by checking the URL address bar in your web browser. You should notice a small padlock icon that denotes a verified SSL connection between your computer and the remote web server. Some browsers will even display more certificate info if you click the lock icon.
Apache .htaccess Redirects
If you’re having trouble keeping visitors on the HTTPS protocol, you may want to consider using a Redirect script. This is commonly set up on Apache servers using a file .htaccess, which many web hosts let you configure right within cPanel.
I’ve added some sample codes below that you can use to set up your own .htaccess file. This will redirect all incoming traffic onto https:// with a www subdomain. You could remove the www so all traffic would instead be directed to https://yourdomain.com/ and the rewrite rules would still run perfectly.
RewriteEngine On
RewriteCond %{HTTPS} = off
RewriteRule ^(.*)$ https://www.yourdomain.com/$1 [R=301,L]
RewriteCond %{http_host} ^yourdomain.com [NC]
RewriteRule ^(.*)$ https://www.yourdomain.com/$1 [R=301,L]
Referencing Files
The most annoying issue you’ll run into is referencing absolute URLs instead of relative file paths. This will not display a completely secured connection, referencing instead to the warning that there are “unsecured items” being displayed on the page. If you call any type of external media: video, image, stylesheet, it must be done locally. I’ve demonstrated an example below:
<!-- absolute -->
<link rel="stylesheet" type="text/css" media="all" href="http://www.domain.com/css/styles.css" />

<!-- local(correct method) -->
<link rel="stylesheet" type="text/css" media="all" href="/css/styles.css" />
With the first bit of code you’re loading a potentially insecure document onto a secure page. This is the very method by which intelligent hackers can bypass your encryption. The majority of cases I’ve run into parse through JavaScript or VBScript. But to be safe just make sure none of your assets are pulling directly via HTTP.
If for whatever reason you must pull a file via the absolute URL then use HTTPS instead. If you’ve got files hosted on an external website or server this may produce issues since you cannot verify another HTTPS connection. Work to keep all webpage media consolidated under one IP so you don’t run into these issues at all!
Related Links
- Explain like I’m 5: What are online security certificates, SSL, HTTPS and how do they work?
- The Evolution of SSL Authenticity [Infographic]
- Generating and Installing SSL Certificates Step-By-Step
Conclusion
I hope this introductory guide has given you a bit of an insight into the world of SSL. Web security is a booming industry which secures a lot of private user data. All of the famous online shops including Amazon and eBay have been using SSL for years.
I’ll admit that SSL/HTTPS isn’t a topic you can just study to understand. Similar to programming, you really need to dive in and get your hands dirty setting up your own certificate. It’s a daunting task to set out after, but it offers a wonderful sense of accomplishment in the long run. If you know of any other helpful guides or related material feel free to share in the post discussion area.