Getting Started with React.js
React.js is a flexible and component-based JavaScript library for building interactive user interfaces. It was created and open-sourced by Facebook and is used by many leading tech companies such as Dropbox, AirBnB, PayPal, and Netflix. React allows developers to create data-heavy apps that can be painlessly updated by re-rendering only the necessary components.
Choosing the Right JavaScript MVC Framework [Infographic]
With web design and development evolving at a fast pace in the past couple of years, more and... Read more
React is the View layer from the MVC software design pattern, and it mainly focuses on DOM manipulation. As these days everyone talks about React, in this post we are taking a look at how you can get started with it.

Install React
You can install React either with the npm package manager or by adding the necessary libraries manually to your HTML page. It’s recommended using React with Babel that allows you to use the ECMAScript6 syntax and JSX in your React code.
ECMAScript 6 – 10 Awesome New Features
Did you know that JavaScript (along with JScript and ActionScript) is an implementation of a general-purpose client-side scripting... Read more
If you want to install React manually, the official docs recommend to use this HTML file. You can download the page by clicking the File > Save Page As... menu in your browser. The scripts you’ll need (React, React DOM, Babel) will also get downloaded into the react-example_files/ folder. Then, add the following script tags to the <head> section of your HTML document:
 <script src="react-example_files/react.js"></script>
 <script src="react-example_files/react-dom.js"></script>
 <script src="react-example_files/babel.js"></script>
Instead of downloading them, you can add the React scripts from CDN as well.
<script src="https://unpkg.com/react@15/dist/react.js"></script>
<script src="https://unpkg.com/react-dom@15/dist/react-dom.js"></script>
You can also use the minified versions of the above JavaScript files:
<script src="https://unpkg.com/react@15/dist/react.min.js"></script>
<script src="https://unpkg.com/react-dom@15/dist/react-dom.min.js"></script>
If you’d rather install React with npm, the best way is to use the Create React App Github repo created by Facebook Incubator — this is also the solution that the React docs recommend. Apart from React, it also contains Webpack, Babel, Autoprefixer, ESLint, and other developer tools. To get started, use the following CLI commands:
npm install -g create-react-app
create-react-app my-app
cd my-app
npm start
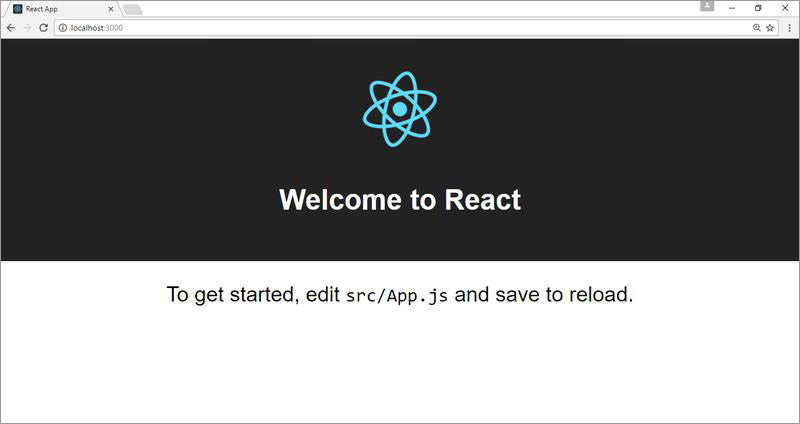
When you’re ready, you can access your new React app on the localhost:3000 URL:
If you want to read more on how to install React, check out the installation guideline of the docs.
React and JSX
Although it’s not compulsory, you can use the JSX syntax in your React apps. JSX stands for JavaScript XML, and it transpiles into regular JavaScript. The big advantage of JSX is that it lets you include HTML in your JavaScript files, therefore it makes defining React elements easier.
Here are the most important things to know about JSX:
- Tags that start with lowercase (lower camel case) are rendered as regular HTML elements.
- Tags that start with uppercase (upper camel case) are rendered as React components.
- Any code written within curly braces {…} are interpreted as literal JavaScript.
If you want to know more about how to use JSX with React check out this page from the docs, and for the default JSX documentation you can take a look at the JSX wiki.
Create React elements
React has a component-based architecture in which developers create reusable components in order to solve different problems. A React component is built up of some or many React elements that are the smallest units of React apps.
Below, you can see a simple example of a React element that adds a Click me button to an HTML page. In the HTML, we add a <div> container with the "myDiv" ID that will be populated with the React element. We create our React element within a <script> tag, right before the ending </body> tag. Note that if you want to use the JSX syntax, you need to add the type="text/babel" attribute in order to make Babel perform the compiling.
<body>
 <div id="myDiv"></div>

 <script type="text/babel">
   ReactDOM.render(
     <button>Click me</button>,
     document.getElementById('myDiv')
   );
 </script>
</body>
We render our React element with the ReactDOM.render() method which takes two required parameters, the React element (<button>Click me</button>) and its container (document.getElementById('myDiv')). You can read more on how React elements work in the “Rendering Elements” section of the docs.
Create components
React components are reusable, independent UI units in which you can easily update the data. A component can be made of one or many React elements. Props are arbitrary inputs you can use to pass data to a component. A React component works similar to JavaScript functions—every time it’s invoked, it generates some kind of output.
You can use either the classic function syntax or the new ES6 class syntax to define a React component. In this article, I’ll use the latter, as Babel allows us to use ECMAScript 6. If you are interested in how to create a component without ES6, take a look at the Components and Props page of the docs.
Below, you can see the simple React component we are going to create as an example. It’s a basic notification that the user sees after logging into a site. There are three pieces of data that will change from case to case: the name of the user, the number of messages, and the number of notifications, we will pass these as props.

Each React component is a JavaScript class that extends the React.Component base class. Our component will be called Stats as it provides the user with a basic statistic. First, we create the Stats class with the class Stats extends React.Component{…} syntax, then we render it to the screen by calling the ReactDOM.render() method (we’ve already used the latter in the previous section).
class Stats extends React.Component {
  render() {
    return(
       <p className="summary">
         Hi {this.props.name}, you have {this.props.notifications}
         new notifications and {this.props.messages} new messages.
       </p>
    );
  }
}

ReactDOM.render(
  <Stats name="John Doe" notifications={5} messages={2} />,
  document.getElementById("myStats")
);
The first argument of the ReactDOM.render() method consists of the name of our React component (<Stats />), and its props (name, notifications, and messages) with their values. When we declare the values of the props, strings are to be enclosed in quotation marks (like "John Doe") and numeric values within curly brackets (like {3}).
Note that because of JavaScript, we used className instead of class in order to pass a class attribute to an HTML tag (className="summary").
The matching HTML page is the following:
<html>
 <head>
  <meta charset="utf-8">
  <script src="vendors/react.js"></script>
  <script src="vendors/react-dom.js"></script>
  <script src="vendors/babel.js"></script>
 </head>
 <body>
   <div id="myStats"></div>
   <script type="text/babel" src="component.js"></script>
 </body>
</html>
In the React docs, there are many other cool examples on how to build & manage React components, and what else to know about props.
React MDL Merges React with Material Design Lite
Google recently put out a library called Material Design Lite which is a frontend resource for developers. It... Read more
Further reading
With React, Facebook introduced a new kind of framework into front-end development that challenges the MV* design pattern. If you want to understand better how it works and what you can and cannot achieve with it, here are some interesting articles that can help:
- Facebook’s blog post on why they built React.
- Andrew Ray’s brilliant blog post on the good and the bad of React.
- Codementor on how React and AngularJS compare.
- FreeCodeCamp’s think piece on whether MVC is dead on the front-end.
- HackerNoon’s article on how to optimize React-related performance.