How to Customize Visual Studio Code
Visual Studio Code, Microsoft’s new open-source code editor provides developers with many awesome features that significantly facilitate the process of source code editing. Besides, Visual Studio Code also makes sure users won’t be bored when they work with it, as it allows them to customize several parts of its appearance, such as colours, fonts, spacing, and text formatting, just like many functionalities, such as linting and validaton rules.
In this post, at first we will have a look at how to change the looks of the Visual Studio Code workspace, then I will show you how to customize the default settings with the help of two JSON-formatted configuration files.
How to Set a Colour Theme on VS Code
Visual Studio Code allows you to set a custom colour theme for your editor.
To put a pre-made theme into use, click on the File > Preferences > Color Theme menu in the top menu bar. When you hit “Enter”, the Command Palette pops up, and displays a dropdown list of the themes you can choose from.
You can achieve the same effect if you press F1 to open the Command Palette, and type the Preferences: Color Theme command into the input field.
As you roll over the options in the dropdown list, the appearance of the workspace changes real-time, so you can quickly see which theme fits your needs the best.
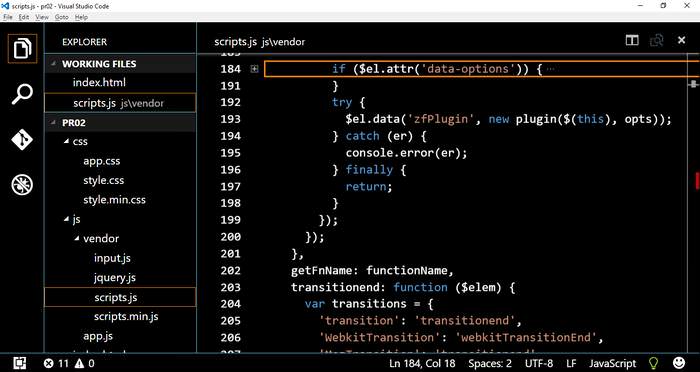
I chooe the “High Contrast” colour theme, as my eyes are not the best. Here’s what my view looks like.
How to Install a Theme from VS Code Marketplace
If you don’t like any of the colour themes VS Code offers by default, you can download many others from the VS Code Marketplace.
Here you can take a look at the themes the Marketplace currently has. If you want to install a theme from the Marketplace, hit F1 right inside your VS Code editor in order to open the Command Palette, then type the ext install command into the input field, finally choose the Extensions: Install Extension option from the list that pops up.

When you click on this option, a new instance of Command Palette pops up. Type the "ext install theme" command into the new input field, and you will get a list of all the themes that are available from the VS Code Marketplace.
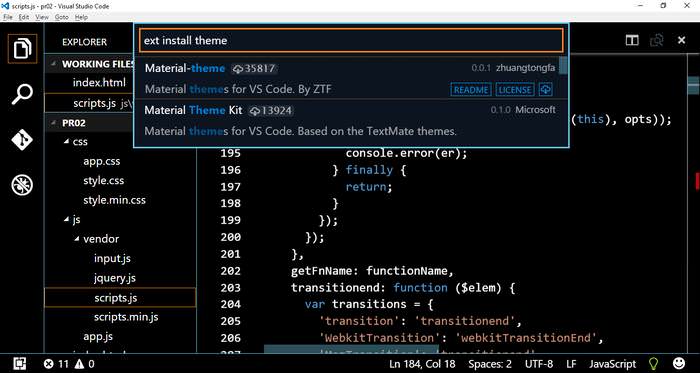
I choose the theme called “Material Theme Kit”, and install it by clicking on it. To have the new theme in the Color Theme list, in the same place where the other default themes are, you need to restart VS Code. After restarting, the new theme appears in the theme list, and you can set it from the Command Palette.
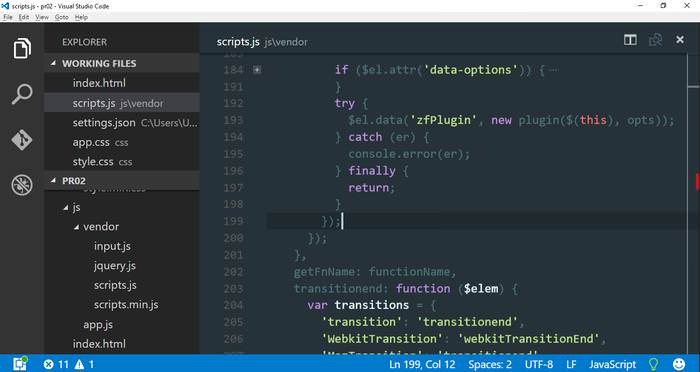
With the new Material Theme, my editor now looks like this:
You can go back to the previous theme (like I did, because I still prefer that theme) or you can play around some more with other themes to see which is the most suitable for you.
If you want, you can also create your custom theme, and publish it on VS Code Marketplace by using the vsce extension manager tool.
Change User and Workspace Settings
VS Code doesn’t only allow you to set a custom theme, but you can also configure many other settings, such as formatting rules, usage of different features, crash reports, HTTP settings, file associations, linting rules, and more.
You can do this by editing two configuration files, both in JSON format. Don’t worry, you don’t need to be a pro, as VS Code offers a pretty straightforward and intuitive way to quickly add your customizations.
At first, let’s see what is the difference between the two configuration files. VS Code has two scopes (global and local) for settings, hence the two separate files:
- the global
settings.json, in which the configuration rules are valid for each workspace - the workspace-related
.vscode/settings.json, that’s only related to an individual workspace
The global settings.json file can be found in the folder where your operating system stores every other app-related configuration files, respectively:
- on Windows:
%APPDATA%\Code\User\settings.json - on Linux:
$HOME/.config/Code/User/settings.json - on Mac:
$HOME/Library/Application Support/Code/User/settings.json
The workspace-related settings.json file is stored in the folder of your current project. By default, this file doesn’t exist, but as soon as you add a custom Workspace Setting, VS Code creates a .vscode/settings.json file at once, and places custom workspace-specific configurations into it.
So when do you use the settings.json files?
If you want VS Code to use your custom configuration rules in all your projects, put them into the global settings.json file.
If you want your settings to only be valid in your current project, place them into the workspace-related settings.json file.
Workspace settings override the global settings, so be careful.
Global settings are called “User Settings” in VS Code. Open them either by clicking on the File > Preferences > User Settings menu, or by beginning to type the expression “User Settings” into the Command Palette (open it with F1).
VS Code opens two panes next to each other: the left one contains all the options that are possible to configure, and the right one displays the global settings.json file. You need to place your custom configuration rules into this file.
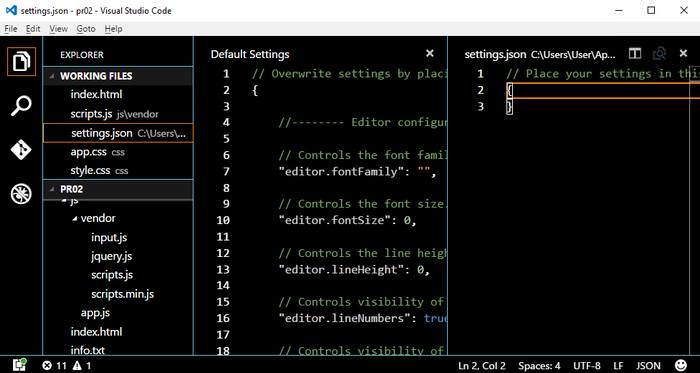
As you can see, you don’t need to do anything else, just copy-paste the settings you want to change from the left side to the right, and add the modified values.
Let’s have a look at a short example (but you can make any other modifications according to your individual needs). I will change the font family, reduce the length of a tab from the default four spaces to two, reduce the maximum number of working files from nine to five, and change one of the CSS linting rules concerning duplicate styles from "ignore" to "warning".
After copy-pasting, my global settings.json file looks like this:
// Place your settings in this file to overwrite the default settings
{
  "editor.fontFamily": "Courier New",
  "editor.tabSize": 2,
  "explorer.workingFiles.maxVisible": 5,
  "css.lint.duplicateProperties": "warning"
}
After saving the modified settings.json file, the looks of my editor change at once (on the screenshot below only the change of the font family is visible):

You can change the Workspace Settings similarly. Now you need to click on the File > Preferences > Workspace Settings in the top menu bar to access the workspace-related .vscode/settings.json file.
Workspace Settings have exactly the same configuration options as User Settings, and you can use the same copy-pasting technique. There are only two differences, the scope (local instead of global), and the settings.json file into which your custom configurations will be saved.