How to Use and Customize the TinyMCE Editor in WordPress
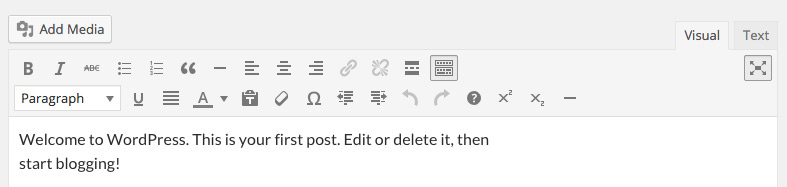
Many WordPress users are familiar with the TinyMCE editor, even if they don’t know it by name. It’s the editor you use to create or edit content, featuring buttons for bold text, headings, text alignment, and more. In this guide, we’ll explore how to add functionality to the TinyMCE editor and how to integrate it into your WordPress plugins.
The TinyMCE editor is built on a platform-independent JavaScript system called TinyMCE, which is widely used across the Web. WordPress provides a great API that allows you to create custom buttons and integrate the editor into other parts of WordPress.
Adding Available Buttons
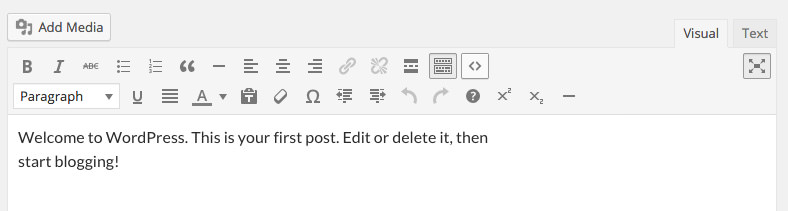
WordPress disables some TinyMCE buttons – such as superscript, subscript, and horizontal rules – to simplify the interface. However, these buttons can be easily added back.
Start by creating a plugin. You can find detailed instructions in the WordPress Codex. In brief, create a folder named ‘my-mce-plugin’ in the wp-content/plugins directory. Then, create a file with the same name, using a PHP extension: my-mce-plugin.php.
Paste the following code inside that file:
<?php
/**
 * Plugin Name: My TinyMCE Plugin
 * Description: A plugin for adding custom functionality to the WordPress TinyMCE editor.
 */
After saving the file, activate the plugin in WordPress. From this point forward, any additional code can be placed inside this file.
Now, let’s enable some of the built-in but hidden buttons. Here’s the code to enable the superscript, subscript, and horizontal rule buttons:
add_filter( 'mce_buttons_2', 'my_tinymce_buttons' );
function my_tinymce_buttons( $buttons ) {
    $buttons[] = 'superscript';
    $buttons[] = 'subscript';
    $buttons[] = 'hr';
    return $buttons;
}
For a full list of available buttons and their names, refer to the TinyMCE documentation.
Creating Custom Buttons
Let’s explore how to create custom buttons from scratch. For instance, if you’re using Prism for code highlighting, you’ll often need to wrap your code within <code> and <pre> tags. Here’s an example:
<pre><code>$variable = 'value'</code></pre>
We can create a button to automate this process!
This involves three steps: adding a button, loading a JavaScript file, and writing the content of the JavaScript file. Let’s walk through it:
To add the button and load the JavaScript file, use the following code:
add_filter( 'mce_buttons', 'pre_code_add_button' );
function pre_code_add_button( $buttons ) {
    $buttons[] = 'pre_code_button';
    return $buttons;
}

add_filter( 'mce_external_plugins', 'pre_code_add_javascript' );
function pre_code_add_javascript( $plugin_array ) {
    $plugin_array['pre_code_button'] = get_template_directory_uri() . '/tinymce-plugin.js';
    return $plugin_array;
}
It’s important to ensure that the button name added in the pre_code_add_button() function matches the key in the $plugin_array variable within the pre_code_add_javascript() function. Also, you’ll need to use this same string in your JavaScript file later.
Some tutorials recommend using an additional admin_head hook to finalize the setup, but this is not necessary and should be avoided as it’s not part of the official Codex.
Next, let’s write the JavaScript to implement the button’s functionality. The following code adds <pre> and <code> tags around selected text:
(function() {
    tinymce.PluginManager.add('pre_code_button', function( editor, url ) {
        editor.addButton( 'pre_code_button', {
            text: 'Prism',
            icon: false,
            onclick: function() {
                var selected = tinyMCE.activeEditor.selection.getContent();
                var content = '<pre><code>' + selected + '</code></pre>';
                editor.insertContent( content + "\n" );
            }
        });
    });
})();
The button’s name (pre_code_button) is used in lines 2 and 3. The value of the text property will be displayed if no icon is used. The onclick method defines the button’s behavior, which in this case, wraps the selected text in the necessary HTML tags.
If you prefer to use an icon, you can select one from the Dashicons set included with WordPress. The Developer Reference has a tool to find icons and their corresponding CSS/HTML code. For example, the code symbol’s unicode is f475.
To display this icon, attach a stylesheet to your plugin and add the following CSS:
add_action( 'admin_enqueue_scripts', 'pre_code_styles' );
function pre_code_styles() {
    wp_enqueue_style( 'pre_code_button', plugins_url( '/style.css', __FILE__ ) );
}
In your JavaScript file, replace “false” in the icon property with the class name you’d like your button to have, such as pre_code_button.
Next, create a style.css file in your plugin directory and add this CSS:
i.mce-i-pre_code_button:before {
    font-family: dashicons;
    content: "\f475";
}
The button will receive the mce-i-[your class here] class, which you can use for styling. Set the font to Dashicons and the content to the unicode value of the icon.
Using TinyMCE Elsewhere
Plugins often create textareas for entering longer text. Wouldn’t it be great if you could use TinyMCE there too? Luckily, you can, and it’s straightforward to implement. The wp_editor() function allows you to place a TinyMCE editor anywhere in the admin area. Here’s what it looks like:
wp_editor( $initial_content, $element_id, $settings );
The first parameter sets the initial content for the editor, which can be loaded from a database option, for example. The second parameter sets the ID of the HTML element. The third parameter is an array of settings. For more details on the available settings, refer to the WordPress Editor documentation.
The most important setting is textarea_name, which sets the name attribute of the textarea element, making it easier to save the data. Here’s how my editor looks when used in an options page:
$settings = array( 'textarea_name' => 'buyer_bio' );
wp_editor( get_option('buyer_bio'), 'buyer_bio', $settings );
This is equivalent to writing the following code, which generates a simple textarea:
<textarea id='buyer_bio' class='buyer_bio'><?php echo get_option