How to Make WordPress Themes More Accessible with Translations
Enabling clients to manage their websites in their native languages is crucial for better accessibility. If you develop a WordPress site for users from non-English speaking countries, translating the theme becomes essential.
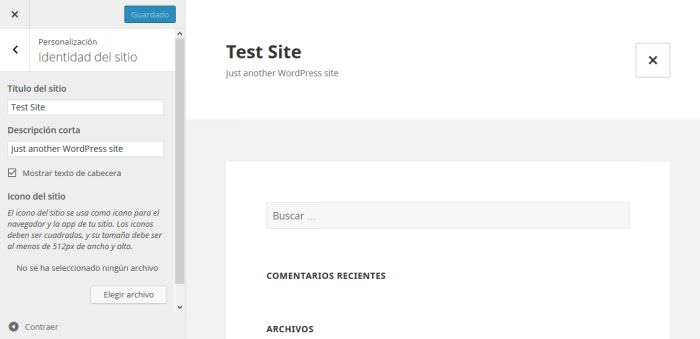
Localizing a theme doesn’t mean translating the frontend content like posts and pages; it focuses on the theme-related content in the admin area: the theme’s description, options, and customizer.
The WordPress Core Team places great importance on translating WordPress Core. It’s already available in many foreign languages, making WordPress a truly global content management system.
Localizing the theme can be invaluable for clients using the admin area in their native language. Otherwise, a significant part of their admin settings (under the “Appearance” menu) will be in English, while the rest of the dashboard is in their native language. This isn’t a seamless experience.
Internationalization vs. Localization
Making a theme accessible in other languages involves two key steps: internationalization and localization. I18n (internationalization) and l10n (localization) are two sides of the same coin.
I18n is the process where theme developers add features to their themes that enable future translation. When a theme is equipped with i18n features, it’s considered translation-ready, but it doesn’t mean it’s already translated.
Translation occurs during the l10n process when a translator, developer, or site owner translates the theme into a foreign language using the i18n features the theme author previously added.
In this guide, we will explore how to provide l10n for a theme, or in other words, how to translate it into a foreign language (in our example, into Spanish).
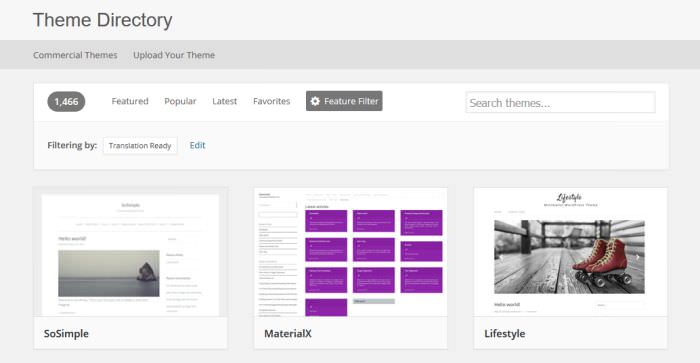
1. Find Translation-Ready WordPress Themes
You don’t need to be a developer or know how to code to localize a WordPress theme; you only need to speak the chosen language.
First, you need to find a translation-ready WordPress theme. This is easy to do, as in the official WordPress Theme Directory, they are marked with the “translation-ready” tag.
Simply click on the “Feature Filter,” check the “Translation Ready” feature, hit the “Apply Filters” button, and choose the theme you like the most.
2. Add Translation with Poedit
If a theme is tagged as translation-ready, it means the author has already added i18n features. Each translation-ready theme contains a file with the .POT extension that enables you to easily translate the theme.
First, locate this file; it’s usually inside the /languages folder. The .POT file is a translation template that can be translated into any language. You need to load this file into the Poedit translation editor program.
Since Poedit is a standalone program that runs on your desktop, you need to download and install it first. There are other translation editor software options available, but Poedit is probably the most widely known. If you choose different software, it’s recommended to use a gettext editor.
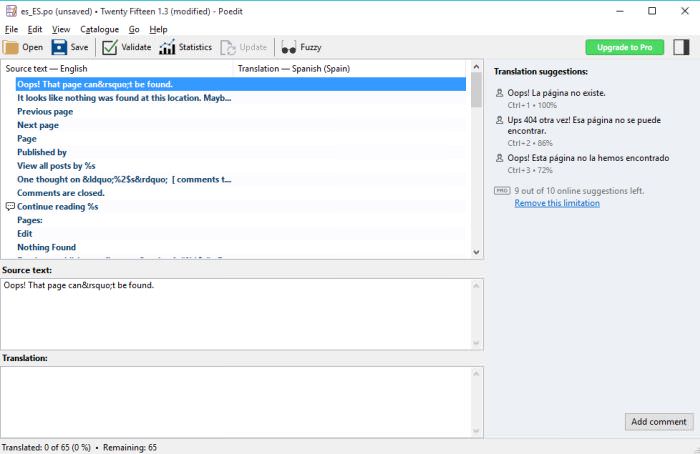
After installing Poedit, you will see the following screen:
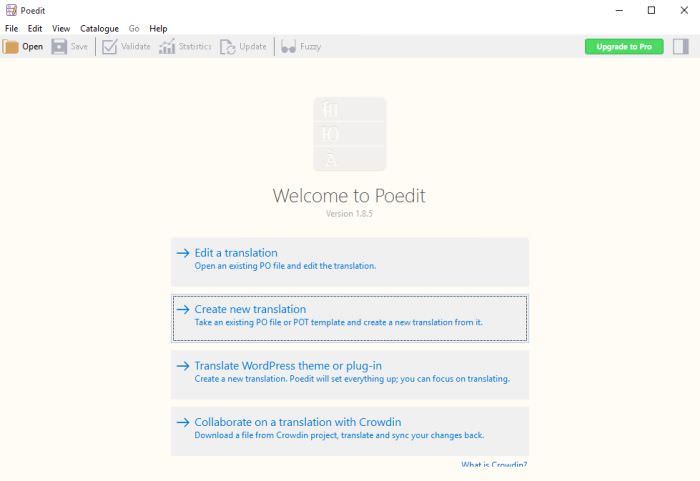
2.1. Create New Translation
Unfortunately, the “Translate WordPress theme or plug-in” option is only available to users who upgrade to Poedit Pro. Therefore, we will choose the second option, “Create new translation”.
After selecting this option, choose the .pot file that you previously located. Next, you will need to select the language for your translation from a dropdown list.
In this tutorial, we will choose Spanish, but the translation process is the same for any other language.
2.2. Translate the File
Translating in Poedit is a straightforward process: the source text is divided into shorter strings, and you need to translate these strings one by one. The good news is that you don’t have to translate the entire file at once; you can save your work and return to it whenever you want to continue.
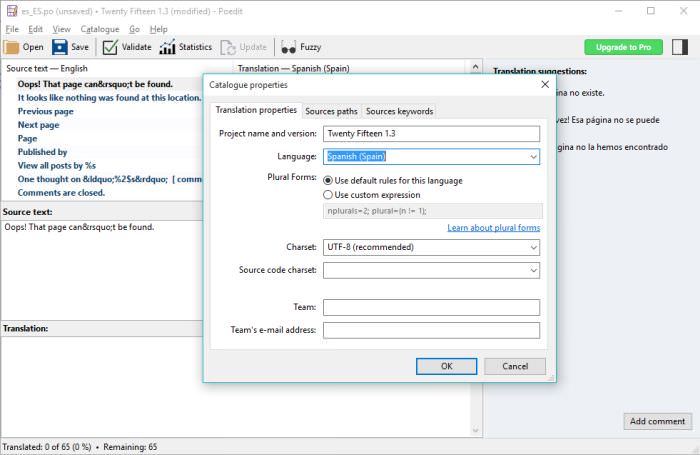
2.3. Check Translation Properties
Before saving the translation, it’s a good idea to check the translation properties. You can find them under the Catalogue > Properties menu item in the top bar. The first two items in the Translation Properties pop-up, the Project name and the Language, are set by default by Poedit, but it’s important to pay attention to the next one, Plural Forms.
Plural forms are an important aspect of translation, as plurals in every language follow specific patterns that the translation editor software needs to know to handle them properly.
Plural forms use the following syntax: nplurals=2; plural=(n != 1); (for the Spanish language).
Poedit sets the default plural translation rules, but you can modify them if you wish. You can find a list of appropriate plural forms in many languages in this handy cheatsheet. If you want to understand how plural forms work in gettext editors, read this user guide.
You can also set the charset in Translation Properties. The default is UTF-8, which is the safest choice as it can be used for all languages, but you can opt for a more specific charset, such as iso-8859-1 for Latin-1 languages like Spanish.
On W3C’s checklist, you can always check if you chose the right one for the language you want to localize.
2.4. Save the Translation Files
When you save the translation, it’s crucial that you use the right format. At the end of the file name, you need to include the appropriate country and language code.
WordPress uses gettext language-country codes. You need to add the appropriate language code first, followed by an underscore, and finally the country code. For Spanish, the proper format is es_ES.
Fortunately, Poedit makes this easy. When you click the Save button in the top menu bar, it provides you with the right language code in the “Save as…” pop-up window. The first two letters are for the language code, and the second two letters are for the country code.
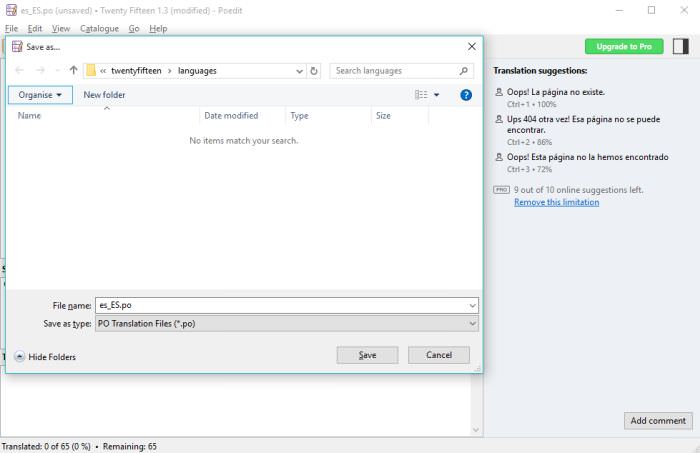
You also need to type the name of the theme before the language-country code. So, the example file will be saved as twentyfifteen_es_ES.po. The .PO (Portable Object) file contains the translation, and you need to open this if you want to modify the translation later.
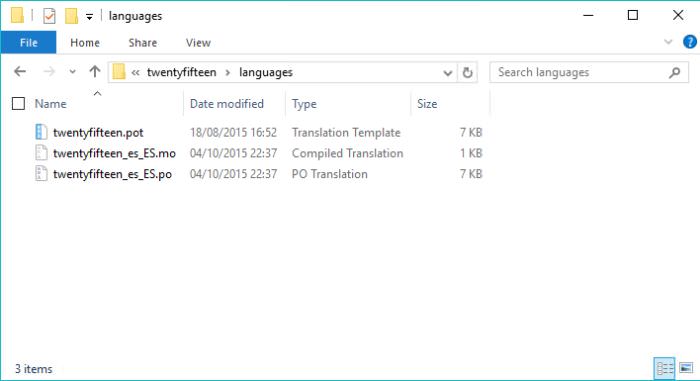
If you look in the /languages folder of your theme, you will notice that Poedit also saved another file with the .MO extension. This is a compiled translation file, and you need it for your localized site to work properly.
3. Upload Your Translation Files
Now that the translation files are ready, you need to upload the modified theme to your server using an FTP client. You can upload the entire theme again, but you can also insert only the two new translation files (.po and .mo) into the /languages folder of your theme.
Final Note
You need to create separate translation files (a .PO and a .MO file) with Poedit for each language you want the theme to be available in.
The cool thing about WordPress is that if your client changes the language of the admin area under the Settings > General menu, WordPress will automatically pick the appropriate translation files for the theme.