How to Perform Synchronized Testing Using Ghostlab
In the previous post, we showed you how to perform synchronized testing using Browser Sync. As you might have seen, “synchronized testing” can greatly enhance your development workflow by testing mobile-optimized websites across multiple browsers and devices simultaneously.
Interactions within the browsers, such as refreshing, clicking, and filling out forms, are reflected across the browsers and connected devices in real-time.
However, everyone has their own working styles. Some people prefer using Command Line, while others prefer using an application with a graphical interface because it is more intuitive for them. In this post, we will show you an alternative for synchronized testing using an application called Ghostlab. Let’s take a look.
Getting Started
Ghostlab costs US$49 for a single license, which can be used on two computers. There is also a trial version available with all features enabled, so you can try it out before deciding to buy.
It is available for Windows and OS X. Download it here. Install it according to your OS procedures, then launch it.

We are now ready to use Ghostlab.
Project Configuration
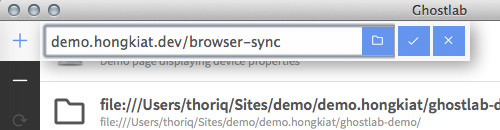
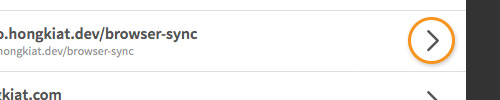
The first thing to do is add our projects to Ghostlab. There are two options: drag-and-drop the project directory onto the application’s window, or copy-and-paste the project’s URL address, like so.
Ghostlab registers all the added projects as follows:
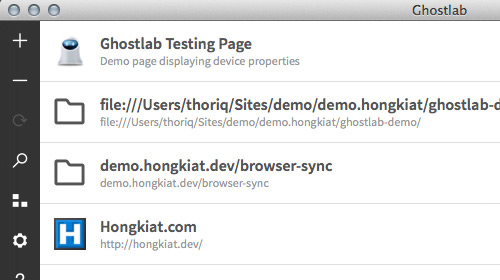
You can also drag-and-drop the project list to switch their positions.
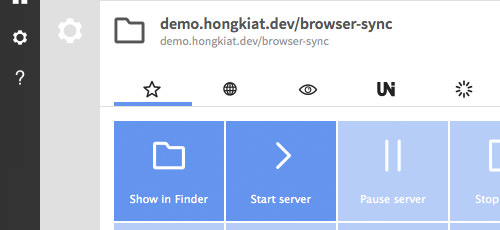
Furthermore, each project can be configured. Hover your mouse cursor over the project icon, and it will turn into a gear icon. Click on the icon to expand it for configuration options displayed in an array of tabs.
Within these tabs, you can turn the Ghostlab server on or off, select which browser to view the project on, change the project title or the URL, and more.
Turning On The Server
As mentioned earlier, Ghostlab is equipped with a built-in server that works for both static sites (only HTML and CSS) and dynamic sites built with PHP, Ruby, etc. Once the configurations are set up, you can turn on the server by simply clicking the arrow icon next to the project list.
When the server is “on”, you will see a notification showing the server URL and port at the bottom-left of the application window. Click on the rocket icon to launch the project in the default browser, or click the browser icon below the rocket to select other browsers. There’s no need to copy-paste the URL.
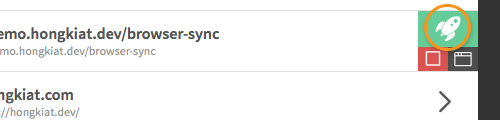
Note: The server can only be active for one project at a time. If you turn on the server for another project, it will switch off for the previous project and turn on for the newly opened one.
Connecting Devices
When you launch the project in any browser, Ghostlab will register it on the right sidebar.
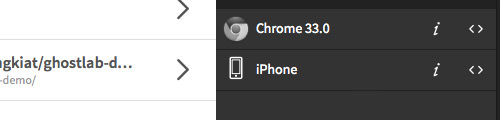
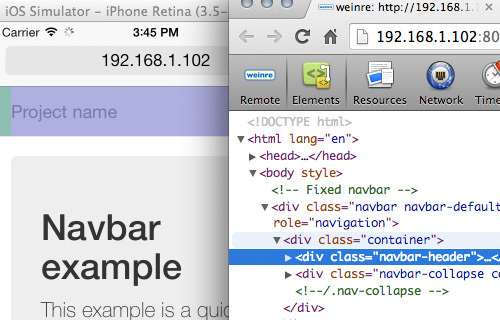
You can debug the project on each of these connected browsers/devices using the Ghostlab built-in code inspector. Click on the < > icon, and the code inspector (which looks similar to Chrome’s) will pop up.
When you navigate through the DOM tree, the respective elements in the browser are highlighted.
And ultimately, you can also perform “synchronized testing” similar to Browser Sync. It automatically refreshes all the connected browsers whenever a change is made. User interactions like scrolling, clicking, and filling out forms are also synchronized in real-time.

Final Thoughts
We have shown you how to perform “synchronized testing” using both a command line tool, Browser Sync, and an application with a graphical interface. Both tools serve their purpose well. My only complaint with Ghostlab is that the UI seems a bit out of place in OS X; it probably looks fine in Windows though.
Ultimately, it is up to you to decide which tool best suits your workflow and budget.