How to Run Stable Diffusion on Your Mac
AI image generation is all the rage these days. There are so many tools and apps that can generate hyper-realistic images based on given text or keywords, a.k.a prompts.
If you’re using a Mac and wondering how to use Stable Diffusion for text-to-image generation directly on your system, then this post is going to help you out.
What is Stable Diffusion?
Stable Diffusion is an AI-powered deep learning text-to-image model developed by Stability AI. Released in August 2022, it allows you to create realistic images from the text provided, a.k.a, text-to-image.
Though Stable Diffusion is a free and open-source machine learning model, it produced high-quality images not very different from DALL-E 2 and Midjourney. You can use use its online version or you can install a standalone desktop version and run it even if you are offline.
Requirements to run Stable Diffusion on Mac
Before we start, let’s look at some of the prerequisites:
- macOS 12.5.1 or higher.
- Mac with Apple silicon (recommended).
- 8GB or 16GB of RAM for optimal performance.
- Mac with M1 or M2 chip (recommended), or Intel-based Mac (performance may be slower).
How to run stable diffusion on your Mac
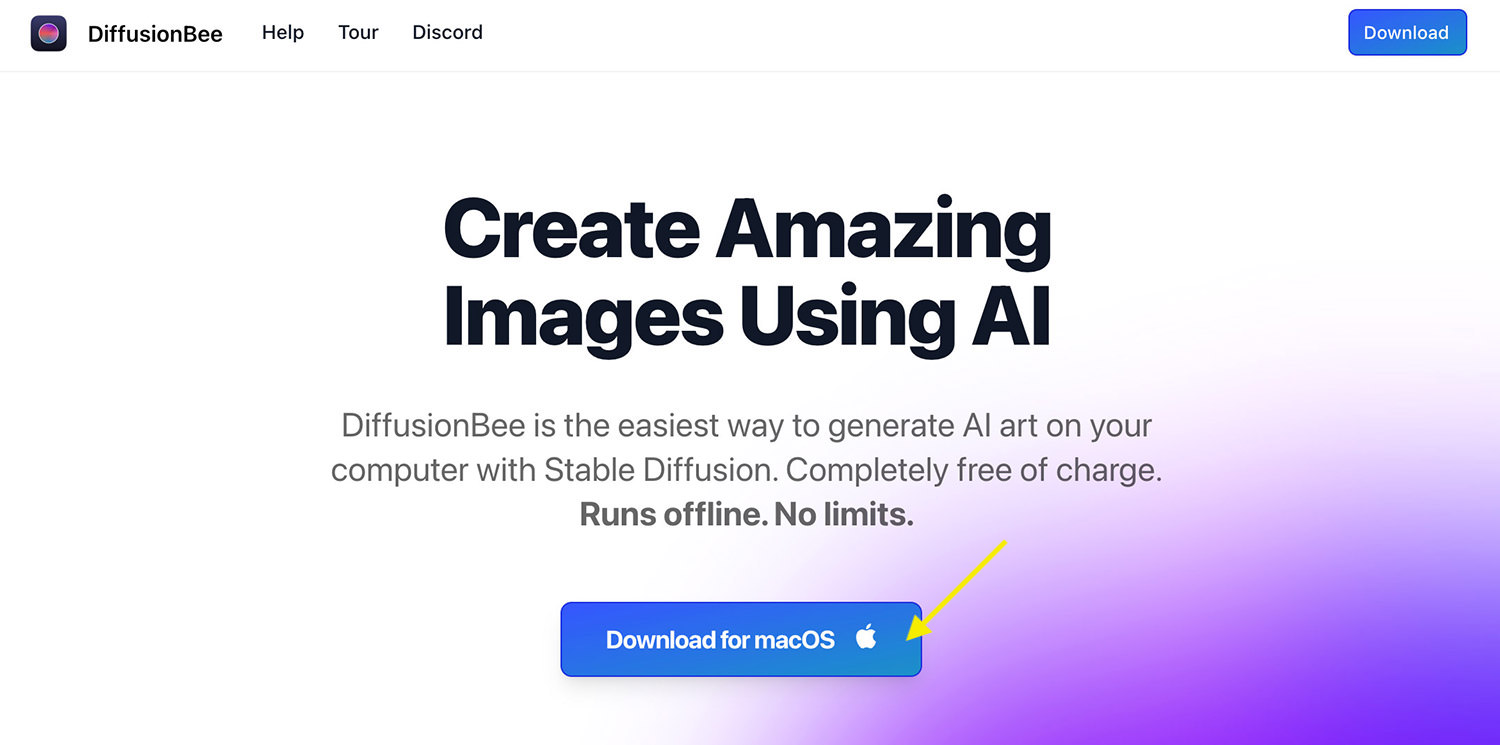
- Go to the DiffusionBee website, and click Download for macOS to download the app.
- Once the download is complete, install it and open up the DiffusionBee app.
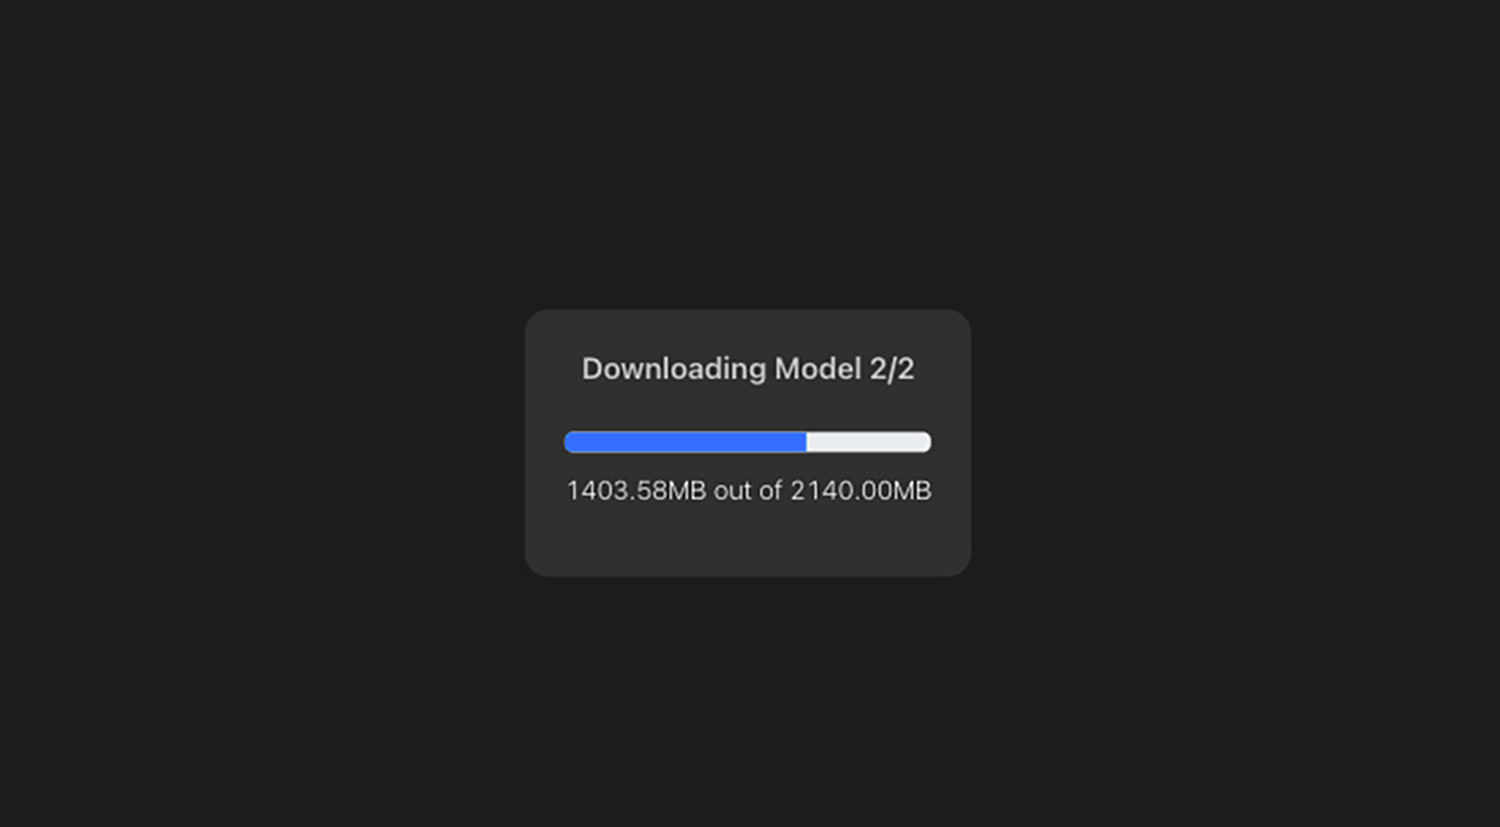
- If this is your first time using the app, there will be some additional downloads of models. It will take some time, depending on your internet connection. If the download hangs halfway, quit and reopen to resume downloading.
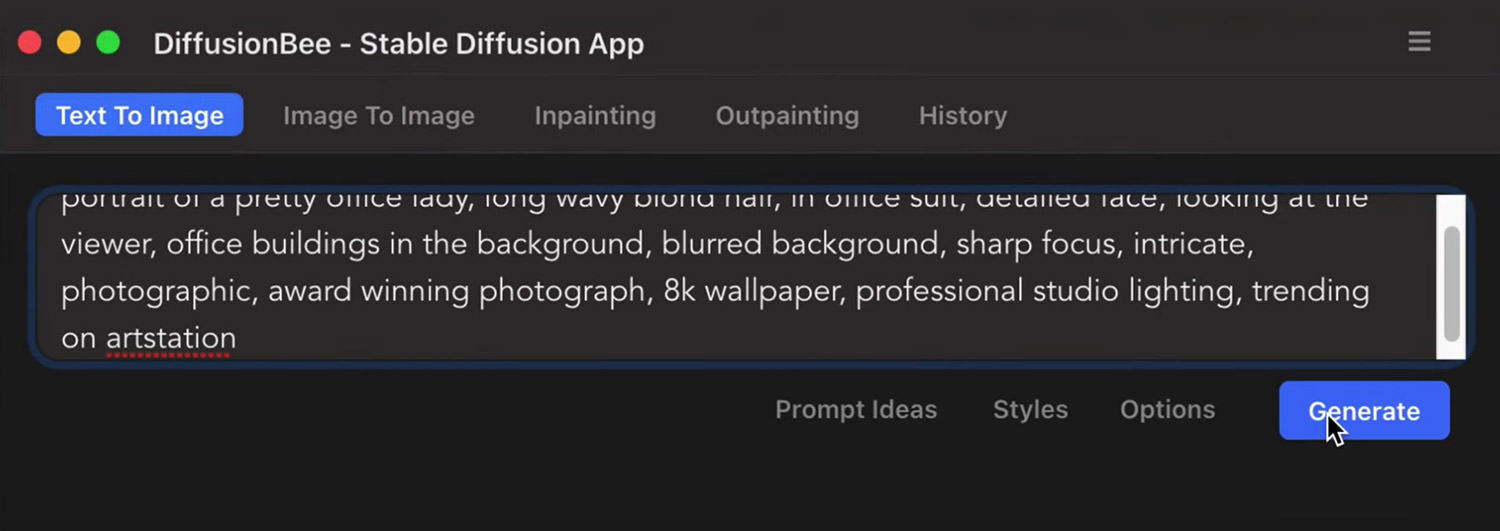
- When all downloads are complete, you can then use the app. Start by making sure that you are on the Text To Image tab, then go to the text field that says Enter your prompt here and start entering the image descriptions, then ending it with other attributes, you see fit.
- When you are satisfied with your prompt, hit Generate. The DiffusionBee app will generate an image based on your description/prompt. This may take a while.
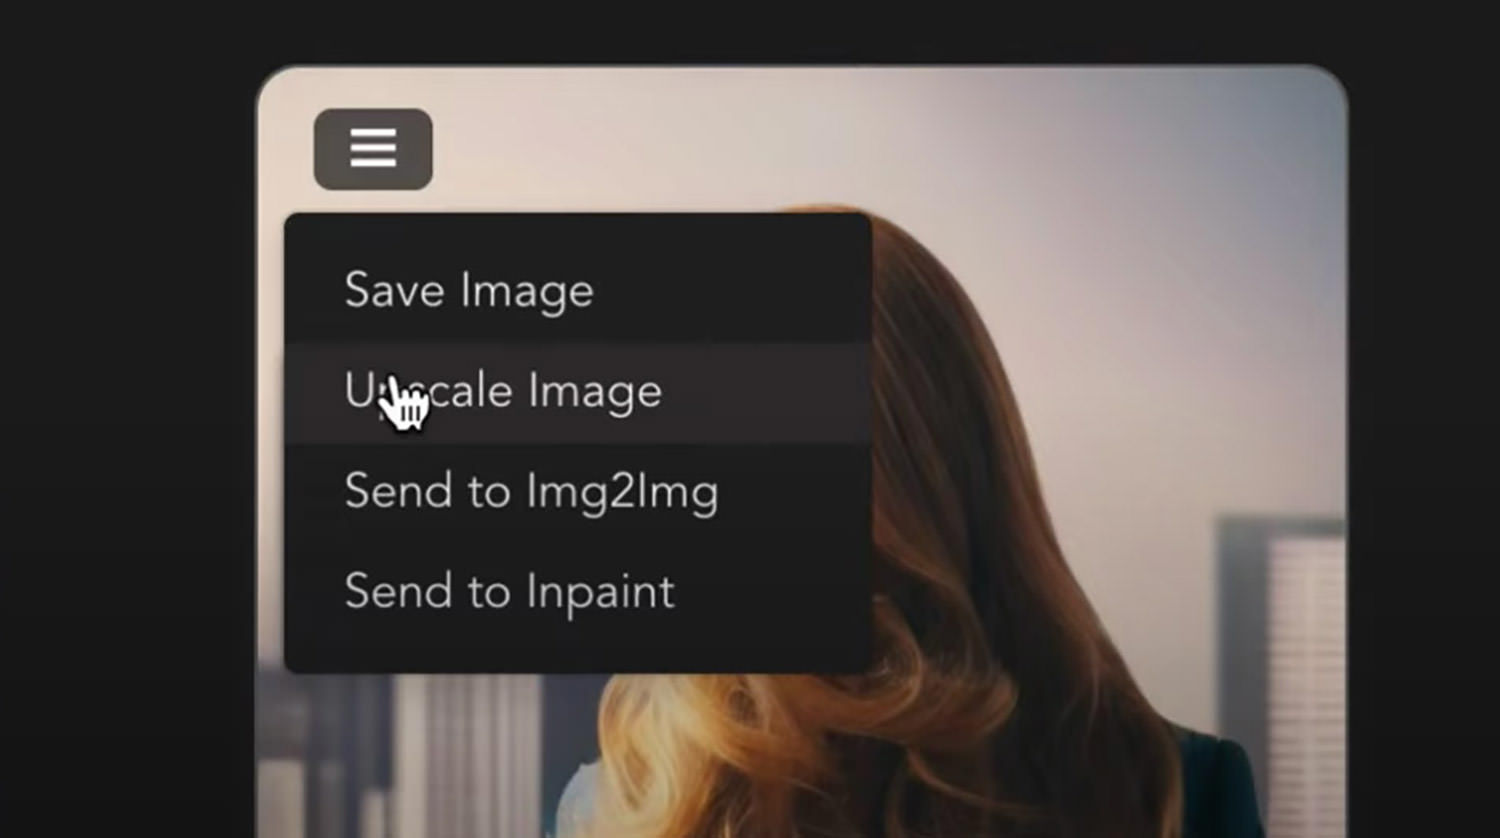
- Once the image is generated, you may choose to Save/Download it, or you choose upscale to get a higher resolution image.
How to generate high-quality AI images
Here are some tips on how to generate a higher-quality image:
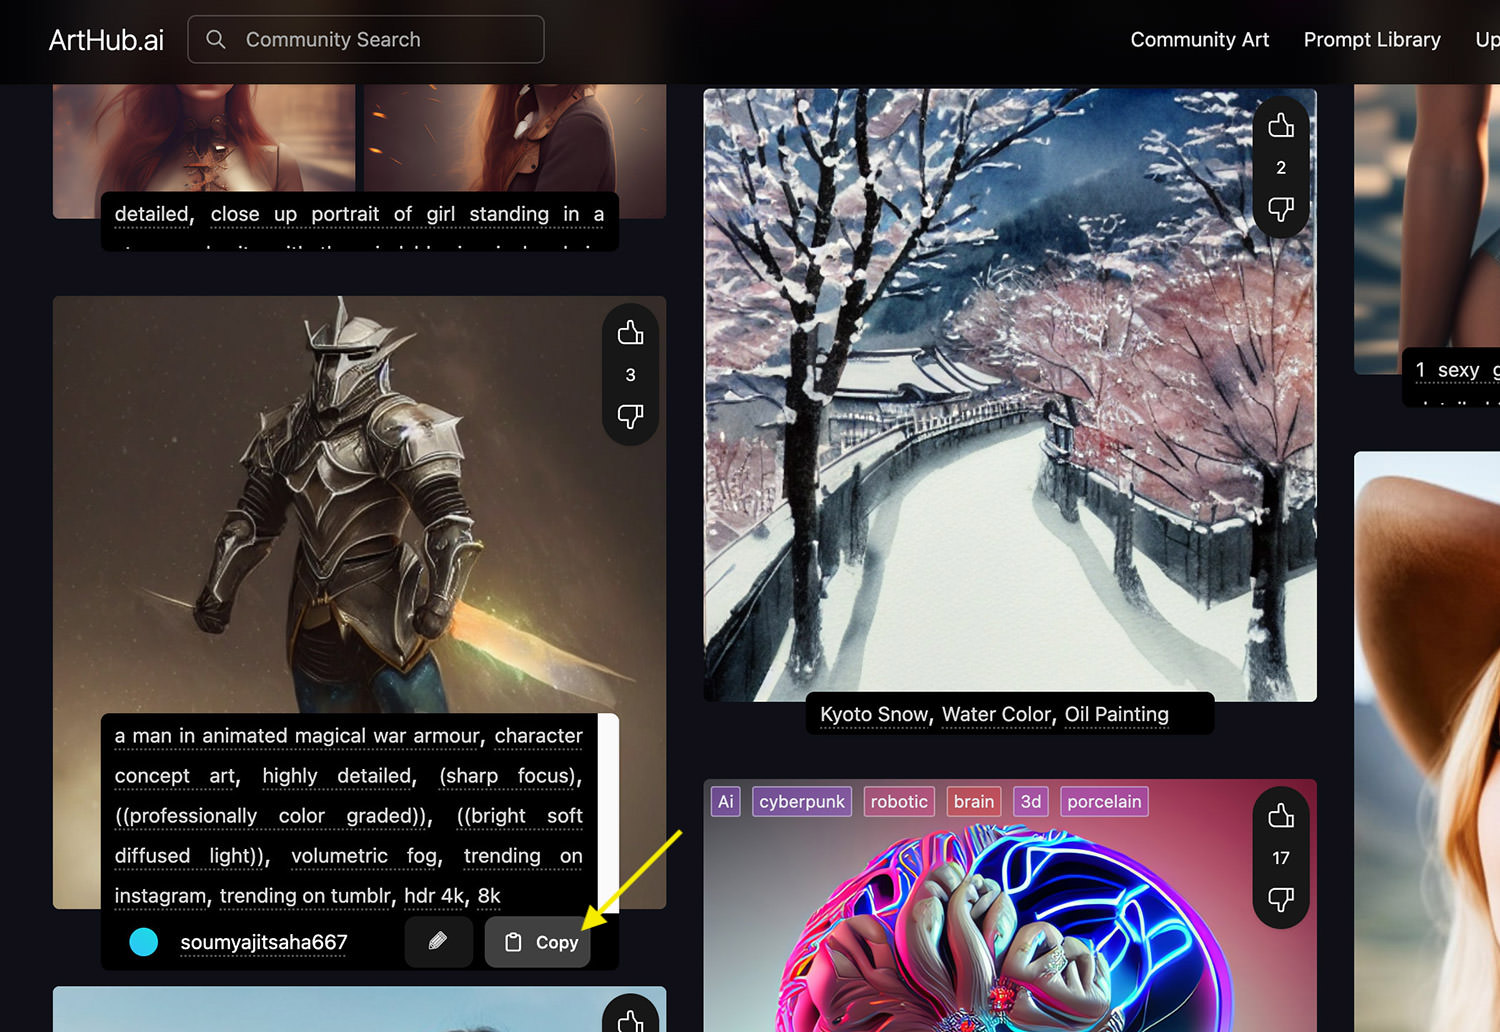
- Visit ArtHub.ai (or click Prompt Ideas in DiffusionBee) to get inspiration from the AI art generated by other users. Copy, edit, and play with the provided prompts to get the hang of creating a better-quality AI-generated image.
- If you want different options for the generated image, go to Options > Number of images and change it to 4. This will generate 4 images instead of 1, giving you more options to choose from.
- Explore and experiment with other settings in Options to get a higher-quality image.
- Always upscale before downloading an image to get the highest quality.


Tips on prompt-writing
- Avoid complex language or unnecessary words.
- Keep prompts clear and consise, separate them with commas.
- Start with the important subjects. i.e. “Portrait of woman”, “unicorn with tiger stripes”, “giant robot standing”, etc.
- Follow by some description of the subject. I.e “beautiful lighting”, “ultra-realistic”, “graceful”, “detailed face”, etc.