How to Recover RSV Files on Sony Cameras
Imagine turning on your Sony video camera, expecting to relive your captured memories, but instead, you’re greeted with a blank screen. It’s a heart-sinking moment.
Sony cameras, renowned for their superior video and photo quality, sometimes encounter glitches. These glitches can result in your precious files being saved in an unrecognizable RSV format, instead of the usual MP4 or MXF.
However, don’t lose hope just yet.
With the appropriate tools, like the 4DDiG Data Recovery Tool, you can transform these inaccessible files back into precious memories ready to be relived and shared. If you’re facing what seems like the loss of irreplaceable moments due to technical issues, this guide is your light at the end of the tunnel.
Here, we’ll simplify the process of recovering your Sony RSV files, turning despair into relief. Let’s begin.
Understanding RSV Files
Let’s first get a grasp on what an RSV file actually is.
In the ecosystem of Sony cameras, RSV files refer to those photo and video files that, due to power glitches or the camera entering an unresponsive state, end up being saved in RAW formats unexpectedly. These files are typically found in formats like ARW, SRF, and SR2, which aren’t directly supported – hence, they’re tagged as RSV files.
The creation of RSV files is often a result of technical hiccups in the camera’s operational framework, systemic issues within the device, or problems related to the power supply. They manifest as errors, with the .rsv file format acting as a sort of digital SOS, storing themselves on the camera’s external SD card storage.
Why Do Sony MP4 Files Turn into RSV Files?
Picture this: you’re capturing a beautiful moment with your Sony camera, but something goes awry, and instead of a playable MP4 file, you’re left with an RSV file.
Why? Well, here are a few culprits:
- Battery Issues or Power Loss: A sudden power outage, whether due to battery failure or disconnection from the power source, can interrupt the video saving process, leading to an incomplete file.
- Camera Problems: With so many components working in tandem, a hiccup in any part during the save operation might prevent the video from saving correctly.
- Glitches and Unexpected Shutdowns: Unforeseen errors or glitches can cause the camera to shut down unexpectedly. If this occurs mid-save, the video file may not be stored as intended.
Such incidents prompt your camera to do its best under the circumstances, resulting in an RSV file – a video file that’s essentially in limbo, awaiting rescue.
To transform an RSV file back into a fully functional MP4, tools like the 4DDiG File Recovery come to the fore, offering a lifeline to your half-saved memories.
Recovering Sony RSV Files with 4DDiG File Recovery
The 4DDiG File Recovery tool can be your go-to solution for retrieving those elusive Sony RSV filesl it helps bring back lost or unreachable data from a variety of predicaments including accidental deletions, corruption, and changes in format.
Let’s walk through the steps to use the 4DDiG Tool to restore your RSV and RAW files to their original MP4 format.
Step 1: Install the Software
Begin by installing the 4DDiG Data Recovery Tool. Once installed, launch the program. Navigate to "Add a file" from the directory or location on your computer where the lost or RSV file resides to start the recovery. The tool will first scan for any minor viruses before proceeding with the recovery of the RSV file.

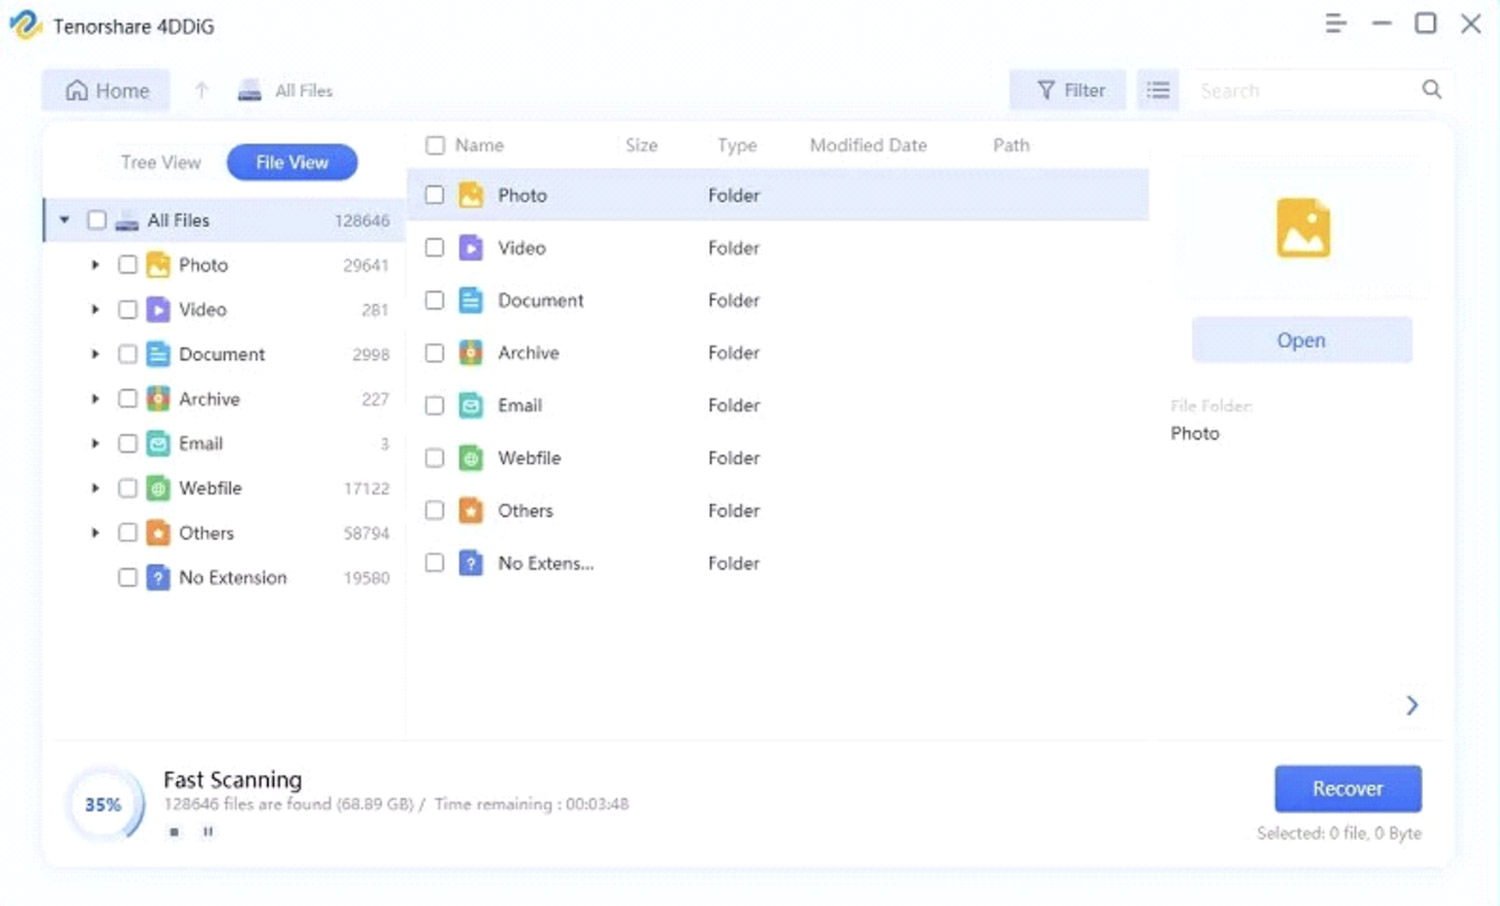
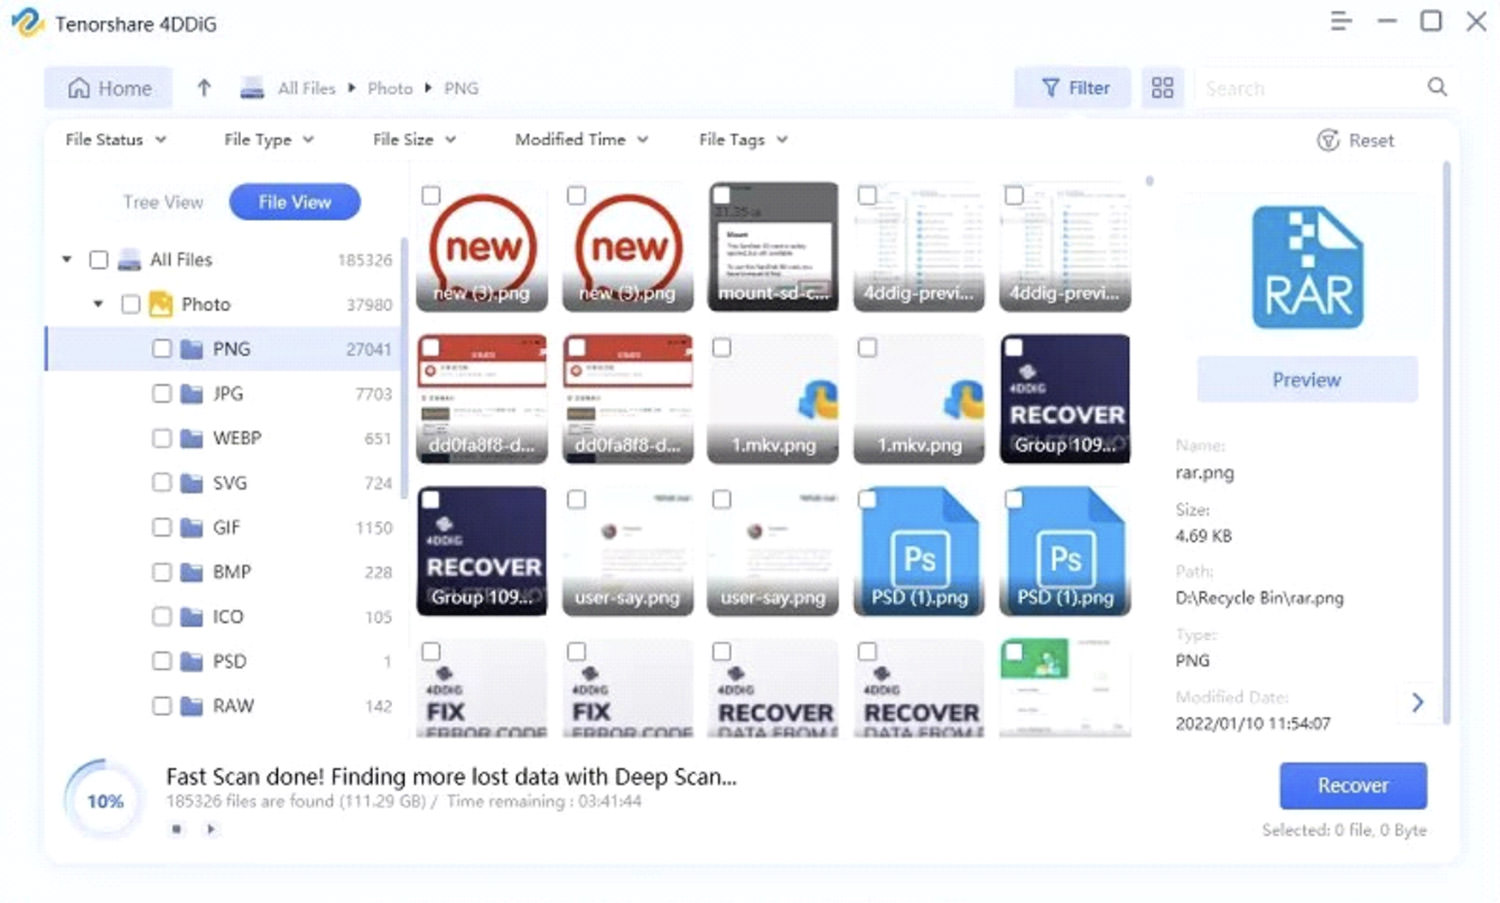
Step 2: Preview and Select RSV Files
After installing and scanning, locate the specific RSV file among a list of detected files to ensure the correct recovery process. This step focuses on identifying and selecting the exact RAW or corrupted file you wish to recover from your storage device or computer.
Step 3: Recover Corrupted Files
In this final phase, the 4DDiG software analyses the RSV, RAW, or corrupted files to initiate the recovery process. Utilizing its advanced algorithms, it refreshes and transforms the data back to its original form, making it accessible and ready to use. In just a few minutes, the tool successfully restores the files to their pristine condition, stored safely on your computer.
Conclusion:
Losing memories captured on your Sony camera to RSV files can feel like an irreversible loss. However, the 4DDiG Data Recovery Tool offers ope, turning technical despair into joy as it recovers those seemingly lost moments. This guide has shown you that with the right steps and tools, retrieving your cherished memories from the abyss of data corruption is not just possible, but straightforward.
So, before you give up on your precious photos and videos, give 4DDiG a try. Your memories might be closer to recovery than you think, ready to be relived and cherished once again.