How to Turn Text to Speech with OpenAI
OpenAI has recently launched the Audio API that includes a text to speech feature called speech, based on their TTS (text-to-speech) technology. This feature offers six built-in voices named Alloy, Echo, Fable, Onyx, Nova, and Shimmer.

These voices can be incredibly useful for tasks such as narrating blog posts, creating spoken audio in various languages, adding voiceovers to video tutorials, or delivering real-time spoken feedback. In my experience, the output is impressively natural-sounding. If you are not using any text-to-speech tools, then this offering by OpenAI is something you should consider trying.
In this article, we’ll explore how to set up OpenAI’s TTS and create your first text-to-speech application. For this demonstration, we will be using the following setup:
- Operating System – macOS
- Application – Terminal
- Programming Language – cURL
This guide is also applicable to Windows users. Where necessary, I’ll mention any tools and commands that differ from those used on macOS.
Step 1 – Set Up cURL
Many operating systems come with cURL pre-installed. If not, we will first install Homebrew, a package manager for macOS, which we will then use to install cURL.
Check if cURL is Installed
To check if you already have cURL on your system, make sure you’re connected to the Internet, then type the following command in your Terminal:
Windows users: Use Command Prompt or Windows PowerShell
curl https://platform.openai.com
If cURL is set up correctly and you have an Internet connection, it will send an HTTP request to retrieve the contents of platform.openai.com, and you should see output similar to this screenshot:

How to Install cURL
If you encounter an error indicating that cURL is not installed, you can install it by following the provided steps.
Windows users: How to install cURL on Windows.
Open a new Terminal window, and enter the commands below to first install Homebrew:
/bin/bash -c "$(curl -fsSL https://raw.githubusercontent.com/Homebrew/install/HEAD/install.sh)"
After installing Homebrew, use the following command to install cURL:
brew install curl
Lastly, run the command below to set the Homebrew version of cURL as the default one in your shell:
echo 'export PATH="$(brew --prefix)/opt/curl/bin:$PATH"' >> ~/.zshrc
source ~/.zshrc
Step 2 – Get API Key from OpenAI
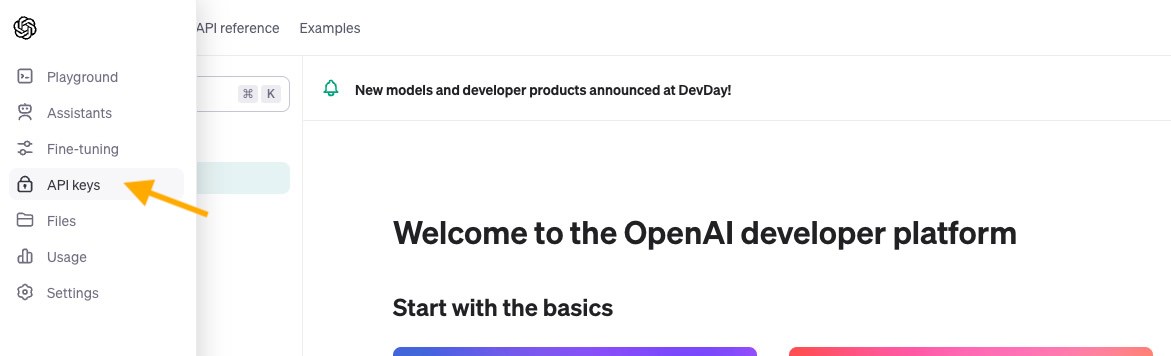
To obtain your API key, first go to openai.com, log in, and then click on “API keys” in the sidebar.
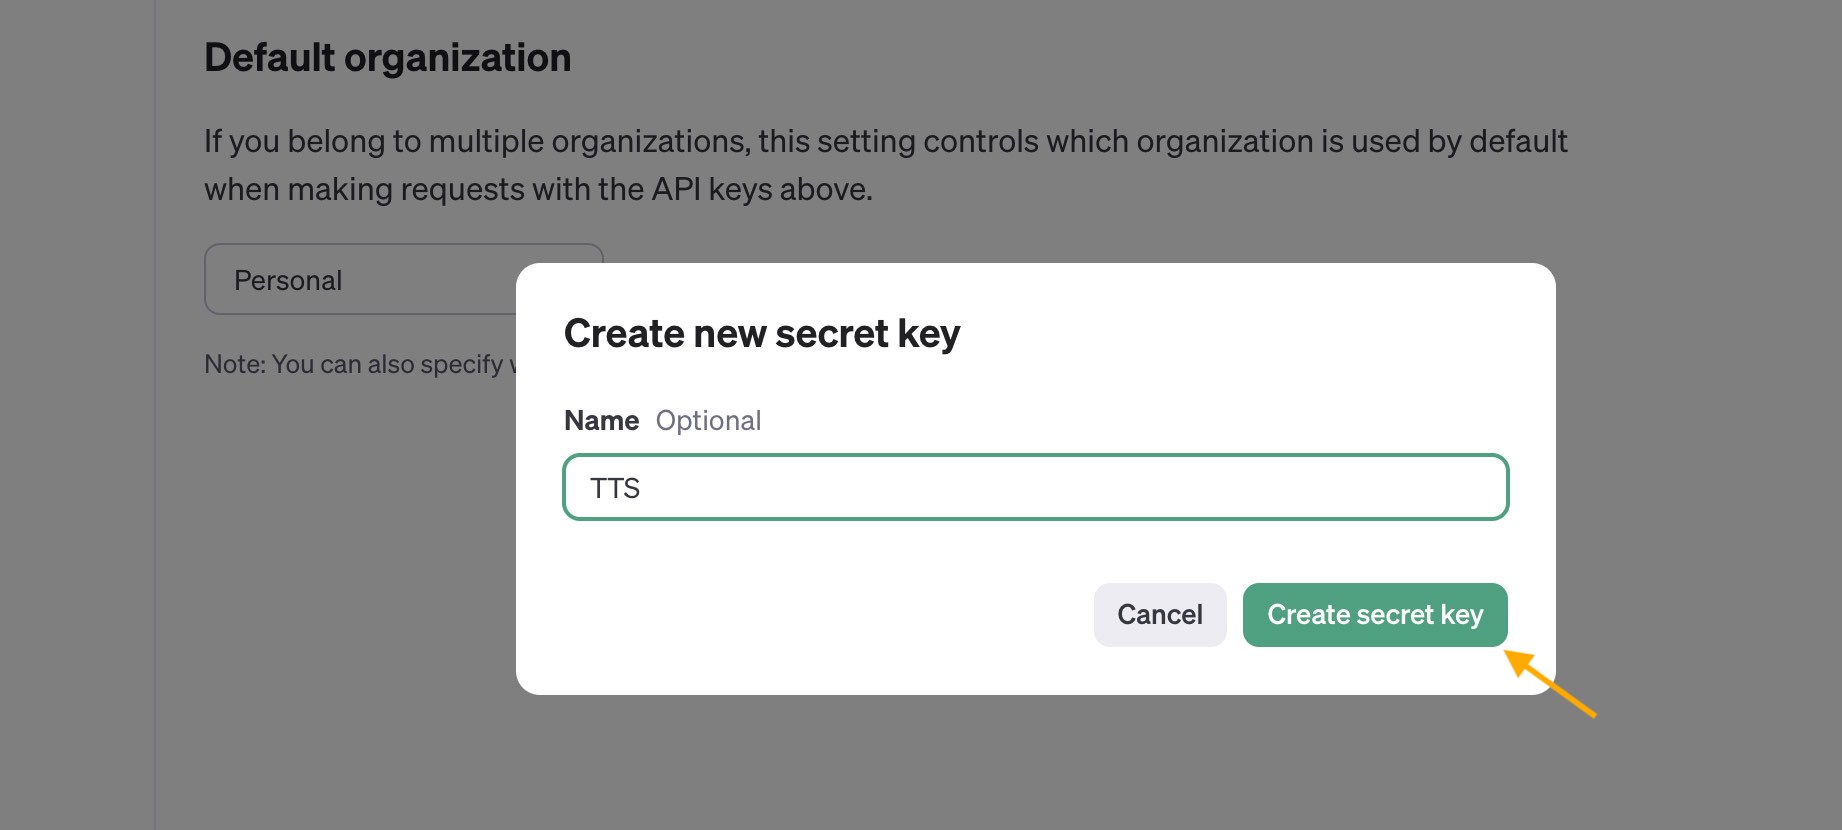
On the API keys page, click “+ Create new secret key“, give it a name, and then click “Create secret key“.
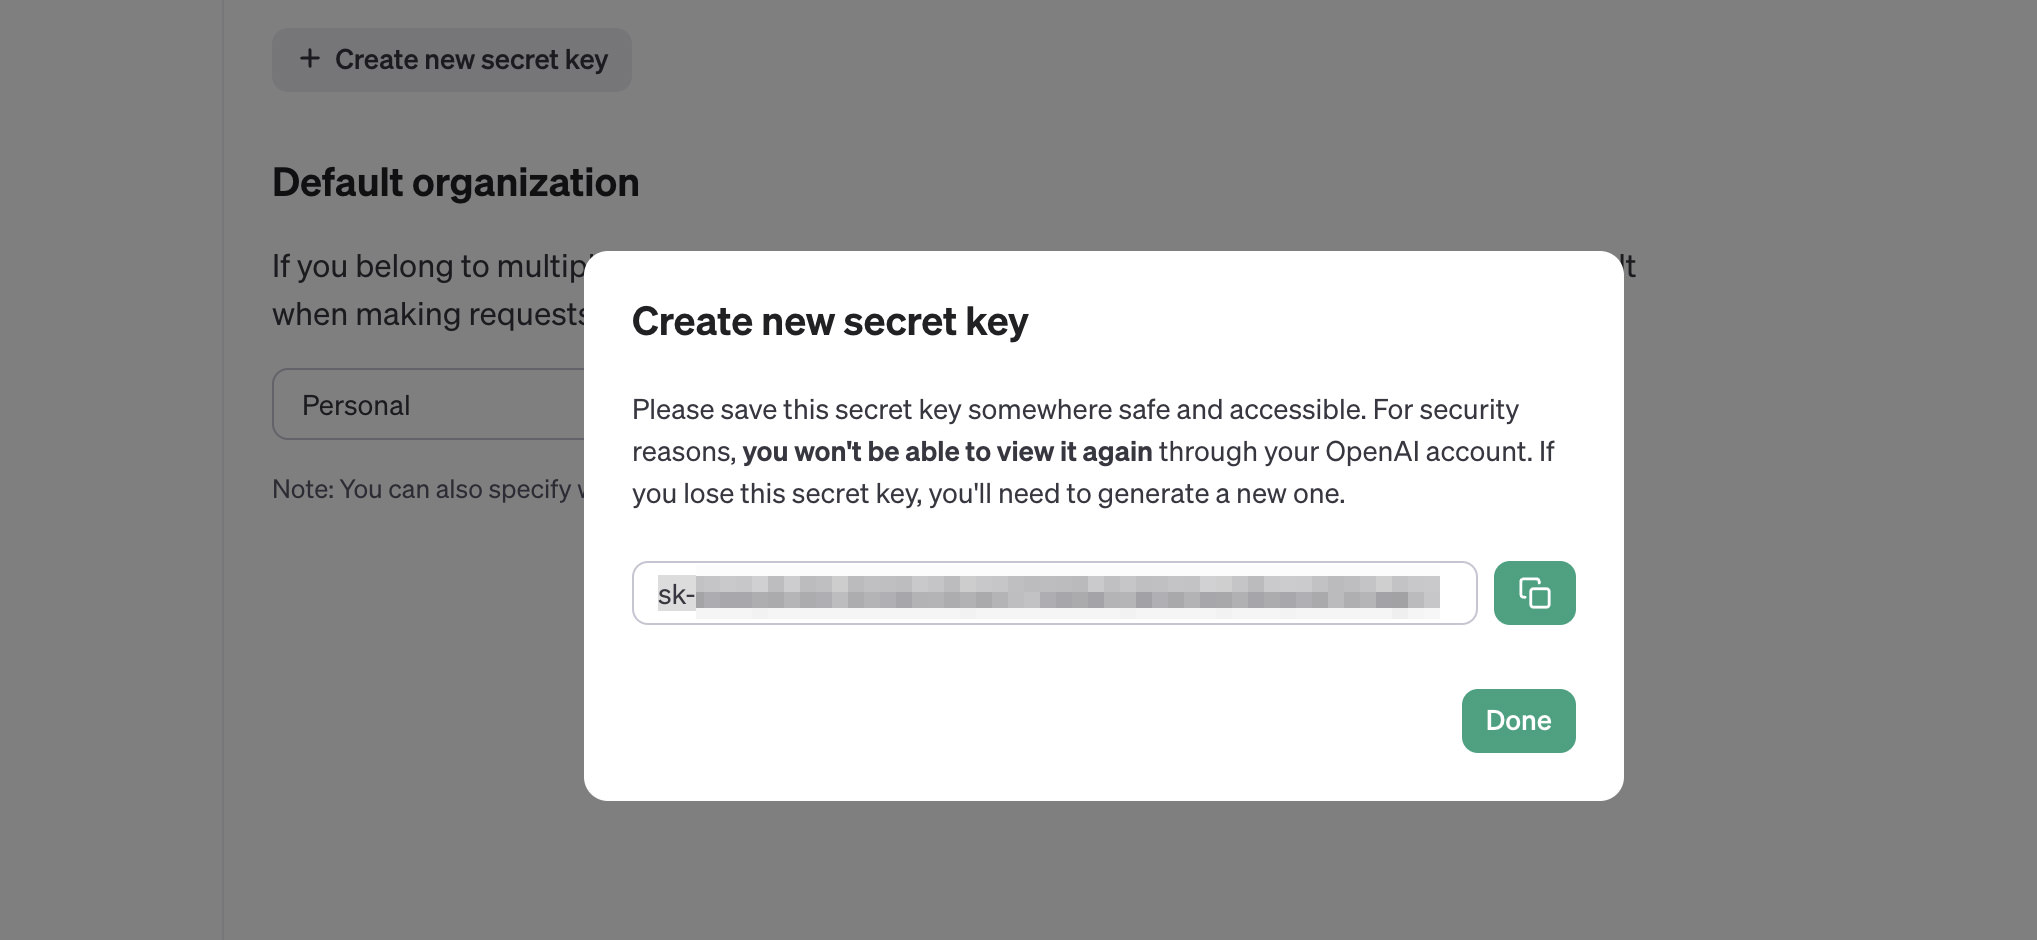
Afterward, you will receive a new secret key. Make sure to copy and keep it somewhere safe because we will use it later.
Store this secret key in a secure and accessible location. You will not be able to view it again through your OpenAI account. If you lose this secret key, you will have to create a new one.
Step 3 – Create Your First Text-to-Speech
Now it’s time to create your first text-to-speech. Refer to the code below, and replace YOUR_API_KEY_HERE with your actual API key.
curl https://api.openai.com/v1/audio/speech \
  -H "Authorization: Bearer YOUR_API_KEY_HERE" \
  -H "Content-Type: application/json" \
  -d '{
    "model": "tts-1",
    "input": "hello world",
    "voice": "alloy"
  }' \
  --output example.mp3
Example:
curl https://api.openai.com/v1/audio/speech \
  -H "Authorization: Bearer sk-IfClJS63a7Ny3v6yKncIT3XXXXXXXXXXXXXX" \
  -H "Content-Type: application/json" \
  -d '{
    "model": "tts-1",
    "input": "hello world",
    "voice": "alloy"
  }' \
  --output example.mp3
Copy the entire code, paste it into your terminal (Windows users can use Command Prompt or PowerShell), and press Enter.
That’s it! This action will create an audio file called example.mp3 that says “hello world”.
Other Changes You Can Make
Now that you’re familiar with converting text into lifelike spoken audio using the OpenAI Audio API, let’s delve into additional adjustments you can make that will influence the quality and style of your TTS output.
Essentially, you can modify the following:
- The model used,
- the input text,
- the voice selected,
- and the output file, including its format.
1. Model
The default model is tts-1, which provides quick response times but at a slightly lower quality. You can switch to the tts-1-hd model for higher definition audio output.
Example:
"model": "tts-1-hd"
2. Input
Any text enclosed within double quotes will be converted into spoken audio.
Example:
"input": "hello there, how are you doing today?"
3. Voice
Currently, there are six different voices available: alloy, echo, fable, onyx, nova, and shimmer.
Example:
"voice": "nova"
4. Output
By default, the output will be in .mp3 format. However, you can change the filename or choose from other supported audio formats. The currently supported formats include:
- Opus .opus: Ideal for internet streaming and communications with low latency.
- AAC .aac: Used for digital audio compression, preferred by platforms like YouTube and devices like Android and iOS.
- FLAC .flac: Provides lossless audio compression, favored by audiophiles for archiving purposes.
Example:
--output myspeech.aac
FAQ
Where do I find the created audio file?
The output file is located in the same folder or path where you executed the cURL script. To find out the current directory of your terminal (Windows users: PowerShell or Command Prompt), use the following command:
- macOS Terminal –
pwd - Windows PowerShell –
pwd - Windows Command Prompt –
cd
Can I create and use a custom copy of my voice?
This feature is not currently supported by OpenAI.
How do other voice options sound like?
You can generate audio using different voice parameters to hear how other voices sound, or you can visit this page to listen to samples.
Does it support other languages?
Yes, it does support multiple languages. I’ve tested it with Japanese, Chinese (Mandarin), Vietnamese, and Spanish, and they seem to sound quite reasonable.