How to Customize WordPress Editor Styles for Better Visual Consistency
WordPress is updated regularly, about 2 or 3 times a year. With each new release, it introduces either some new features or improvements to the existing ones. In this post, we will discuss one WordPress feature that is often overlooked: Editor Styles.
Before version 3.0, where this feature was first introduced, you frequently needed to refresh your page to see how your post looked on the front end. This is because the content styles in the WordPress TinyMCE editor are different from those on the front end. The styles on the front end come from the theme’s styles.css, while the editor styles are specified by the WordPress core function.
60+ Most Wanted WordPress Tricks and Hacks (Updated)
Have you ever came across a WordPress blog, saw something you liked, and thought; how they did that,... Read more
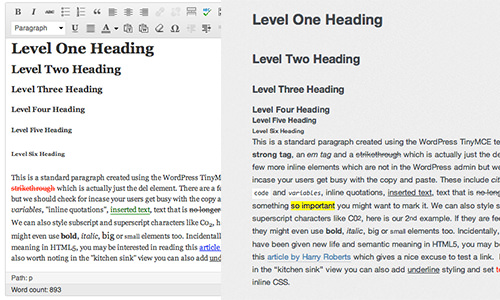
As you can see below, the WordPress editor uses a Serif font family for the content, while on the front end, it uses a Sans Serif font.
In version 3.0, WordPress lets you customize the editor styles to match your theme styles. Let’s take a look.
Add Editor Styles Function
The editor styles can be added with the add_editor_style() function. You need to create a separate stylesheet for your style editor apart from the default stylesheet. Assuming you named it editor-style.css, you can add the following in the functions.php file of your theme.
add_editor_style('editor-style.css');
This stylesheet should contain only the styles for the elements in your post, such as paragraphs, headings, links, and images. If you are unsure what to include in this stylesheet, here is a tip:
Download one of the WordPress default themes like TwentyTen, copy the editor-style.css, and then customize the style rules to match your theme. To set the TinyMCE width, you can add the following in the stylesheet:
html .mceContentBody {
    max-width: 640px;
    padding: 10px;
}
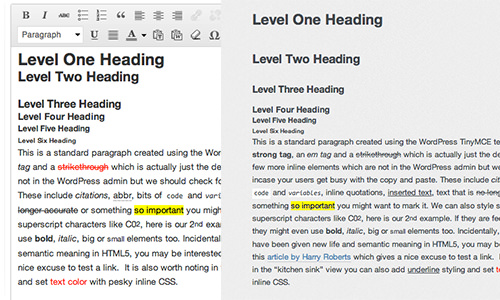
That’s it. You should now find your content styles in the editor similar to those on the front end.
Editor Style for Post Types
In version 3.0, WordPress allows you to create Post Types to handle different content focuses. By default, WordPress allows you to create Pages and Posts. Using Post Types, you can create one for Products or Portfolio with more customized field sets, for example.
To add specific Editor Styles for your Post Types, you can add the following to functions.php:
function my_theme_add_editor_styles() {
    global $post;
    $post_type = get_post_type( $post->ID );
    $editor_style = 'editor-style-' . $post_type . '.css';
    add_editor_style( $editor_style );
}
add_action( 'pre_get_posts', 'my_theme_add_editor_styles' );
Now, in your theme directory, create the stylesheets with the following name convention: editor-style-{post_type}.css. If you prefer using a different name, simply change the value in the $editor_style variable.
For more advanced implementation, you can refer to the following resource on WordPress.org Codex.
Note: This post was first published on the Jul 29, 2013.