A Guide to Understanding CSS Style Priorities
The Cascading Style Sheet (CSS) is one of the simplest web-related languages. Hence, many beginners starting their web development journey often begin with CSS and HTML.
In this article, we’ll revisit CSS fundamentals. We’ll explore how CSS styles are applied, which styles take precedence, and why some style declarations override others.
CSS Terminologies Explained
CSS has become the most popular language for front-end design and has amazing abilities with the release of... Read more
This article is tailored for beginners who are navigating the challenges of CSS and might be encountering mistakes while crafting their first stylesheets. Let’s dive in!
Understanding Default Browser Styles
Firefox, Chrome, Safari, Opera, and Internet Explorer are the leading desktop browsers today. All these browsers, along with others, have built-in styles that help display HTML elements correctly.
Even if you add random HTML elements without any custom styling, they will still appear correctly in the browser.
However, if you look closely, you’ll notice that each browser has slightly different default settings. This can lead to inconsistencies, especially in older browsers like IE6, IE7, and Firefox 3.0.
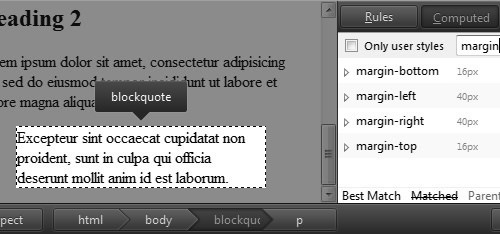
For instance, the latest version of Firefox displays the blockquote element with a margin: 16px 40px 16px 40px. In contrast, Internet Explorer 7 sets the margin for blockquote as margin: 0px 40px.
To address these inconsistencies, many web designers and developers use a CSS Reset file. This file standardizes the appearance of almost all HTML elements.
Here are my top three favorite CSS reset options:
Understanding CSS Selectors
You’ve likely come across the term Selectors while reading about web design and development. What are they?
Selectors in CSS help you pinpoint specific parts of your HTML document to apply styles to. In this article, we’ll focus on three basic selectors that you’ll likely use when building your first website. We’ll explore more in future articles.
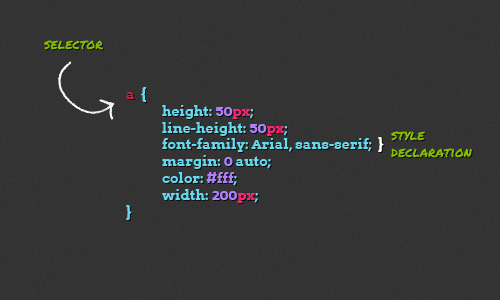
The Type Selector
The Type Selector targets specific HTML elements. For example:
 p {
 /* Your CSS code here */
 }
This will apply styles to all p, or paragraph elements, overriding any default browser styles.
The Class Selector
If you’ve added a class (or multiple classes) to an HTML element, you can target it using the Class Selector, which starts with a dot.
 .box {
 /* Your CSS code here */
 }
This will apply styles to all elements with the class “box”. You can also be more specific:
 p.box {
 /* Your CSS code here */
 }
This targets only paragraph elements with the class “box”. Using the Class Selector will override styles from both the Type Selector and default browser settings.
The ID Selector
The ID attribute is unique; each element can have only one ID, and each ID must be unique within the document.
<div id="content">Content</div>
If an element has an ID, you can target it using the ID Selector, which starts with a hash (#).
 #uniqueID {
 /* Your CSS code here */
 }
Because an ID is unique, it has the highest priority among selectors. So, styles applied using the ID Selector will override all others, including Class and Type Selectors, as well as default browser styles.
How to Add Styles to Your HTML Document
In this guide, we’ll explore different methods for adding CSS styles to an HTML document.
Using External CSS Files
External styles are stored in a separate .css file. You can link this file to your HTML document using the <link> tag.
<link rel="stylesheet" href="css/style.css">
Styles from this file will override the browser’s default styles. They can also override other styles based on their priority level.
This method is highly recommended, especially for large projects with lots of CSS code. It makes your styles easier to manage. For example, you can have different CSS files for different purposes, like typography.css for text styles.
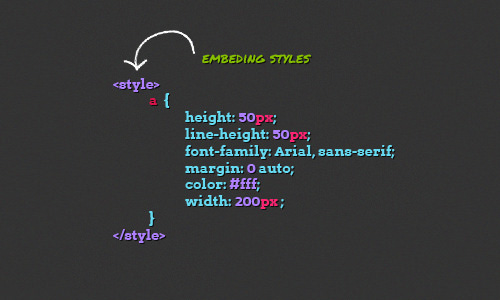
Using Internal CSS
Internal styles are added directly within the HTML document, usually inside the <head> tag.
 <head>
 <style type="text/css">
 h1 {
   /* Your CSS code here */
 }
 p {
   /* Your CSS code here */
 }
 </style>
 </head>
This method is not ideal for large projects. It makes your HTML file longer and harder to manage. If you have multiple pages, you’ll need to copy and paste the styles into each one, which is time-consuming.
Internal styles have higher priority and will override external styles.
Using Inline CSS
Inline styles are added directly to individual HTML elements.
<p style="margin: 5px;">This is a paragraph</p>
This will add a 5px margin to the paragraph. It will override any margins set in both internal and external styles.
However, this method is not recommended. It makes your HTML messy and hard to manage, especially if you have many inline styles.
Further Reading: Three Ways to Insert CSS – W3Schools.
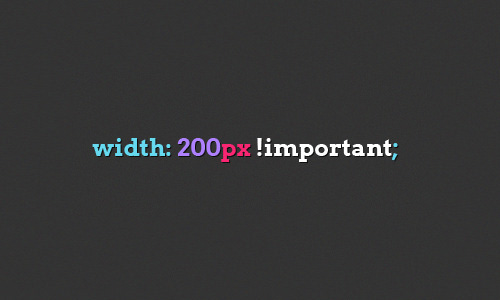
Understanding the !important Rule in CSS
At times, you might want to apply a specific style to an element, but that style has already been set elsewhere in the stylesheet or directly in the HTML. Here’s an example:
Let’s say we have an anchor tag with styles directly added to it:
<a style="color: #border: 1px solid #156E8E; background-color: #389ABE;">This is a link</a>
We also have a separate set of styles for the same anchor tag in the stylesheet:
 a {
 border: 1px solid #333;
 background-color: #555;
 }
In such cases, you can use the !important rule to make sure the browser uses the stylesheet styles over the inline styles.
 a {
 border: 1px solid #333 !important;
 background-color: #555 !important;
 }
The !important rule tells the browser that this particular style is the most important and should override any other styles, even if they are directly added to the HTML element (Inline Styles).
Further Reading: !important CSS Declarations: How and When to Use Them – Smashing Magazine.
Wrapping It Up
We’ve covered all the key points in this article. It’s clear that different selectors and styles have varying levels of priority in how a browser displays them. While this article is aimed at beginners, even experienced web designers can benefit from revisiting the basics.
It’s often good to go back to the fundamentals, especially when we get caught up in creating cool and complex designs.
I’ve also provided a demo and source file for further exploration. If you have any questions or notice any errors, feel free to leave a comment below.