How to Create and Send Email Newsletter For Free
Most businesses, especially the developing ones, do not have much marketing budget to use on paid email newsletter services and are always looking for free newsletter services.
So, if you are looking for such newsletter tools and tips that help you send a your burgeoning business’s newsletter to a small group of people, then this tutorial is just for you. It’ll guide you on how to save your newsletter templates as an HTML template and start sending them, with the help of CampaignMonitor.
Recommended Reading: 9 Tricks To Design The Perfect HTML Newsletter
Start with email template in Photoshop
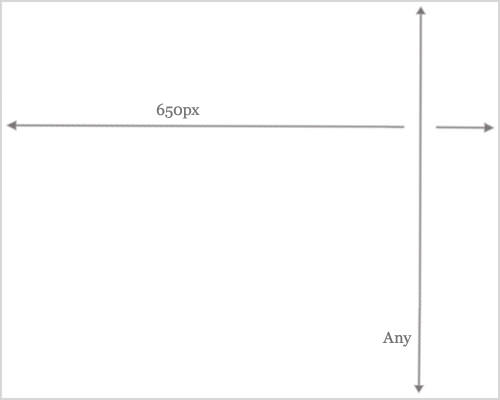
If you have an idea on what you want your newsletter template to look like, you can start working with Photoshop. Otherwise, you can download a template from many free email template providers. There are no specific width and height of an email template, but to make sure it is compatible and readable on any email without breaks, we suggest you set the width size at not more than 650px. There are however no limitations on heights, so that parameter is up to you.
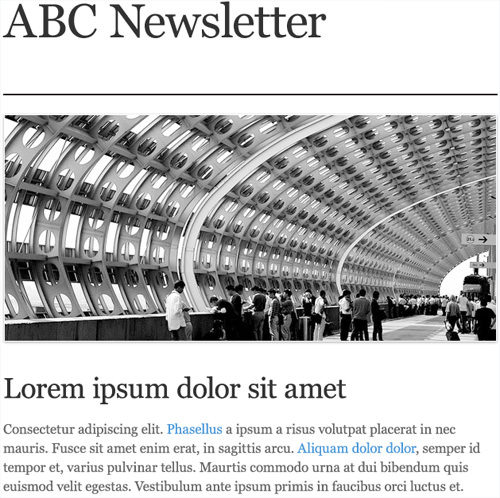
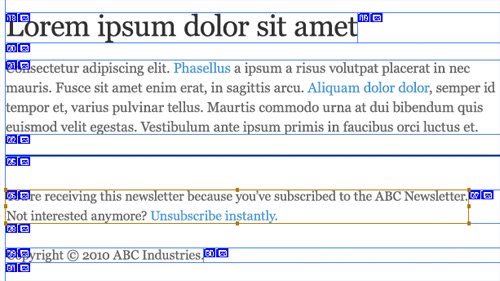
Email template
You can be as creative as you like with your email template, but bear in mind, with more creative elements included, there will be more work in slicing each element. The template that we will be using has only a few simple elements: a header, photo, lines and text, for the benefit of this guide.
Fonts selection
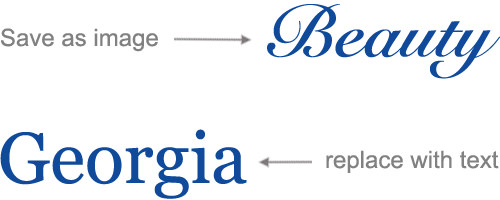
You can definitely use any type of font available on your Photoshop. But if you are creating a newsletter, it is advisable to use web fonts such as Times New Roman, Arial and Georgia. Otherwise, use your special fonts, but save them as images, rather than as text.
Try to limit having to save too many images in your template, as this will only make it larger and hence take longer to load.
1. Slice your email template
In this guide, we will be using an edited version of free email template by CampaignMonitor. Download it here to follow this tutorial.
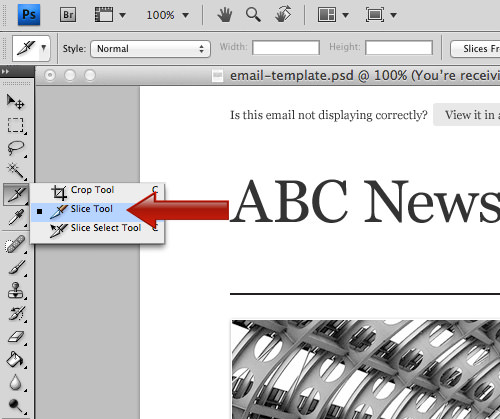
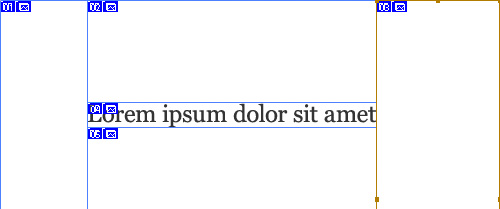
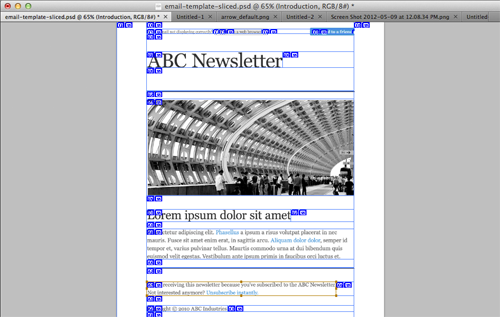
Now that you are ready with your email template, open it with Photoshop, select Slice Tool and start slicing every element of the template.
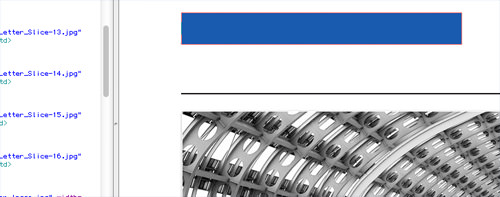
In this process, you have to slice every single space, text, line and image.
When you slice a text, make sure you select the exact size, do not leave any extra space in the text area. For empty spaces, slice them in one big slice, but separate them into squares.
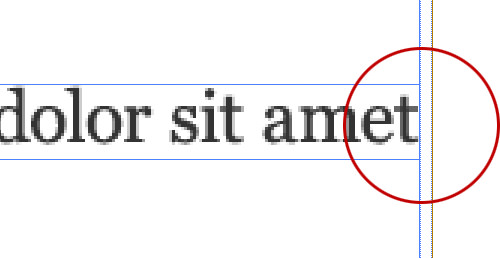
The next tool you need to use with Photoshop is the Slice Select Tool. Use this tool to fix every single sliced element in your template. Make sure every line is connected, don’t leave any empty area without slicing them.
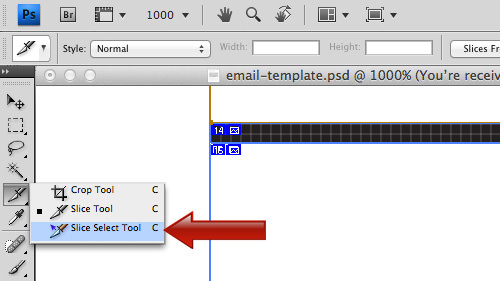
With the Slice Select Tool, zoom your template and check every single slice you made. Make sure every line is connected and fixed.
The result will look like this.
2. Save as HTML template
When you are ready with your sliced template, go to File and select Save for Web & Devices.

A window with saving options will pop up. Firstly, double-click on your image element and name it so you can easily recognize the image file when it is saved. Click OK after you have named them.

Next at the top right corner of the popup window, set the image type as JPEG from the dropdown menu. The quality can be set to 60 or 80. If you set the quality to 100, the image quality will be maximum but it will make your template heavy.
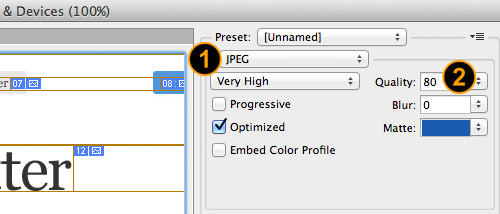
Now click on the Save button at the bottom of the window.
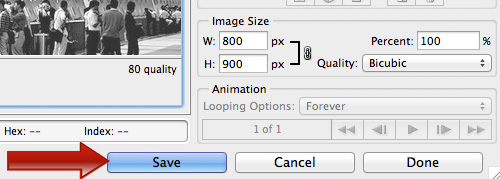
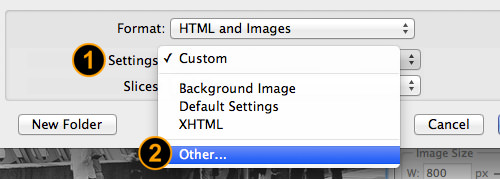
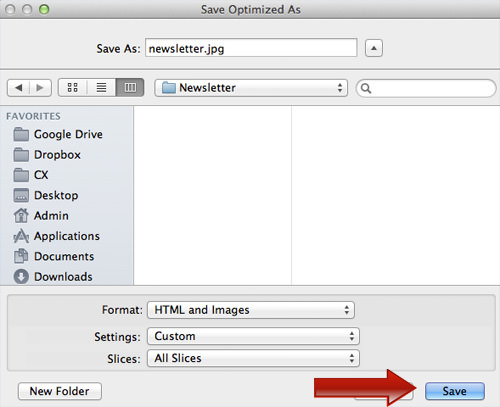
A new popup window will appear. Here, select the destination where you want the file to be saved at, then change the format to HTML and Images and set the Slices to All Slices.
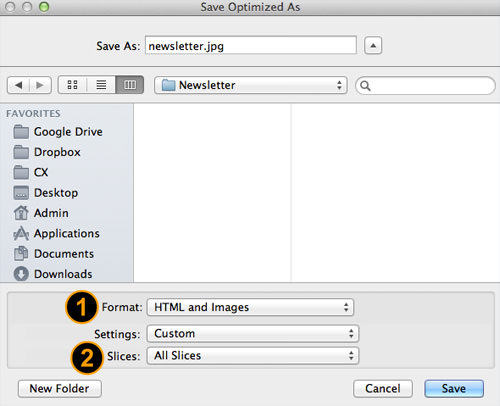
Next, under the Settings dropdown menu, select Other.
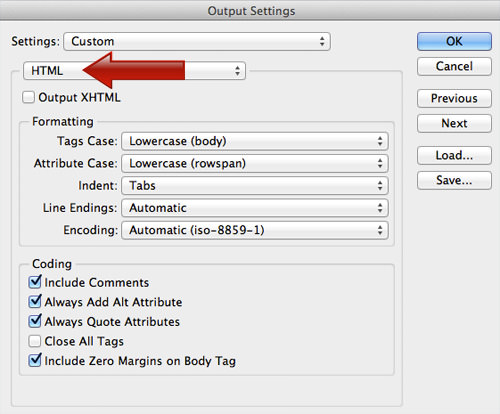
Another popup window will appear, under the HTML section, make sure the choices under ‘Formatting’ are as below; do the same for the ‘Coding’ section.
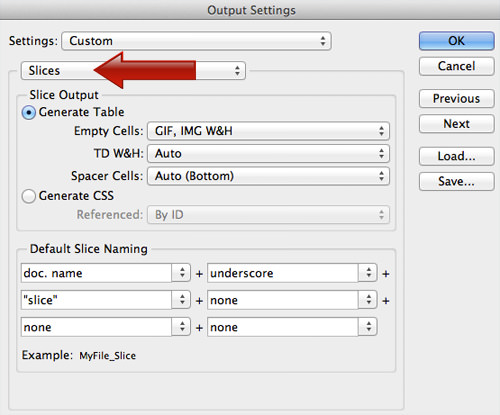
Now from the HTML dropdown menu, select Slices, and select Slice Output to Generate Table and set the columns as the following.
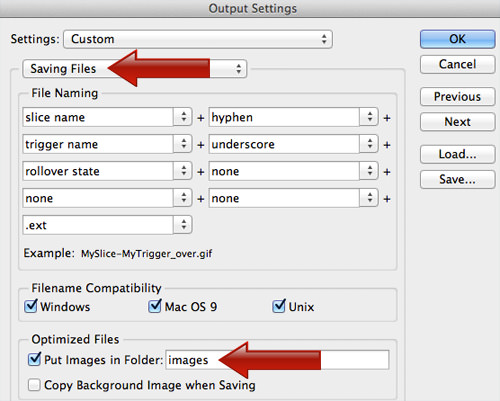
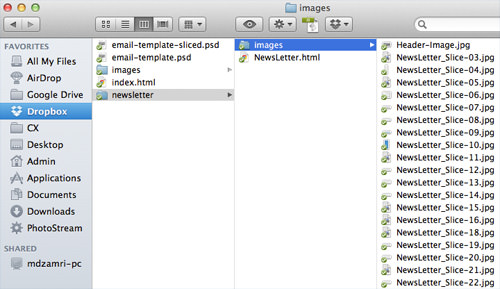
Now from Slices, go to Saving Files from the dropdown menu, go down to ‘Optimized Files’ section and check Put Images in Folder and set the image folder’s name. The default image folder will be ‘images’. Then click ‘OK’.
Clicking OK will bring you back to the previous popup window, now click Save.
After you press the save button, open up the location folder where you saved the file to, and you will see the html and images folder containing sliced images already saved for your email template.
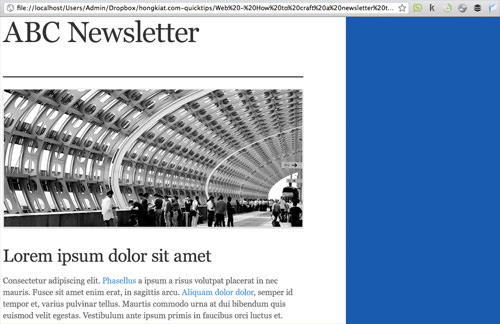
Open the ‘.html’ file in your browser, and you will see that your newsletter has now been converted into an HTML template.
3. Fix HTML, change text image to web fonts
At the end of the following steps, you will get the finalized email template in HTML format.
All elements in the HTML newsletter are saved in images, that include all text. Now you need to convert the text images to web fonts. To do that, open the ‘.html’ file with HTML editor. In this example, I am using Dreamweaver.
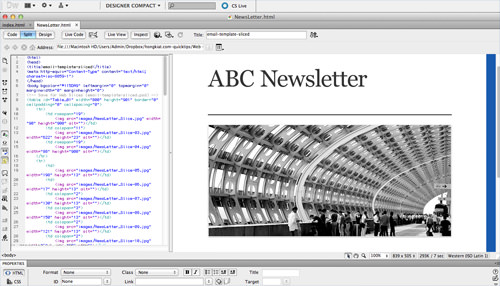
Click on the header and check on the highlighted HTML.

The HTML will be something like this;
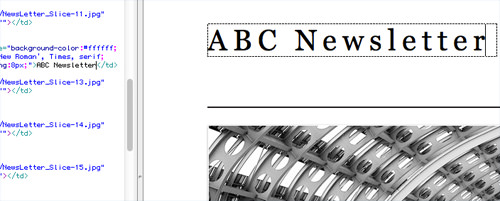
<img src="https://assets.hongkiat.com/uploads/create-send-email-newsletter/NewsLetter_Slice-12.jpg" width="408" height="47" alt="">
Now delete every line that’s highlighted, alternatively, click on the header image and press delete. Once deleted, you will see the area filled with the default background color.
Now go back to Photoshop, check the header’s font details. You need to get the font type, color and size.
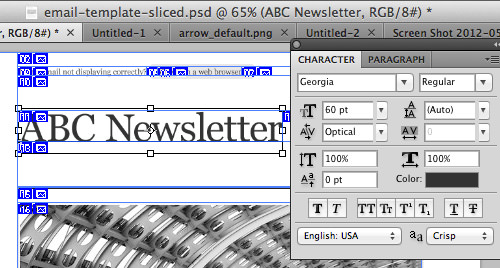
Once you get the details of the font, enter the header text in the header area of the template, and include the font details too. In my example, my header text HTML is as follow:
<td colspan="5" style="background-color:#ffffff; font-family:Georgia, 'Times New Roman', Times, serif; font-size:41px; letter-spacing:8px;">ABC Newsletter</td>
The HTML line above has ‘style’ included. That is where you define your background color, font family, font size as well as letter spacing. Try to fill the text space with suitable letter spacing and font size; make sure it does not break your template.
Now you need to repeat the same process for every text in your template. Make sure all text images are transformed into web fonts and avoid unnecessary images in HTML.
Next one is optional, but you can set the newsletter to center, add the alignment in the <table> section.
<table id="Table_01" align="center">
To review your final template, open the ‘.html’ file on your browser;

You can also download the final template here for your reference.
4. Send HTML as newsletter via Gmail
Now here’s a little trick to get you to send your HTML email directly from Gmail. To get this done, you actually need to upload the newsletter folder to your web server, but in case you don’t have one, lets get it done with Dropbox instead.
Using Dropbox Public Folder
If you registered your Dropbox account before 1st August 2012, you may follow the steps below.
-
Register a free account with Dropbox, and then install the app to your PC or Mac so you can skip the uploading process over the Web. Let the app do the uploading for you.

-
The email template you created was saved in a folder. Copy the folder, and paste it in the Public folder found in your Dropbox (Dropbox > Public).

-
Now, locate your ‘.html’ file in the folder, right-click and select Copy Public Link.

-
Once you select ‘Copy Public Link’, the link will be saved in your computer memory. Paste this link to your web browser, then open it as a web page.

-
You need to copy the content of this newsletter, so use your keyboard and press Ctrl + A to select all and then Crtl + C to copy the whole content (for Mac, use Cmd + A to select all and Cmd + C to copy)
-
Open your Gmail, click Compose to get a blank email, click your mouse in the text field and then press Ctrl + V to paste your newsletter in the email content field. Mac users can press Cmd + V

-
Your newsletter now appears as your email content. Enter the subject and email address and send out your first email newsletter!
Using Site44 app
Since Dropbox has no longer provide Public folder feature for Dropbox user who registered after 1st August 2012, you may try Site44, an app that turns Dropbox folders into websites.
-
Visit Site44 and sign in with Dropbox to get started.

-
Allow Site44 connects with your Dropbox account. In most cases, you’re required to verify your email address.

-
Click on "Click a new website" to start.

-
In "Use a site44.com domain" section, type in your preferable folder name for this website in your Dropbox and click "Create". In this case, I am using "mynewsletter" as my folder name. After that, accept the terms of use to proceed.

-
Now, Site44 has created new folders for the website in your Dropbox.

-
Copy newsletter.html and images folder which you created previously to mynewsletter.site44.com Dropbox folder.

-
Open web browser and go to http://mynewsletter.site44.com/newsletter.html.

-
You need to copy the content of this newsletter, so use your keyboard and press Ctrl + A to select all and then Crtl + C to copy the whole content (for Mac, use Cmd + A to select all and Cmd + C to copy)
-
Open your Gmail, click Compose to get a blank email, click your mouse in the text field and then press Ctrl + V to paste your newsletter in the email content field. Mac users can press Cmd + V
-
Your newsletter now appears as your email content. Enter the subject and email address and send out your first email newsletter!
Conclusion
As long as the newsletter HTML folder is still saved in your Dopbox Public folder, your recipient will be able to view your newsletter correctly, but once you remove the folder, the link will be broken, and the recipient will only be able to view the text. I hope you can follow this tutorial on how a basic HTML newsletter can be created with Photoshop then sent in HTML form via Gmail. If you have other ways, do share with the rest of our readers.