How to Create Medium-Like Floating Action Menu
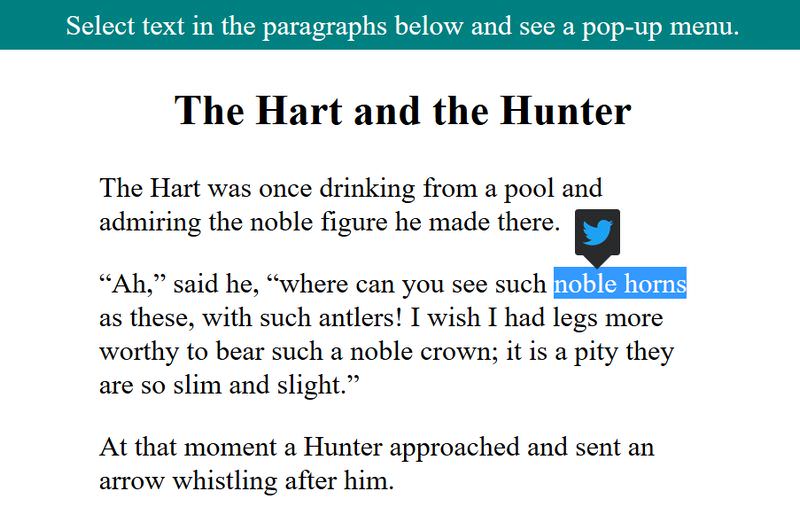
The popularity of floating action menus has been on the rise, especially since Medium.com brought the feature into vogue. In brief, the floating action menu pops up when you select some text on a web page. The menu appears near the selection, showing different actions that allow you to quickly format, highlight, or share the selected text.
In this tutorial, I’ll show you how to display an action menu for a selected text snippet on a web page. Our action menu will enable users to tweet the selected text to their followers.
Read Also: Add Contextual Menu on Your Website With HTML5
1. Create the HTML
The starter HTML is simple, we only need some text the user can select. For the demo, I’ll use “The Hart and the Hunter” bedtime story as sample text.
<article>
  <h1>The Hart and the Hunter</h1>
  <p>The Hart was once...</p>
  ...
</article>
2. Create the action menu template
I’m adding the HTML code belonging to the action menu inside a <template> element. Whatever is inside the <template> tag, it won’t be rendered by browsers until it is added to the document using JavaScript.
<template id="shareBoxTemplate">
  <span id="shareBox">
    <button></button>
  </span>
</template>
Don’t leave any unnecessary space inside the <template> tag, as that might disturb the action menu layout once it’s inserted into the document. If you want, add more buttons inside #shareBox for more options.
3. Create the CSS
The CSS for the #shareBox inline container goes like this:
#shareBox {
  width:    30px;
  height:   30px;
  position: absolute;
}
The position:absolute; rule will let us place the menu wherever we want on the page.
I also styled the action button inside #shareBox with a background color and image and in its ::after pseudo-element I added a triangle for a down arrow.
#shareBox > button {
  width: 100%;
  height: 100%;
  background-color: #292A2B;
  border: none;
  border-radius: 2px;
  outline: none;
  cursor: pointer;
  background-image: url('share.png');
  background-repeat: no-repeat;
  background-position: center;
  background-size: 70%;
}
#shareBox > button::after {
  position: absolute;
  content: '';
  border-top: 10px solid #292A2B;
  border-left:10px solid transparent;
  border-right: 10px solid transparent;
  left: 5px;
  top: 30px;
}
4. Add event handlers with JS
Moving on to JavaScript, we need to add event handlers for the mousedown and mouseup events to capture the beginning and the end of the text selection.
You can also do research for other selection events such as selectstart and use them instead of mouse events (which would be ideal but as of yet their browser support are not very good).
Also add a reference to the <template> element using the querySelector() method.
document.addEventListener('mousedown', onMouseDown);
document.addEventListener('mouseup', onMouseUp);
var temp = document.querySelector('#shareBoxTemplate');
function onMouseDown() {
}
function onMouseUp() {
}
5. Clear previous selections
In the mousedown event, we’ll perform some clean-up, i.e. clear any previous selection and the belonging action menu.
function onMouseDown() {
  document.getSelection().removeAllRanges();
  var shareBox = document.querySelector('#shareBox');
  if (shareBox !== null)
  shareBox.remove();
}
The getSelection() method returns a Selection object representing the ranges of text currently selected by the user and the removeAllRange() method
removes all ranges from the same Selection object, thus clearing any previous selection.
6. Display the action menu
It is during the mouseup event, when we’ll confirm if a text selection was made and take further action.
function onMouseUp() {
  var sel = document.getSelection(),
  txt = sel.toString();
  if (txt !== "") {
    var range = sel.getRangeAt(0);
    if (range.startContainer.parentElement.parentElement.localName
    === "article"
    || range.startContainer.parentElement.localName
    === "article") {
        // some text in the article was selected
    }
  }
}
Get the selected text string by calling the toString() method of the Selection object. If the selected text is not empty, go ahead and get the first range from the Selection object.
Range is the selected portion of the document. Typically, users will make a single selection only, not multiple (by pressing the ctrl/cmd key), so just get the first range object (at index 0) from the selection using getRangeAt(0).
Once you’ve got the range, see if the selection started from a place that’s inside the article. The startContainer property of the range returns the DOM node from where the selection began.
Sometimes (when you select within a paragraph), its value is just a text node, in which case its parent element will be <p> and the parent of the <p> element will be <article> (in the sample code in this post).
Other times, when you select across multiple paragraphs, the startContainer will be <p> and its parent node will be <article>. Hence the two comparisons in the second if condition in the above code.
Once the if condition passes, it’s time to fetch the action menu from the template and add it to the document. Place the code below inside the second if statement.
document.body.insertBefore(document.importNode(temp.content, true), temp);
The importNode() method returns nodes from external documents (in our case, nodes from <template>). When it’s called with the second parameter (true), the imported element/node will come with its child elements.
You can insert #shareBox anywhere in the document body, I’ve added it before the template element.
7. Place the action menu
We want to place the action menu right above & at the middle of the selected area. To do so, get the rectangle values of the selected area using the getBoundingClientRect() method that returns the size and the position of an element.
Then, update the top and left values of #shareBox based on the rectangle values. In the calculations of the new top and left values, I made use of ES6 template literals.
var rect = range.getBoundingClientRect();
var shareBox = document.querySelector('#shareBox');
shareBox.style.top = `calc(${rect.top}px - 38px)`;
shareBox.style.left = `calc(${rect.left}px + calc(${rect.width}px / 2) - 30px)`;
8. Add functionality
Now that we added the action menu near the selected text, it’s time to make the selected text available for the menu options so that we can perform some action on it.
Assign the selected text to a custom property of the share button called 'shareTxt' and add a mousedown event listener to the button.
var shareBtn = shareBox.querySelector('button');
shareBtn['shareTxt'] = txt;
shareBtn.addEventListener('mousedown', onShareClick, true);
The true parameter of addEventListener() prevents the mousedown event from bubbling.
Inside the onShareClick() event handler, we insert the selected text into a tweet by accessing the shareTxt property of the button.
function onShareClick() {
  window.open(`https://twitter.com/intent/tweet?text=${this.shareTxt}`);
  this.remove();
  document.getSelection().removeAllRanges()
}
Once the button is clicked, it does what it’s supposed to do, then remove itself from the page. It’ll also clear any selection in the document.
Source code & demo
In the Codepen demo below, you can test how the action menu works. You can also find the full source code in our Github repo.