How to Connect Nikon Z Wirelessly to iPad and iPhone
If you’re already loving your experience with Nikon Z Series (Z6, Z7, Z50 or Z9) cameras, then you’ll love it even more when I’ll tell you that the photos shot on it can be sent wirelessly to your iPhone or iPad without using cables, or going through PC or Mac!
In this post, I’m going to show you how to establish a wireless connection between your iPad or iPhone and the Nikon Z camera so that the photos taken will be instantly available for preview or post-editing with your favourite app on your iPhone or iPad.
Let’s get started.
Connecting Nikon Camera Wirelessly to PC
It's quite a hassle that every time you need to transfer photos or videos from your camera to... Read more
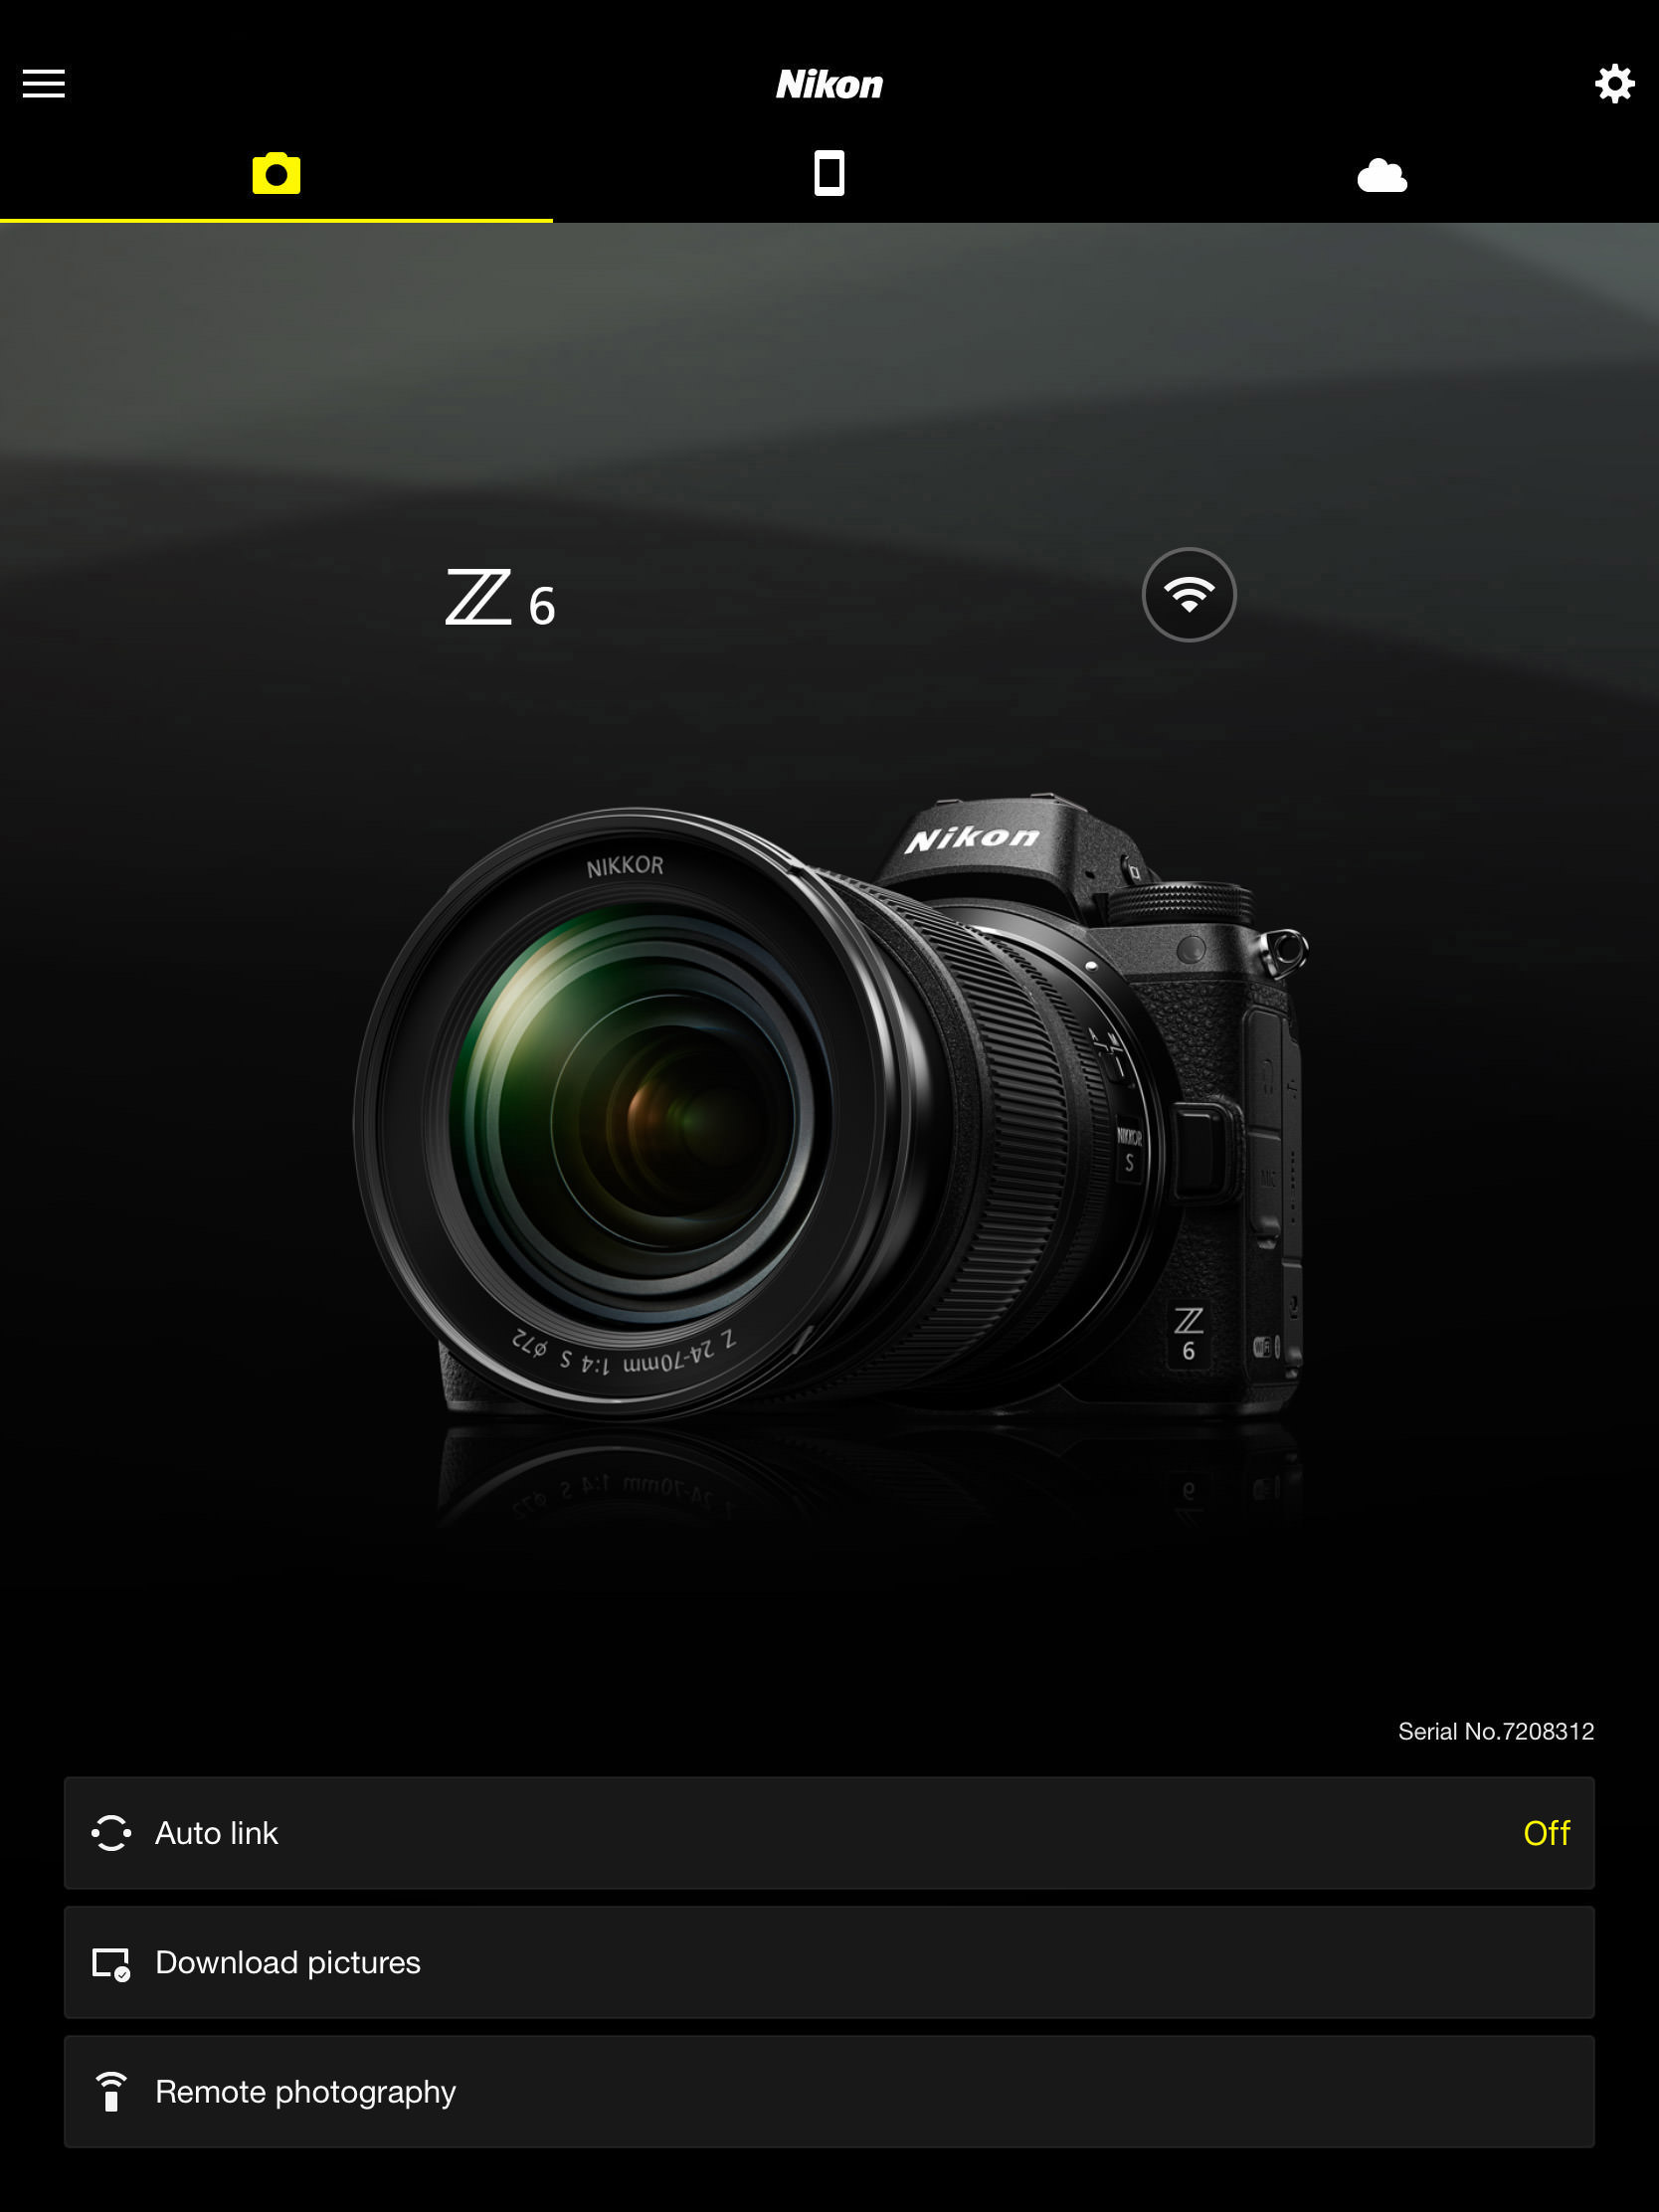
Connecting Nikon Z Series Camera to iOS
To establish a connection between your Nikon Z series camera and your iPad or iPhone, take the following steps:
- Download the SnapBridge app from the App Store on your iPad or iPhone and launch it.
- Check to accept the Application Agreement License and then tap Start.
- Tap “Connect to camera”.
- Select the type of camera you are using; in this case, we will be choosing the “mirrorless camera”.
- Now select “Pairing (Bluetooth)”.
Once this is done, the SnapBridge app will provide you with two options to achieve a wireless connection between your iOS device and the camera i.e., “WiFi Connection” or “WiFi + Bluetooth Connection.”
Note: The former option establishes a one-time connection between the two devices and the latter method – which I would recommend – will ensure that the two devices are always connected as long as Bluetooth and WiFi are turned on.
- Now, on your camera, press the Menu button.
- Navigate to SETUP MENU > Connect to smart devices > Pairing (Bluetooth).
- Select “Start Pairing”. Your camera’s name will be shown on the LCD screen, as well as on the iPad.
- Go to the iPad, tap the camera’s name. If a "Select Accessory" screen appears, tap the camera’s name again.
- Tap “Understood” to continue.
- Making sure that the two sets of authorization codes appearing on your camera and iPad are the same, tap Pair on your iPad, or click OK on your camera.
- Lastly, on your camera, make sure “WiFi connection” is turned on.


That’s it! both your camera and iOS device should now be paired. Any photos taken on the camera will be send to your iPhone or iPad automatically.

Accessing Camera Photos on iOS Devices
To view all photos taken on your camera on your iPad or iPhone, tap “Download pictures” in the SnapBridge app. Photos from your camera will be downloaded and listed in the thumbnail format.
Tap on any photo for a larger view or for download options.
Note #1: Tap “Join” if you are prompted to join the camera’s WiFi.
Note #2: If no photos are being displayed, tap on the ” Display options” and make sure you have the correct formats selected.
