Simplify Payments with Stripe Checkout for Web and Mobile
If you’re involved in e-commerce and haven’t yet explored Stripe, you’re missing out on one of the easiest ways to receive payments online. Stripe handles the payment process without requiring complex coding. Not long ago, Stripe introduced a new payment form: Checkout. It integrates seamlessly with stripe.js and works smoothly on both mobile and desktop browsers.
Checkout allows users to complete their payment without leaving the page they’re on. Users can also opt to save their credit card information by entering an SMS code sent to their phone. This feature is embeddable and effectively addresses issues related to mobile payments.
Checkout Overview
The Checkout form is easy to integrate into a website. Simply insert this snippet wherever you’d like the checkout button to appear:
<form action="/charge" method="POST">
    <script
        src="https://checkout.stripe.com/checkout.js" class="stripe-button"
        data-key="pk_test_6pRNASCoBOKtIshFeQd4XMUh"
        data-image="/square-image.jpg"
        data-name="Demo Site"
        data-description="2 widgets ($20.00)"
        data-amount="2000">
    </script>
</form>
It’s recommended to link directly from the Checkout server, ensuring that the form updates automatically with any changes. You can customize the logo and text in Checkout to match your brand or design using the appropriate data attributes: data-name and data-image.
This default script generates the following button:

To change the button label, simply add data-panel-label to the script and customize the button name. For more documentation on available options, please visit this page.
When the button is clicked, a window will pop up, displaying forms to complete the payment.
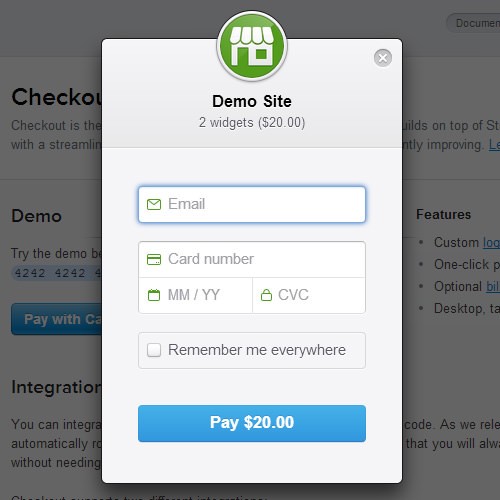
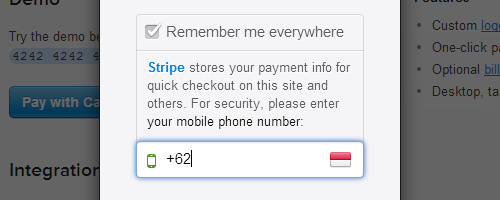
As mentioned, Checkout offers an optional feature to save credit card information using an SMS code. Users simply need to enter their phone number, and for future payments, they can enter the code sent to them.
Customizing The Form
There is also a custom form integration that can be used with any HTML element or JavaScript event. Here’s a quick example from the custom integration documentation:
<script src="https://checkout.stripe.com/checkout.js"></script>

<button id="customButton">Purchase</button>

<script>
var handler = StripeCheckout.configure({
    key: 'pk_test_6pRNASCoBOKtIshFeQd4XMUh',
    image: '/square-image.jpg',
    token: function(token, args) {
        // Use the token to create the charge with a server-side script.
        // You can access the token ID with `token.id`
    }
});

document.getElementById('customButton').addEventListener('click', function(e) {
    // Open Checkout with further options
    handler.open({
        name: 'Demo Site',
        description: '2 widgets ($20.00)',
        amount: 2000
    });
    e.preventDefault();
});
</script>
Rather than working with data- attributes like the previous example, this custom form uses JavaScript. The StripeCheckout.configure() function is the handler object when the page loads, and options can be passed within the open() or configure() methods.