How to Teach Kids to Code with MIT Scratch Language
Children learn differently than adults, therefore if we want to teach them to code, we need to use an approach suitable to their needs. Adults’ coding courses usually start with explaining building blocks, such as data types, variables, and functions, however this teaching method doesn’t fit well with most kids.
Visual block languages offer a solution to this issue by introducing learners to coding with the help of visual building blocks. Block languages (sometimes also called bubble languages) focus on logic rather than on syntax, and teach coding via creative projects.
A handful of great apps teaching block languages, such as Scratch, Code.org, and Tynker, are available on the net (Scratch and Code.org are free, and Tynker comes at a friendly price).
Read Also: 5 Myths about Teaching Kids to Code
One of the best thing about them is that you don’t necessarily have to be a programmer to help your kids get started with them. In this article, we’ll have a look into Scratch, a visual block language developed by Google and the MIT Media Lab.

Get started
Scratch is a programming language created for educational purposes, in which you need to snap blocks together in order to create different projects, such as animations, games, and interactive stories.
Scratch is primarily created for children and teenagers between the ages of 8 and 16, but in some cases it can work for younger kids and adult learners as well.
Scratch is available in more than 40 languages, its latest version is Scratch 2 that runs in more recent web browsers on Windows, Mac, and Linux machines. If you have problems with the system requirements, you can use its earlier version, Scratch 1.4, as well.
Read Also: 10 Tools to Teach Kids Basics of Programming
You can use Scratch in 3 different ways:
- Create an online account, and use the online editor. If you choose this, you can save your projects online, and share them with the Scratch community.
- Use the online editor anonymously. If you choose this, you can save your projects only to your computer.
- Download the Scratch Offline Editor, and work locally.
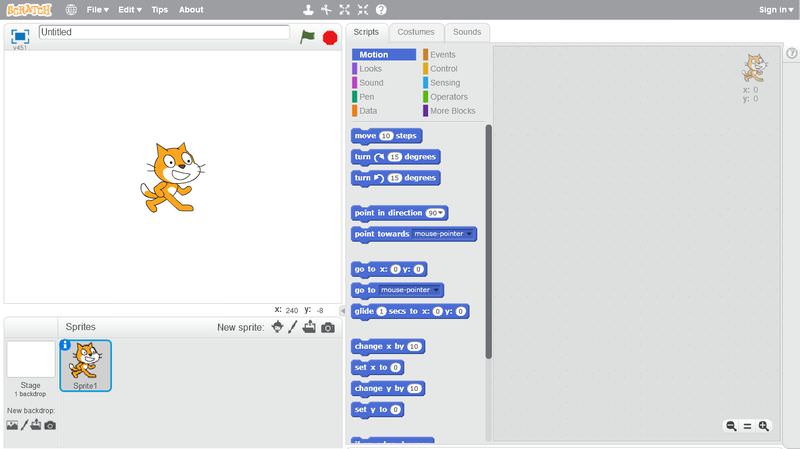
To get started, click the Create menu in the top menu bar, and the Scratch editor will appear on your screen.
Create the design
First, let’s add the design elements to our program. The workflow of real-life programming is basically the same, first we need to create the design elements, such as backgrounds, buttons, and navigation (this part is usually done by a designer), then we need to add functionality to them with code (this part is done by a programmer).
Sprites and backdrops
Scratch offers two different kind of design elements: backdrops and Sprites.
The term “backdrop” stands for the background, and the term “Sprite” stands for the characters (the default character is the cat you can see on the screenshot above). Their related settings are in the bottom left corner, below the stage.
There are four ways to add a new backdrop or Sprite to the stage, you can choose one from a predefined library, paint one, upload one from your computer, or take a photo with your web camera.
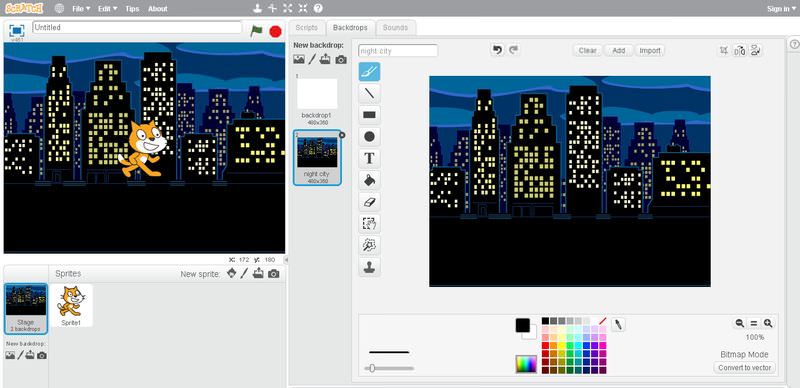
Now let’s use the quickest solution, and choose a backdrop from the Backdrop Library.

Also let’s choose one or more Sprites from the Sprite Library by clicking on the little sprite icon next to the “New sprite” label in the bottom left corner of the screen.
If you want, you can edit both the backdrop and the Sprites with the help of a handy image editor that automatically appears after you add a new design element to the stage.
Below, you can see my screen right after I added the “Night city” backdrop to my stage — if I wanted I could change the looks of the backdrop with the drawing tools of the image editor.
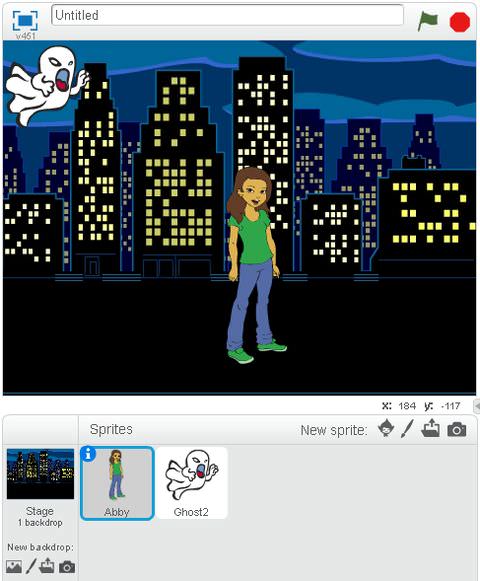
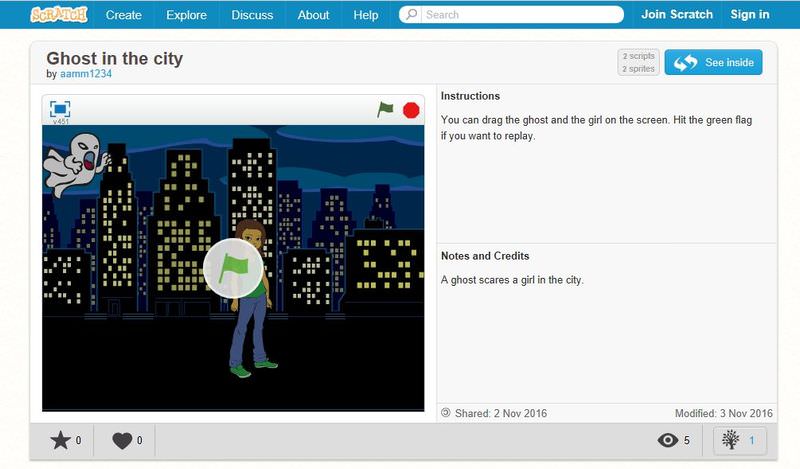
In this article, I will create a simple animation about a girl who is scared by a ghost in a night city (I know…). I already have the night city backdrop, and now I need two Sprites: a girl and a ghost.
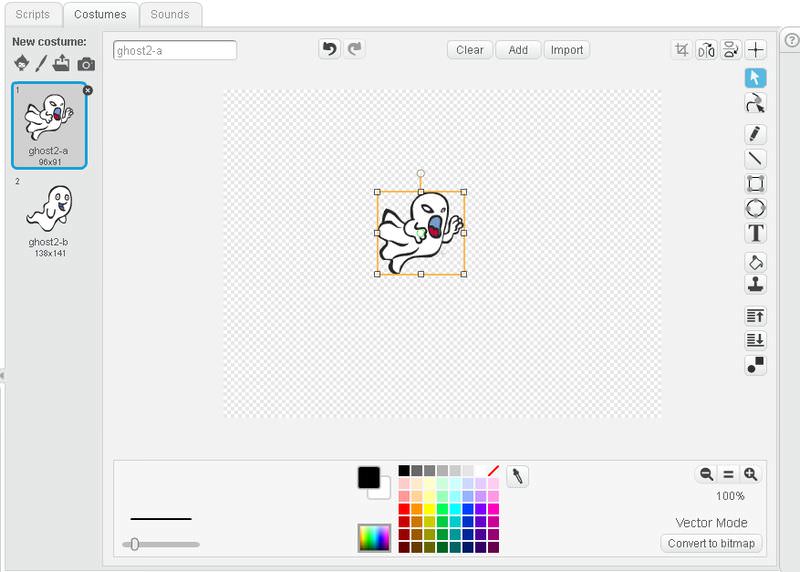
I don’t need the default cat, therefore I right-click on it, and remove it. I add the girl and the ghost from the Sprite library. As the ghost is bigger than the girl, and they look awkward next to each other, I resize the ghost using the image editor.
Now I have all the design elements I need. Below you can see how my stage looks like right now. In the next section, we’ll add functionality to the two Sprites (the girl and the ghost) by using Scratch blocks.
Add functionality
The Scratch blocks that can be found under the “Scripts” tab. Behind each block there is an underlying code snippet.
Blocks are grouped into 10 categories (Motion, Looks, Sound, Pen, Data, Events, Control, Sensing, Operators, More blocks), each of them use a different color, this way the block groups are easily distinguishable.

We will add functionality to each Sprite (specifically we’ll animate them), which means each Sprite will have its own script (sequence of Scratch blocks).
Note that we could add a separate script to the backdrop as well, for instance change its colors from day to night, however for the sake of simplicity we won’t change the backdrop in this example.
Create a human-readable algorithm
It can be helpful to plan out on paper what your Sprites will do. Here is the algorithm of our girl-ghost example program.
The girl’s algorithm:
- The user starts the script.
- The girl thinks about how much she’s afraid.
- The girl is waiting until the ghost attacks her.
- The girl screams.
- The girl runs away.
The ghost’s algorithm:
- The user starts the script.
- The ghost is waiting while the girl is thinking.
- The ghost approaches the girl.
You can see that the girl’s algorithm is written from the girl’s perspective, and the ghost’s algorithm is written from the ghost’s perspective. While one character acts, the other one needs to wait, as we need to synchronize the actions of the two characters.
The ghost’s script
Let’s start with the ghost’s script, as it’s only 3 steps. Click on the Ghost in the bottom-left corner, and you can start dragging the blocks to the Script area. First we need to make the user to start the program. We can easily do this by adding the “when green flag clicked” block from the “Events” category.
Next, the ghost waits 2 seconds while the girl is thinking. We program this action with the “wait 2 secs” block that can be found in the “Control” category.
Finally, the ghost needs to approach the girl, which we can achieve with the “go to Abby” block from the “Motion” category. “Abby” is the girl’s name, Scratch automatically adds the names of the other Sprites to the dropdown menu of this block.
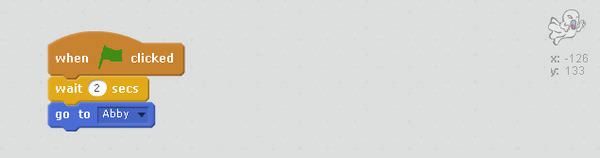
This is how the ghost’s script look like. By now, you’ve certainly realized that Scratch works similarly to LEGO, you need to join the blocks together.
The girl’s script
The girl’s script is a little more complicated. Click on the girl’s Sprite in the bottom left corner, and you can start adding the blocks related to the girl’s behaviour.
The girl’s script also starts with the “when green flag clicked” block. I show you now how the girl’s script will finally look like, so that you can follow the explanation more easily.
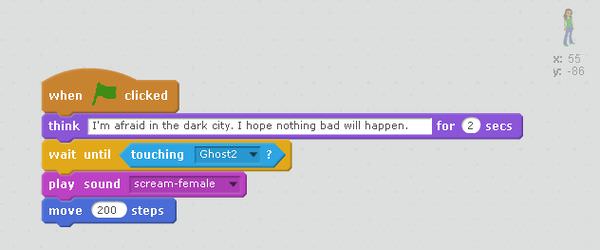
After the green flag is clicked, the girl is thinking for 2 seconds (the program will show a thinking bubble for this period), this is the same 2 seconds while the ghost is waiting in the corner — programmed with the waiting block in the ghost’s script.
Then, the girl needs to wait until the ghost touches her. This is done by a composed waiting block. You can see on the above screenshot that this block includes an inner diamond-shaped block you need to join separately. You can add only diamond-shaped blocks to this waiting block.
Remember, Scratch is similar to LEGO, you need to pay attention to the shapes of the blocks as well. This feature prevents you from adding blocks that shouldn’t be there in order to avoid a wrong coding logic.
By now, the ghost touched the girl, and the ghost’s script ended. Now we need to make her scream with a “play sound” Sound block (I added the female scream sound from the built-in Sound Library), and finally make her move away from the ghost by using the “move 200 steps” Motion block.
You can have a look at the final project on its Scratch page. If you want to have a look into the building blocks, click the See inside button on the top right corner.
Next Steps
Our “Ghost in the city” example is a very simple project. When your kids can safely create linear stories and animations, you can move towards more complicated coding structures, such as if-then blocks (conditional statements) and repeat blocks (loops), both can be found in the “Control” category.
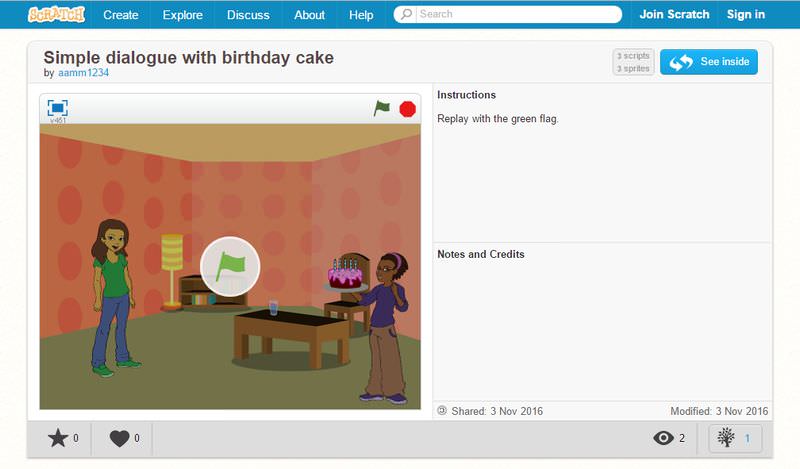
If you want a more complicated example for a linear animation (still without conditional statements and loops) you can check out my other demo that features a simple dialogue, and uses 3 Sprites (two friends and a birthday cake), each of which has its own script.
You can also inspire your children by printing Scratch Cards to them, that they can hold in their hands while programming. Scratch Cards also have great project ideas on them. It’s also worth learning from others by exploring existing projects, or taking part in discussion forums.
If you want to understand Scratch better, there’s a free Coursera course by The University of Edinburgh, that introduces beginners to Scratch programming in a very accessible, even enjoyable way.
You can also take leverage of the Scratch Wiki, and the Harvard University’s Creative Computing department also has some great resources for Scratch learners.