Auto-Organize Mac Screenshots into Folder and Rename with AI
Mac’s built-in screenshot tool has two major issues:
- Screenshots save to your Desktop by default, creating clutter
- Filenames are based on timestamps (e.g., “
Screen Shot 2026-01-09 at 2.30.00 PM.png“), which aren’t descriptive
This post will show you how to solve both problems by automatically saving screenshots to a custom folder with meaningful, descriptive filenames.
Why does this matter?
Over time, you’ll accumulate tons of screenshots with unhelpful filenames. Finding the right one becomes difficult. You might tell yourself you’ll organize and rename them later, but let’s be honest – that rarely happens.
Eventually, the clutter becomes overwhelming and you delete them in bulk, often losing screenshots you actually need.
What we’re building
Here’s what we’ll do using Mac’s native features (no additional apps required): Every time you take a screenshot, your Mac will automatically save it to a custom folder, analyze the content, and give it a short, descriptive filename.
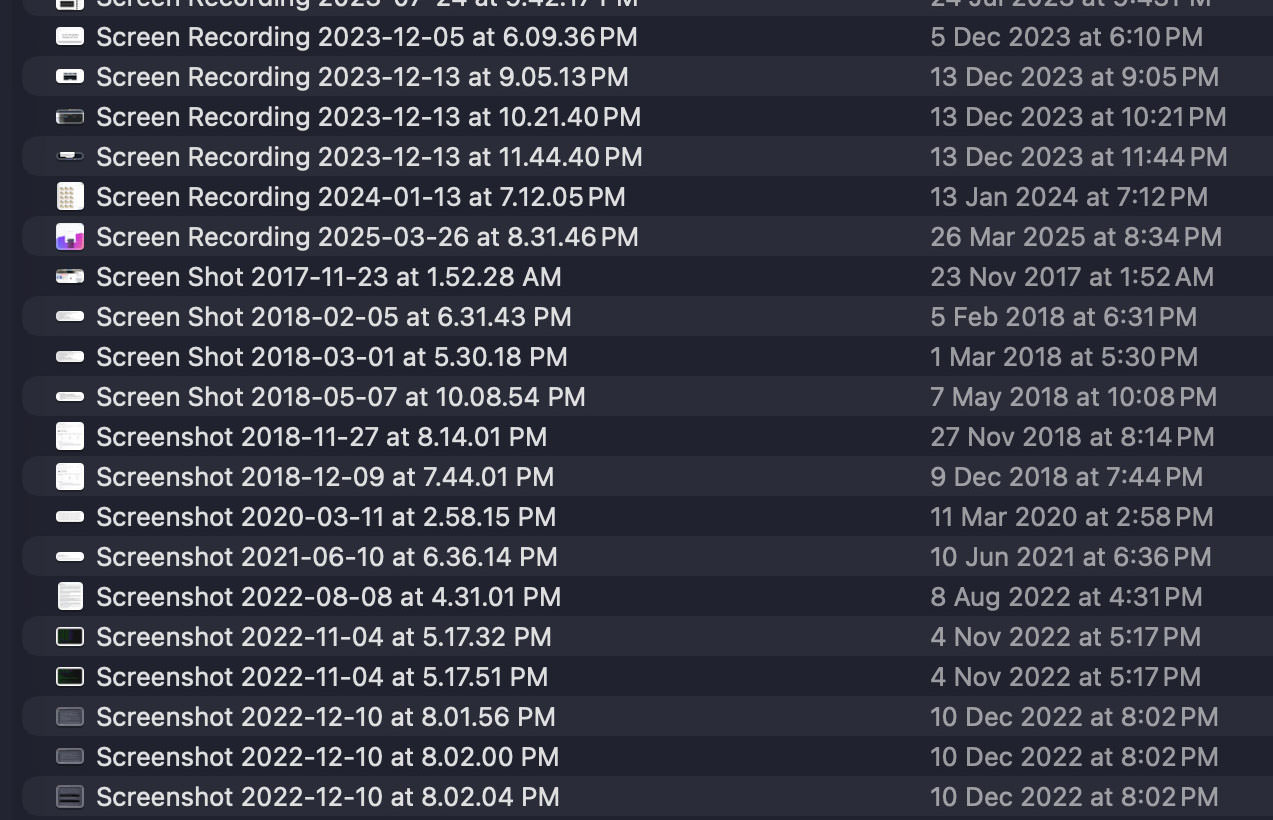
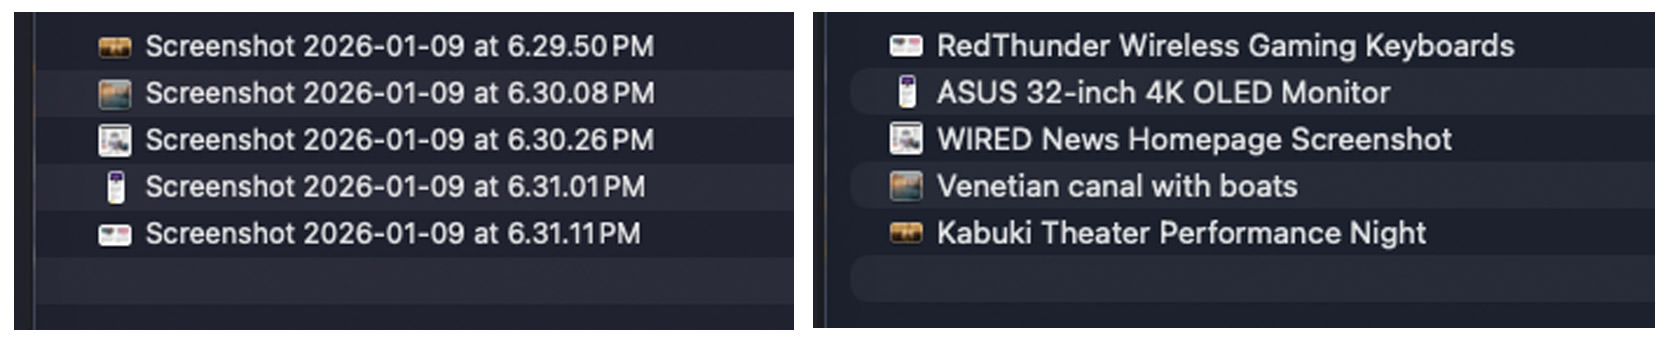
Basically, you’ll turn messy screenshot files like these (left) into organized, descriptive ones like these (right).
Getting started
This setup takes about 5-10 minutes and requires Mac’s Terminal and Shortcuts apps.
System requirements:
- Apple silicon Mac (M1, M2, or later)
- Latest macOS version
- Apple Intelligence enabled
Now, let’s get started.
1. Specify a folder for screenshots
First, let’s configure macOS to automatically save all screenshots to a specific folder.
Steps:
- Create a folder named “Screenshots” (or any name you prefer)
- Open the Terminal app
- Type the following command followed by a space (don’t press Enter yet):
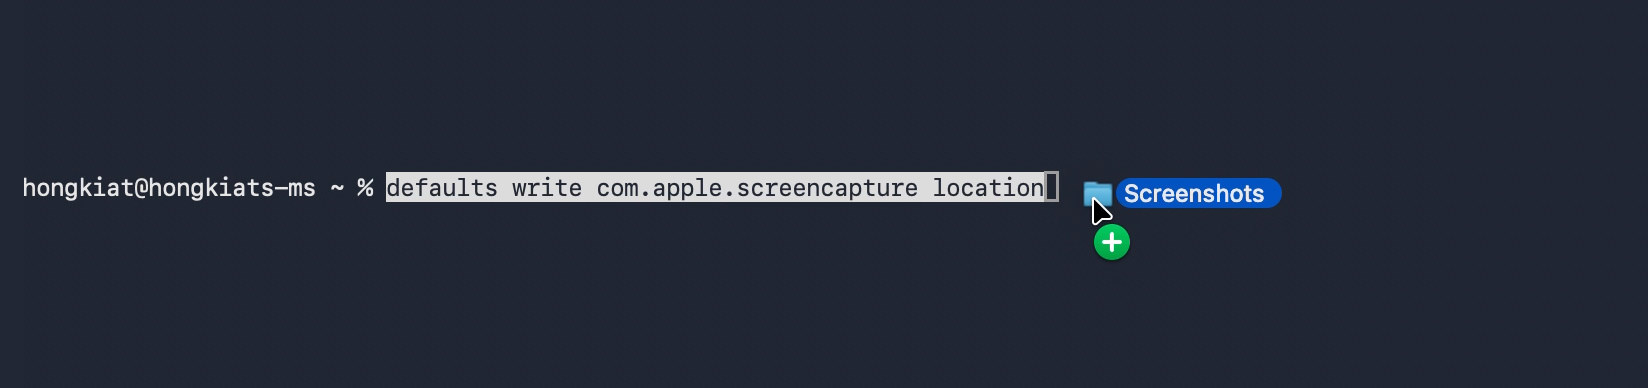
defaults write com.apple.screencapture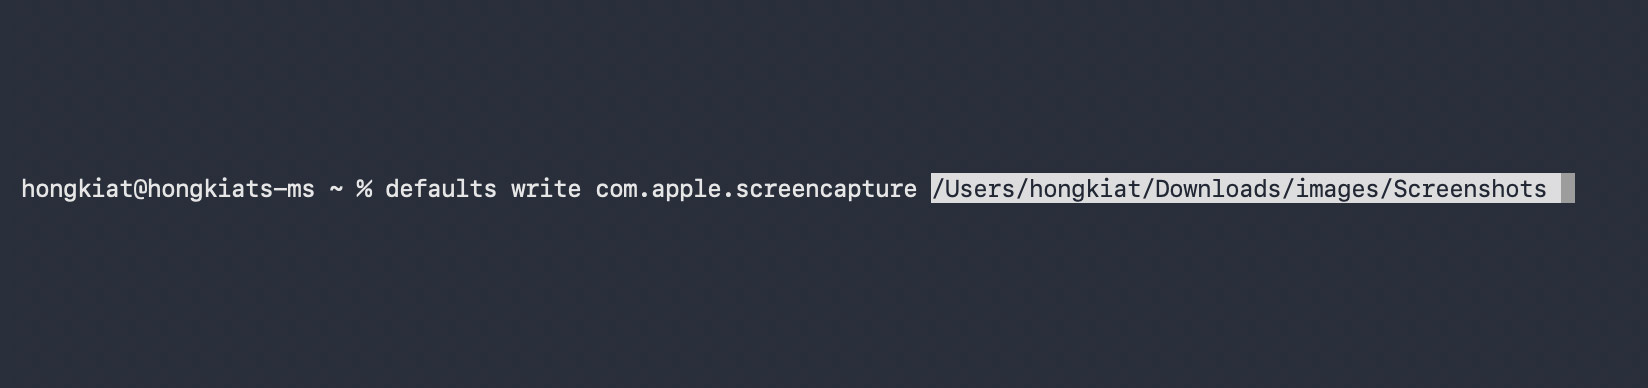
- Drag and drop your folder from Finder into the Terminal window – this automatically fills in the folder path
- Press Enter
- Apply the changes by running:
killall SystemUIServer
That’s it! Exit the Terminal app and take a few test screenshots. They should now save automatically to your designated folder.
2. Building the automation
Here’s what we’re building: whenever a screenshot is saved to your folder, it will be automatically analyzed and renamed with a meaningful, descriptive filename.
Steps:
- Launch the Shortcuts app
- Create a new Automation: Go to File > New Automation, select Folder, then click Next
- In the next screen:
- Click Choose Folder, navigate to your screenshot folder, and click Select
- Under “When Any Items Is”, check Added
- Check Run Immediately
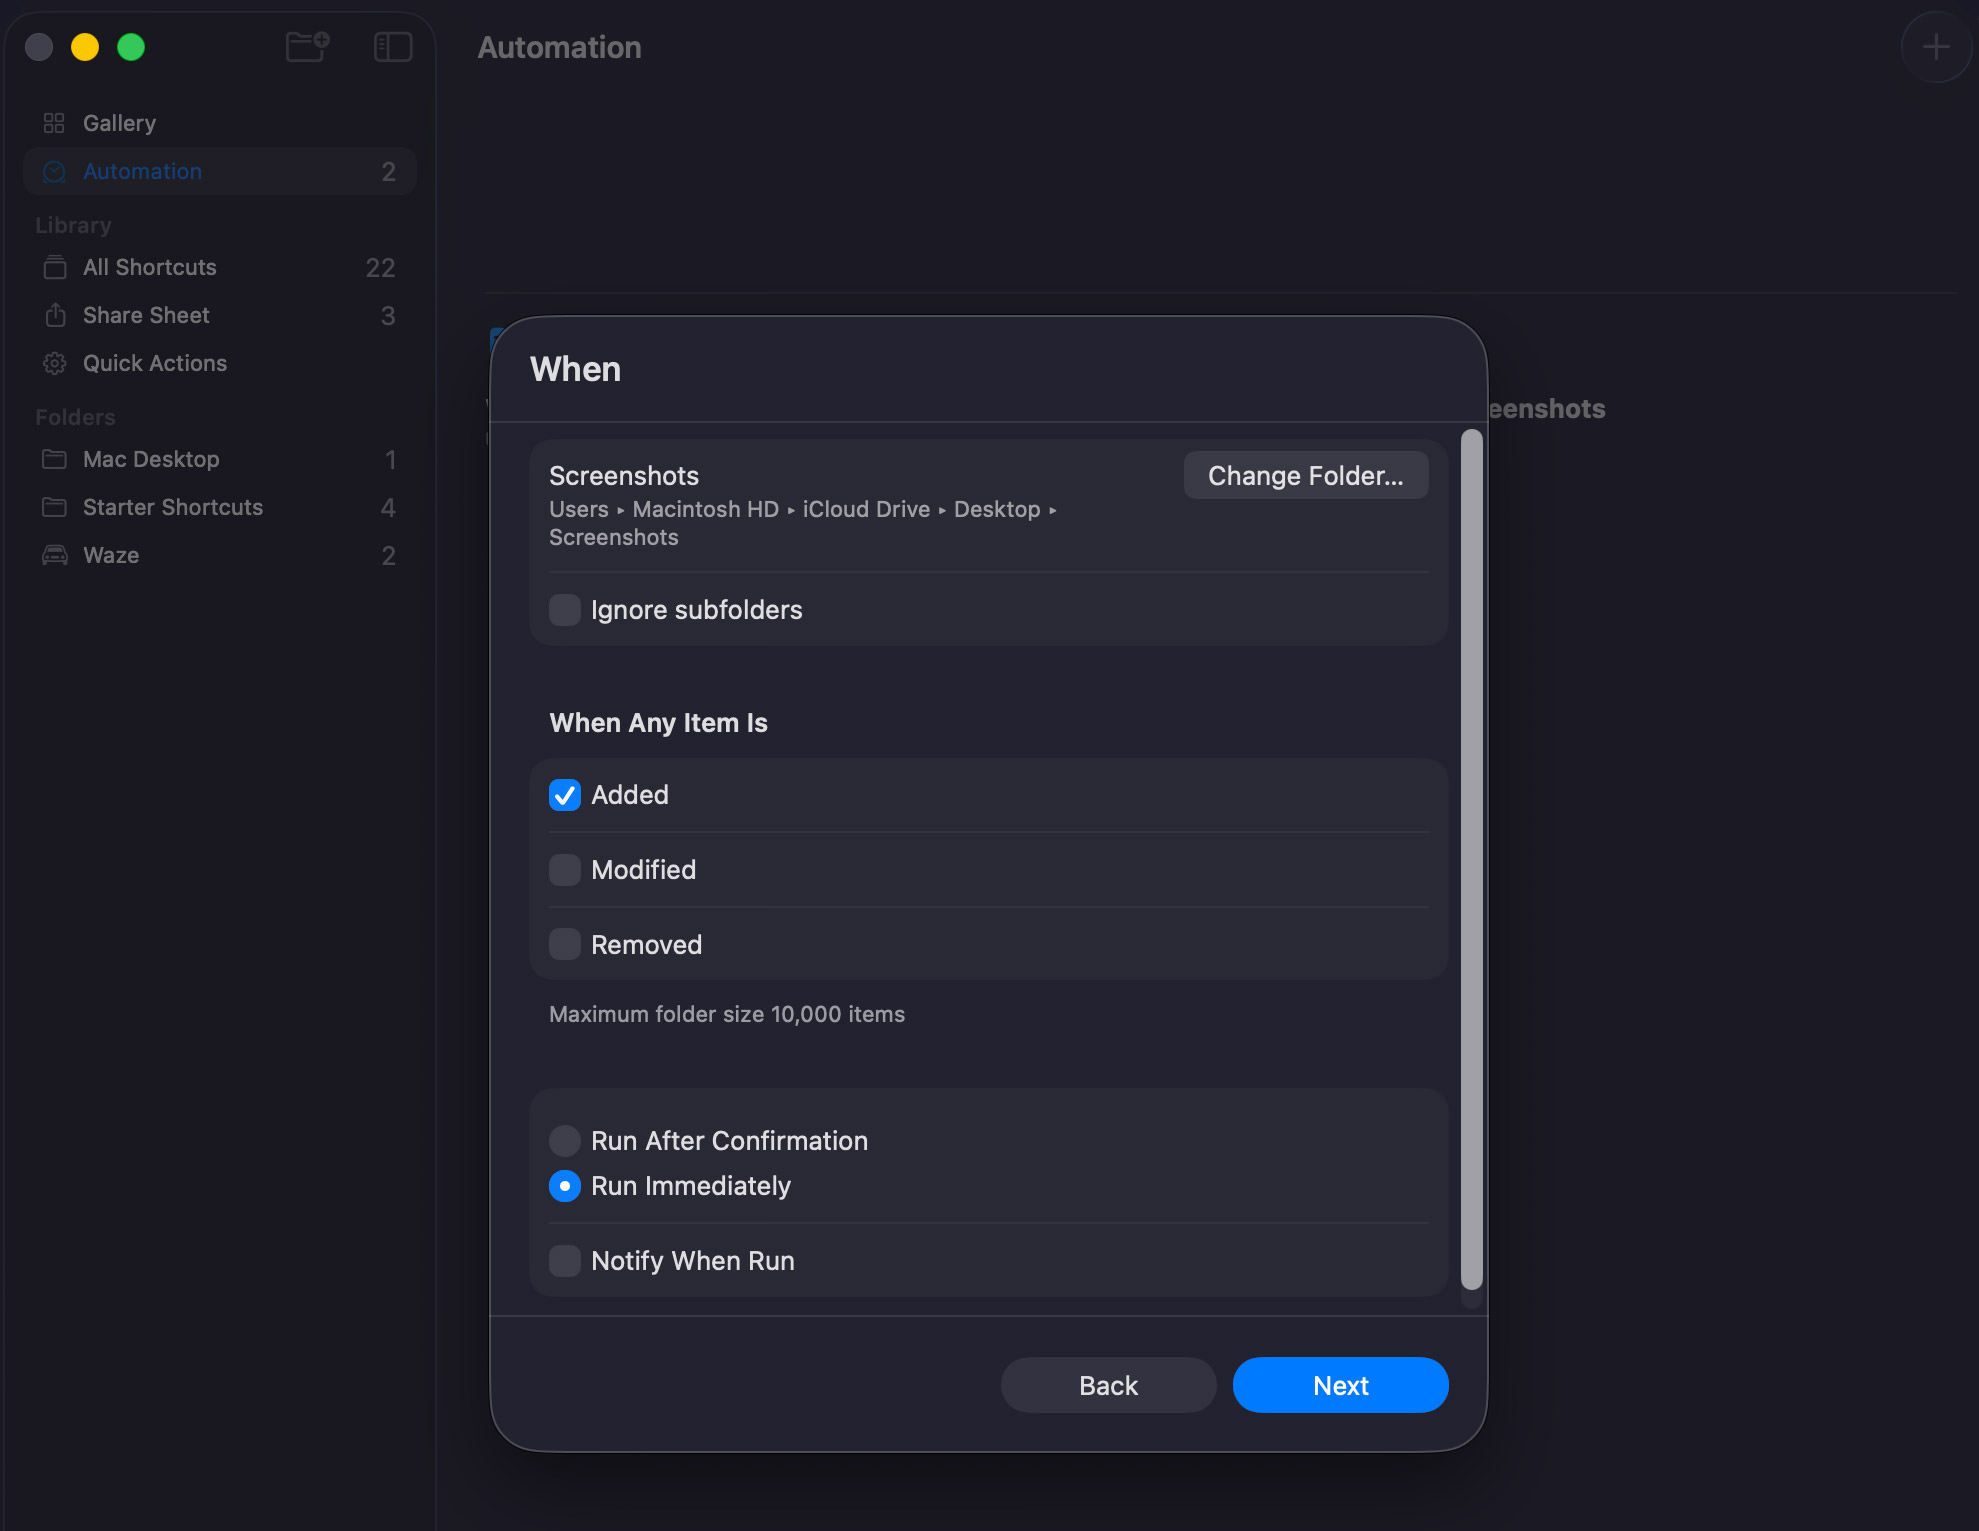
- Verify everything is correct (see screenshot below), then click Next
On the next screen, click “New Shortcut” to continue, and then you’ll be directed to the shortcut’s interface.

Follow these below steps carefully to build the shortcut:
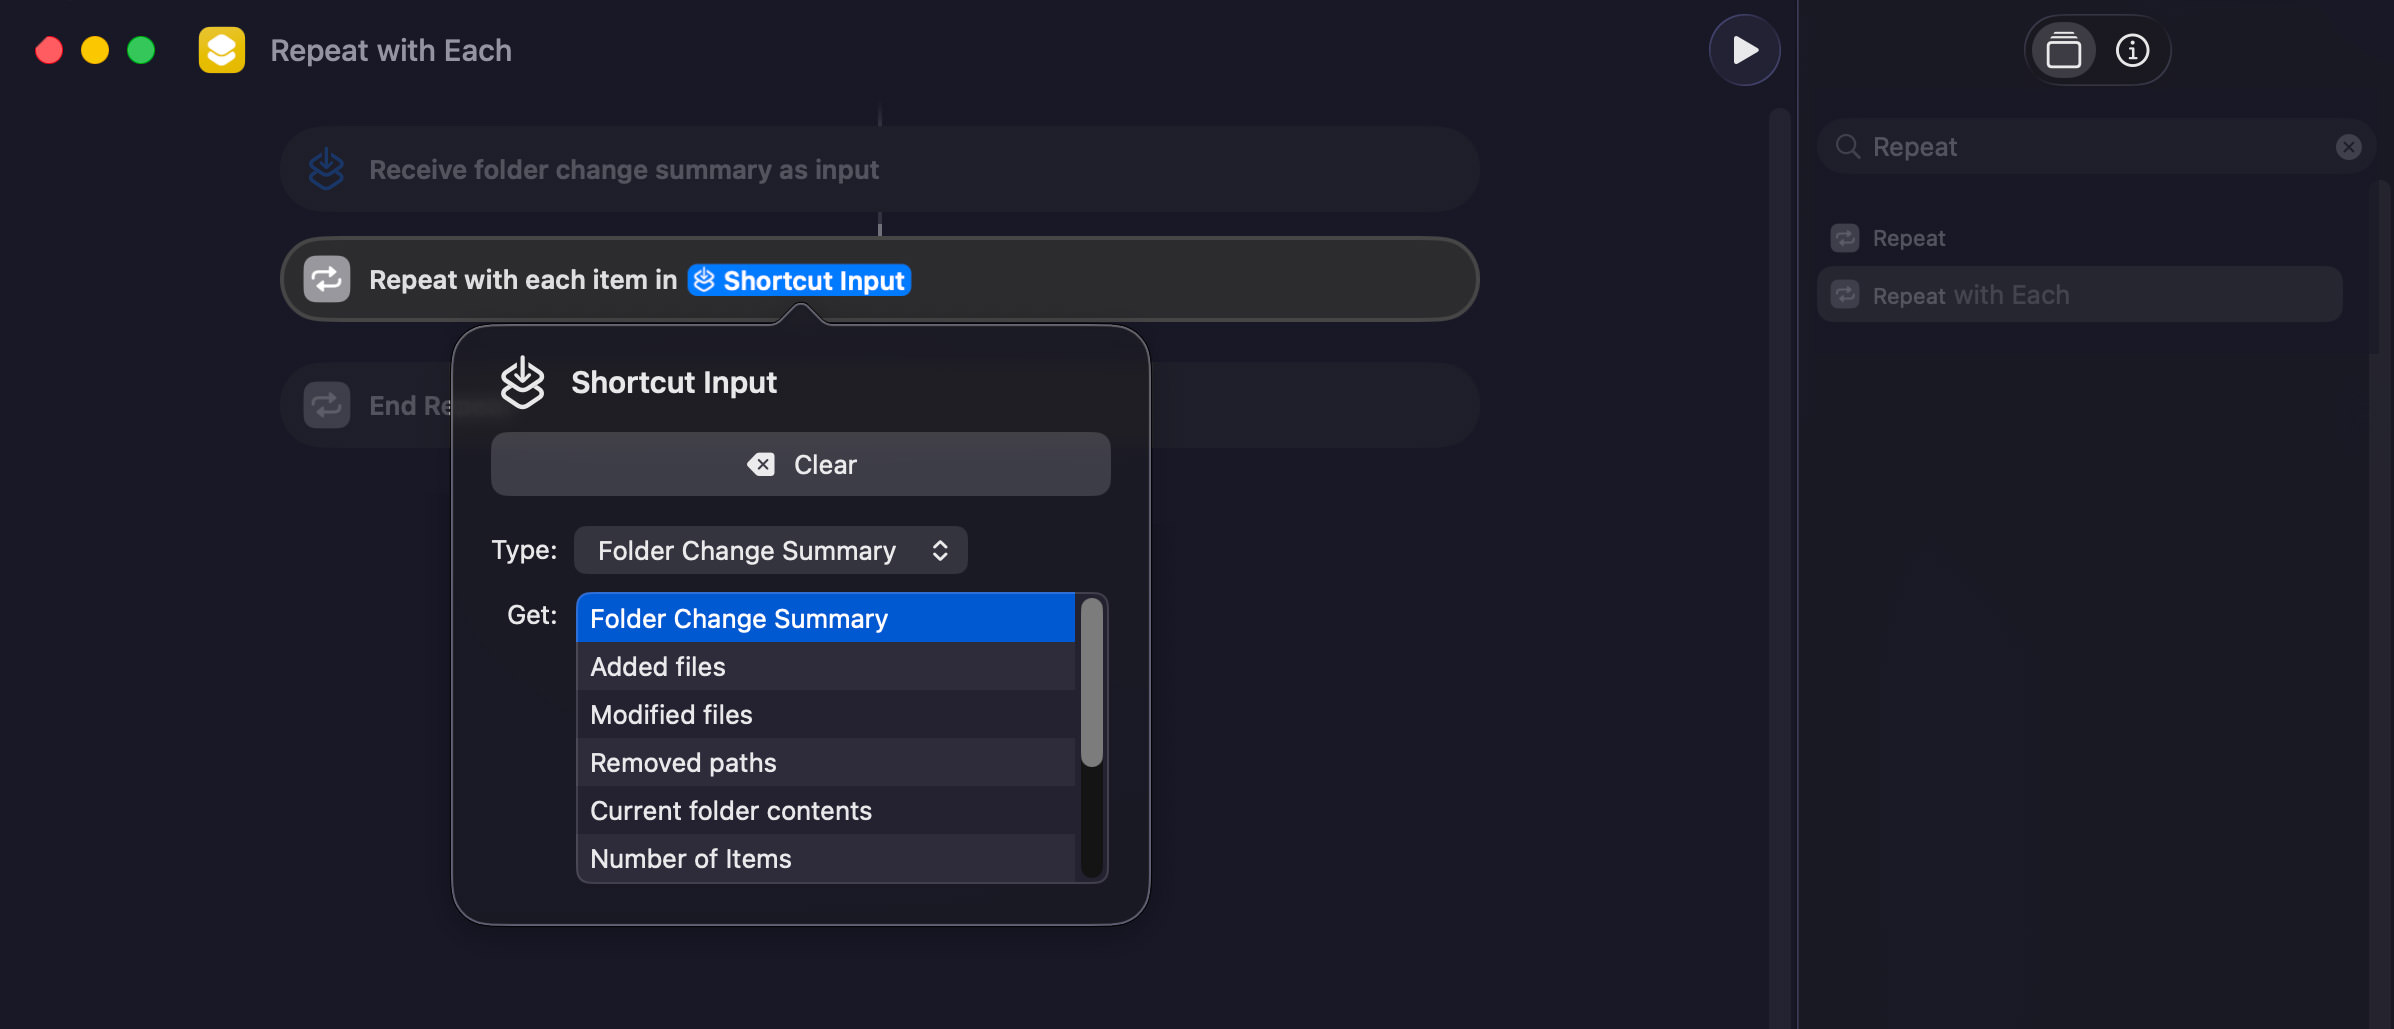
1. Add “Repeat with Each” action:
- In “Search Actions” (top right), search for “Repeat with Each” and double-click to add it
- Click the blue “Items”, select “Shortcut Input” from the dropdown
- Click “Shortcut Input” again, then select “Added files”
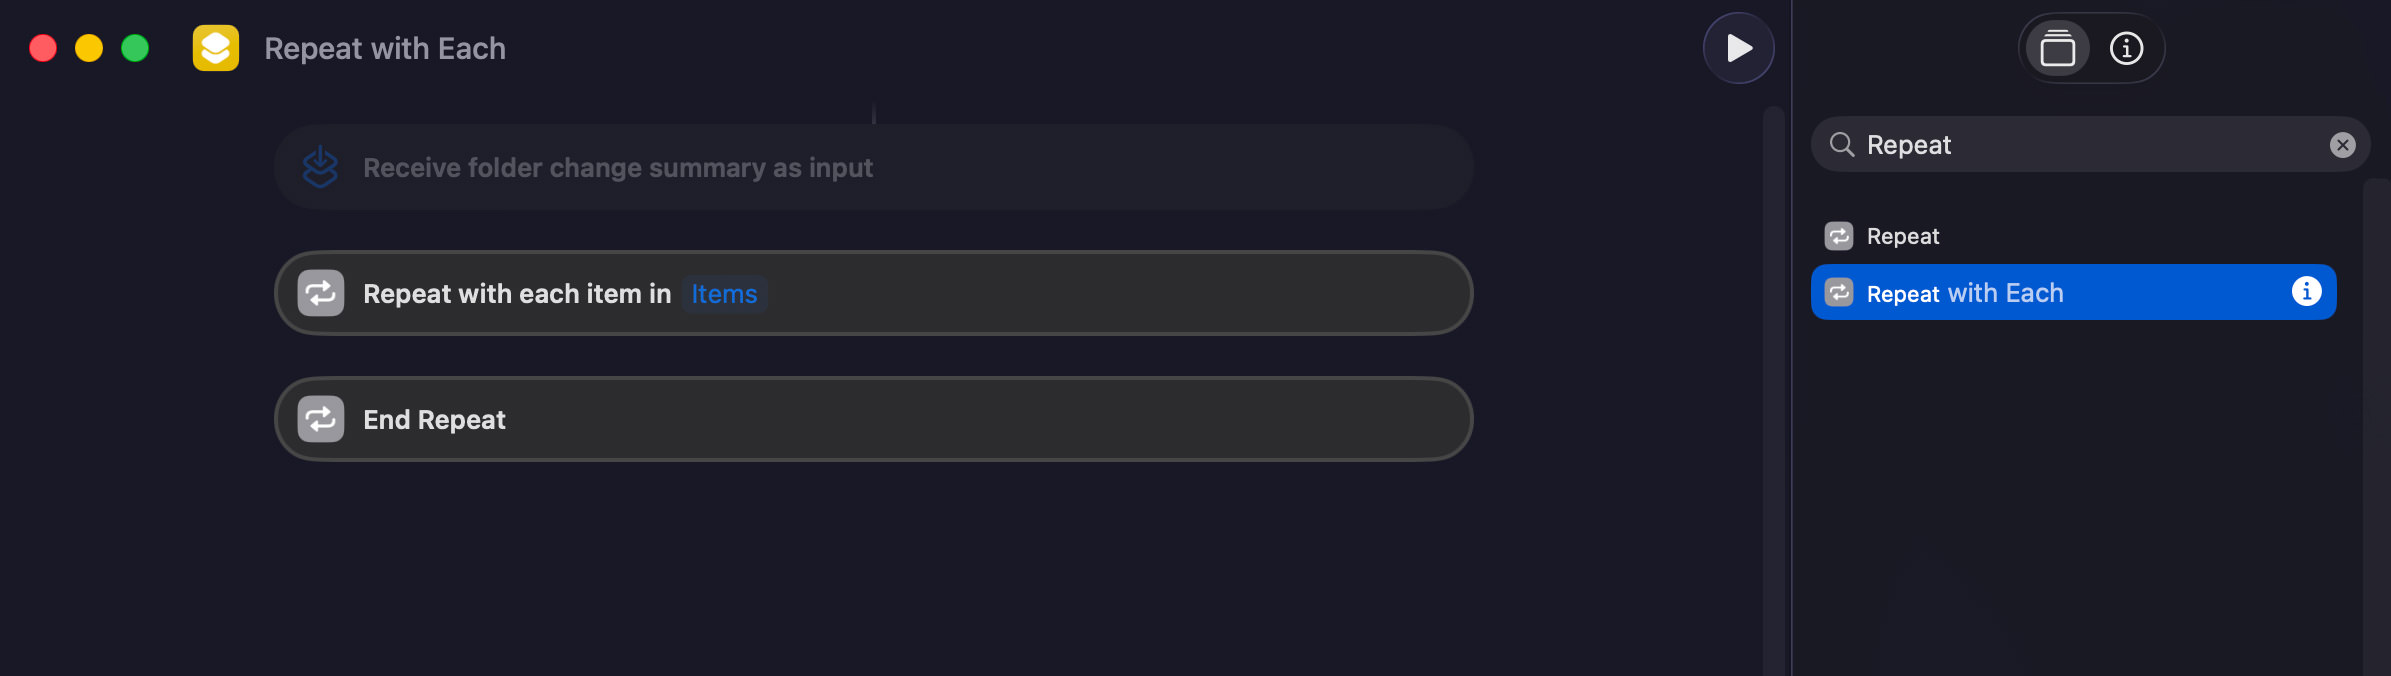
2. Add “Get Images from Input” action:
- Search for “Get Images from Input” and double-click to add it
- Drag it between “Repeat with…” and “End Repeat”
Check your shortcut against the screenshot below to verify it’s correct.

3. Add “Use Model” action:
- Search for “Use Model” and add it to the panel
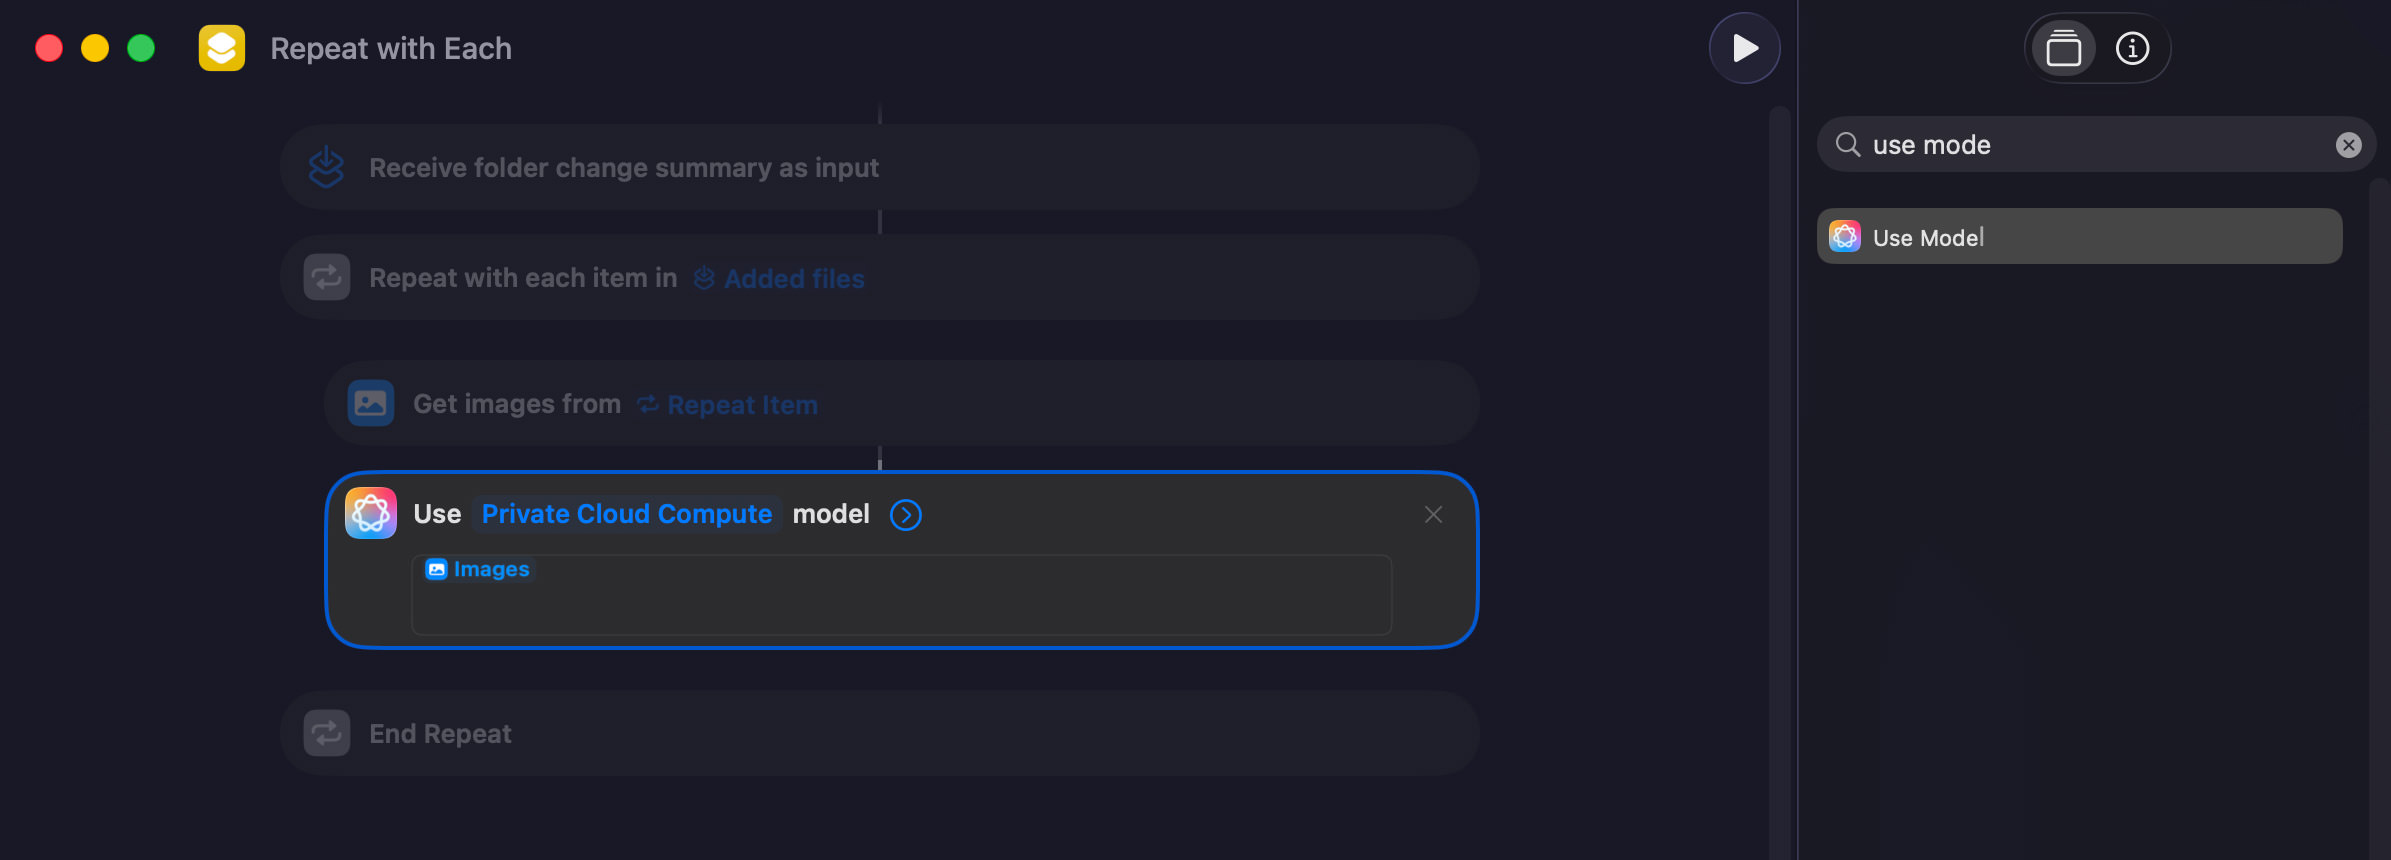
- Click the textbox containing “Images”, clear it, and paste this prompt:
Analyze the image and provide a short, simple descriptive name based on these rules:
* "Length:" Use between 3 to 5 words.
* "Format:" Do not end the description with a period (.).
* "Style:" Keep it clear, concise, and descriptive of the main subject.
- At the end of the textbox, right-click and select “Insert Variable > Images”
4. Add “Rename File” action:
- Search for “Rename File” and add it above “End Repeat”
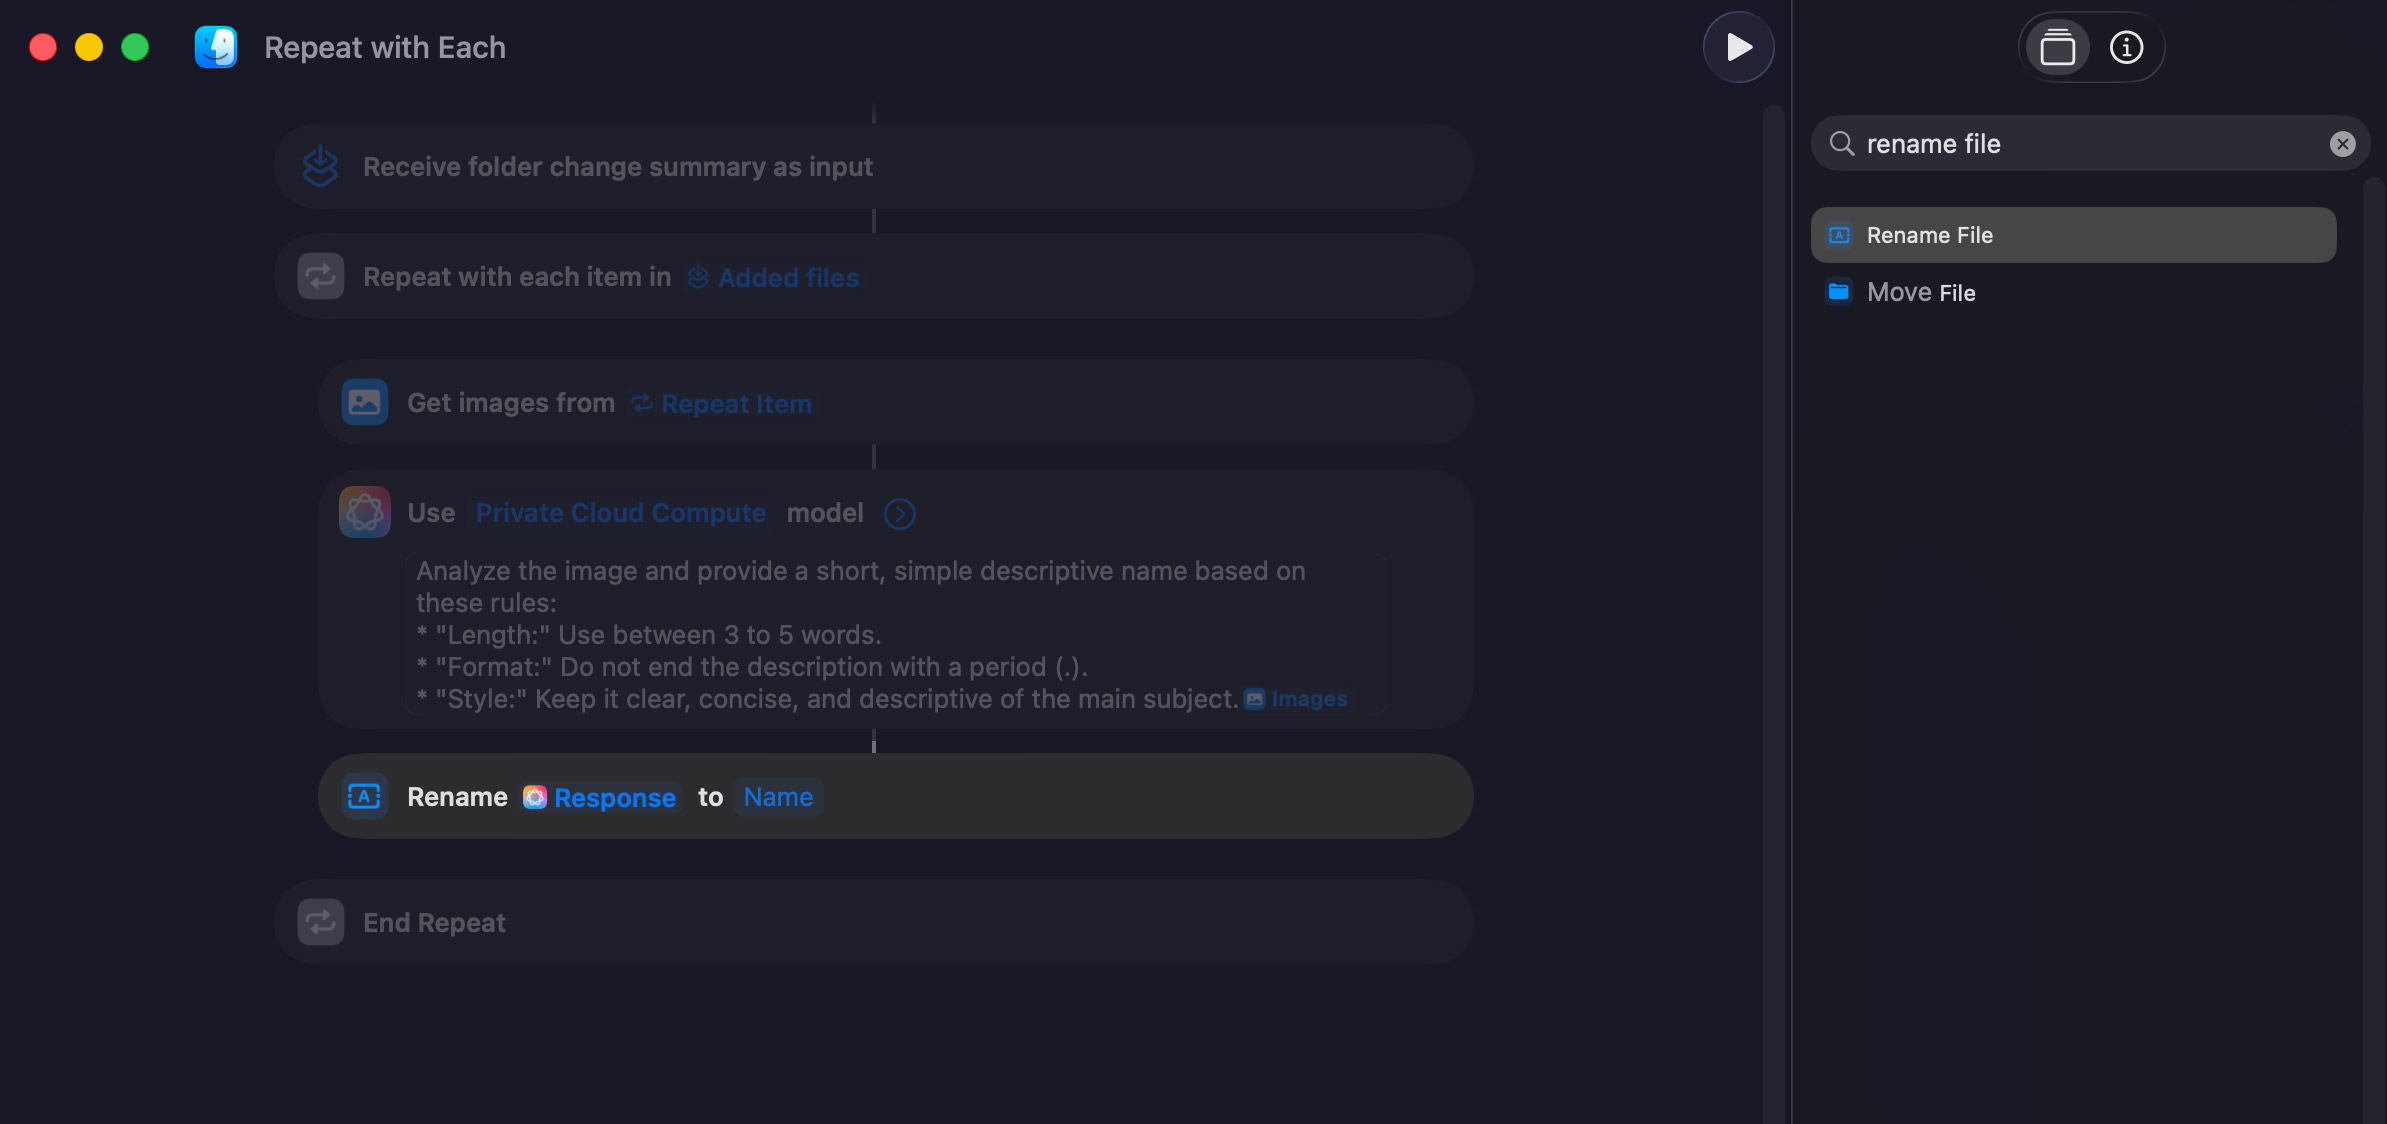
- Right-click “Response” and change it to “Repeat Item”
- Right-click “Name” and change it to “Response”
That’s it! Take a test screenshot. The first time, you’ll see a permission prompt – click Okay to allow access to your screenshot folder.
Take a few more screenshots and watch them automatically get renamed with descriptive filenames in your designated folder.
Final thoughts
If the renamed screenshots aren’t exactly what you want, feel free to edit the prompt. With this automation quietly working in the background, your screenshots will be better organized, easier to search via Spotlight, and easier to identify at a glance.