Hidden VS Code Terminal Features Every Developer Should Know
If you’re using Visual Studio Code (VS Code), you’ve probably used its built-in terminal to run commands and scripts without ever leaving the editor.
The terminal plays a big role in most developers’ daily workflow, so even small annoyances like a barely visible cursor or losing your place while scrolling can slow you down and break your focus.
In this article, we’ll go over a few simple settings you can tweak in your VS Code terminal to boost your productivity and make your coding experience more enjoyable.
First, let’s see where to find the terminal settings.
In this article
- User Settings
- Terminal IntelliSense
- Sticky Scroll
- Customize Cursor
- Default Location
- Customize Tab Title
- Split CWD
- Customize Font Family
- Wrapping Up
User Settings
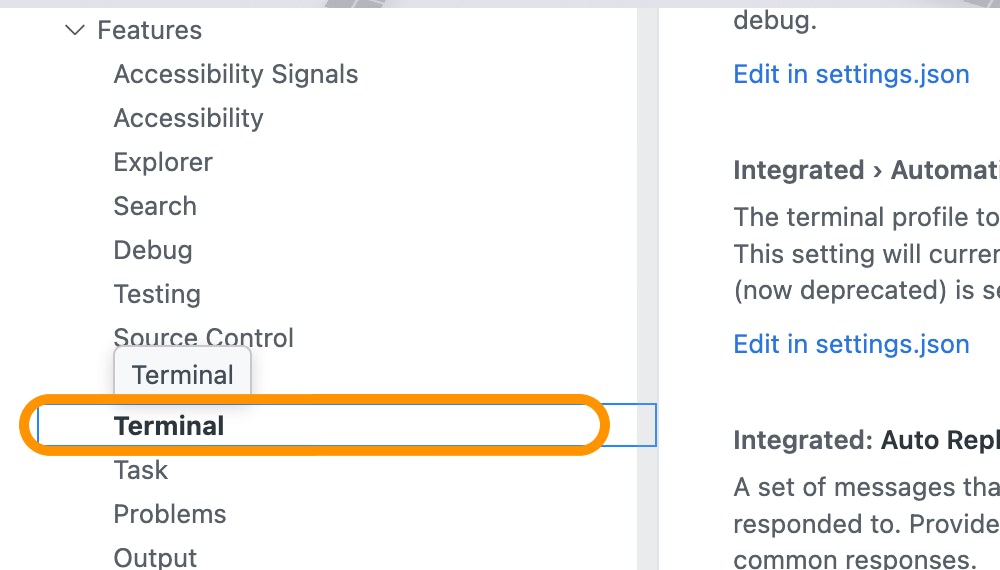
You can access the terminal settings by going to File > Preferences > Settings (or by pressing Ctrl + ,), then searching for “terminal” or navigate from “Features > Terminal” on the left pane menu.
In this case, however, we’ll be adding the settings directly to the settings.json as I think it’s more straightforward than having to search for each setting individually.
To save settings on the settings.json file, you can launch Command Palette (Ctrl + Shift + P (or Cmd + Shift + P on Mac), then type and select Preferences: Open Settings (JSON).
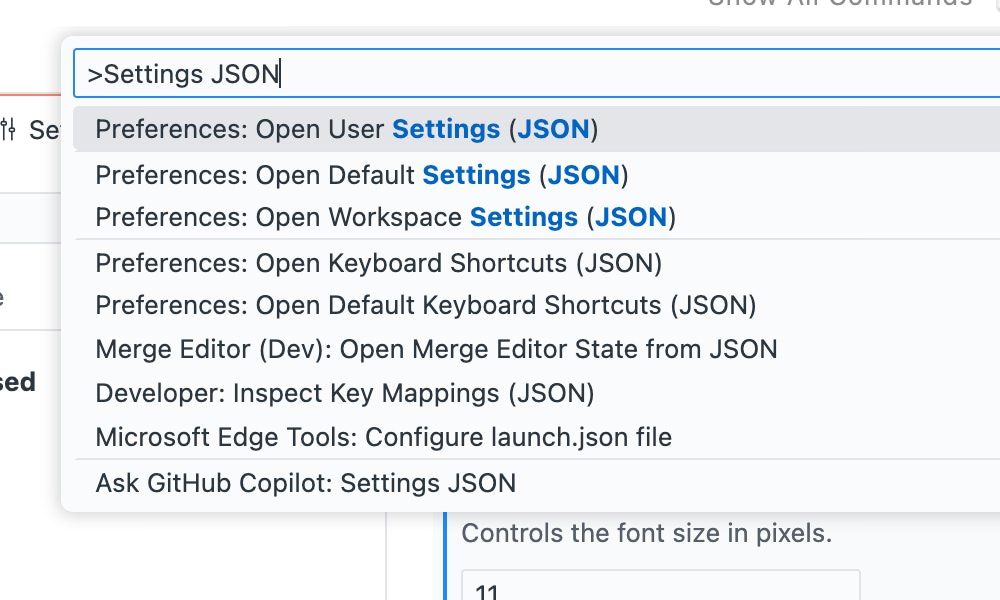
This will open the settings.json file where you can add or modify your terminal settings.
Now, we can start customizing the terminal.
Terminal IntelliSense
VS Code’s Terminal IntelliSense makes working in the terminal faster and smoother by suggesting files, folders, commands, and even arguments as you type.
To use it, you’ll first need to make sure that shell integration is enabled by setting:
{
    "terminal.integrated.shellIntegration.enabled": true
}
Once that’s turned on, you can activate IntelliSense suggestions with:
{
    "terminal.integrated.suggest.enabled": true
}
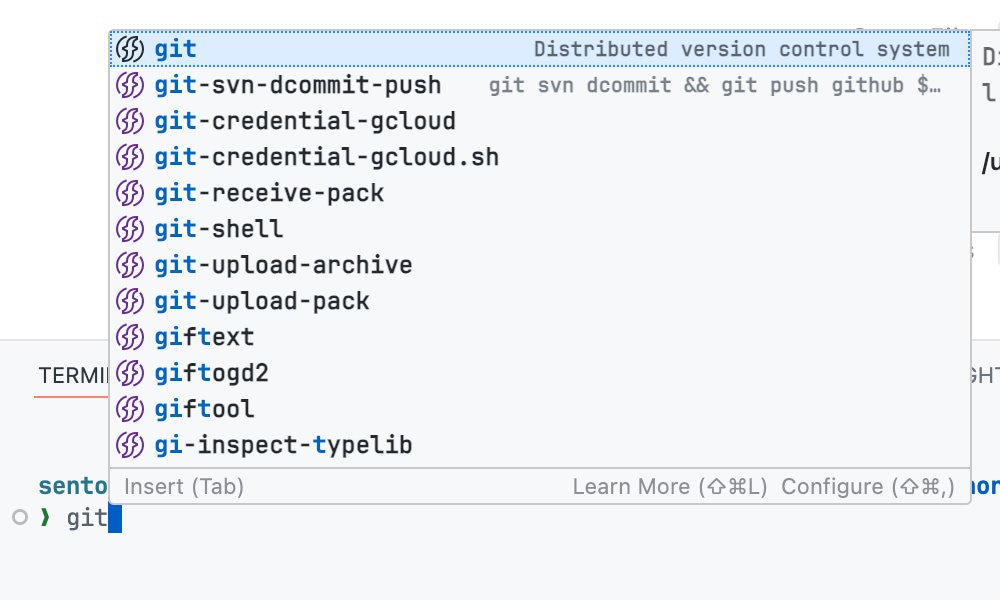
VS Code then provides smart suggestions based on your shell including Bash, Zsh, or PowerShell. As you start typing a command, it will automatically show you relevant suggestions. It checks your system to suggest available commands.
For example, it supports native or built-in command in Unix such as ls, clear, and even an alias.

It also supports commands from additional packages or applications such as git.
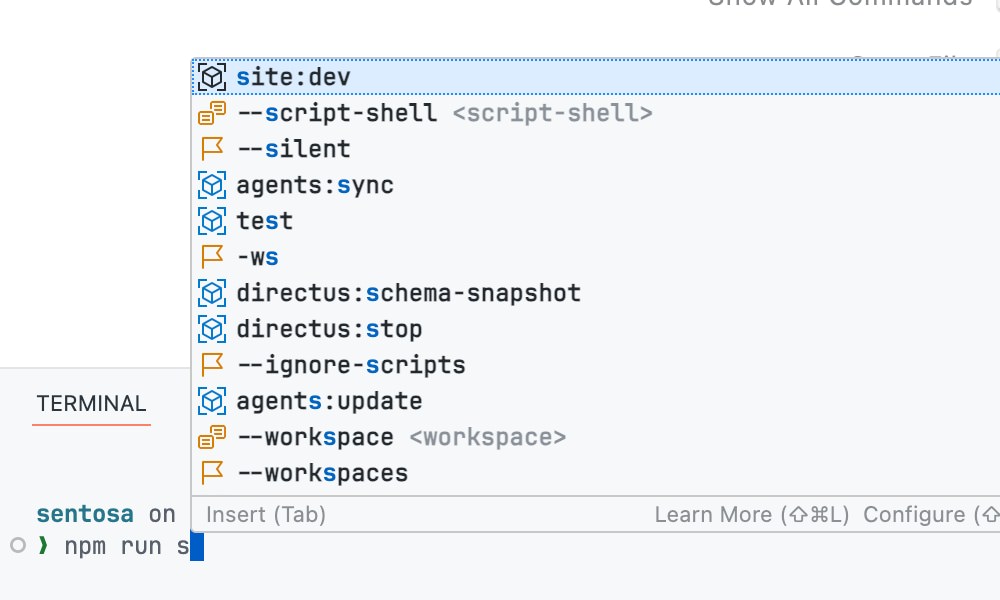
It even checks your current workspace for commands or scripts set in the project workspace such as in the package.json or composer.json file.
Sticky Scroll
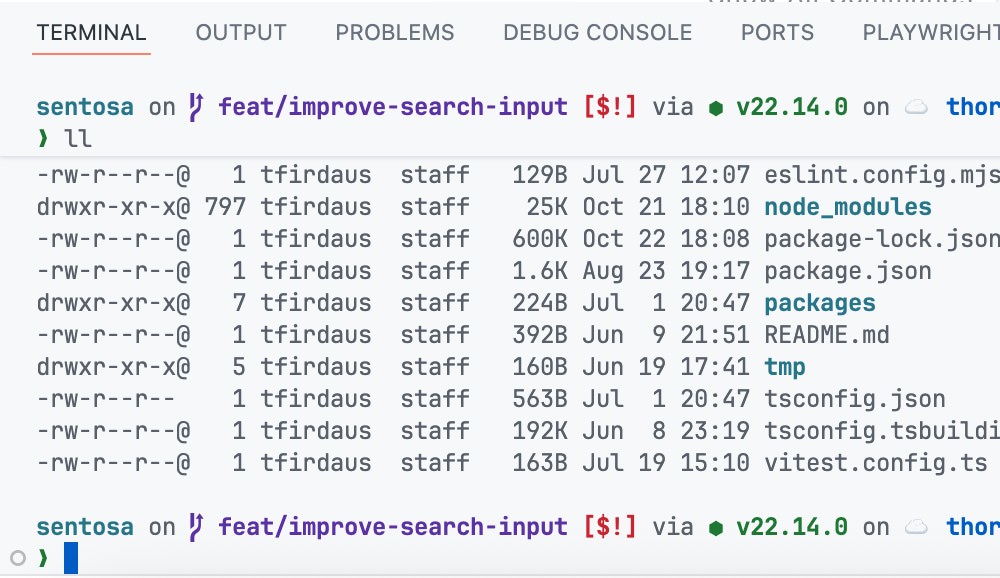
The Sticky Scroll is a new feature in VS Code. When enabled, it keeps the top line of the terminal visible as you scroll down showing the command you’re currently working on. This is especially useful when working with long outputs or logs, as it helps you keep track of your position without losing context.
To enable Sticky Scroll, add the following setting to your VS Code settings:
{
    "terminal.integrated.stickyScroll.enabled": true
}
With this setting enabled, the top line of your terminal will remain visible as you scroll through the output, making it easier to follow along with your commands and their results. Below for example, we’ve just run ll to list items in the current directory.
Customize Cursor
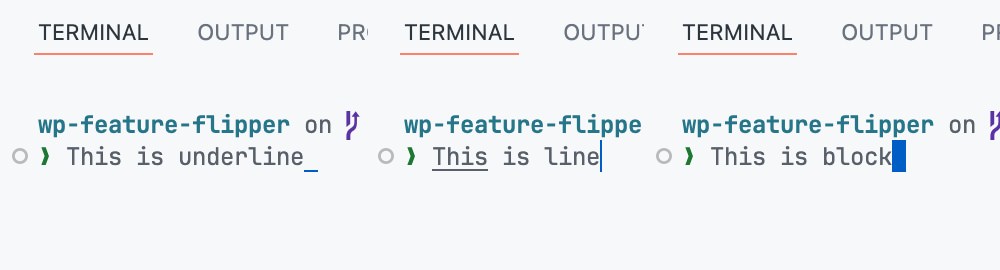
Changing how the terminal cursor looks can make a big difference in usability. A more visible cursor helps you quickly locate where you’re typing, reducing errors and improving efficiency.
To customize the cursor style, you can use the following setting:
{
    "terminal.integrated.cursorStyle": "block"
}
Options include block, line, or underline.
You can also set the styles when the terminal is focused or unfocused using:
{
    "terminal.integrated.cursorStyleInactive": "line"
}
As well as change whether the cursor should blink. This is by default disabled, but enabling it can make the cursor more noticeable:
{
    "terminal.integrated.cursorBlinking": true
}
Default Location
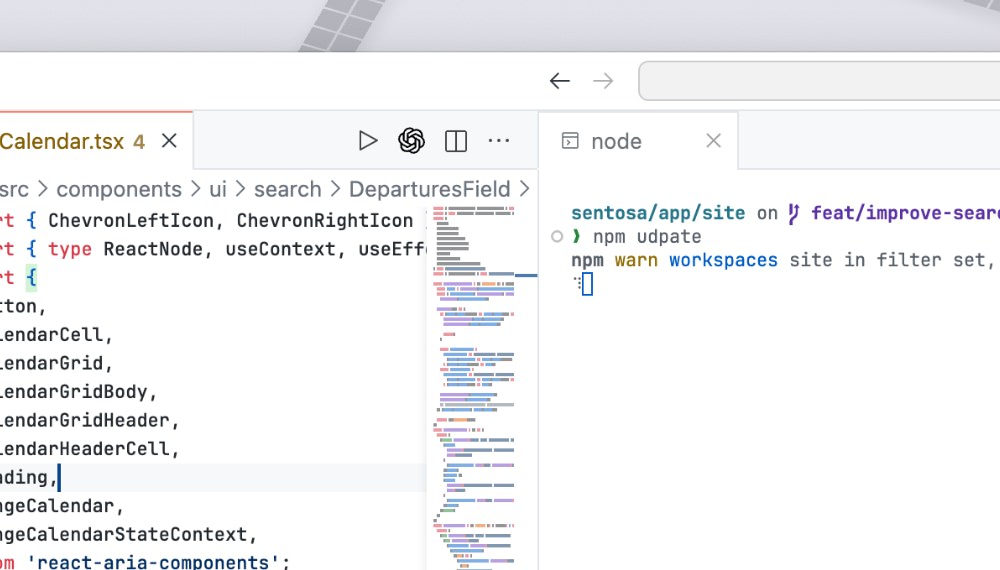
By default, the Terminal in VS Code will be located at the bottom of the window. However, you can change its default location to open as an editor tab with the following setting:
{
    "terminal.integrated.defaultLocation": "editor"
}
This can be particularly useful if you have a wide monitor or prefer to have your terminal alongside your code.
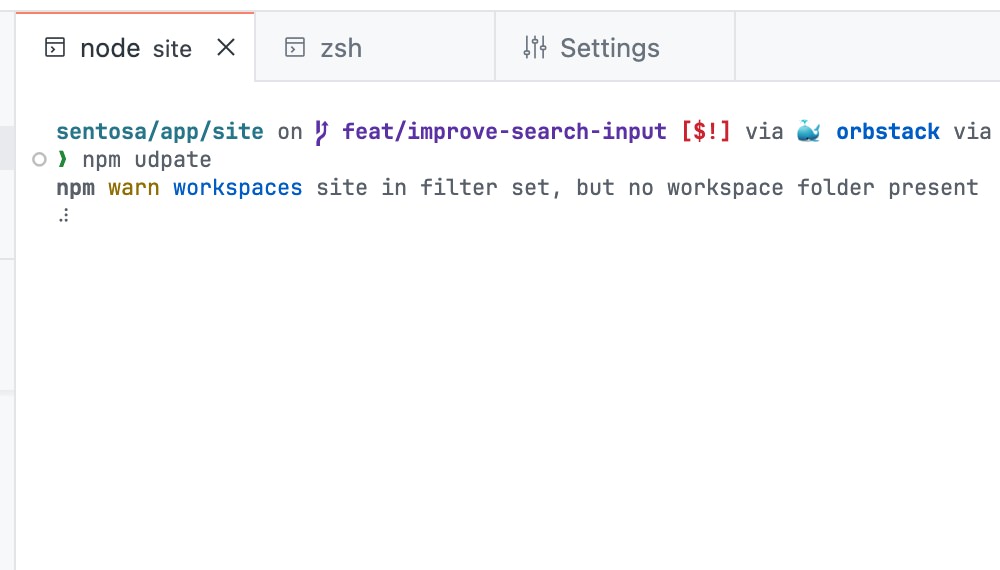
Customize Tab Title
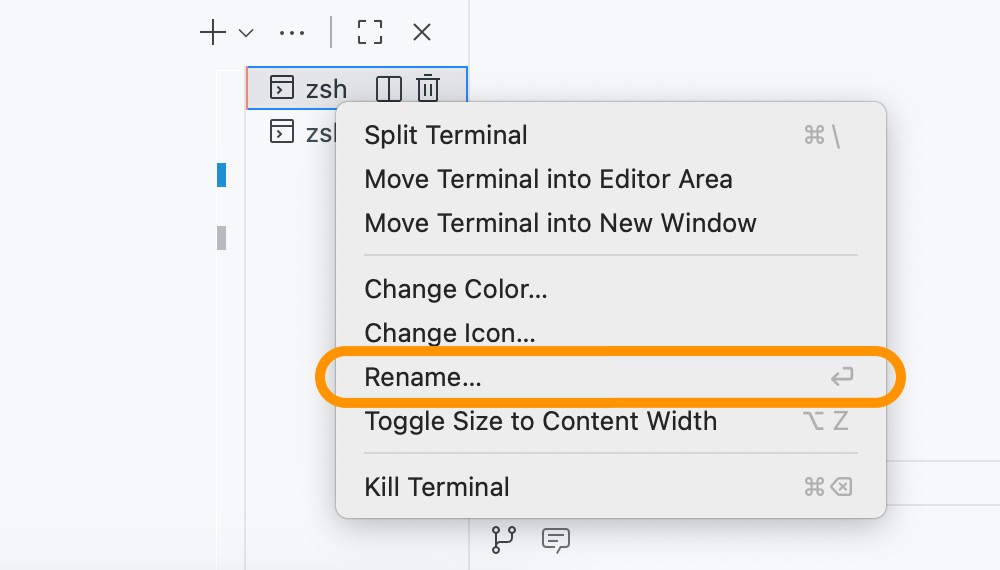
When working on modern projects, you often need to run multiple terminals at once. Perhaps one for your frontend, and one for the backend. Keeping track of them can get messy fast. Thankfully, VS Code allows you to rename terminal tabs so you always know what’s what.
To rename a terminal tab, simply right-click on the terminal tab and select Rename. Then, type in your desired name and hit Enter. For example, you can label them “Frontend” or “Backend” to make it easier to identify.
Just keep in mind that this change is temporary and will be lost when you close the terminal. If you want to set a more permanent naming convention, you can customize the terminal tab title using variables.
My favorite trick here is to combine both to have the terminal show the running process along with the current working directory.
You can do this by adding the following setting:
{
    "terminal.integrated.tabs.title": "${process}",
    "terminal.integrated.tabs.description": "${cwdFolder}",
}
Split CWD
When you split a terminal in VS Code, where the new terminal opens, the current working directory (CWD) can vary depending on your operating system.
On Windows, it often jumps back to the directory where the first terminal started, while on macOS and Linux, it usually opens in the same folder as the parent pane. This small difference can easily cause confusion, especially when you’re switching between systems.
You can make this behavior consistent by updating the terminal.integrated.splitCwd setting, as follows:
{
    "terminal.integrated.splitCwd": "workspaceRoot"
}
Setting it to "workspaceRoot" ensures that every new split terminal always opens in your project’s root folder. It’s a small change that makes your workflow predictable.
Customize Font Family
A clean and readable terminal makes a big difference when you spend hours coding. You can change the font used in the integrated terminal. By default, VS Code uses the same font as the editor, but you can specify a different font by adding the following setting:
{
    "terminal.integrated.fontFamily": "Fira Code"
}
Simply replace Fira Code with the name of your preferred font. Make sure the font is installed on your system for it to work properly.
If the font supports ligatures, you can enable them in the terminal by adding:
{
    "terminal.integrated.fontLigatures": true
}
I have a couple of favorite fonts you can check out if you’re looking for recommendations.
Wrapping Up
The VS Code terminal is a powerful tool that can significantly enhance your development workflow. By customizing its settings to fit your preferences, you can create a more efficient and enjoyable coding environment.
Hopefully, these tips help you get the most out of your VS Code terminal.