Getting Started with Gemini CLI
Gemini CLI is a free, open-source tool that brings Googles Gemini AI right into your Terminal.
If you’re a developer, it can help you work faster as it allows you to talk to your system and code in plain English. Aside of dealing with code, you can use it for, writing, research, and more. It’s lightweight, supports long prompts, works with tools like VS Code, and is easy to customize.
But, before you can start using its powerful features, you’ll need to install it on your machine. Let’s see how to install it and how to get everything set up.
Installation
First, install Node.js version 18 or higher on your machine. You can download it from the official Node.js website: Node.js Downloads.
You will also need a personal Google Account or a Gemini API key, which you can get from Google AI Studio, to authenticate your access to Gemini AI.
Once you get either of those, you can either run Gemini CLI instantly using npx:
npx https://github.com/google-gemini/gemini-cli
Or, I would recommend to install it globally with npm, so you can use it from anywhere in your terminal. To do this, run the following command:
npm install -g @google/gemini-cli
After the installation is complete, you can verify whether Gemini CLI is installed correctly by running:
gemini --version
Authentication
When you run Gemini for the first time…
gemini
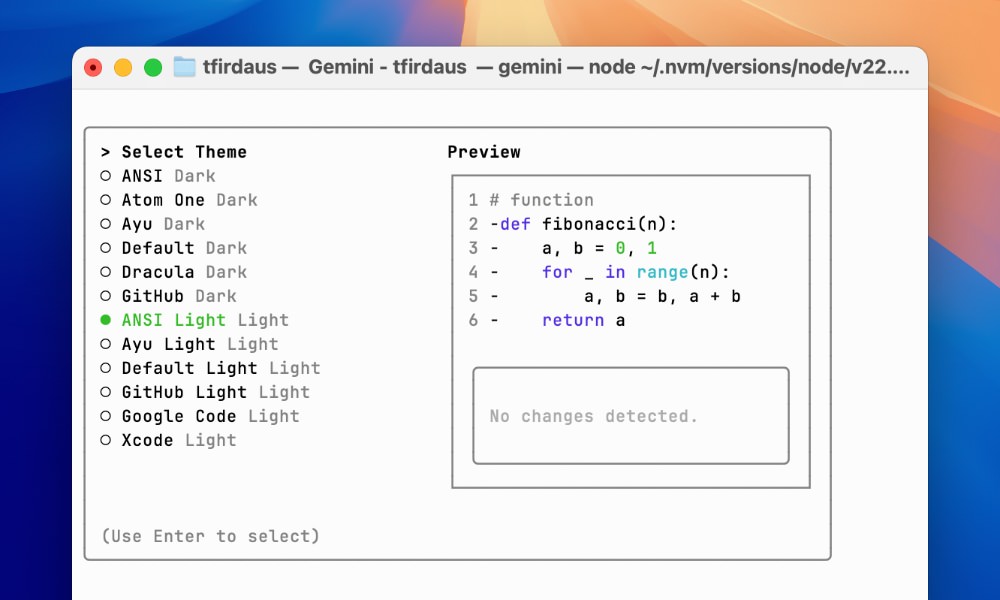
…you will be asked to select the color theme that it will use to render the codes generated. You can select any of the available themes that suit your preference.
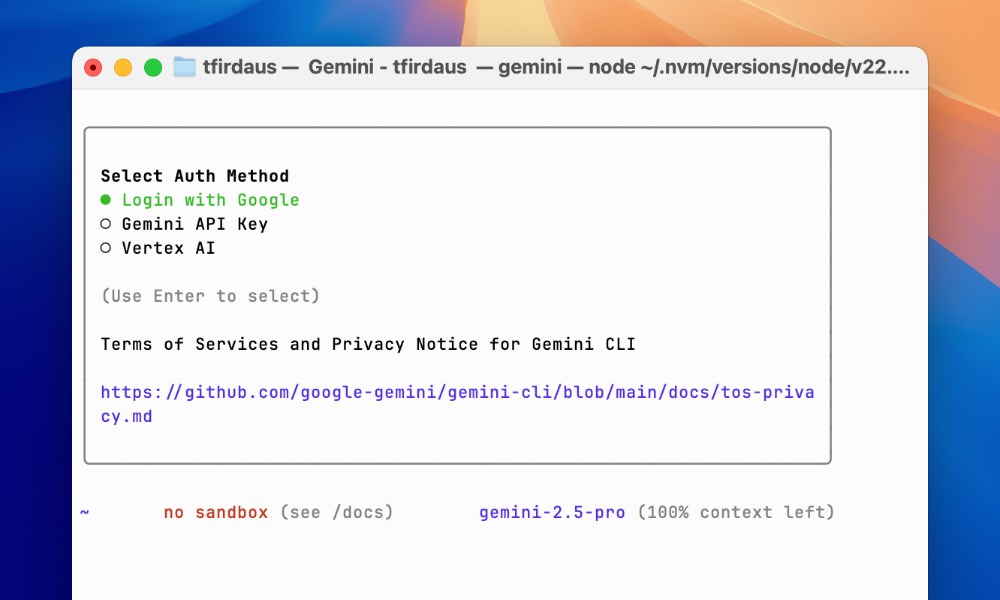
Then, you will also need to authenticate your access to Gemini AI by providing your Google Account. Or, If you need higher quotas, beyond the free tier, I’d suggest to provide a Gemini API key from Google AI Studio.
Examples and Use Cases
The Gemini CLI can be used for various tasks including for coding assistant, file management, content generation, research, task automation, and even system troubleshooting. Let’s see some of these examples:
Coding Assitant
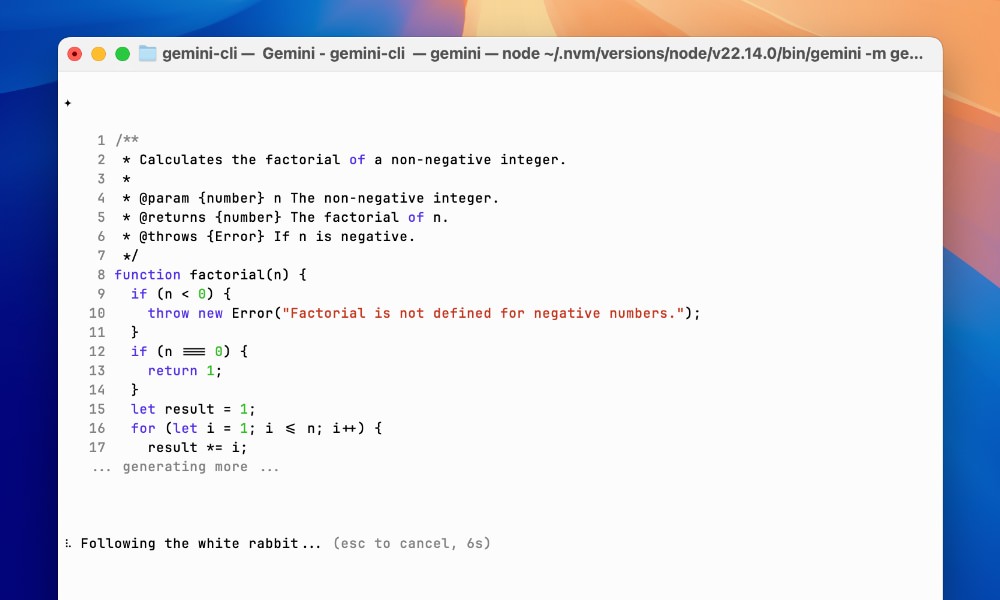
Gemini CLI can help you write code, debug, and even explain code snippets. For example, you can ask it to write a function in Node.js that calculates the factorial of a number. To do this, you can simply run gemini. This will bring the interactive mode, as we can see below:
By default, it will be using the gemini-2.5-pro. But, if you do not need all the power of the gemini-2.5-pro model, you can switch it to other Gemini models, such as gemini-2.0-flash-lite, which is a lightweight model that is faster and cheaper to use.
gemini --m gemini-2.0-flash-lite
Now, we can ask it to write our function. In this case, I will prompt it to: Generate a function in Node.js that calculates the factorial of a number.
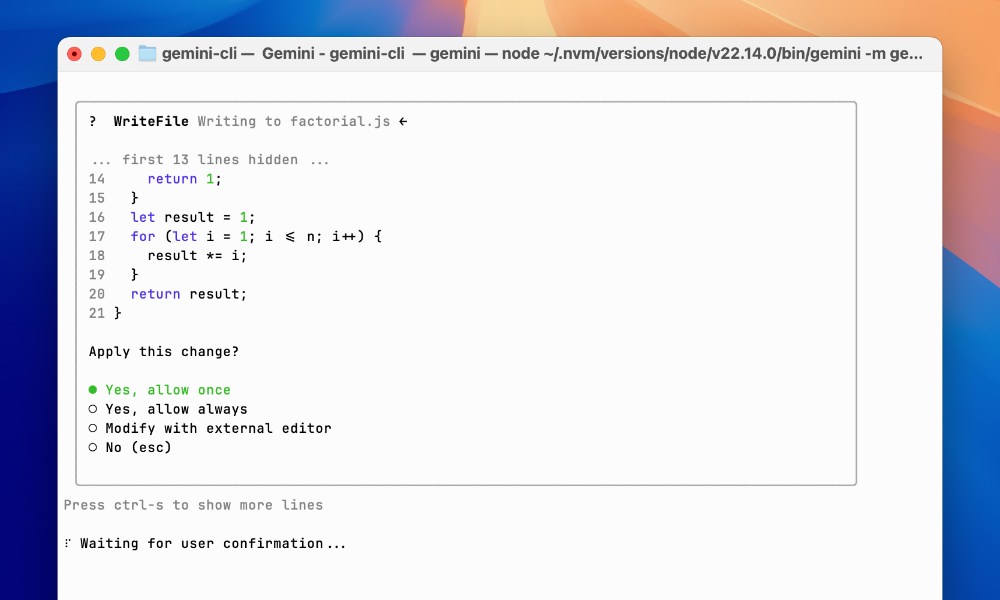
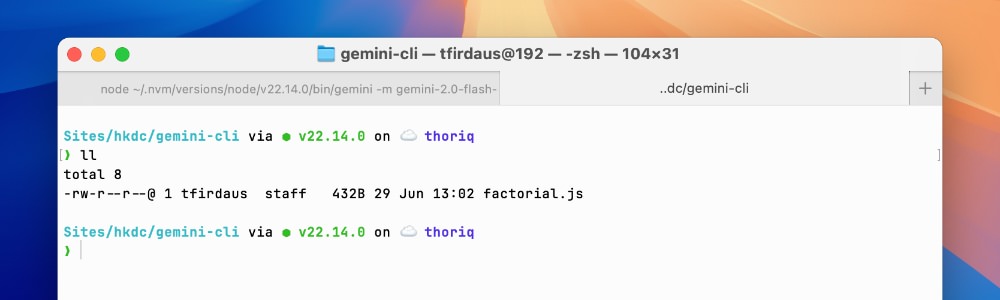
It generated the code for us. But we can also ask it even further to save it in a file, such as factorial.js. To do this, we can simply prompt it to: Save this code in a file named factorial.js
.
You will be asked permission to save the file, and you can either allow it once or always. If you choose to allow it always, it will save the file without asking you again in the future.
Now, we should find the file in the current working directory.
File and Project
As mentioned earlier, Gemini CLI can also help you with file management. For example, you can ask it to create a new directory for your project, and then create a new file inside that directory.
In this example, I’d like to ask Gemini to scaffold a new Go project for me. To do this I will ask it a bit more detail about what needs to be created inside the initial project, for example:
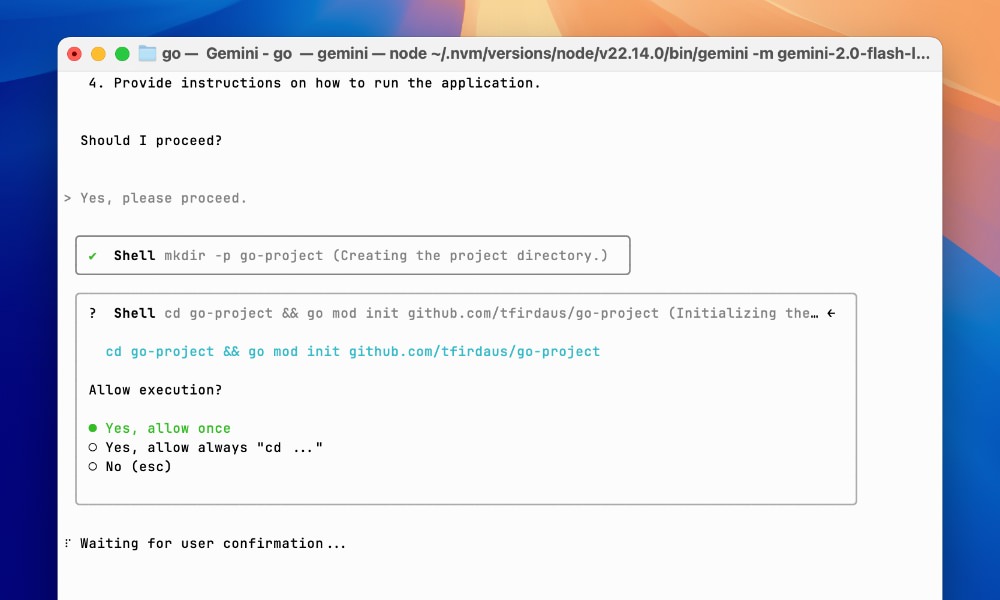
I want to scaffold a new Go project with the following details:

* Module name: github.com/tfirdaus/go-project
* Language: Go
* Purpose: A simple CLI application
* Go version: 1.20+
* Dependency management: Go modules

Please generate:

1. A standard directory structure
2. Initial go.mod file
3. A minimal main.go file (if applicable)
4. Sample README.md
5. Optional: .gitignore for Go projects
6. Test file example

Use idiomatic Go practices and organize the code to be easy to extend later.
After sending this prompt, Gemini will ask you some permissions to make some changes on the file system such as for changing directory, creating directory, creating and writing files.
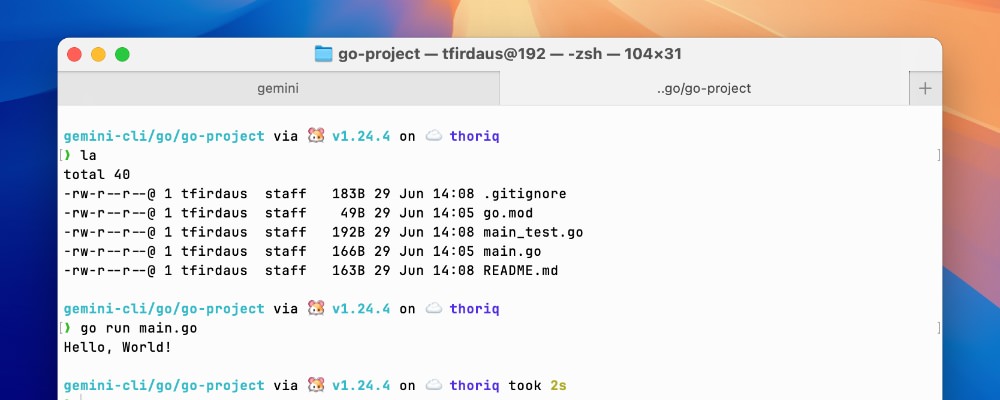
After you allow it, it will start creating the project structure for you, and you can check the result by running ls command:
Wrapping up
Gemini CLI is a powerful and flexible tool that can help you with all kinds of tasks, from coding and managing files to generating content and answering questions. It’s easy to install, simple to set up, and works right from your terminal using plain language commands.
In this article, we walked through how to install Gemini CLI, setting it up, and explored a few practical examples, like using it to help with code and generate an initial project structure.
But there’s much more to explore. In upcoming articles, we’ll dive deeper into Gemini CLI’s advanced features, like integrating with Model Context Protocol (MCP), customizing context and behavior, and using some of its built-in tools.
Stay tuned for more tips to help you get the most out of Gemini CLI!