Fork CMS: A Guide to Easy Installation, Themes, and Tips for Beginners
A variety of powerful open source projects have emerged. Content Management Systems (CMS) stand out because they provide more functionality compared to other open source tools. These projects enable even those with minimal technical skills to set up and manage their own websites effortlessly.
In this post, I’ll explore Fork CMS, a relatively new entrant in the realm of PHP/MySQL CMS platforms. Fork CMS has quickly become a notable alternative, filling gaps that WordPress has left, despite WordPress’s extensive updates and large developer community. If you’re considering a different open-source PHP solution, Fork CMS deserves your consideration.
Introduction to Fork CMS
Before diving into installation, let’s discuss some key differences between Fork CMS and WordPress. One notable distinction is that Fork cannot be installed within a subdirectory on your website. Instead, it requires installation on a root domain or a subdomain, such as forkcms.hongkiat.com, for testing purposes. This restriction may change in future updates, but currently, subdomains are necessary.
It’s also important to note that Fork CMS does not mirror WordPress’s trajectory. WordPress began as a blogging platform and evolved into a comprehensive CMS. In contrast, Fork was designed from the start as a CMS, incorporating additional modules for blogging, page management, and user administration.
The user experience with Fork CMS is distinctly different, and although it may not have undergone as extensive testing as WordPress, the system offers a robust suite of functionalities. While it’s possible to use Fork for blogging, its architecture is fundamentally built to support a broader range of CMS capabilities.
Installing Fork CMS for the First Time
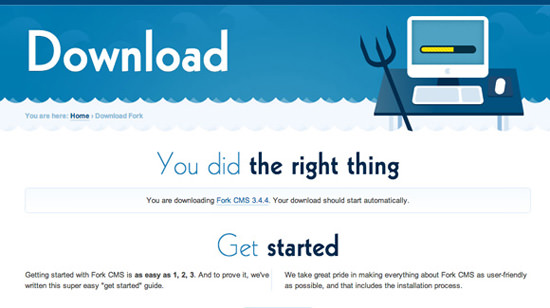
Begin your journey with Fork CMS by downloading a copy from the download page. The download will start automatically and the zip file, which extracts to about 10MB, is comparably sized to the WordPress core files.
A streamlined aspect of this installation process is that no file renaming or editing is required before uploading to your server. The installation of Fork CMS is managed entirely in the backend. Your main task is to set up a MySQL database with a root user, upload the core files to your server, and navigate to the URL to initiate the installation.
If you lack a server for testing, 000Webhost provides free subdomains and PHP/MySQL hosting, though the quality of server resources might be limited. Ideally, test on your own hosting account or locally on your computer.
Initial Setup and Configuration
After uploading the files, visit your domain to be redirected to the installation page. The script will initially check your server settings to identify any unavailable features, focusing on file permissions and php.ini settings.
Despite encountering minor errors, proceed by clicking the “Install anyway” button. Fork is well-known for its multi-language support, offering numerous translation options. If your website will operate in a single language, you can leave the default settings.
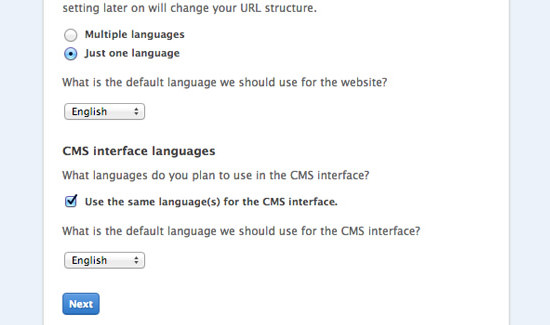
Next, you’ll have the opportunity to install various modules integral to Fork’s functionality. At a minimum, the Blog and Analytics modules are essential, though you can add more later through the admin panel. This stage also allows for the installation of sample data, useful for initial testing.
Database Setup and Completion
Following the basic settings, you’ll enter your database details. This information is critical for storing page content, blog posts, usernames, and more. The hostname and port usually work for most servers unless your MySQL server requires different specifications.
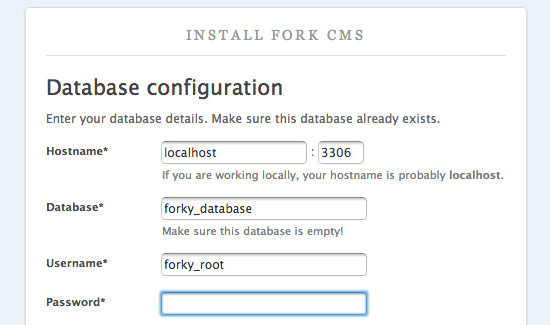
The setup will prompt you for a database name, root user, and password. Ensure this user has full privileges to create and modify tables. After entering all necessary details, click Next to finalize the installation.
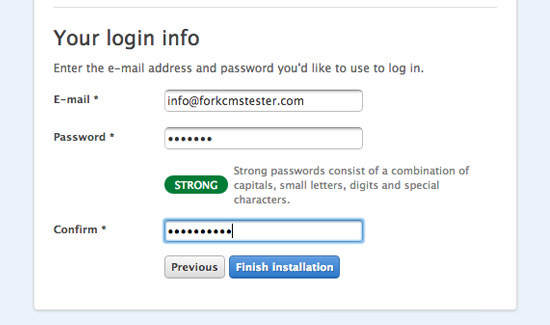
Create an administrator email and password for your website. While the email does not need to be real, it is used as the default for receiving contact messages and updates. Click Finish installation to complete the setup. The final page offers options to visit the homepage or log into the backend, allowing you to explore the capabilities of Fork CMS in depth.
Welcome to the Backend
After logging in, you’ll be directed to the unique admin URL, which is not accessible from the homepage – a common feature in many WordPress themes. While you could modify the template to include a link on your site, remembering the URL, such as www.myforkwebsite.com/private/, is straightforward enough.
The /private/ subdirectory doesn’t actually exist on the server. Instead, access is controlled through .htaccess redirects and PHP URL routing, enhancing security but potentially confusing for new users.
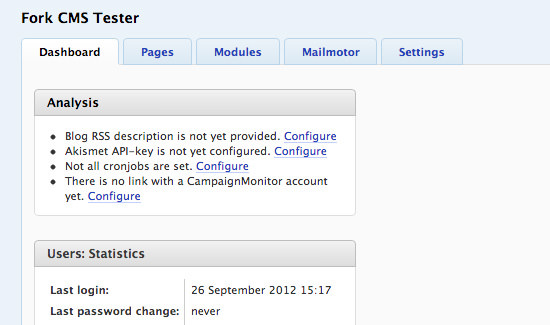
Enter your setup details on the private login page to access the Fork admin dashboard. The best way to become acquainted with a new system is to explore its various sections. Here’s a brief overview of some essential areas.
Managing Website Content
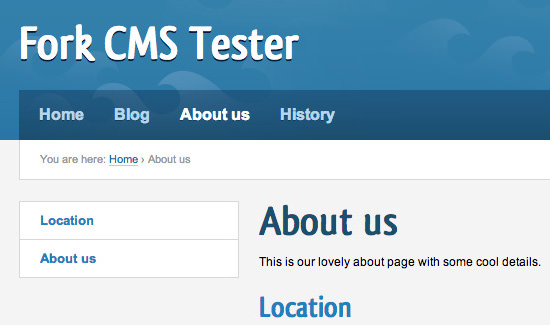
One of the main advantages of using a CMS over plain HTML is the ease of managing content. Fork CMS offers a user-friendly interface for creating and editing pages without any coding. This system presents a significant departure from WordPress, Joomla, or Drupal.
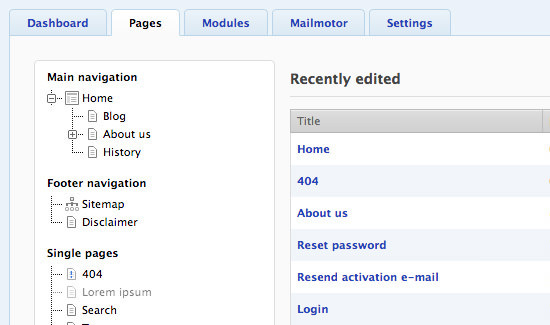
By clicking the ‘Pages’ tab, you will see a tree view of your content. This includes root-level pages and initially hidden sub-page menus. To edit a page, simply select it to open a new window with the template and currently displayed modules or widgets.
You can switch templates for any page to meet specific layout needs, such as two-column, three-column, or a single center column. Fork CMS offers a range of custom page templates that provide flexible solutions for any layout.
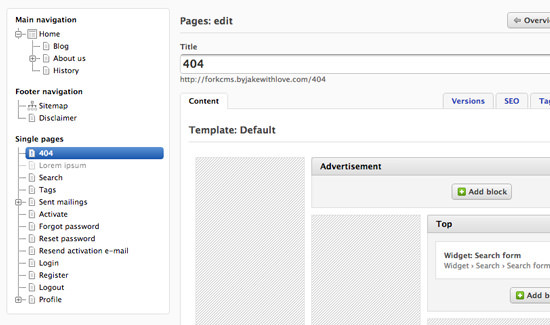
Editing the default HTML of the 404 page involves navigating to the ‘Main’ block, where the ‘Editor’ contains direct HTML output. Hovering over this section reveals editing buttons; clicking the first pencil icon opens the editor window for content adjustments.
Fullscreen Editing
Accessing a full-page editor within Fork CMS differs from WordPress’s dedicated editing setup. There are two primary methods for fullscreen editing in Fork.
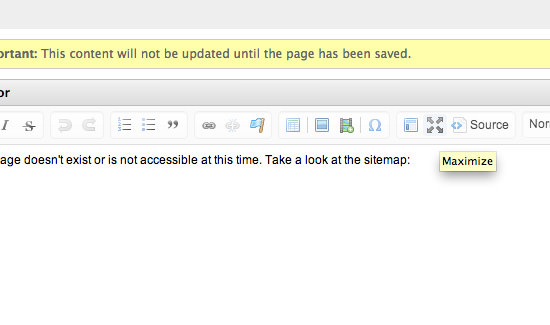
The first method involves clicking the maximize icon within the textbox editor to expand the view to fullscreen, allowing you to edit and then save changes. The second method involves creating unique content blocks to be added to pages as widgets.

This method simplifies content management. To create a content block, select the ‘Modules’ tab, then ‘Content’ blocks. Initially, no content blocks are present post-installation, but they are straightforward to set up, requiring only a title and content. Remember, content block titles are invisible on the frontend and are solely for administrative distinction.
Publishing Blog Posts
If the Blog module is installed, publishing articles is straightforward. Unlike standard content pages, blogs offer less control over templates and the addition of widgets or custom modules.
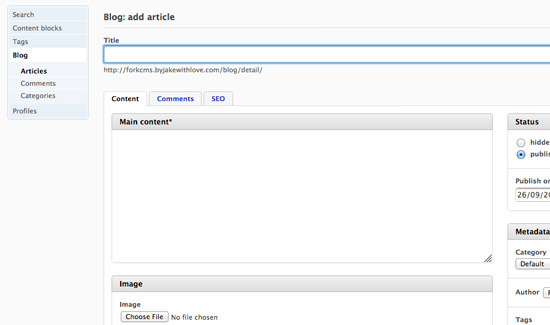
To add a new post, navigate to the ‘Modules’ tab, select Blog, and view a table of existing posts. Click “Add article” to open the editing page. Here, you can choose a blog category, add tags, and upload a featured image. The ‘SEO’ tab provides extensive options for customizing the permalink, title, meta keywords, and more, enhancing your post’s visibility.

This setup provides a robust framework for managing and enhancing your website’s content through Fork CMS, offering both simplicity and depth in customization and management tools.
Analytics and Email Marketing
One area where Fork truly excels is in its seamless integration of analytics and email marketing tools directly into the CMS. You can easily connect your Google Analytics account to the admin dashboard, allowing you to view recent visitor statistics and overall traffic data each time you log in.
While similar functionality can be found in some WordPress plugins, Fork’s built-in analytics capability is notably convenient and user-friendly. But what about marketing? Fork features a module called “Mailmotor” that enhances your email marketing efforts.

With Mailmotor, you can connect to any Campaign Monitor account and access detailed statistics, manage campaigns, and edit newsletters all from your Fork admin panel. Even without a Campaign Monitor account, Fork allows you to utilize the PHP mail() function to send emails to registered users, effectively functioning as both a marketing tool and your primary CMS.
Extending Modules
Like many CMS platforms, Fork CMS allows developers to create their own extensions or applications, known as modules. These modules can be integrated into any template or page on your website.
During the initial installation, you had the option to install various modules that come standard with Fork. Additionally, there is a growing gallery of modules available for download and installation. You can find these by navigating to the ‘Settings’ tab and selecting ‘Modules’ in the sidebar.
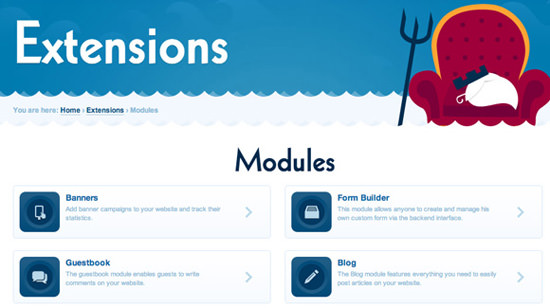
Each module includes details and allows for easy management, including installation and uninstallation. If you choose to download any modules as .zip files from the gallery, you can upload and install them directly from your admin panel. Popular module options include Photogallery, Newsletter, Polls, and even a Twitter module for displaying recent tweets on your site.
Working with Custom Themes
Fork CMS adopts a unique approach to themes compared to WordPress. Instead of .php files, all theme resources are constructed using .tpl files, which may be more familiar to users accustomed to template-based systems.
If you’re a web developer looking to delve deeper into theme creation, consider reviewing this support article on theme development. A theme in Fork can include numerous different template files. While the system uses core template files by default, these can be overridden by any corresponding files in your template folder.
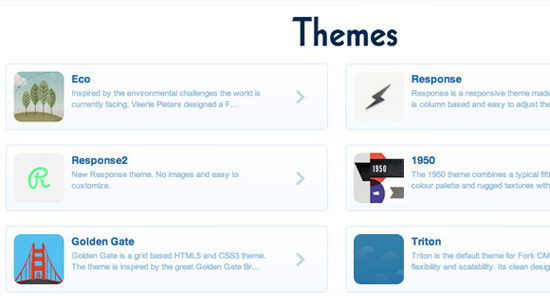
What makes Fork’s theming system particularly appealing is its user-friendliness, even for those with limited technical expertise. The extensions page features a collection of additional themes that can be downloaded and installed for experimentation. Within the admin panel, under the “Settings” tab, select themes to find an Upload theme button in the top right corner.
Fork recommends uploading themes in their original .zip format, as it can automatically decompress these archives and manage the installation process. To switch themes, simply click to select a new one and save your changes. For more details on a specific theme, click the ‘Details’ link below each preview thumbnail.
Final Thoughts
I’ve always been keen on exploring new software and open source projects. Early adopters play a crucial role as trendsetters, sifting through the clutter to uncover hidden gems. My experience with Fork CMS has been quite positive, and I hope you’ll feel the same enthusiasm after trying it out.
This article aims to provide you with a solid foundation to start your own custom Fork CMS website. There are numerous support resources available from the developer community, which are incredibly helpful. Given that Fork CMS is still actively developed, expect to see new and exciting modules and themes released in the near future.