5 Ways to Customize Your WordPress Post Embeds
WordPress introduced post embeds in version 4.4, allowing you to easily share and display WordPress posts from one site to another. When you paste a link to a WordPress post, it automatically appears as a styled preview with the title, excerpt, and featured image.
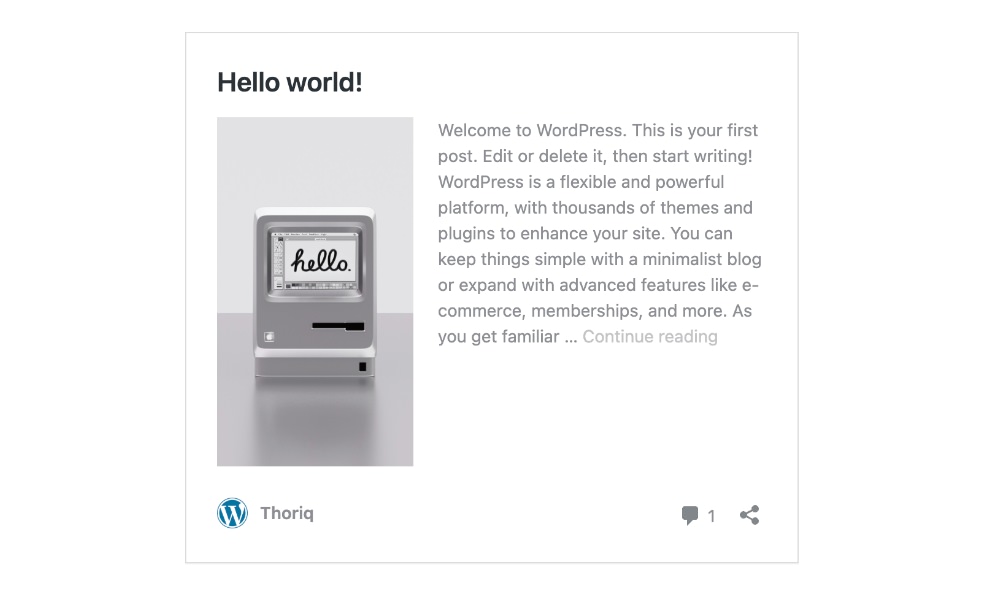
While this feature makes sharing content simple, the default look might not always match your website’s style or layout, as we can see below.
Fortunately, WordPress provides several ways to customize these embeds to better fit your design. In this article, we’ll explore different ways to tweak and personalize WordPress post embeds, so they blend seamlessly with your site.
1. Customizing the Styles
You can easily change the embed’s appearance to better match your website’s theme by adding a custom CSS file with the enqueue_embed_scripts hook, which ensures it’s loaded when the embed is displayed. You can add it in your theme’s functions.php file, for example:
add_action( 'enqueue_embed_scripts', function () {
    wp_enqueue_style(
        'my-theme-embed',
        get_theme_file_uri( 'embed.css' ),
        ['wp-embed-template']
    );
} );
This function tells WordPress to load your custom embed.css file when rendering an embedded post. Now, you can define your own styles in css/embed.css to modify the look of the embed. For example, you can adjust the typography, colors, or layout with CSS like this:
.wp-embed {
    background-color: #f9f9f9;
    border: 1px solid #eee;
    border-radius: 8px;
}

.wp-embed-featured-image img {
    border-radius: 5px;
}
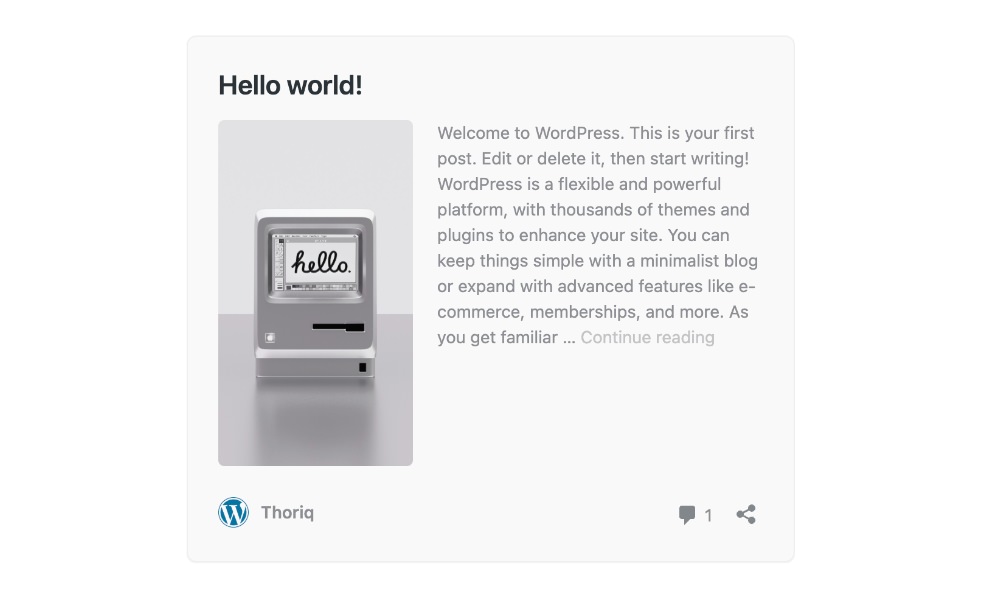
With these changes, your WordPress post embeds will have a unique style that aligns with your site’s design, as shown below:
2. Customizing the Image
By default, WordPress post embeds use a predefined image size for the featured image. However, you can customize this to better match your design by specifying a different image size.
For example, if you want the embed image to be a perfect square but don’t have a square image size set up yet, you can define one using the following code in your theme’s functions.php file. This code will create a new image size called embed-square, which crops images precisely to 300×300 pixels.
add_action( 'after_setup_theme', function () {
    add_image_size( 'embed-square', 300, 300, true );
} );
Then, use the embed_thumbnail_image_size hook
add_filter( 'embed_thumbnail_image_size', function () {
    return 'embed-square';
} );
If you’ve already uploaded images before adding this code, WordPress won’t automatically generate the new embed-square size for them. To fix this, you can use the Regenerate Thumbnails plugin. This ensures that all your older featured images are available in the new size and display correctly in post embeds.
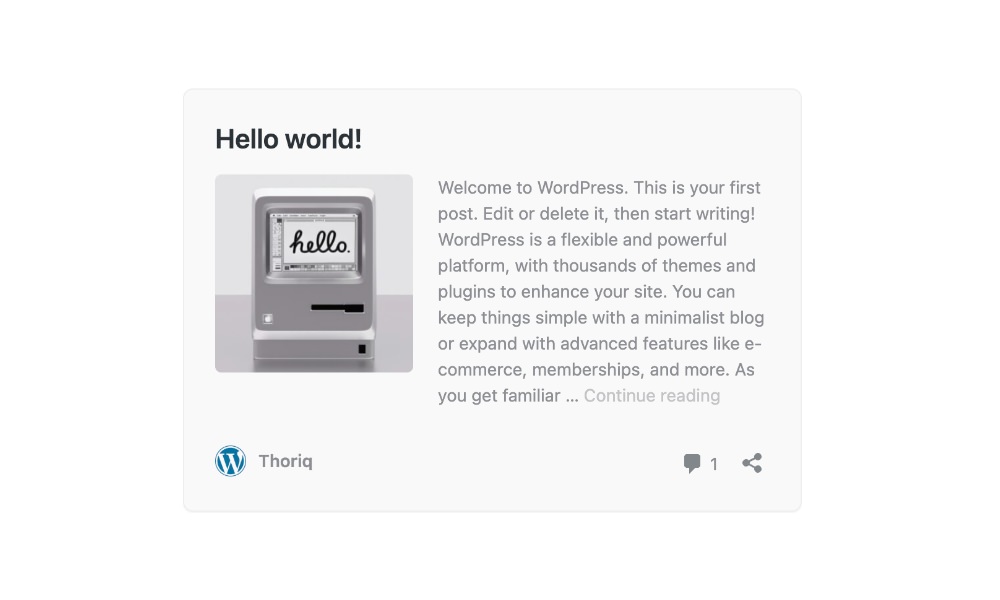
Now, your WordPress post embeds will now use the embed-square image size, as shown below:
3. Customizing the Excerpt
The post embeds also display an excerpt of the post content. However, the default length may not always fit your design or readability preferences. Fortunately, you can control how much text is shown by adjusting the excerpt length by using the excerpt_length
For example, if you want to shorten the excerpt to 18 words specifically for embeds, you can use the following code in your theme’s functions.php file:
add_filter( 'excerpt_length', function ($length) {
    return is_embed() ? 18 : $length;
} );
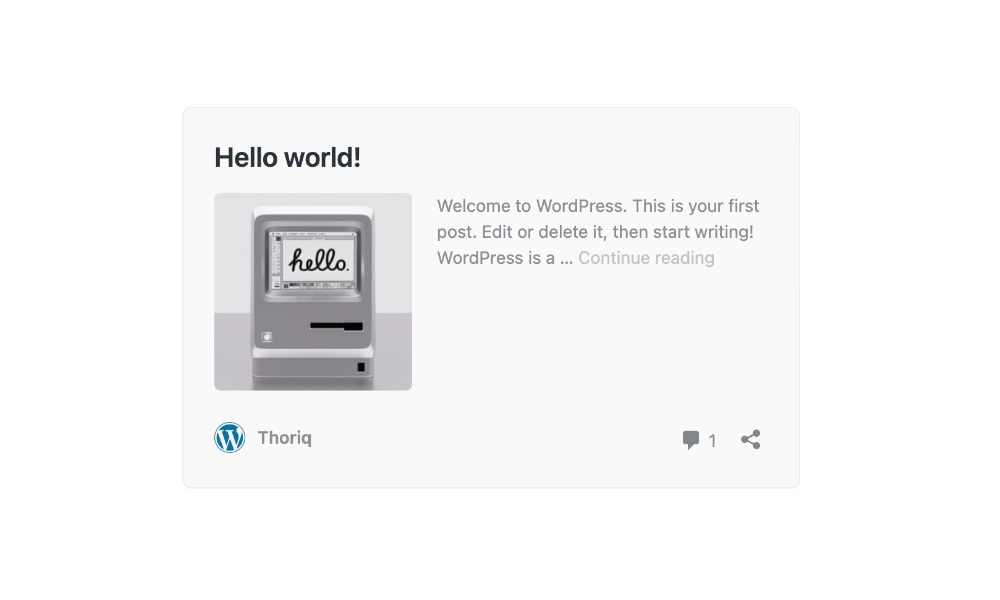
This code checks if the content is being displayed in an embed and, if so, limits the excerpt to 18 words. Otherwise, it keeps the default excerpt length, as shown below.
Experiment with different word counts to find the right balance in your content.
4. Adding Custom Content
By default, WordPress post embeds display basic information like the title, excerpt, and featured image. However, you might want to include additional details, such as the post’s updated date, to provide more context.
To do so, you can use the embed_content. In our case, we can add the following code in the functions.php file to display the post’s updated date:
add_action( 'embed_content', function () {
    if ( ! is_single() ) {
        return;
    }

    $updated_time = get_the_modified_time( 'U' );
    $published_time = get_the_time( 'U' );

    if ( $updated_time > $published_time ) {
        $time = sprintf(
            '<time datetime="%s">%s</time>',
            esc_attr( get_the_modified_date( 'Y-m-d' ) ),
            esc_html( get_the_modified_date() )
        );

        printf(
            '<p class="wp-embed-updated-on">%s</p>',
            sprintf(
                esc_html__( 'Updated on %s', 'devblog' ),
                $time
            )
        );
    }
} );
Now, the post embeds will display the updated date after the content, as shown below:
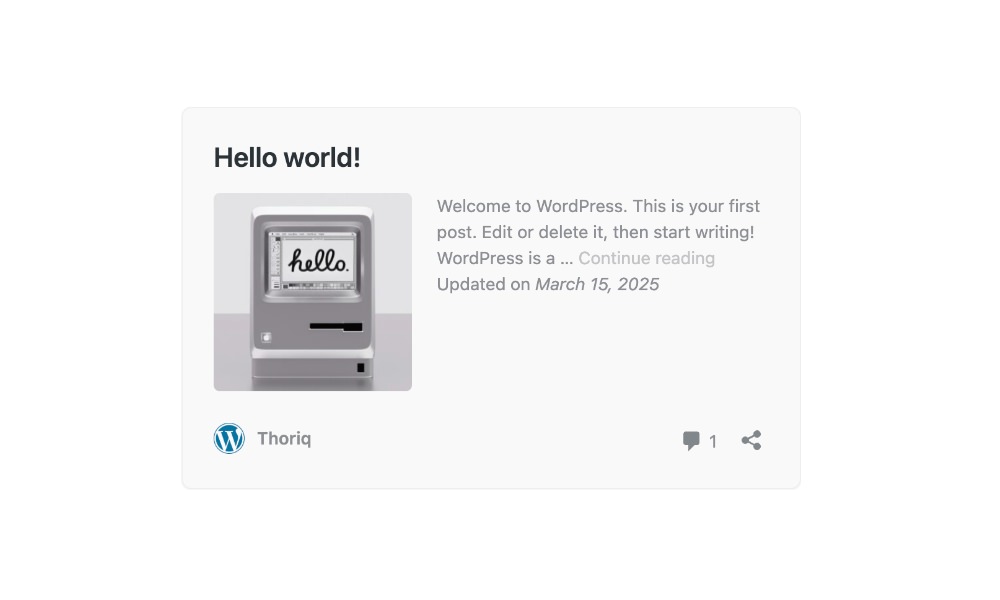
Displaying the updated date is helpful for readers to know if the content has been recently refreshed. This is especially useful for articles with time-sensitive information, tutorials, or news posts that may change over time.
5. Overriding Embed Templates
By default, WordPress uses a single template file called embed.php to display embedded content for all post types, including blog posts, pages, and custom post types. If you want to change how embedded content looks across your site, you can create a custom embed.php file inside your theme folder.
Additionally, WordPress lets you customize embeds for specific post types. For example, if you have a custom post type called “product” and want its embed to show extra details like price and availability without affecting other embeds you can create an embed-product.php file in your theme folder and customize it as needed.
<?php get_header( 'embed' ); ?>
<?php $product = wc_get_product( get_the_ID() ) ?>
<div id="embed-product-<?php the_ID(); ?>" <?php post_class("wp-embed") ?>>
    <div class="embed-product-image">
        <?php the_post_thumbnail( 'embed-square' ); ?>
    </div>
    <div class="embed-product-details">
        <header class="embed-product-header">
            <h3 class="embed-product-title"><?php the_title(); ?></h3>
        </header>
        <div class="embed-product-content">
            <?php the_excerpt(); ?>
            <p><strong>Price</strong>: <?php echo number_format($product->get_regular_price()); ?></p>
            <p><button>Buy Now</button></p>
        </div>
    </div>
</div>
<?php get_footer( 'embed' ); ?>
Now, whenever a product post is embedded, WordPress will use this template instead of the default one.

Bonus:
Disable Post Embed for Specific Post Types
While post embeds are a useful feature for sharing content, you might want to disable them for specific posts or post types. For example, you may have private content that you don’t want to be embedded on other sites.
To disable post embeds for a specific post, you can use the embed_oembed_html filter to return an empty string.
Here’s an example of how you can disable post embeds for page post type.
add_filter( 'embed_oembed_html', function ( $html, $url, $attr, $post_id ) {
    if ( get_post_type( $post_id ) === 'page' ) {
        return '';
    }

    return $html;
}, 10, 4 );
Wrapping up
WordPress post embeds make it easy to share content between websites. In this article, we explored several ways to customize how these embeds look, so they match your site’s design and include extra details for your readers. Now, you can try these techniques to create embeds that look better and make your content more engaging.