wpDataTables Responsive Tables WordPress Plugin – Review
You have a website that anyone would be proud of. Now, you plan to post engaging content and attention-grabbing images. You also want to incorporate interesting and informative videos.
Here is just one little problem. You also have a ton of data that needs to be analyzed, categorized, etc., and made to fit neatly in a table. Try as you might, the result is either ugly to look at or causes your website to crash. However, this important data contains the information you wish to present.
That’s where wpDataTables enters the picture. This WordPress plugin will do the heavy lifting and manage any amount of data it’s confronted with. In return, it will give you a perfectly organized, responsive, and interactive table.
Who Should Use wpDataTables?
wpDataTables doesn’t require writing a single line of code! This makes it a handy time-saver for web designers and programmers. It can also be used by almost anyone needing to organize and publish data in tabular form.
E-commerce store owners, small business owners, and marketers have a lot of data to manage. Bloggers can use this plugin as a means of providing tabular data to provide information. The same is true for event planners.
What wpDataTables Can Do?
Do you have a million-row table with multiple data categories and labels you need to condense? Or maybe you have a raw spreadsheet that you want to present in a more eye-pleasing format?
This WordPress table plugin is a great companion! It will help you whether you’re working with price lists or comparisons, and product catalogs. It also will ease your work with inventories and data collection in general.
If your job involves informing people about the latest sports results, use wpDataTables! If you work with up-to-date event rundowns or progress tracking, use wpDataTables! This WordPress table plugin will help you get results in no time.
How to Use wpDataTables?
Let’s go through the steps involved in using wpDataTables to create a table and publish it on your website.
Step 1.
Do some up-front preparation.
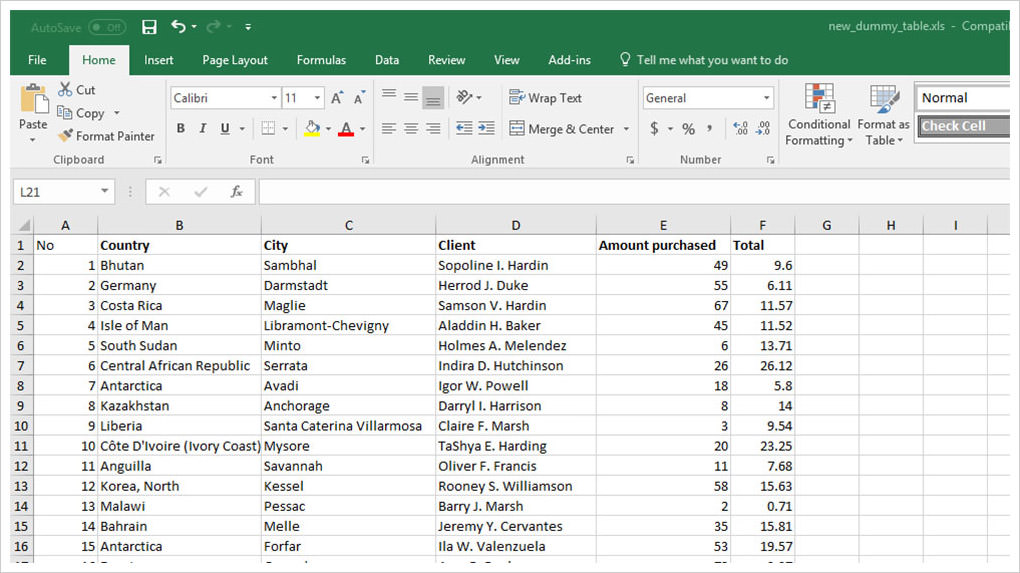
Have your data organized and structured like how you want to present it. If you have an existing table in Excel, a couple of clicks is all it takes to import its data to wpDataTables.
You can also manually create the table directly in WordPress, which is really easy. No need for a data source.
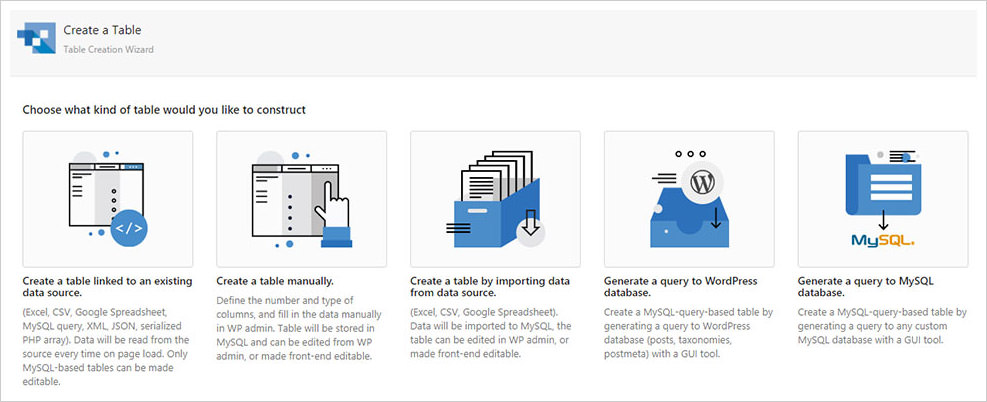
wpDataTables isn’t all that choosy. You can feed it almost any type of data; Google Spreadsheet, Excel, or MySQL.

Want a PHP array-based table with images for a product catalog? It’s not a problem with this WordPress table plugin.
Step 2.
Add a new table in 2 seconds — max.
From the left-hand side of the WordPress dashboard, navigate to wpDataTables. Then click Add New, and you’re ready to create a table.
Step 3.
Organize your table to the nth degree.
When you’ve clicked on Add New, you’ll be presented with a menu from which you can adjust the new table’s parameters.
Now, you can input the table’s title and choose whether to share it or leave it visible for your eyes only.

Having done that, it’s simply a matter of selecting the input source type. For instance, MySQL, CSV, Excel, Google Spreadsheet, XML, JSON, or Serialized PHP array.
Best of all? You don’t even need a pre-created data source. You can build the table manually from WordPress Admin.
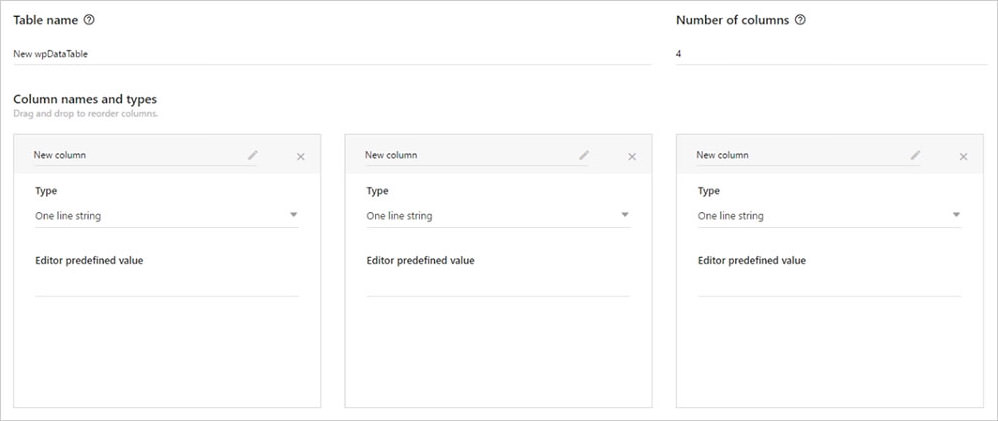
These are the basic features involved in creating a table. Yet, you can experiment with a host of others to make a table exactly as you want it to be. This involves customization down to the smallest of details.

A few examples:
- Use the Responsive feature to allow your table to display properly on various devices.
- Use the Scrollable feature to scroll your table horizontally.
- Want to hide your table until the full-page loads? Use the Hide Table feature.
- You can display a filter below in the column or create a filter within the form. Do this with the Advanced Filtering feature or Filter in Form feature.
- Go to the Table Tools feature to copy a table, save it to Excel, or save it to CSV.
- You can sort tables with the Enable Sorting feature. For this, limit a table’s width with the Limit Table Layout feature. Alternatively, go to the Display Length feature to define how many entries are to display on a page.
- Another feature that may come in handy is the Sum/Totals Row. It calculates the sum of all numeric columns’ data values.
Step 4.
Nice-looking may be OK; but, when you want your table to look impeccable.
You can preview your table to see the changes you’ve made (you don’t have to go back and forth to do this).

You can preview your table. Like this, you can ensure it is structured the way you want. Afterward, you can get involved with the aesthetics, which include:
Adding different colors and changing font sizes, among others. You can also edit each column by its type — text, numbers, or strings.
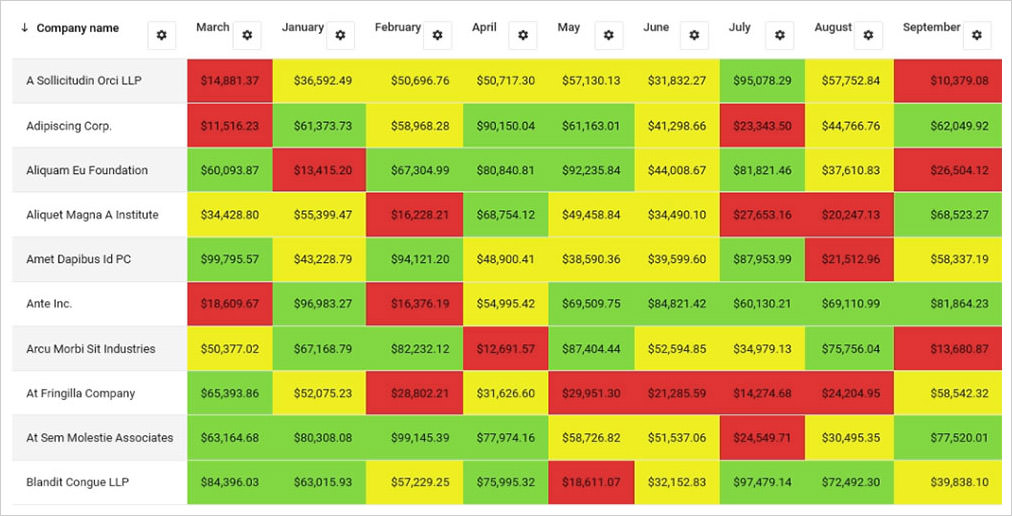
Need to highlight a few things? The Conditional Formatting feature lets you highlight rows, columns, or individual cells. Its work principle is based on the content. When a table consists solely of numbers, you’ll want to take advantage of this feature.
Step 5.
Shortcode — Save, copy, and add the table to your page.
Happy with your result? If so, click Save and then Close.
You can navigate to the wpDataTables dashboard. Here, you can see your new creation in all its glory. You can see its type, title, shortcode for inputting onto your page, and an option to duplicate it.
Copy the shortcode, and navigate to the selected page or post. Paste the shortcode into the page editor to add the table to your page.

It’s easy to place the table exactly where you want it on the page. Having done so, you can start building content around it.
Step 6.
Time to publish.
This is the easiest step of all and, without a doubt, the most satisfying: click on Publish.
That’s it!
Your table should look the same as when you reviewed it.
Step 6 (Bonus).
Create flawless charts with the wpDataTables plugin.

This is where the wpDataChart Wizard comes into play. It takes your data and turns it into a chart or graph, only requiring a few clicks.

The Wizard can be used with 3 render engines: Google Charts, Highcharts, and Chart.js.
Conclusion
There are even more features to work with to create truly amazing tables or charts in just a few minutes.
wpDataTables handles financial or operational statistics with ease. You can use it for large catalogs that feature products or services. In addition, you can use it to do complex data analyses and comparisons.
This plugin does more than work with data. With a few clicks, it also relieves you of hours of seemingly unending work.