Boost Your Site’s Search Capabilities with Google CSE on WordPress
Feeling let down by WordPress’s basic search functionality? Here’s a nifty workaround. Consider using Google’s Custom Search Engine (CSE) to level up your WordPress site. Google CSE can significantly enhance your site visitors’ search experience.
By integrating Google’s powerful search engine features, you’ll provide your visitors with a smoother, more effective search experience. Whether it’s in the sidebar, footer, or a dedicated page, this guide will walk you through implementing Google CSE on your WordPress site effortlessly.
Creating Your Custom Search Engine
Getting started with CSE is a breeze – almost as simple as creating an email account. Just enter a few details about your search engine, and you’re all set. Let’s walk through the steps together.
First, head over to the Google Custom Search page and hit the Create a Custom Search Engine button. If you’re not already logged in, you’ll be whisked away to the CSE login page. Here, sign in with your Google account. No Google account? No problem – it’s high time you created one!
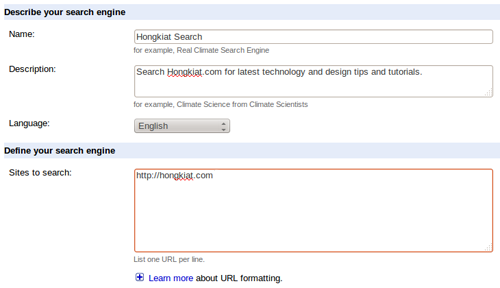
Now, dive into the details: Name, Description, Language, and Sites to Search. You need to list all the sites in the Sites to search section to define where your custom search engine will look for results.
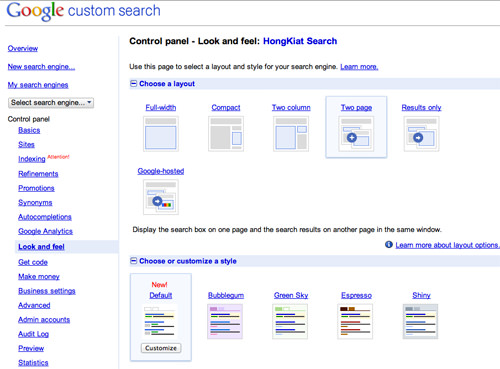
Choose your edition of CSE (did we mention the Standard edition is free? But, if you need Site Search, that’s available for $100/year). Agree to the Terms of Service and click Next. On the Try it Out page, focus on the ‘Look and feel‘ section right at the top.
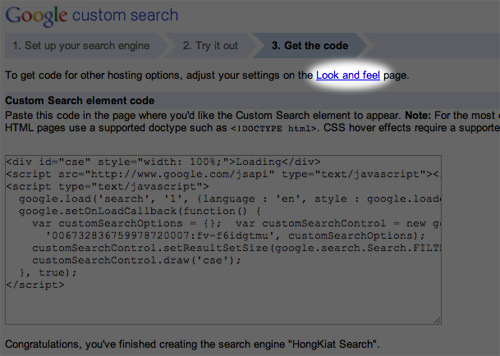
At the Layout page, pick a layout for the CSE on your site. Click the Save & Get Code… button. Keep the Get Code page open as we’ll refer back to it when implementing CSE in various layouts on your WordPress site.
Implementing Templates for Google CSE
Ready to get your hands a little dirty with some WordPress templates? These templates are like magic wands that extend WordPress pages’ capabilities, allowing them to display dynamic or programmed content, including your shiny new CSE.
Here’s a quick and dirty guide to creating a template specifically for your CSE. Grab a notepad or text editor, and copy the code snippet below. But be careful – a single misplaced space can turn your code into a pumpkin. Save your masterpiece as page-template-cse.php on your computer.
 <?php
 // Get the header from your theme
 global $theme; get_header(); ?>
 <div id="main">
   <?php $theme->hook('main_before'); ?>
   <div id="content">
     <?php $theme->hook('content_before'); ?>
     /* Insert your CSE-Bar-code right here. Don't be shy. */
     /* End of the CSE-Bar-code zone. */
     /* Time for your CSE-Results-code. Let's do this. */
     /* That's all, folks! For the CSE-Results-code, anyway. */
     <?php $theme->hook('content_after'); ?>
   </div>
   <?php get_sidebar(); ?>
   <?php $theme->hook('main_after'); ?>
 </div>
 <?php get_footer(); ?>
Bringing Google CSE to Life on Your Site
Stretching Across the Full Width
Let’s start with getting your CSE to spread its wings across the full width of your page. Open the page-template-cse.php file you just created and paste the CSE-Bar-code in the designated spot. After saving your file, upload it to your website’s WordPress installation directory using your hosting account’s File Manager.
Next up, dive into your website’s dashboard and whip up a new page. You can get creative with the Page Name and SEO Options, but leave the page body empty for now. Keep an eye out for the Template option on the right side. Select Google CSE from the dropdown menu, then hit Save or Publish.
Compact, Results Only, or Google-hosted
Prefer a more concise or specialized setup? Copy the appropriate Google Search Element code from the Get Code page. Head back to your dashboard, navigate to Appearance > Widgets, and pick a Text widget. Drag it to your Sidebar or Footer – wherever you envision your search bar living. Paste the code into the widget and click Save.
Two-Page Approach
This one’s for those who like to keep things organized in separate compartments. First, decide on the URL where your CSE’s search results will shine. This URL should be a beacon, guiding your search queries to the right place on your site. Once you’ve nailed down the page name or slug, consistency is key – stick with it when you create the page.

Grab the CSE-Bar-code from the Get Code page and make a beeline to Appearance > Widgets in your dashboard. Choose a Text widget and place it in your Sidebar or Footer. Paste the CSE-Bar-code there and hit Save. Don’t forget to copy the CSE-Results-code too.

Revisit the page-template-cse.php file and paste the CSE-Results-Code in its rightful place. After saving, upload the file again. Create a new page via your dashboard, adding any necessary Page Name and SEO options, but leave the page body untouched. Look for the Template option to the right, select Google CSE from the dropdown, and you’re good to go – Save or Publish your page.
Wrapping It Up
Google’s Custom Search Engine is a powerful tool to enhance your site’s search functionality. Not only does it offer your visitors superior search results, but it also opens up opportunities to monetize your site with Google Adsense. We hope this guide has made the process of integrating Google CSE into your WordPress website straightforward and hassle-free. If you bump into any snags or have questions, drop us a line in the comments below. We’re here to help!