Reveal.js – A Framework For Amazing HTML Presentation
Presentations are a great way to convey valuable and important information. Whether it’s for business, education, or marketing purposes, you have to create interesting, informative and engaging presentation slides. It’s most often done on a desktop or smartphone, but you can also create it using web technology. In this post, I will introduce you to Reveal.js, a framework for beautiful HTML presentations made easy.
Reveal.js is a very powerful framework for creating HTML presentations, as it has so many advanced features. With Reveal.js, you can create a presentation which supports mobile gestures, such as pinch and slide. You can also create the presentation content with markdown, or with visual editors like Slides, if you don’t want to dirty your hands with code. It even equips you with some beautiful transitions and themes and comes with a multitude of other features to help you out.
Recommended Reading: Synchronize Web-Based Presentation Slides With Impress.Js And Impressr [Quicktip]
Getting Started With Reveal
In this post, I will guide you through the basic implementation of Reveal.js. Let’s start by downloading the copy of this repository. The downloaded file contains the following folders:
- css: the core style
- js: javascript dependencies
- plugin: some components developed as Reveal.js extension
- lib: all other third party assets (JavaScript, CSS, fonts)
Now we will call all the dependencies that need to be included. In the head section, call the main style and also the theme you want to use (give an id of “theme”). Available themes are: default, sky, beige, simple, serif, night, moon and solarized. For this demo, I simply use the default one like so:
<link rel="stylesheet" href="css/reveal.min.css">
<link rel="stylesheet" href="css/theme/default.css" id="theme">
And before the end of body tag, include the following javascript:
<script src="lib/js/head.min.js"></script>
<script src="js/reveal.min.js"></script>
HTML Markup
In this guide, let’s assume that we’ll create three basic slides using some HTML codes. There are three main elements for creating the presentation slides. They are: <div class="reveal">, <div class="slides"> and <section>.
In the <section> tag is where you have to specify the slide content. The default slide is moved horizontally, if you want to create a vertical slide, easily add another <section> inside. Here is the example:
<div class="reveal">
    <div class="slides">
        <section>This is horizontal slide</section>
        <section>
            <section>And this is vertical slide</section>
        </section>
    </div>
</div>
In the first slide, we’ll put the intro. Fragmented views will go in the second and this will finally be followed by a punchline slide with a quote and internal link inside.
For the intro, I’m going to format the title with h1 and the sub title with h3 like so:
<section>
	<h1>Hongkiat Presentation</h1>
	<h3>Hi, this is a demo for Reveal.js</h3>
</section>
Now for the second slide, I’ll use some words for the fragment. To create a fragmented view, you’ll need to double the section like in the creation of vertical slide. Then, include the sub section with a fragments id and a class of fragment in the content element like so:
<section>
	<section id="fragments">
		<h2>I'm Fragmented</h2>
		<p>Hit the next arrow to reveal me!</p>
		<p class="fragment">I'm number one</p>
		<p class="fragment">And I'm number two</p>
		<p class="fragment">Hey don't forget me! I'm third.</p>
	</section>
</section>
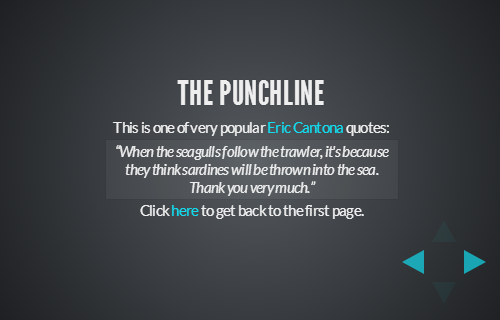
Finally, for the punchline, I want to use a popular Eric Cantona quote. Just wrap the word with a <blockquote> element to get a pretty quote style. And to internally link to other slide, just add an a tag with the slide link map. The following is the result:
<section>
	<h2>The Punchline</h2>
	<p>This is one of very popular <a href="https://en.wikipedia.org/wiki/Eric_Cantona" rel="external">Eric Cantona</a> quotes:</p>
	<blockquote>
		“When the seagulls follow the trawler, it's because they think sardines will be thrown into the sea. Thank you very much.”
	</blockquote>
	<p>Click <a href="#">here</a> to get back to the first page.</p>
</section>
After everything has come together, the last step to make the presentation work is by adding the following configuration:
<script>
	Reveal.initialize({
		controls: true,
		progress: true,
		history: true,
		center: true,
	});
</script>
Those are the basic configurations that we need for basic implementation. A full list of configurations and other advance settings like markdown, notes, auto-sliding and more can be found here.
Now we have a pretty slide for the presentation. This is the intro:

This is our fragmented view:

And this is the final slide:
Conclusion
With this tool, you can create a great HTML presentation within your site. You can find some examples for inspiration here. Compared to other impressive presentation libraries, like Impress.js which focuses on its wonderful transition animation, Reveal in my opinion is still way more powerful in terms of features.