Beginner’s Guide to iOS Development: Exploring the Interface – Part I
Apple has consistently led the mobile industry with its iPhone and iPad lines, capturing significant market share with each new release. This dominance is why many clients prioritize having their applications available on Apple’s App Store, encouraging developers to venture into iPhone app development.
Fortunately, creating an iPhone app may be easier than it seems. This article serves as a detailed guide to help you navigate the journey of developing an app for the iPhone.
We will cover the motivations, stages, and tools involved in app development, culminating in a straightforward tutorial to craft a simple iPhone app using Xcode.
Whether you’re aiming to boost your business or you’re fueled by a groundbreaking app idea that could turn you into a millionaire, let’s embark on the path to creating your first iPhone application!
Note: Developing and submitting apps requires a computer running macOS, as Xcode cannot be legally used on Windows.
Why Choose Apple for App Development?
This question comes up often, so let’s dive into why iPhone development is worth considering. As mentioned earlier, the iPhone commands a significant market share in the mobile industry.
This fact alone should motivate you to learn iPhone app development, aiming to reach a vast audience whether you’re creating apps for yourself or for clients.
From a development perspective, Apple prioritizes simplicity in their products and frameworks. iOS, the operating system for all Apple mobile devices such as the iPod Touch, iPhone, and iPad, exemplifies this. Developing for iPhone means potentially catering to all these devices.
Moreover, the unified programming language across Apple’s devices simplifies coding. Writing code for an iPhone app means you’re also setting the stage for future integration with iPad and even Mac systems.
Objective-C is the foundational language for Apple’s frameworks, used alongside Cocoa Touch, the framework responsible for managing user interactions on iOS.
This introduction is just the tip of the iceberg in iPhone app development. Though the process may seem daunting, approach it with patience. Now that you understand the reasons, the next step is yours to take. Whether you decide to proceed or not, you’re ready to move on to the next phase: designing iPhone apps.
Mapping Out Your iPhone App’s Structure
Embarking on the journey of iPhone app creation involves several key stages, starting with planning and drafting.
Initially, you must define the purpose of your app: Why would it be valuable to users? And which features should it include? This stage is crucial as thorough planning can minimize confusion and issues during the coding phase, potentially saving you from having to start over.

It’s advisable to draft rough layouts for several app screens. Imagine drawing a few rectangle shapes on paper, representing different screens, and sketching out the intended features on each. Think of these screens like web pages, each offering distinct functionality, such as login forms, contact lists, or data tables.
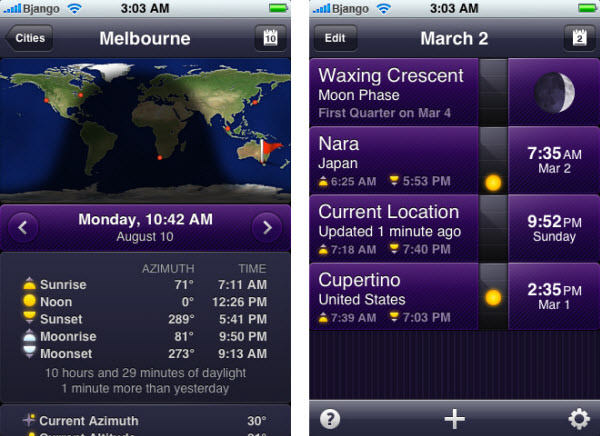
Here’s a quick overview of common UI bar elements you might include:
- Status Bar – Shows the device’s battery level, network status, and more. It’s generally a good idea to incorporate this.
- Navigation Bar – Allows users to navigate through the app’s hierarchy. Typically includes a back button to return to the previous screen.
- Toolbar – Located at the bottom, featuring icons for actions like Share, Download, Delete, etc.
- Tab Bar – Similar to the toolbar but for switching between screens. Tabs highlight upon selection, showcasing a glossy effect.
This compilation covers the basics, but there’s a broader array of views and styles available, detailed in Apple’s iOS UI Element Usage Guidelines. Consulting this resource is highly recommended when in doubt about UI components.
While it’s impractical to describe every possible UI element here due to their vast number and the likelihood that not all will be used in a single project, these guidelines and inspirations from existing iPhone apps can greatly inform your design process.
Crafting Photoshop Mockups for Your App
Assuming many of you are already familiar with Adobe Photoshop, the leading tool for creating web graphics, banners, logos, and mobile mockups. While designing for web might seem straightforward, crafting designs for iPhone apps introduces a layer of complexity.
For app development, it’s crucial to start with pixel-perfect mockup designs.
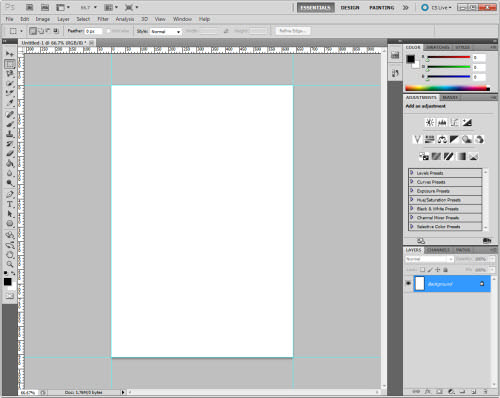
Let’s dive into the Photoshop settings essential for iPhone design. There are two main design resolutions to consider. The standard iPhone screen resolution is 320 x 480 pixels, but the iPhone 4’s retina display requires designs at double that resolution, 640 x 960 pixels, to accommodate the increased pixel density.
This also means preparing two sets of icons for your designs: one at 163ppi and another at 326ppi for the retina display, with the latter typically labeled with @2x in the file name, like “icon@2x.png“.
Optimizing your Photoshop document begins with adjusting preferences: navigate to Photoshop > Edit > Preferences > Guides, Grid, and Slices. Set your gridline to appear every 20px with 2 subdivisions. This setup means that a 2px line in your design correlates to 1 point on the actual device, a critical consideration for retina display designs.
Although designing at higher resolutions and scaling down is my preferred method, experimenting with both approaches to find what works best for you is advisable. Remember, we’re working with 640 x 960 pixels at 326ppi – consider saving this as a custom preset for future projects.
Utilizing Template Elements in Photoshop
While it’s entirely possible to craft a pixel-perfect layout from scratch in Photoshop, such a task can be overwhelmingly intricate and time-consuming.
Dealing with a file that contains an abundance of elements can get cumbersome. To streamline the process, you can press v to enable the Move Tool, then toggle the “Auto-Select” option to “Layer” instead of “Group”. This adjustment allows you to select any element on your canvas, and Photoshop will automatically navigate to the corresponding layer.
You’re encouraged to experiment with the mockup, adapting it into a prototype for your app. The PSD file may contain a variety of features that could be integral to your app’s functionality. It’s also feasible to modify layer elements, like font styles, gradient colors, and more. Just be cautious to avoid resizing elements, as all UI components are designed to adhere to standard dimensions.
Navigating App Development in Xcode
Xcode is the go-to development environment for creating apps on iOS and macOS. If you’re using macOS Lion or later, Xcode and all necessary packages are available for free in the Mac App Store.
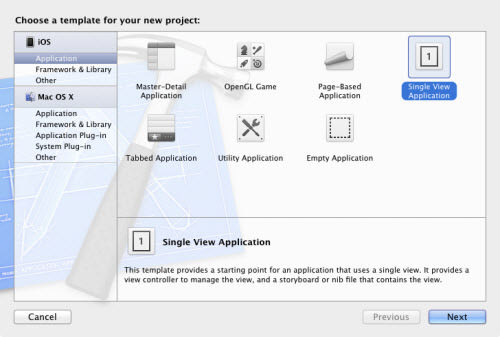
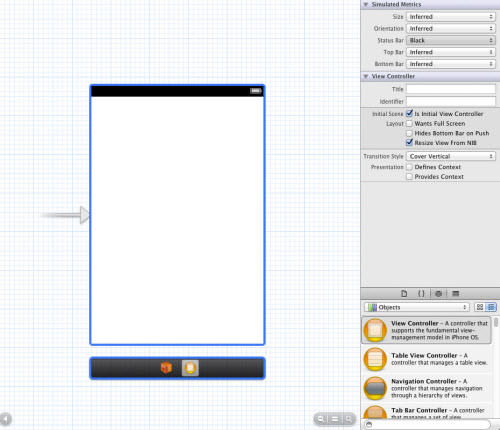
Once Xcode is installed, launching it will bring you to its welcome screen. Here, you can either open an existing project or start a new one. To begin, select “Create a new Xcode project“. In the template window, under iOS > Application, choose “Single View Application” and proceed to the next step. Name your app, for instance, Test (avoid spaces), set a Company Identifier with any name like mycompany, choose where to save it, and click “Save”.
Xcode will then prepare your project’s file structure and present you with your workspace. The folder named after your app contains all the crucial files.
For designing the UI, Xcode offers two approaches. The traditional xib/nib method allows for individual page views but can become cumbersome with multiple views. Alternatively, the storyboard format consolidates all your views into a single editor pane, simplifying the process of adding or removing UI components.
You will also find .h (header) and .m (implementation) files within your project, which are used for writing Objective-C code for your app’s functionality. Understanding Xcode’s adherence to the MVC (Model, View, Controller) pattern explains the necessity for separate files for each controller’s code.
Understanding the MVC Programming Structure
To grasp how an app functions, it’s essential to comprehend its programming framework. The Model, View, Controller (MVC) pattern is fundamental in Xcode, delineating the separation between user interface code and the logic and processing operations. Although MVC might initially seem daunting, familiarity and practice with constructing basic apps will enhance your appreciation for its organized architecture.
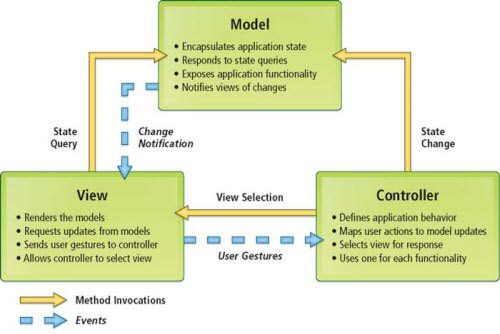
For clarity, here’s a breakdown of each component:
- Model – Contains logic and core data, such as variables, external connections (e.g., to RSS feeds or images), functions, and calculations. It operates independently of your user interfaces, allowing you to modify views without affecting the underlying data.
- View – Represents the visual elements within your app, like tables, profile pages, summaries, and media players. While you can alter their appearance and structure, they interact with the same data defined in the Model.
- Controller – Serves as the bridge between the Model and View, facilitating data transfer. For example, a button tap in the View can be processed by the Controller to affect data in the Model, such as logging out a user and displaying a confirmation message.
In essence, the Model manages the data and functions necessary for display, but cannot directly modify the View, which is strictly for visual representation and receives data via a ViewController. The Controller conceals backend processes from the frontend, enabling design changes without sacrificing functionality.
With this foundation, venturing into app development becomes more accessible. Using Objective-C, the primary language for app development on Apple platforms, requires a solid understanding of its syntax and concepts. For beginners, I recommend starting with the Mobiletuts+ tutorial series to get acquainted with Objective-C fundamentals.
Designing Your App’s Interface with Storyboards
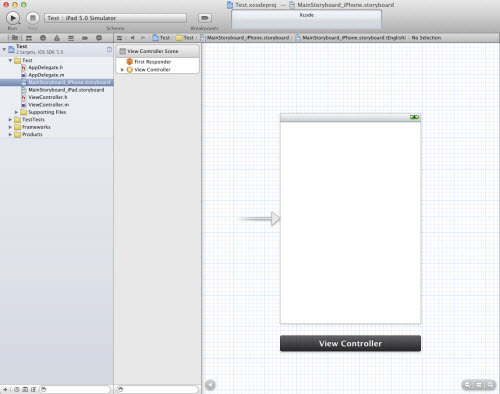
Having delved into the technicalities of app development, let’s shift our focus to the design aspect of the interface. Assuming you selected the “Storyboard” option when setting up your project, you’ll have access to a MainStoryboard_iPhone.storyboard file within the project’s folder hierarchy. Navigate to this file and open it to start designing your interface.
Upon selecting the storyboard file, a sidebar, known as the Document Outline, will appear next to the folder group. This feature offers a convenient way to preview all views contained within the storyboard.
To begin crafting the user interface, we’ll integrate a couple of key components: a Navigation Bar and a Tab Bar. But first, head over to the Attributes Inspector (View > Utilities > Show Attributes Inspector) located on the right-hand side. There, you’ll find the Status Bar option, which is set to Inferred by default, reflecting the standard iPhone status bar appearance. However, for a design that matches your app’s aesthetic more closely, you can opt for either Black or Translucent Black.
Exploring the Object Library in Xcode
If you can’t see the Utilities pane on the right side of the Xcode window, make it visible by going to View > Utilities > Show Utilities. At the bottom of the Utilities pane, you’ll find the Object Library, identifiable by a drop-down menu with “Objects” listed first. If it’s not immediately visible, select View > Utilities > Show Object Library to access it.
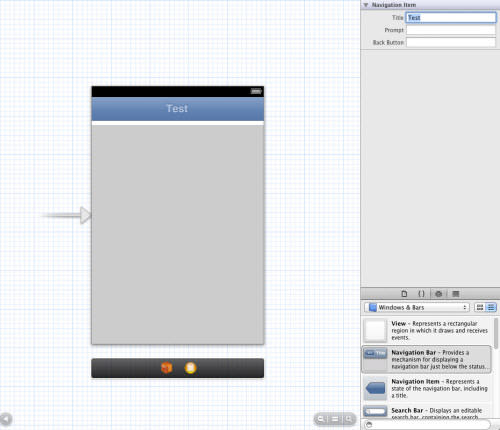
Within the Object Library’s drop-down menu, navigate to Windows & Bars and select the Navigation Bar. Drag it into your storyboard, positioning it just below the Status Bar that displays the battery icon. To customize the title, double-click the default “Title” text, and you’ll see a “Title” label in the Utilities pane where you can change the description to “Test“. Press “Enter” to apply the new title.
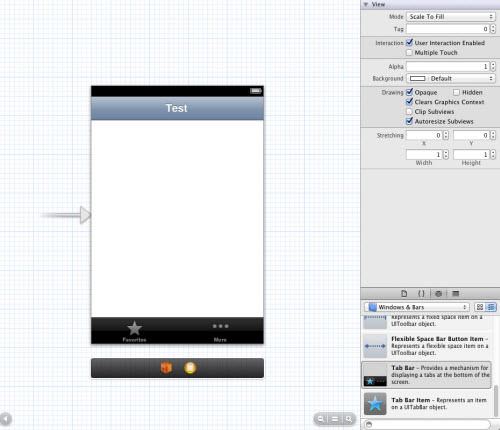
Return to the Windows & Bars panel to find the Tab Bar, drag it to your storyboard, placing it at the bottom of the view. These elements naturally integrate well within the design.
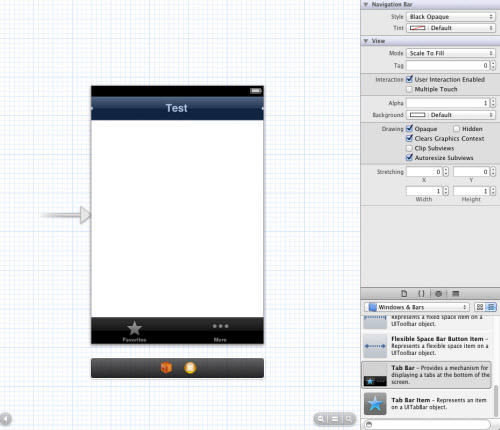
To align the Navigation Bar’s gradient with the Tab Bar’s style, select the Navigation Bar and check the Attributes panel in the Utilities pane. The first option is Style, set by default to Default. Change this setting to Black Opaque for a cohesive color scheme.
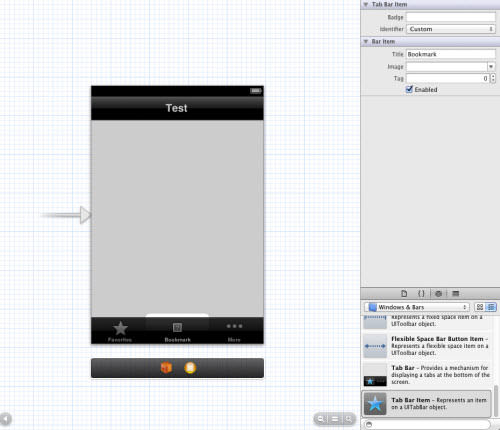
Add another tab button by selecting a Tab Bar Item from the Windows & Bars panel and dragging it between the existing Tab Bar buttons. Double-clicking this new button reveals options in the Utilities pane to modify its image and title; for instance, setting the title to “Bookmark” for the new item.
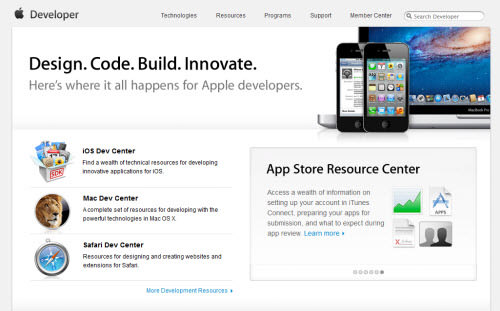
This brief tutorial introduces the basics of designing views within Xcode. While adapting to the interface might take some time, experimenting with additional elements as you become more comfortable is encouraged. For further learning, explore Apple’s iOS Development Resources for a wealth of information and guidance.
Stay Tuned for Part II
This marks the end of the first installment in our series on iPhone app design and development. In our next chapter, we’ll dive deeper into Objective-C and Cocoa Touch, guiding you through the steps to create a functional iPhone app. Stay tuned for more!
iOS Design Inspiration Gallery
For the designers among us seeking inspiration, we’ve compiled a collection of captivating iPhone app designs below. This list showcases a wide array of innovative app elements that may have flown under your radar. We welcome you to share your designs, ideas, or any questions in the comments section. Thank you for your engagement!
Race Splitter
Satisfaction Remote
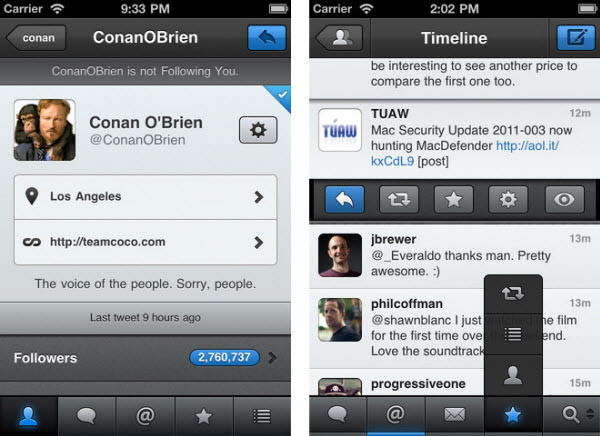
Tweetbot for iPhone
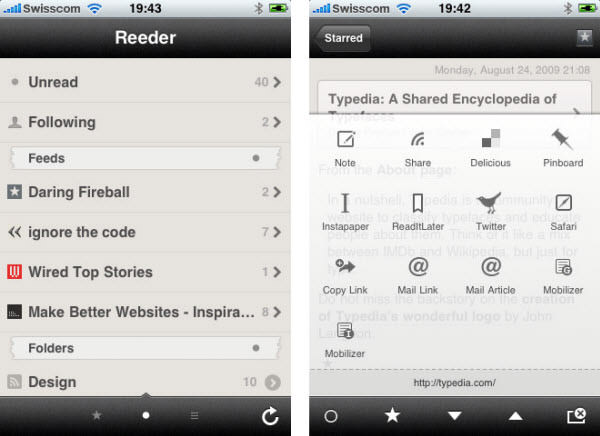
Reeder
Foursquare

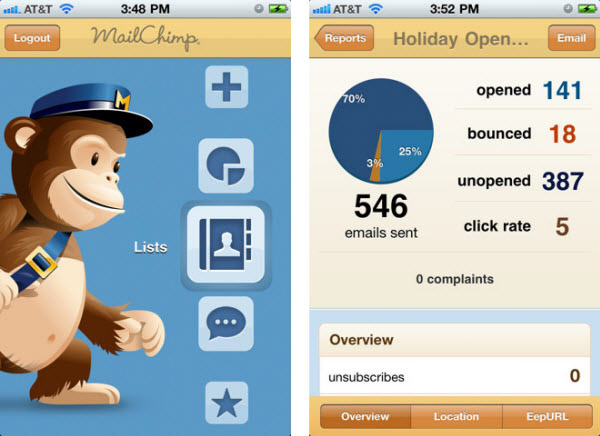
MailChimp

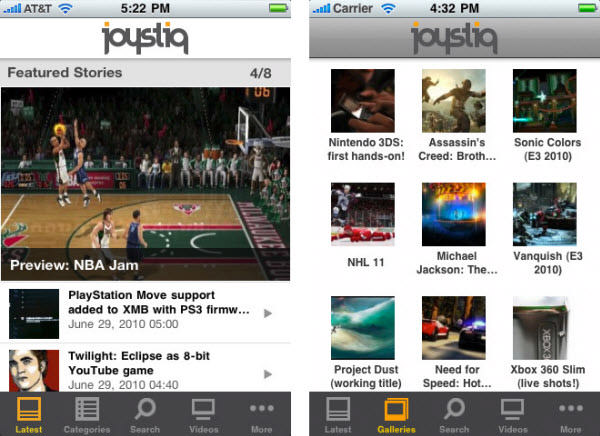
Joystiq
Piictu

Darkness
Note: This post was first published on Oct 25, 2011.