How to Build A Fully Customized WordPress Login Page
Many of you, I believe, are familiar with the WordPress login page at wp-login.php. It looks nice, and works fine. But when it comes to creating a website for clients, you might want a more customized login page, so that it integrates nicely with the website design as a whole. In addition, having a customized login page could also give your clients a good impression of your skills.
If this is something that you want to achieve on your site, here’s how you can build a fully customized WordPress login page.
WordPress Conditional Tags and Snippets for Beginners
One of the best features of WordPress could be conditional tags. It allows you to tell the code... Read more
Custom Login Page
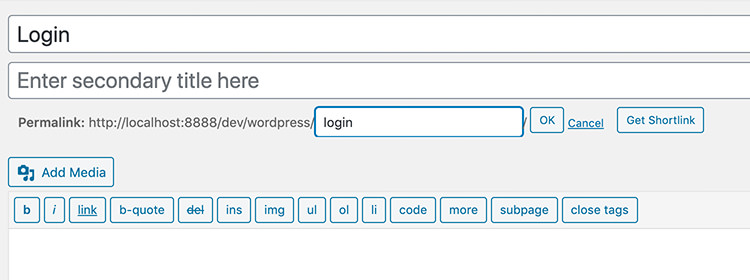
First, we need to create a custom page template for the login page. To do so, you can create a new page template and name it – for example – page-login.php. Then, create a new Page from the WordPress backend and set the permalink to login so that WordPress will automatically take the page-login.php template for the page.
The Login Form
Put the wp_login_form tag in the page-login.php page template to display the login form.
<?php wp_login_form(); ?>
The following is optional, but could be useful in certain cases. You can configure a few things for the login form, like specifying the redirecting of URL after the user has successfully logged in, changing the ID of the username, and the password input field.
<?php
$args = array(
    'redirect' => home_url(),
    'id_username' => 'user',
    'id_password' => 'pass',
   )
;?>
<?php wp_login_form( $args ); ?>
Furthermore, you can also add something aside. It could be your logo and a little description of your site, for example.
<div class="login-branding">
	<a href="#" class="login-logo">Hongkiat.com</a>
	<p class="login-desc">
		Hongkiat.com is a design weblog dedicated to designers and bloggers. We constantly publish useful tricks, tools, tutorials and inspirational artworks.
	</p>
</div>
<div class="login-form">
<?php
$args = array(
    'redirect' => home_url(),
    'id_username' => 'user',
    'id_password' => 'pass',
   )
;?>
<?php wp_login_form( $args ); ?>
</div>
Now, let’s make the form nicer with CSS. You can make the CSS up on your own as per your site requirements. In this example, here is how my login form looks like. It has black background, with a blue button, which fits quite well with the Hongkiat.com site theme.

Validation
At this point, the login page is already functional. We can try logging in, and if suceeded we will be redirected to the URL that we have specified in the redirect parameter above. But, there is something that we need to address.
First, the wp-login.php page is still accessible. It would be better to redirect the wp-login.php to our new login page to deliver a unified experience to our clients.
To do so, you can add the following codes in the functions.php of your theme.
function redirect_login_page() {
	$login_page  = home_url( '/login/' );
	$page_viewed = basename($_SERVER['REQUEST_URI']);

	if( $page_viewed == "wp-login.php" && $_SERVER['REQUEST_METHOD'] == 'GET') {
		wp_redirect($login_page);
		exit;
	}
}
add_action('init','redirect_login_page');
Remember to change the $login_page variable to your own login page (thanks to Montana Flynn for the tip).
Second, the login page can work as expected when we are successfully logged in. But if an error occurs like when submiting invalid user and password combinations, or submitting an empty field, we will also be thrown away to wp-login.php. To solve this issue, add the following functions in the functions.php.
function login_failed() {
	$login_page  = home_url( '/login/' );
	wp_redirect( $login_page . '?login=failed' );
	exit;
}
add_action( 'wp_login_failed', 'login_failed' );

function verify_username_password( $user, $username, $password ) {
	$login_page  = home_url( '/login/' );
    if( $username == "" || $password == "" ) {
        wp_redirect( $login_page . "?login=empty" );
        exit;
    }
}
add_filter( 'authenticate', 'verify_username_password', 1, 3);
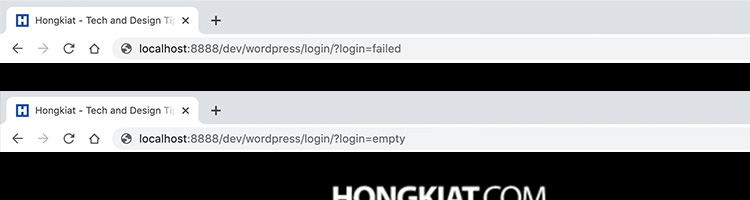
These two functions perform two tasks. They will redirect the user upon failing, and append a login query string to the URL with the value of either failed or empty.
The last problem is we will also be redirected to wp-login.php when we have logged out from the site. So, we also need to specify the redirecting URL upon logging out, like so.
function logout_page() {
	$login_page  = home_url( '/login/' );
	wp_redirect( $login_page . "?login=false" );
	exit;
}
add_action('wp_logout','logout_page');
Error Message
We will display an error message, showing the user when the error occurred, and when they have logged out by using the query string that we have put in the URL. To get the value from the login query string above, we can use $_GET.
Put this code below in the login page template.
$login = (isset($_GET['login']) ) ? $_GET['login'] : 0;
The above code will check whether the login variable contains value, otherwise it will set to 0. Then we will display different notification messages based on the value of $error, like so.
if ( $login === "failed" ) {
	echo '<p class="login-msg"><strong>ERROR:</strong> Invalid username and/or password.</p>';
} elseif ( $login === "empty" ) {
	echo '<p class="login-msg"><strong>ERROR:</strong> Username and/or Password is empty.</p>';
} elseif ( $login === "false" ) {
	echo '<p class="login-msg"><strong>ERROR:</strong> You are logged out.</p>';
}
And below is what the error message looks like.

Conclusion
There are several things that we could do to improve our login page such as adding Lost Password link, Register Link, and a personalized error message. But, at this point it is now functioning well enough for our users to login and logout, and it could also be a good start to create a more advanced login page.
We hope that you find this tutorial useful.