How to Make iOS Devices More Kid-Friendly & Child-Safe
Kids these days have gone digital and there’s nothing we can do about it. But what we can do is to ensure their digital safety. Thankfully, there are many ways in which you can make your iOS device safer for your kids.
All it takes is a few minutes of your time to set things up so your kids can have a safe digital space while enjoying a certain degree of freedom on the internet.
If this is your first time doing this, the moment you enter the “Screen Time” option, you will be asked if the device is for you or for your child. Then you can just simply follow the wizard as shown in the image above. But if you would like to revisit the settings you made (or if you skipped the wizard), then follow the guide below:
5 Best Parental Control Apps for Mac
Discover top 5 Mac parental control apps for child safety online. Manage screen time, filter content, and monitor... Read more
1. Block in-app purchases & disable app installation & deletion
Just a couple of days ago I saw the news about some parents being billed $16,000 because their son just kept on buying in-game items on mobile. Nightmare, right? But this can be easily avoided.
Just follow the steps below:
- Go to Settings and tap Screen Time.
- By default, Content & Privacy Restrictions is probably turned off. Turn this option on.
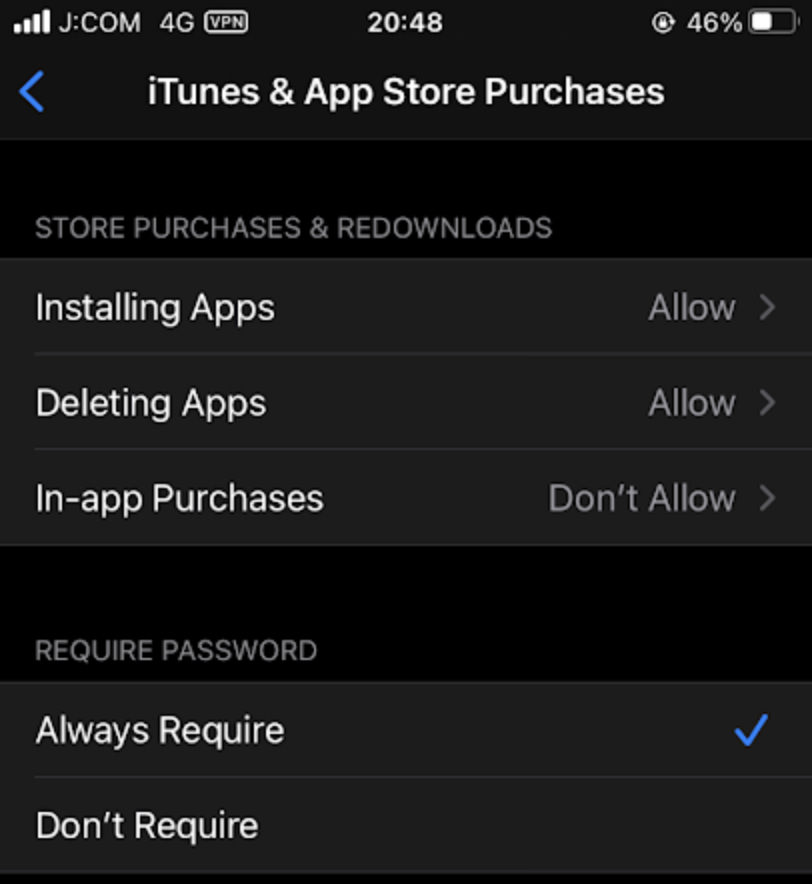
- Tap on the first option for iTunes & App Store Purchases.
- Tap In-app Purchases and choose Don’t Allow.
- And while you’re at it, require the password each time an app is installed or deleted for extra precaution.
As easy as that. Now you won’t have to worry about a surprise $16,000 in your credit card statement.
2. Set a scheduled downtime for apps to limit app usage
A lot of parents limit their child’s screen time, but oftentimes it’s just a verbal agreement that often slips away from the mind of the parents. So the 2-hour screen time becomes 3, 4, 5 hours. There are also the sneaky ones who keep on using their devices well past bedtime.
But you can actually configure your iOS device to just simply stop working during a specific hours, or when the daily limit has been reached.
To do this:
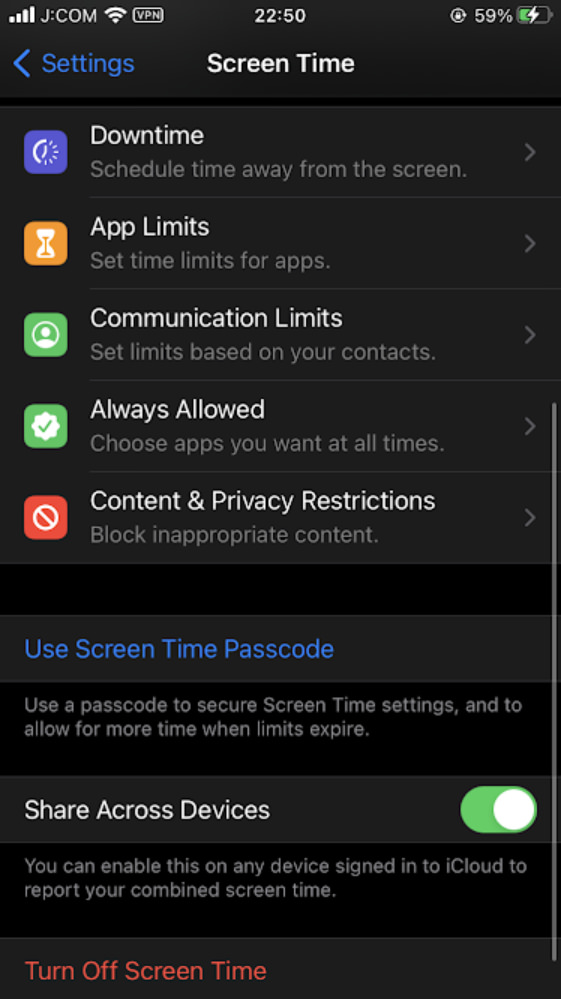
- Go to Settings and choose Screen Time.
- You will see 5 different options here that you can utilize to secure your child’s device: Downtime – you can set a schedule for when apps on the Allowed list can be used. App Limits – choose either per application or by app category and limit how many minutes or hours each of them can be used. Communication Limits – set a schedule and define who can be called, FaceTimed, messaged – allow for Everyone, Contacts Only, or Contacts & Groups with at Least One Contact. Always Allowed – while you are setting restrictions, allowing a blanket approval for specific apps will also be helpful, especially during emergencies. For example, Messages and FaceTime, as well as Maps. Content & Privacy Restriction – this enables you to restrict all types of content deemed inappropriate for a certain age.
3. Limit accessible content
In your iOS device, you can limit or block the content that’s accessible to your kid like adult websites, explicit music, books, and apps etc.
To do this:
- Go to Settings in your iOS device.
- Under Screen Time, choose Content Restrictions.
Here you will find different ways to filter content that you’d rather not have your child see.
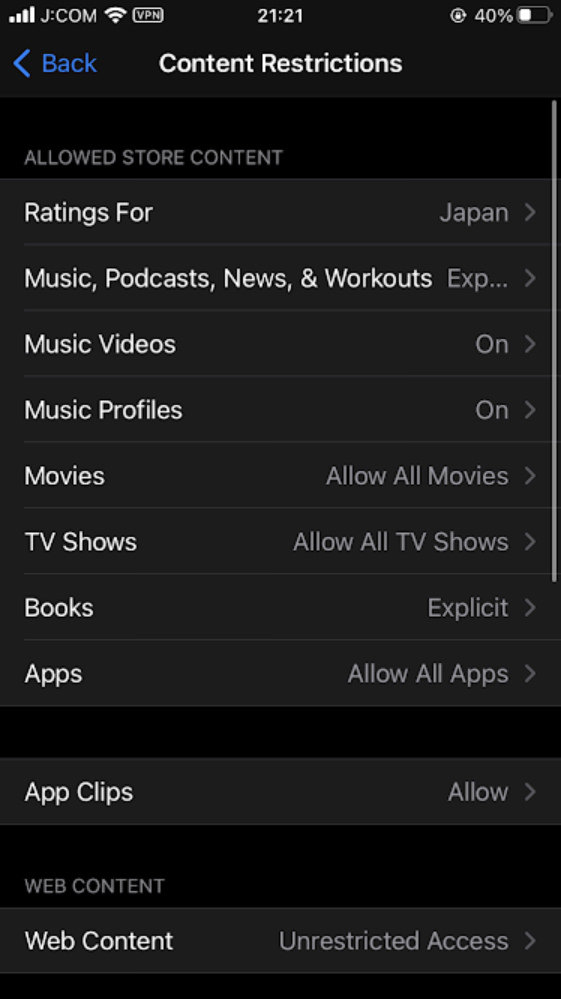
This is also where you can block adult websites.

4. Limit in-game interaction with strangers
To me, this is one of the most useful things for parents who are trying to give freedom to their kids, but at the same time child-proofing their phones from the harsh elements online.
Believe it or not, there are a lot of applications and games geared towards children that are being utilized by some adults who don’t have any good intentions towards the target user base.
For example, if a multiplayer game allows for connecting with nearby users based on your location, then it will be easy to determine the general location of the player. In which case, it could be dangerous to leave your child unattended. Adding friends and private messaging in-game is possible too.
In which case, these might pose a considerable security risk to your kids.
Here are the things you can restrict under Settings > Screen Time > Content Restrictions > Game Center:

- Multiplayer Games – allow kown friends, don’t allow at all, or allow for everyone.
- Adding Friends – a lot of games allow their users to add friends, which is a kind of a social network of its kind.
- Connect with Friends – a lot of apps can pull the device’s contact list in order to connect with them through the game.
- Screen Recording – disable capturing the screen and sound.
- Nearby Multiplayer – as I mentioned above, you can disable this to prevent your kids from broadcasting their approximate location.
- Private Messaging – need I say more?.
- Profile Privacy Changes – a lot of applications allow users to set their privacy to private, show their name, contact info, address, etc.
- Avatar & Nickname Changes – you can set your kid’s nickname and Avatar so they won’t have to type in their real name and upload their actual photo.
Pretty neat features, huh?
5. Disable Changes to Device Settings and Features
One thing you definitely don’t want happening is your kid changing the settings of their device, especially for privacy, passcode, and the like, since that’s like enabling them to circumvent the restrictions you placed above.
To do this, simply:
- Head over to Settings and tap Screen Time.
- Inside Content & Privacy Restrictions, scroll down to Allow Changes.

Here you can allow or disallow passcode changes, account-level changes, and the like. This is probably one of the most important things you should set up, since if you don’t disallow passcode changing, then it’s like locking a door with a flimsy nail.
By the way, this is how it will look like once the daily time limit runs out, or once the scheduled downtime arrives:
You can set to require the passcode each time the time limit or down time happens, so your kid won’t be able to bypass the restriction without entering the passcode.
To end
That’s a quick run-through of how you can safeguard your iOS devices for your kids. You can explore around and see for yourself how you can turn your iPhone or iPad into a kid-friendly and child-safe device.
In the end, it will also help you do your own stuff without minding too much if your kid is already spending thousands of dollars to buy gems in their favorite game