15 Tips and Tricks to Master Prezi Presentation Software
If you need to create presentations for high-powered clients, or impress lecturers and professors in university, you may have heard of (or are already using) Prezi. Prezi is a cloud-based presentation tool and is known for its zooming user interface (ZUI) allowing you to easily break down or go into things in detail.
As it was created to replace slide presentations, Prezi’s interface and visual story-telling makes it ideal for conveying information interactively.
Prezi is not new but if you are just starting out, it may be a little disorientating to use, beyond the basics. Granted, it will also take you a while not to get over-excited with the zooming feature but that is a different topic for another day. But if you would like to give Prezi a try, we’ve compiled 15 tips and tricks to help you get started and make the most of your Prezi-making journey.
15 Online Presentation Tools to Win Over Your Audience
PowerPoint is a great presentation tools, but it lacks interactive features, making presentation dull. That's where these online... Read more
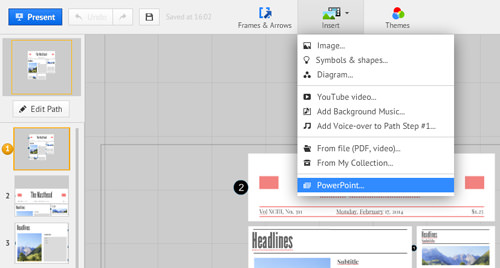
1. Importing From PowerPoint
If you already have a PowerPoint presentation ready and don’t want to build slides from scratch on Prezi, just import your slides over. You can even choose to do it either slide per slide or all at once.
- Select the Insert tab from the top bar in the Edit mode.
- Select PowerPoint from the drop-down menu.
- Now, choose the PPT or PPTX file you want to import. (Wait for a bit for Prezi to load the slides.)
- The slides will appear on your right hand side. You can either choose to drag individual slides to your Prezi or click on the Insert All button at the top.
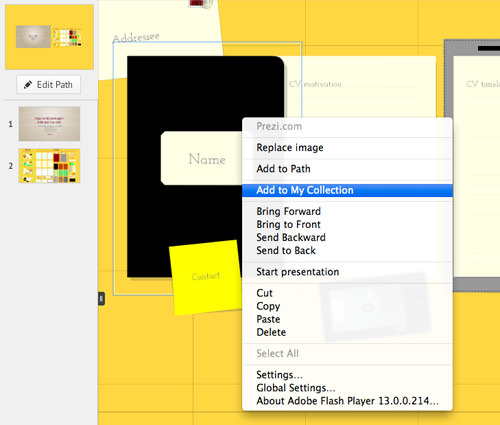
2. Using “My Collection” File
If you foresee yourself using Prezi often or are a power user, you will be using the same symbols, logos and images constantly. Instead of copying and pasting them from previous Prezis, you can store them in ‘My Collection’ and easily access them for future Prezis.
- Rright-click on the element you want to save.
- Select Add to My Collection from the drop-down menu.
- To use the element in a Prezi, access the Insert tab on the top of the bar in Edit mode.
- Select From My Collection in the drop-down menu.
- Choose the content you want to add and click the Insert button.
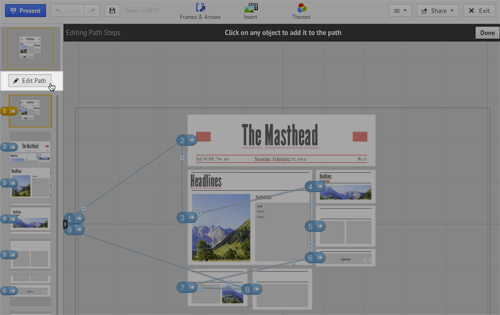
3. Creating A Path
As there are no slides in Prezi, Paths determine the presentation order of your information. It contributes to the transition of one info to another. There are no set Paths, so it is highly flexible and editable.
- Enter Edit mode. Click Edit Path on your left sidebar.
- Click on the objects in the order you want them to appear. You can also choose to drag items you want based on your order.
- If at any time you want to delete something from your Path, simply hover over the object until an X icon appears. Clicking on it will remove it from the Path.
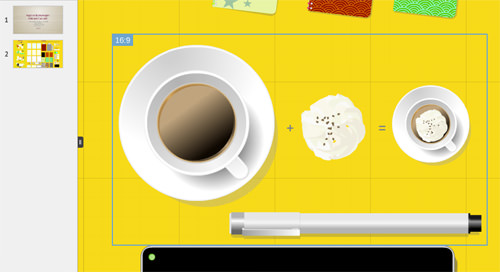
4. Drawing And Using Frames
Having frames is a good way to group elements together. Like PowerPoint, Prezi allows you to adjust the size by drawing the frames. Prezi even has an invisible frame option, which organizes content without a visible frame and helps to add Path steps.
Frames, however, work best when it fills the whole screen without other elements from your Prezi creeping in. The normal screen or monitor aspect ratio is 4:3, although there are some that are 16:9.
Tip: To get your frame to fit within that ratio, hold down the Shift key whenever you are drawing a frame.
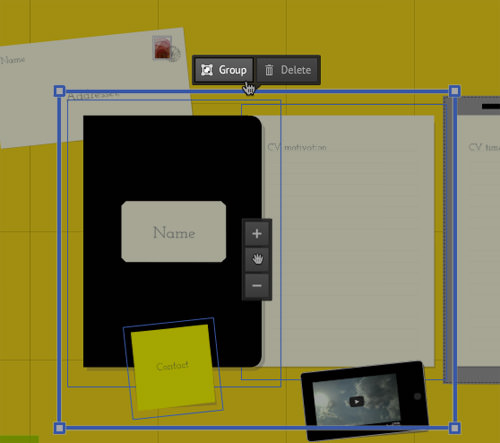
5. Moving Multiple Objects At Once
Most times when you are editing your Prezi, you are bound to accidentally move something and lose your formatting, especially when you are trying to move multiple elements together. By grouping them, you’ll be able to minimize this.
- Hold down on the Shift key then click on each object.
- Lock the objects by clicking on the Group button that appears on top of the selection.
- That’s it, you can now move your group wherever you please.
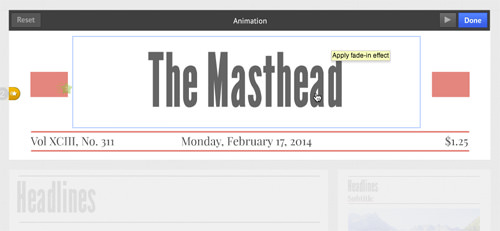
6. Fade-in Objects
You don’t have to just rely on Prezi’s zooming effect to make your presentation interesting. Use the fade-in animation to make your points or objects appear.
- In Edit Mode, click on Edit Path, which is at the top of the left sidebar.
- Select the frame that you want to animate. Click on the star symbol that appears in orange.
- When the animation wizard appears, hover over the element you want to fade-in.
- Click on the element to apply the fade-in effect. It will immediately play the animation.
- Click Done on the top right corner once you’re done editing.
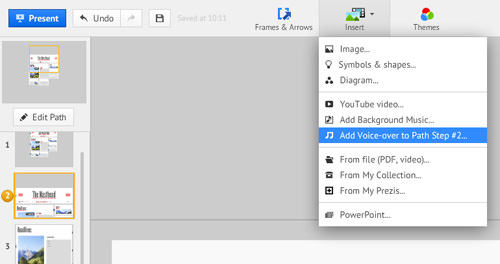
7. Adding A Voice-over
A Prezi presentation can basically present itself when you add sound to it. This feature is ideal for tutorials or when you want to embed Prezis on your website. Take note that you have to record your audio file beforehand using external sound recording software.
- In Edit mode, first select the Path you want to add sound to at the left sidebar.
- Click on the Insert tab on the top bar. From the drop-down menu, select Add Voice-over to Path Step.
- Choose the audio file you want to add. The file will take a while to upload onto your Prezi.
- Once done, you can click on the triangle to test play the sound.
- When finished, click Done to resume editing your Prezi.
8. Editing Collaboratively
You don’t have to be physically next to a groupmate or partner to work on a presentation together. You can both edit it online and see each other’s edits in real-time. You can have up to 10 people collaborating with you on a Prezi.
- Click on the Share button located on the top right in Edit mode.
- Select Share Prezi from the drop-down menu.
- A window will pop up. Type in the person’s email address in the Invite people field. Select Editor from the drop-down menu next to the field and click Add.
- The person will receive an email address linking him or her to the Prezi’s Edit mode.
- The full list of people working on a Prezi is located on the sidebar on the right.
- You can invite more people to edit as you go by accessing that right sidebar. Click Invite to edit when you expand the sidebar.

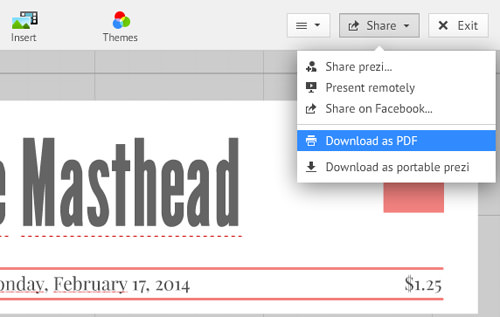
9. Printing A Prezi
Do you normally give out your slides as handouts? You can do the same with Prezi by first converting it into a PDF file. Each Path will be turned into a PDF page so you might need to edit your Path, as the flow of the document may differ from the presentation.
- Click on the Share button on the top right in Edit mode. Select Download as PDF from the drop-down menu.
- It will take a while for your Prezi to convert. Once it’s done, a new option will appear asking you to Save PDF.
- In the pop up window, type in the name of the Prezi and choose a location to save it in.
- That’s it, you can now print the PDF file.
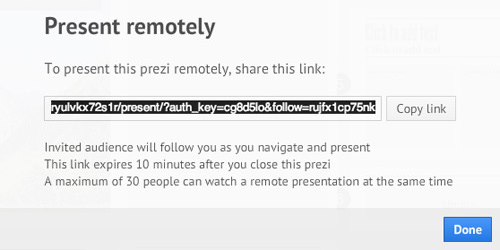
10. Presenting Remotely
Prezi has this function called Prezi Meeting. The function allows you to remotely conduct presentations for anyone, anywhere, in real time. You are allowed to invite up to 30 people to view your presentation.
- Click on the Share button on the top right in Edit mode. Select Present remotely from the drop-down menu.
- A window will pop up with the link to your Prezi. Send it to whoever you are supposed to present to.
- The recipient who clicks on the link will be redirected to the live presentation you will be giving.
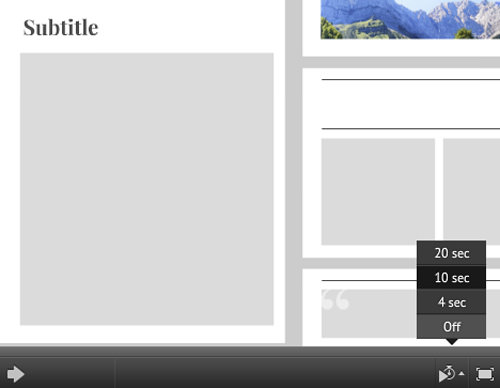
11. Set On Autoplay
You can set your presentation on autoplay and have the presentation loop on endlessly. You can then embed this presentation on a website as part of a product presentation or an explanation video. Here’s how to set your Prezi on autoplay. You can find instructions on how to embed the Prezi in the next section.
- If your Prezi doesn’t have a Path, create one first.
- Enter Present mode and click on the clock icon at the bottom right of the screen.
- From there, select the time intervals you want, to pace your Paths.
- To stop the autoplay, simply click on the clock icon again and select Off. You can also press the Left and Right arrow keys on your keyboard.
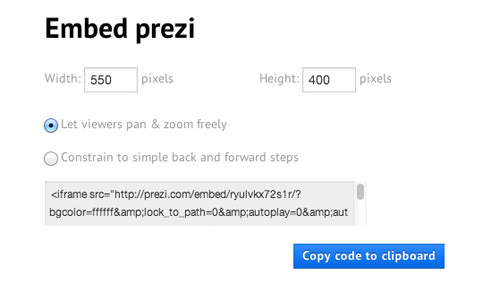
12. Embed Prezi Into A Website
You’ve written a blog post and made a Prezi to illustrate your points better. Or maybe you’ve made a Prezume (that is a Prezi as a resume) and would like to feature it on your website. You can do that by embeding the Prezi into your website.
- Click on the Embed button at the bottom of your Prezi.
- In the pop up window, set the settings you want on the size and interactivity of the Prezi.
- Once done, click on the Copy code to clipboard button to get the embed code.
- Insert the code on your website.
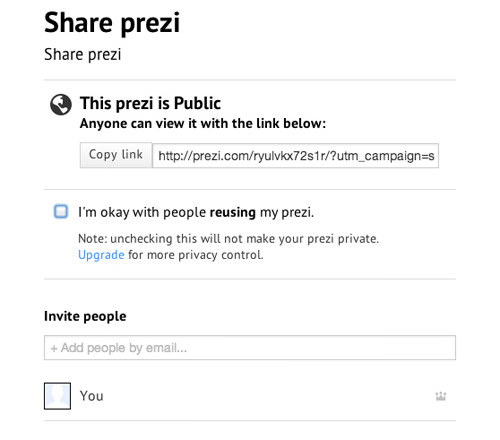
13. Sharing And Privacy Settings
If you only have a free account on Prezi, you can’t set your Prezi on private. You can however set your sharing settings to prevent people from saving a copy of your Prezi. By setting it to Public, people who search for your Prezi can only view it.
- After selecting your Prezi from the library, click on the Share button at the bottom of the Prezi.
- A pop up window will appear. Uncheck the I’m okay with people reusing my Prezi option.
- Alternatively, you can click on the second button on the far right bottom of your Prezi. You’ll be redirected to the same pop up window.
14. Bring Prezi Along Offline
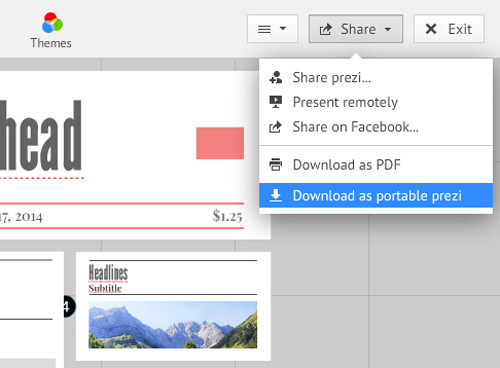
Prezi relies on Internet connection for you to present, unless you’re using the Mac or Windows Prezi application. If you’ll be presenting in a place with low connectivity or do not want to risk getting your connection cut off, download a portable version of your Prezi. This way you don’t even have to sign in to your Prezi account to present and you can even save it in a USB drive.
- First select the Prezi you want and go to its Edit mode.
- Click on the Share button located at the top bar on the far right.
- In the drop-down menu, select Download as portable prezi.
- It will take a while for your Prezi to download. Prezi will confirm that it’s done and will save your Prezi as a zip file.
15. Keyboard Shortcuts
Make the most of Prezi by using keyboard shortcuts. Do note that if you want to use the keyboard shortcuts you have to turn it on. To do that, go to the options tab on the right hand corner and enable keyboard shortcuts by clicking On.
| Shortcut | Action |
| F | Draw frame and change frame type |
| L | Open new canvas |
| S | Draw a shape and change a frame type |
| P | Go to Path mode |
| 1 | Zoom in when editing |
| 2 | Zoom out when editing |
| 3 | Rotate object clockwise |
| 4 | Rotate object counter clockwise |
| Delete / Backspace | Delete selected object(s) |
| Ctrl + S | Save Prezi |
| Ctrl + Z | Undo last action |
| Ctrl + Y | Redo last undone action |
| Ctrl + D | Duplicate selected object(s) |
| Ctrl + C | Copy selected object(s) |
| Ctrl + V | Paste copied object(s) |
| Ctrl + Shift + M | Toggle screen ratio |
| Ctrl + Shift + C | Open Prezi CSS editor |
| Ctrl + Shift + D | Duplicate and flip images and arrows |
| Esc | Finish current action or close open dialog |
| Space | Enter between Edit and Present mode |
| Right , Left | Move forward and back respectively along Path in Present mode |
| Up , Down | Zoom in and out respectively |
| B | Blackout screen when presenting (press any key to return) |
| Space | Advance along Path |
| Esc | End presentation |