How to Get More Google Assistant Custom Voice Commands
Google Assistant, the smart voice assistant from the search giant, allows you to accomplish many tasks using nothing but your voice. You can use voice control on your device with this application, but it’s limited to understanding only a few commands.
The good news is you can use two awesome tools to extend the use of Google Assistant. This means better control and more functions for you to do custom jobs, all enabled with just your voice. If this tickles your fancy, have a look at how you can set this up.
You will need to either Commandr or AutoVoice (just pick one), but to be able to run either of them, you will need to get Tasker, which is a paid app. However, you can play around with Tasker’s trial version for 7 days first before deciding if you want to get it (for US$3.75). With this combo, you can send preset messages to friends and colleagues, post a pre-defined status update to your favorite social network amongst many other things.
200+ Useful Google Assistant Commands
Google Assistant was first introduced in Google Allo, and it slowly replaced the old de-facto virtual assistant for... Read more
Note: This tutorial was built using Commandr 3.1, AutoVoice 2.0.18 and Tasker 4.5u1 on Android 5 (Lollipop). It’s believed the steps given below will also work for other versions of these applications.
1. Setting Up Tasker
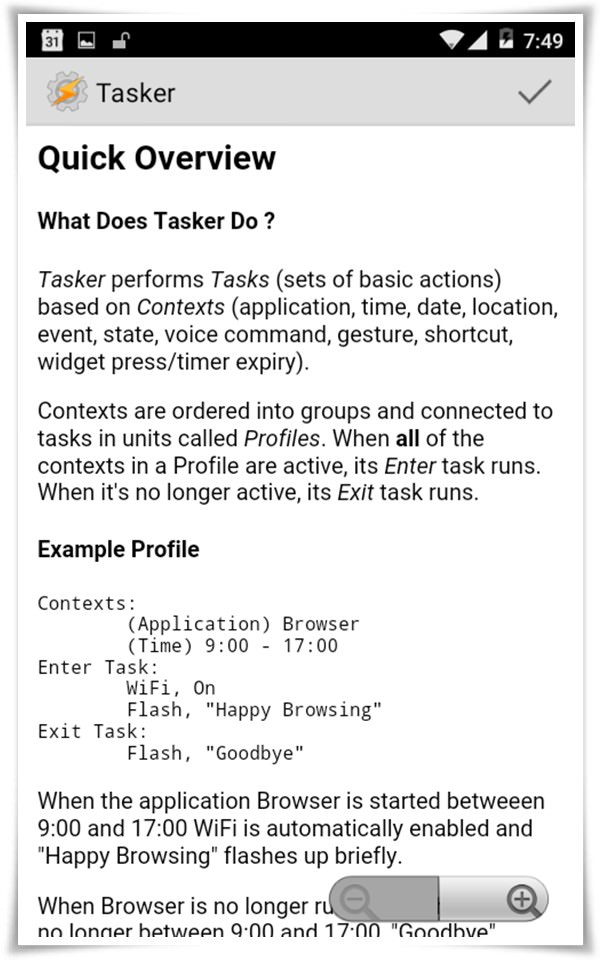
Tasker is an application to automate tasks in Android. It is similar to scheduled tasks makers in desktop operating systems. It can be used to create tasks that are automatically executed as per the active profile or situation.
For example, if your phone’s battery drops to 15% charge (a low-battery profile is activated), then your device’s screen brightness sets to minimum possible (a task to set brightness to zero is executed).
How to Install Tasker
Here’s how to install Tasker’s trial version:
- Go to Tasker’s Download page on your device.
- Download the relevant Tasker version, as per your Android version.
- Install Tasker according to the instructions on the download page.
After installing Tasker, you need to configure it to be accessible by other apps, ie other apps get permission to run its tasks. Here’s how you configure it:
- Open Tasker.
- Click Settings button on top-right corner.
- Choose "Preferences".
- On UI tab, un-check "Beginner Mode".
- On Misc tab, check "Allow External Access".
- Click the back button, or the cross button beside the ‘settings" button.
How to Create Tasks With Tasker
Tasker is now set to run tasks for other apps, such as Commandr and AutoVoice. Now you need to create some tasks and here’s how to do that:
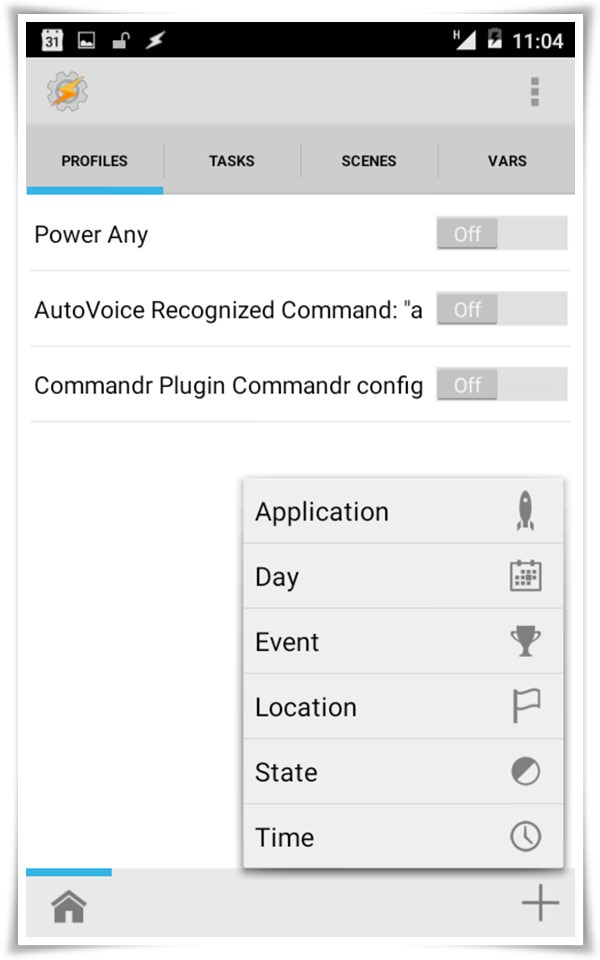
- Open Tasker, click on "+" button under Profiles.
- Select "Event".
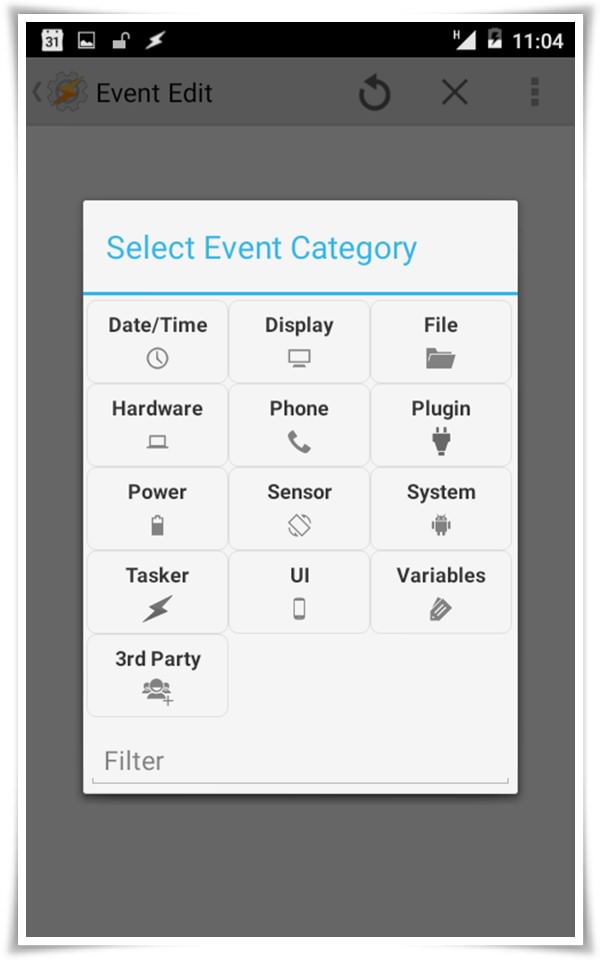
- Select "Plugin".
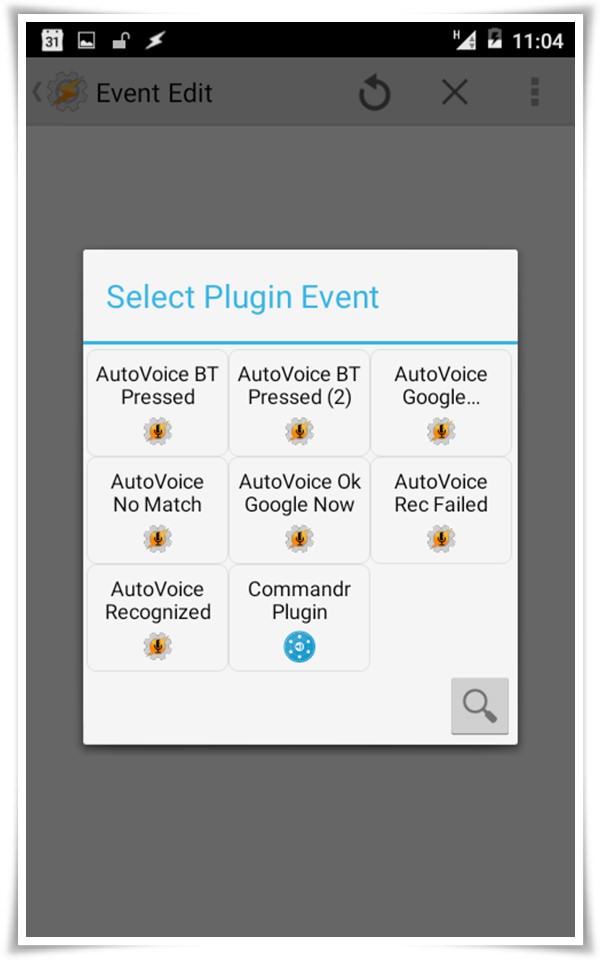
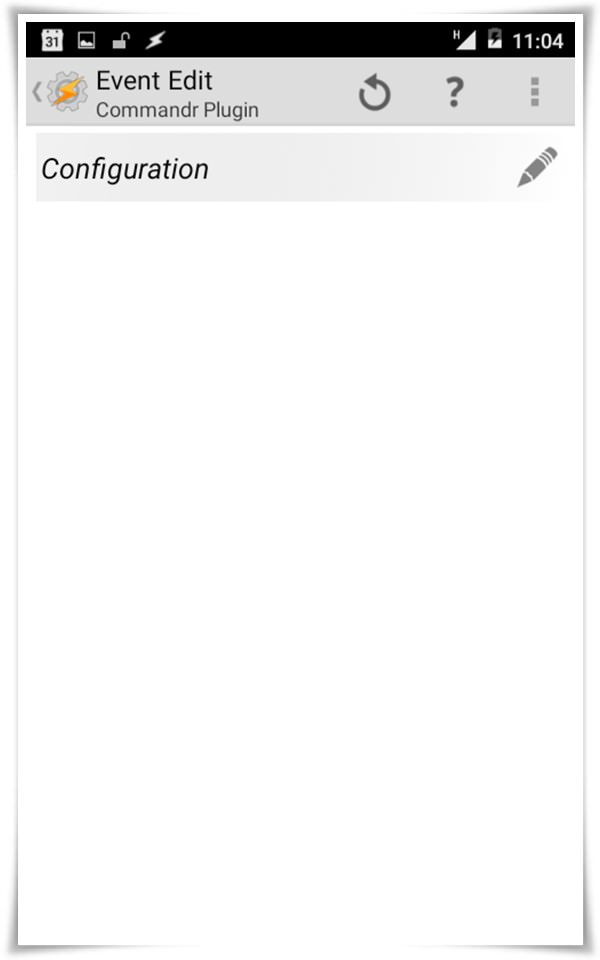
- Select the "Commandr" plugin if you’re creating this task for Commandr. Otherwise, choose the "AutoVoice Recognized" plugin.
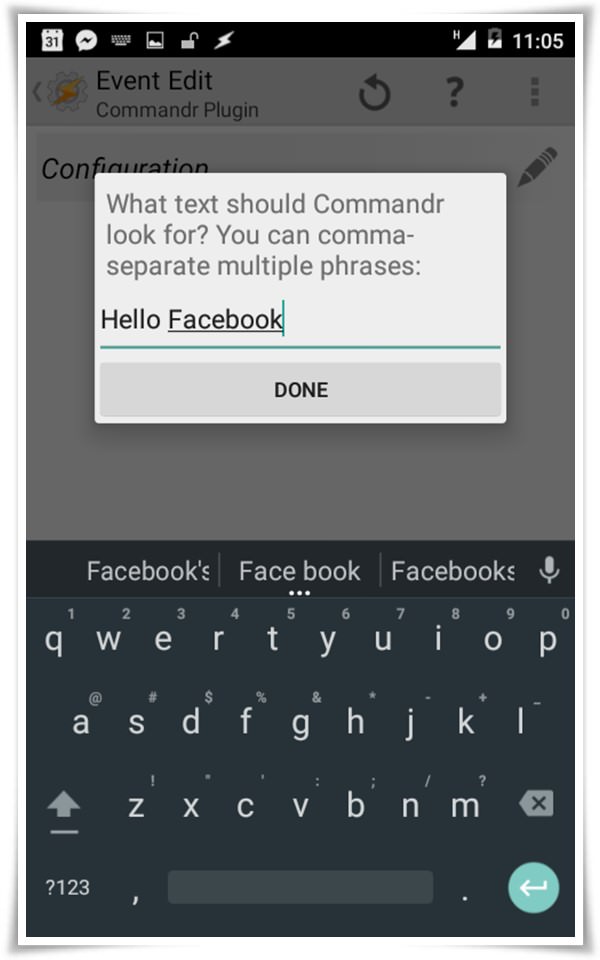
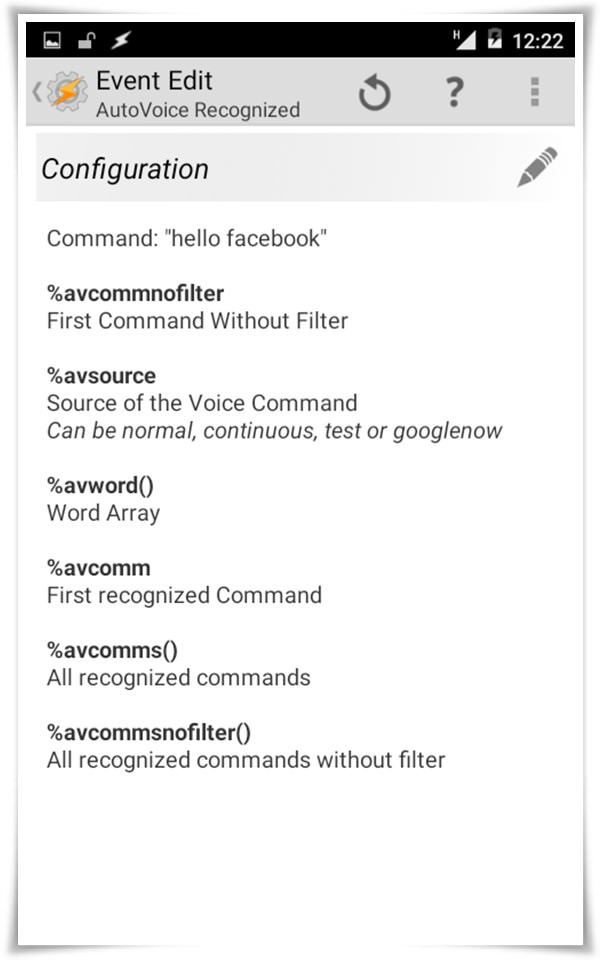
- Click on the pencil and configure the "Commandr" plugin as per below. Enter the text that you want to use as a voice command, such as "Hello Facebook".
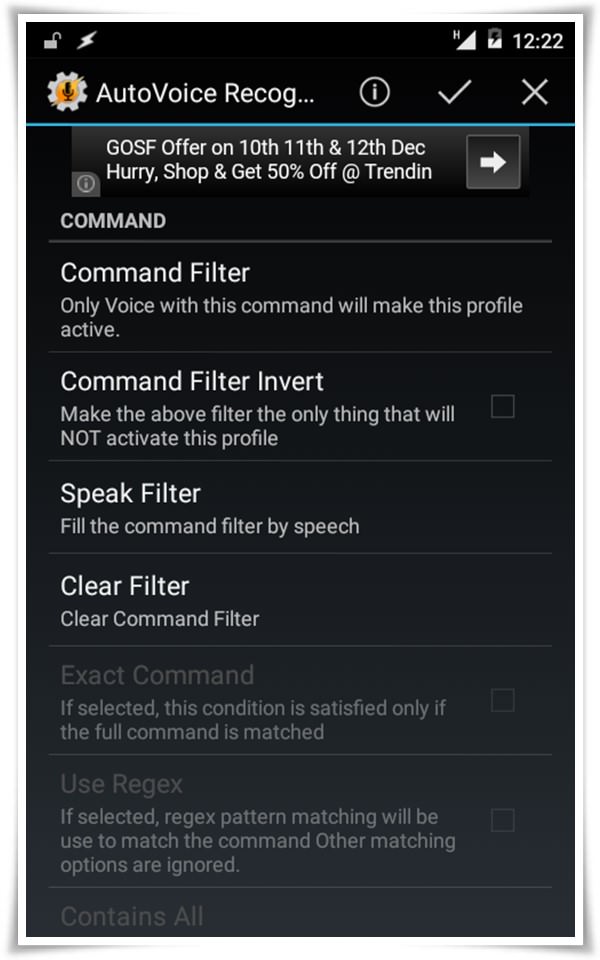
- Or configure the "AutoVoice Recognized" plugin as given below:
- Press OK if the "joaomgcd Apps" box appears.
- Click on "Command Filter" under the Command section.
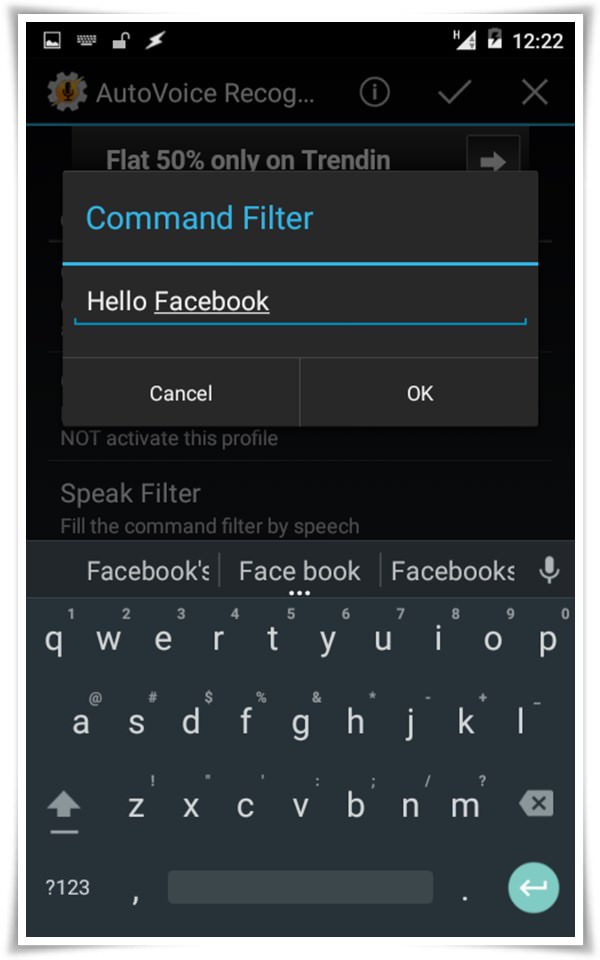
- Enter the text that you want to use as a voice command, such as "Hello Facebook". Note: The lite version of AutoVoice only allows a voice command of maximum four characters.
- Press the tick button.
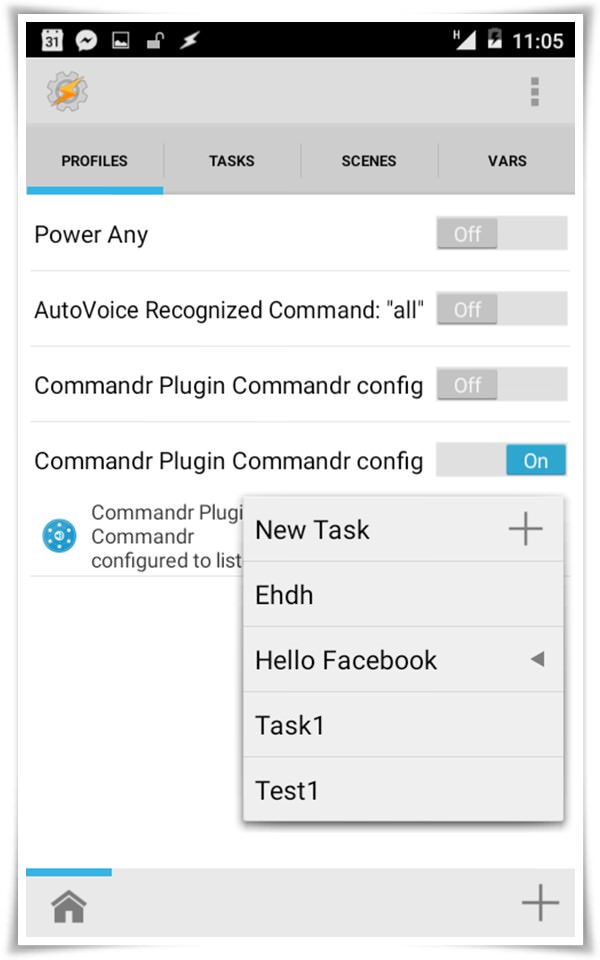
- Press the back button. Tasker now asks you to choose a task for this newly-created profile.
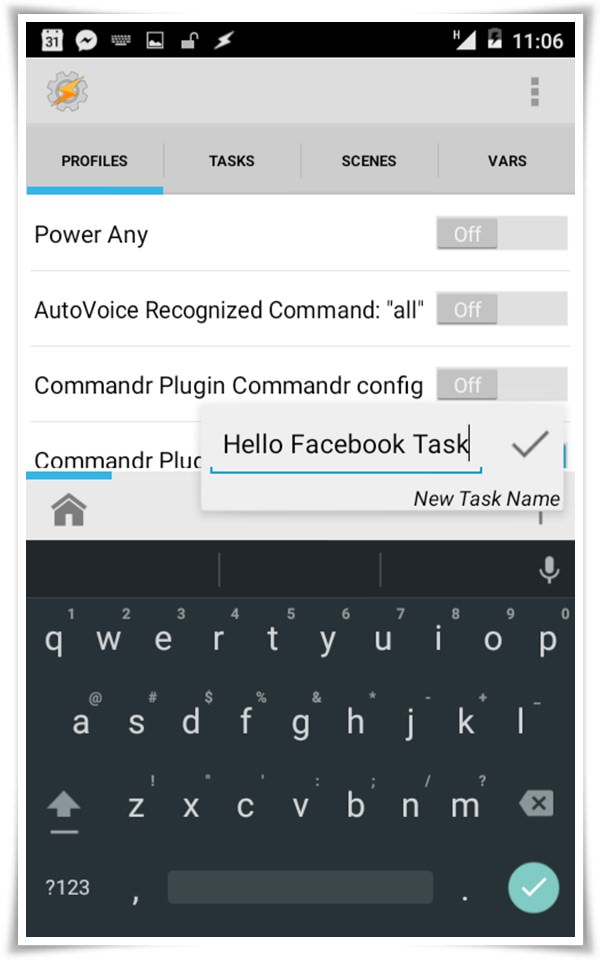
- Select "New Task +". Enter task name, such as "Hello Facebook Task".
- Press the tick button.
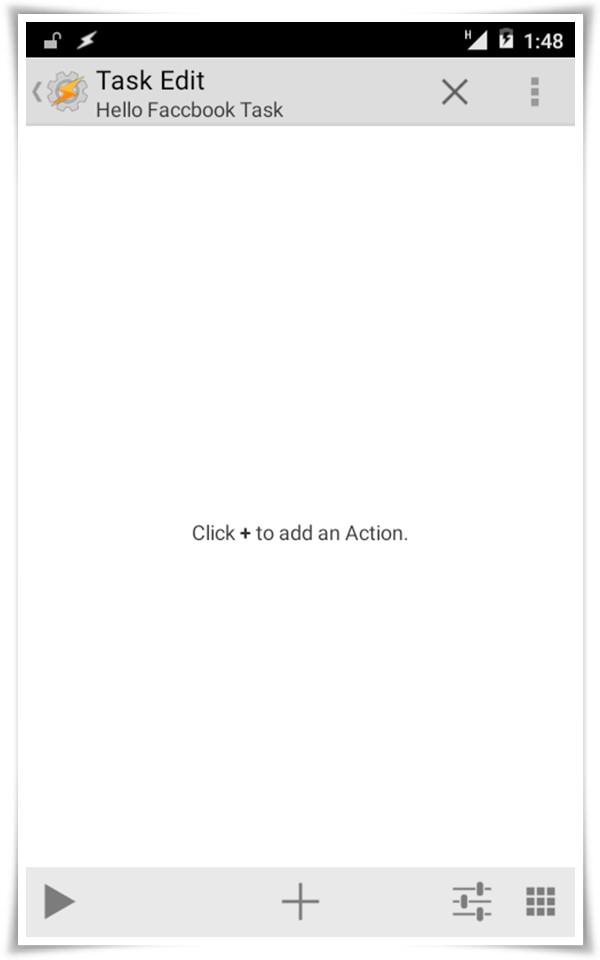
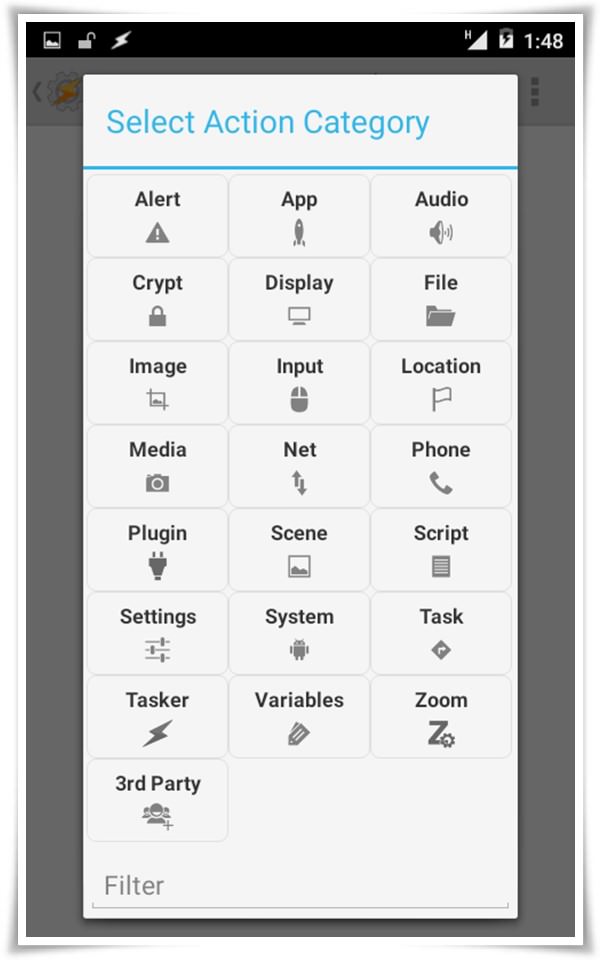
- Click on the "+" button.
- Select an Action category, such as "App".
- (Select an action, E.g. "Launch App".
- Set the options for that action, such as selecting "Facebook" from the apps.
- Press the Back button. The "Task" is now created.


2. Using Commandr or AutoVoice
Now you can continue with the tutorial and install either Commandr or Autovoice to extend the features of Google Assistant and use your own custom commands with it. Both can be used to accomplish the task, but which is better?
Personaly, I would go with Commandr because it comes with lots of built-in commands such as toggle hardware settings, read messages, etc and it’s free as opposed to AutoVoice’s full version that costs around $1.32.
Going With Commandr
Commandr can dramatically extend the power of Google Assistant. It gives you the ability to toggle hardware switches and control the music with simple voice commands. It adds tons of commands to Google Assistant, which makes voice-control functionality even more useful.
It plugs into Google’s voice assistant, and lets you better use your device by making voice commands. It uses the "run-as-per-need" mode, and that’s why, it doesn’t slow down your mobile device or decrease your battery’s life like a hungry beast!
Step 1: Setup Commandr
Install Commandr, then go through its short setup process as shown below:
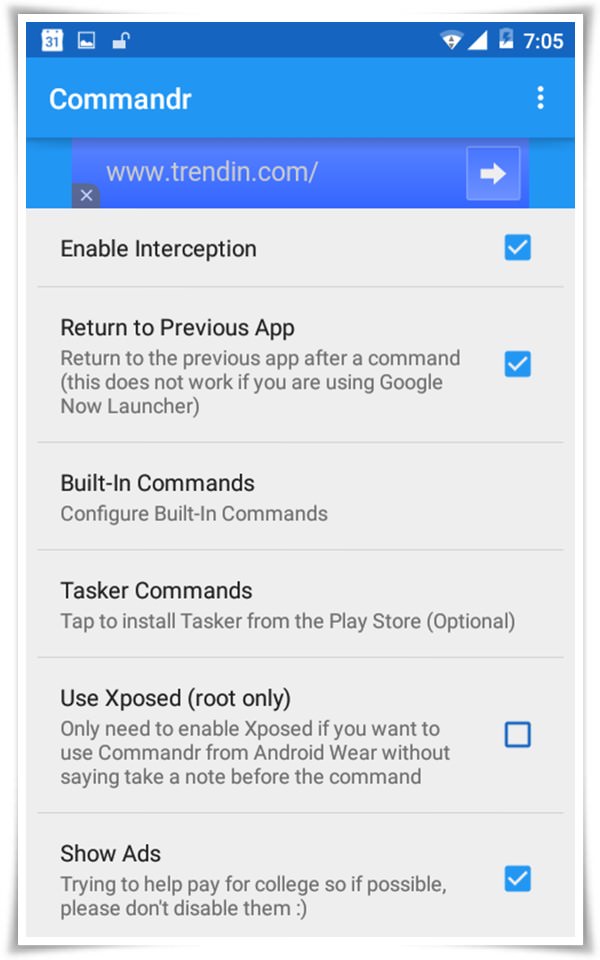
- Open Commandr (and swipe left). Click on "Open Settings".
- Click on "Commandr for Google Assistant" (under Services). Switch on and click OK.
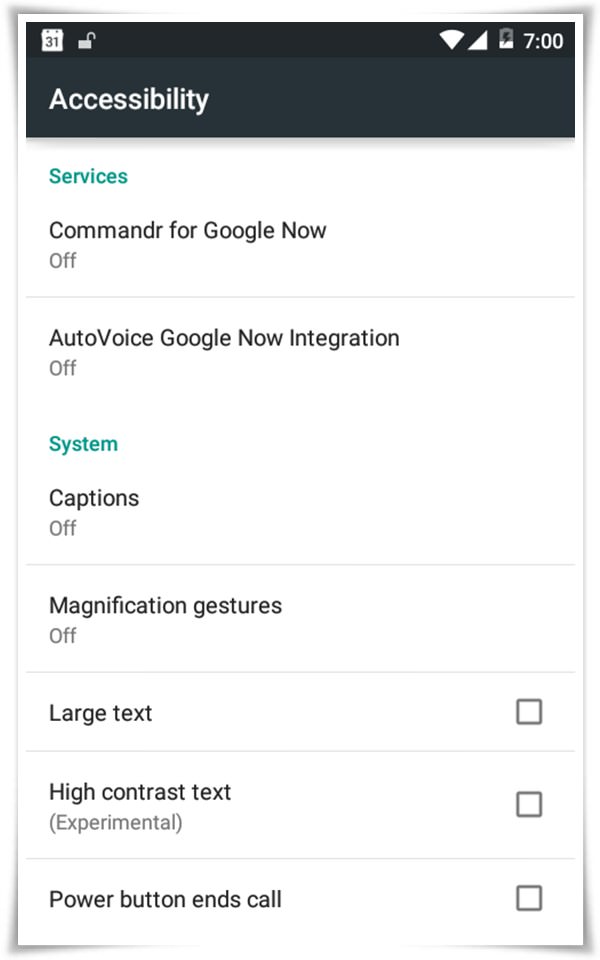
You need to do this small step to give it the accessibility access on your phone, so that it can listen to the commands given to Google Assistant. It will allow you to give the additional voice commands directly to your phone.
If you chose "Limited Access" instead of "Open Settings" then you’re required to say "Note to self" before giving any additional commands to your phone.
Step 2: Activate Built-in Voice Commands
Commandr comes with tons of built-in voice commands. These commands are available after installation, and helps you to better voice-control your device, such as toggle hardware switches, read messages, etc. Here is how you activate them:
- Open Commandr.
- Tap on "Built-In Commands".
- Enable/disable built-in voice commands as per your choice.

That’s all! Now you can use these additional voice commands directly in Google Assistant.
Step 3: Create Custom Voice Commands
Commandr needs Tasker to create custom voice commands for Google Assistant. First, you should create tasks in Tasker as given above for Commandr.
After that, you need to activate those tasks in Commandr so that they become recognizable and can be executed by Google Assistant.
Here’s how to activate Tasker’s tasks in Commandr:
- Open Commandr. Tap on "Tasker Commands".
- Enable/disable custom voice commands as per your choice.

That’s all! Now you can use these custom voice commands directly in Google Assistant.
Going With Autovoice
AutoVoice, just like an add-on, extends the functionality of Google Assistant. It brings new possibilities to the Google’s voice assistant, and powers it to understand your custom commands. Tasker helps it add your own commands to Google Assistant.
It works as follows: you create an automated task (whatever you need to do at your voice command) in Tasker, and AutoVoice calls that scheduled task every time you speak those "magic words" to Google Assistant. It only runs when required and thus hardly affects your device’s performance.
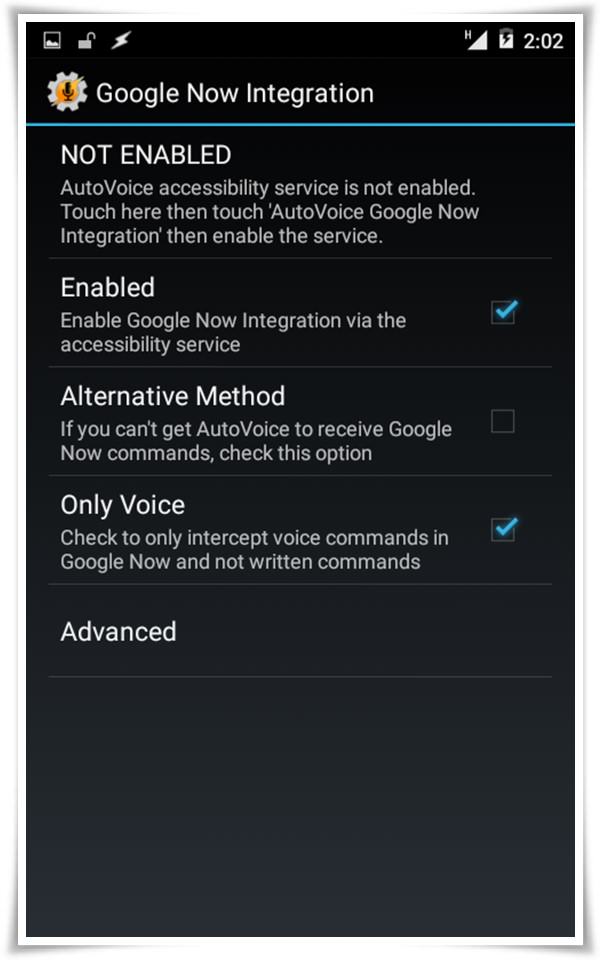
Step 1: Setup AutoVoice
Install AutoVoice from the Google Playstore.
AutoVoice needs to be configured after its installation for proper integration with Google Assistant. You need to turn on its accessibility setting, so that it can listen to the voice commands spoken to the Google’s voice assistant. Here’s how to setup AutoVoice:
- Open AutoVoice.
- Click on "Google Assistant Integration".
- Click on "Not Enabled". Click on "AutoVoice Google Assistant Integration". Switch on and press OK.
Step 2: Create Custom Voice Commands
AutoVoice, as a Tasker’s add-on, have no additional steps to create custom voice commands. You can simply create tasks in Tasker as given above for AutoVoice, and that all tasks can be activated by speaking the correct command for Google’s voice assistant.
That’s all. Now you can use your custom voice commands with Google Assistant.
Conclusion
As you must have noticed: (Commandr OR AutoVoice) AND Tasker AND Google Assistant make a powerful voice assistant. These apps open doors to a new set of possibilities by letting your voice take control of your android device. They are easy to install and configure and even easier to use when creating custom voice commands.
What are you waiting for? Try one of the apps given in this tutorial, add some new voice commands to speak to your device and let the magic happen!